


How to Print Photo on Fabric (how to print photo on fabric): A Simple DIY Guide
Bringing a digital photo to life on fabric is one of the most rewarding ways to add a personal touch to a project. Whether you're making a memory quilt, a custom t-shirt, or a unique piece of home decor, the method you choose makes all the difference.
The easiest way to get started is with inkjet transfer paper, but that’s just the beginning. Options like printable fabric sheets, sublimation, and even heat transfer vinyl (HTV) open up a world of different finishes, textures, and levels of durability. This guide will walk you through five of the most popular methods, so you can find the perfect one for your creative vision.
Your Guide To Printing Photos On Fabric At Home
Think of this as your starting point for mastering the art of printing your own custom fabrics. We’ll kick things off with simple, accessible techniques that are perfect for a quick weekend project. Then, we’ll move into processes that give you a softer feel and eventually cover more advanced methods like sublimation, which delivers truly professional, permanent results.
For each approach, I'll break down the real-world pros and cons, the specific supplies you’ll need, and what to expect in terms of feel, durability, and color vibrancy. The goal is to give you the confidence to pick the right technique for your skill level and project, whether you’re a quilter, a cosplayer, or just someone looking to make something special.
Comparing Your Fabric Photo Printing Options
To get a quick high-level look at the five main DIY methods, this table compares the key factors that will likely influence your decision. It's a great way to figure out which technique best suits your specific project needs before you start buying supplies.
| Method | Best For | Ease of Use | Cost Per Print | Durability |
|---|---|---|---|---|
| Inkjet Transfer Paper | Quick & easy projects, dark fabrics | Beginner | Low | Low-Medium |
| Printable Fabric Sheets | Quilts, detailed images, soft feel | Beginner | Medium | Medium |
| Sublimation | Vibrant, permanent prints on polyester | Intermediate | High (initial) | High |
| Heat Transfer Vinyl (HTV) | Bold, layered designs, various fabrics | Beginner | Medium | Medium-High |
| Direct-to-Fabric | Professional results, large quantities | Advanced | High (initial) | High |
Each of these methods has its place. Your choice ultimately comes down to balancing your desired outcome with the time, effort, and budget you have to work with.
Choosing Your Printing Path
The desire for one-of-a-kind items has completely transformed the photo printing market. It was valued at around USD 26.13 billion in 2025 and is expected to hit nearly USD 59.64 billion by 2035. This growth is all about people wanting custom apparel and textiles, which makes learning these at-home printing skills more valuable than ever.
So, how do you decide where to start? This graphic breaks down the core decision you need to make.
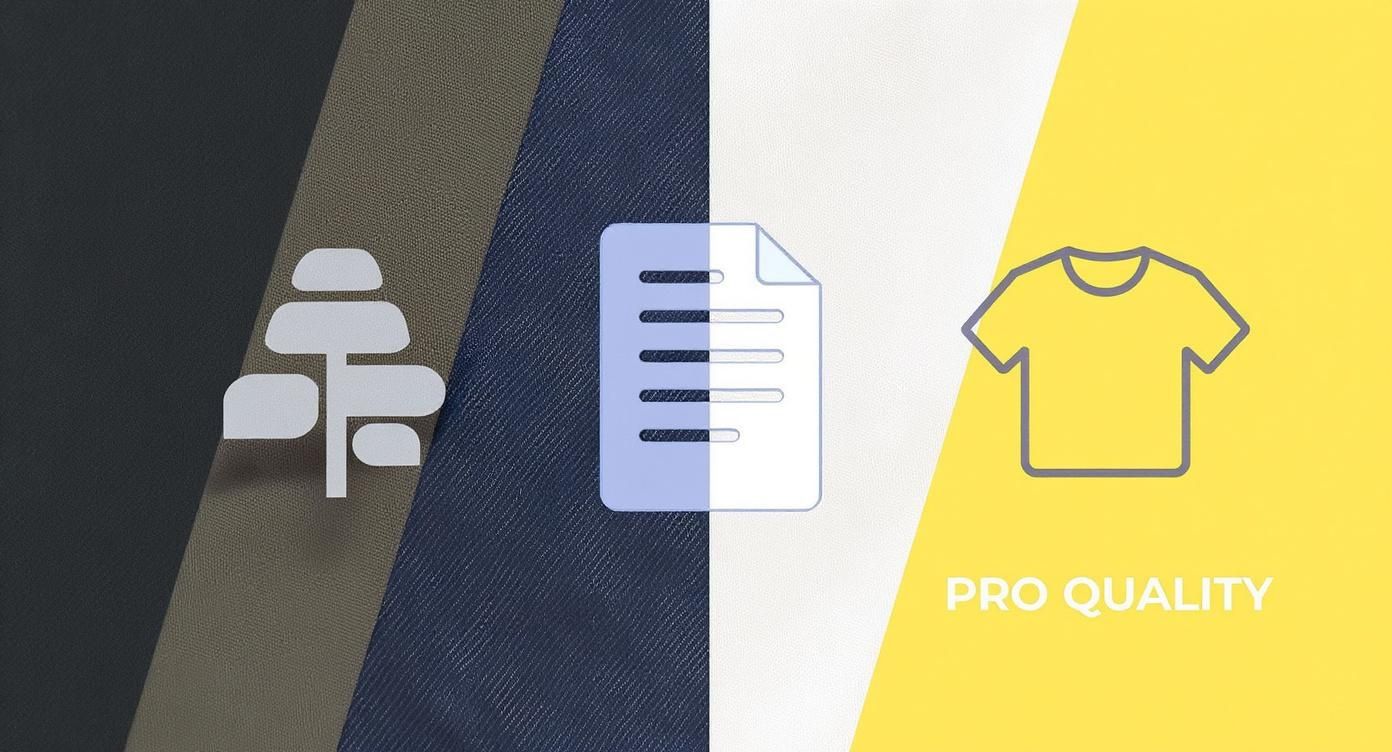
The first question you should always ask is: what's more important for this project? Is it speed and ease, or is it long-term durability and a premium feel? If you’re aiming for something you could sell, exploring professional methods for putting photos on clothing can give you a better sense of industry standards.
The biggest difference to understand is between a surface-level print (like transfer paper) and an infused print (like sublimation). A surface print sits on top of the fabric, which can feel a bit stiff and may crack over time. An infused print, on the other hand, becomes part of the fibers, giving it a much softer feel and incredible longevity.
As you get into these methods, you'll find that many of the core skills overlap. If you’re new to working with fabrics, building a solid foundation first will make a huge difference. You might want to check out these free sewing lessons at https://www.famcut.com/blogs/tips-and-tricks/free-sewing-lessons to sharpen your fundamental techniques before you dive into a big printing project.
Using Inkjet Transfer Paper for Quick Results
If you're looking for the fastest way to get a photo onto fabric, inkjet transfer paper is your ticket. It's a go-to for so many crafters because it's incredibly straightforward—all you need is your regular inkjet printer, the special paper, and a household iron. It's the perfect way to dip your toes into custom t-shirts, tote bags, or even memory quilt squares without having to buy a bunch of expensive gear.
So, how does it work? You simply print your photo onto a sheet of this coated paper, and then use your iron to press the image onto the fabric. The process leaves a thin, film-like layer with your photo on top of the material. While it won't feel as soft as ink that's soaked into the fibers, you can't beat the speed and simplicity for a one-off project.
Choosing the Right Transfer Paper
This is the first, and arguably most important, decision you'll make. Getting this wrong can ruin your project before you even start. There are two main types of transfer paper, and they are definitely not interchangeable.
- For Light-Colored Fabrics: This paper has a clear transfer film. When you press it, only the ink moves over to the fabric. The un-printed areas remain transparent, letting the fabric's light color show through. The crucial thing to remember here is you absolutely must mirror your image before printing. If you don't, any words or lettering will be backward.
- For Dark-Colored Fabrics: This type has an opaque, white background. You print on it just like normal paper (no mirroring needed!), and the entire design—white background and all—gets transferred. That white base is what makes your colors stand out on a dark shirt instead of getting lost.
Trust me, mixing these up is the most common mistake I see beginners make. Always check the package to make sure it’s the right one for your fabric.
Prepping Your Image and Printer
Got the right paper? Great. Now let's make sure your image is ready. Always start with the highest-resolution photo you can get your hands on. A fuzzy, low-quality image will only look worse when it's printed on a t-shirt. For the crispest results, you'll want an image that's at least 300 DPI (dots per inch).
Before you click "Print," take a second to dig into your printer’s settings. Don't just go with the default. Look for an option like "High Quality," "Photo Paper," or even a specific "T-Shirt Transfer" setting. This tells your printer to use more ink and be more precise, which makes a huge difference in the color and detail of your final transfer. And make sure you load the paper correctly—there's usually a marked side that needs to face up.

This picture shows the make-or-break step: applying the heat. You need consistent pressure and the right temperature to get a clean transfer without scorching your fabric or leaving part of the image stuck to the paper.
The Art of the Perfect Press
Here’s where a lot of people stumble. A standard ironing board is your enemy here—it’s too padded and wobbly. You need a solid, flat surface that can handle the heat. I usually use a wooden cutting board on a sturdy table, sometimes with a thin pillowcase over it for protection.
Pro Tip: Crank your iron up to the highest setting the paper's instructions allow and, most importantly, turn the steam OFF. Steam is just water, and it will absolutely ruin the adhesive on the transfer paper.
Press down hard. I mean, really put your weight into it. Move the iron slowly and steadily across the entire design for the full time recommended, which is usually somewhere between 1 to 3 minutes. Give extra love to the edges and corners, as those are always the first places to start peeling if they aren't sealed down properly.
If you find yourself doing a lot of small or detailed work, a good mini iron like the Oliso M3 Pro Mini Iron can be a game-changer for control.
Once you’re done pressing, let it cool down completely before you even think about peeling the backing paper off. Be patient! Peeling it while it’s still warm can stretch the design or tear it. For some more great tips that apply to this kind of project, check out this DIY guide to iron-on clothing decals.
To keep your masterpiece looking good, wait at least 24 hours before its first wash. Then, turn it inside out, use cold water on a gentle cycle, and let it hang to dry or tumble dry on the lowest heat setting. A little extra care goes a long way.
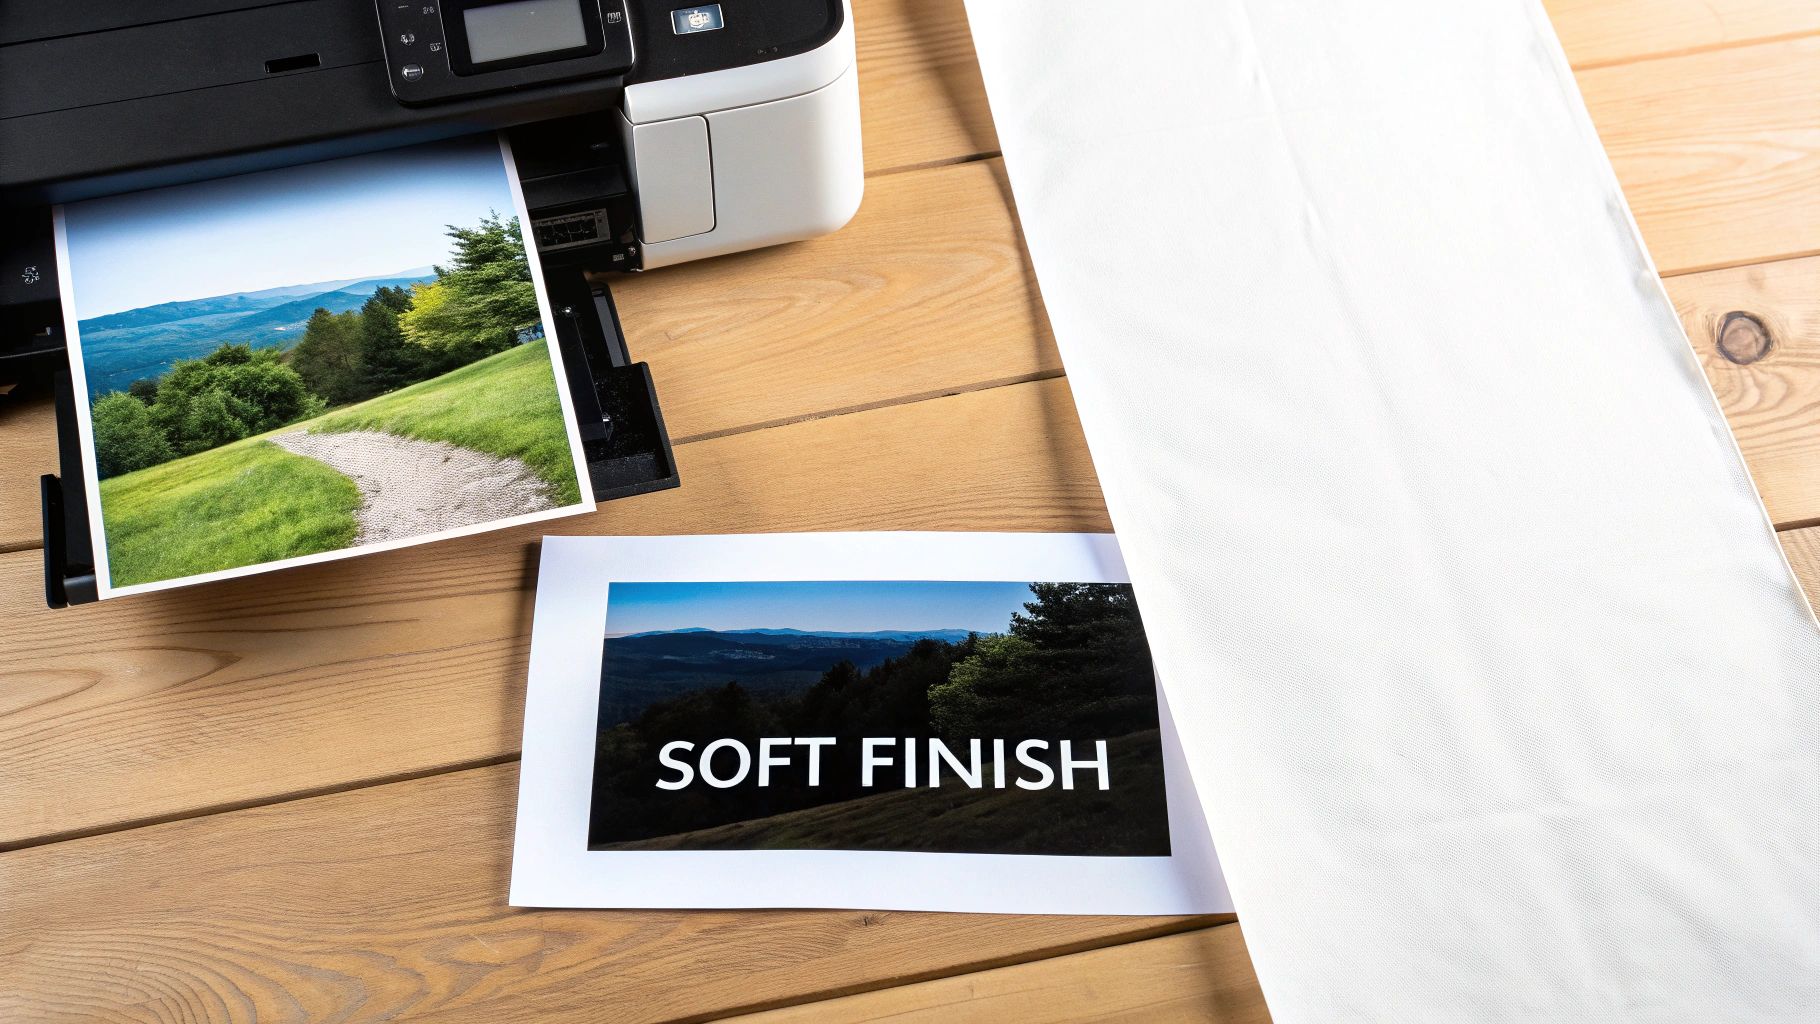
Getting a Softer Finish with Printable Fabric Sheets
When the final feel of your project is just as important as the image itself, printable fabric sheets are the way to go. This method is a huge favorite among quilters and crafters making things like memory pillows or baby blankets, where a soft, natural touch is absolutely essential.
Unlike transfer paper that leaves a plastic-like film on top, these sheets are actual fabric with a temporary paper backing. This clever design lets you run them right through your standard inkjet printer, printing a photo directly onto the cloth.
The result? A print that drapes and flexes just like the rest of the material, with absolutely zero plastic feel. The image truly becomes part of the textile, not just something stuck on its surface. Let’s walk through the whole process, from picking the right sheet to locking in the ink for a durable, washable finish.
Prepping Your Printer and Fabric Sheet
First things first, let's get your printer ready for a slightly thicker material. Before you even think about loading the fabric sheet, I always recommend running a nozzle check and a head cleaning cycle on your inkjet printer. It’s a simple maintenance step that prevents frustrating streaks and ensures your colors come out as vibrant as possible.
When it comes to the image itself, resolution is everything. Aim for a high-quality photo, at least 300 DPI (dots per inch), to get a sharp, clear result. In your printer settings, you'll want to select a high-quality print mode—often labeled "Best" or "Photo Quality." I also find that choosing a paper type like "Matte Photo Paper" tells the printer to lay down a bit more ink for richer, deeper colors.
Loading the sheet is pretty straightforward. Just treat it like a heavy piece of cardstock and make sure you place it in the paper tray so the printer prints on the fabric side, not the paper backing.
The Printing and Setting Process
With your settings all dialed in, it's time to print. The image will come out directly on the fabric surface. Now, patience is key. Let the sheet sit for at least 10-15 minutes after printing. You need to give the ink a chance to dry completely before you touch it, otherwise, you're risking smudges.
Once the ink is dry, you have to "set" it to make it permanent and washable. This is the most crucial part of the whole process, so don't skip it.
- Remove the Backing: Gently peel the paper backing away from the fabric. It should come off smoothly, leaving you with your printed, flexible piece of cloth.
- Heat Set the Ink: Lay the printed fabric on an ironing board and place a piece of parchment paper or a thin cloth over the top. Using a dry iron (no steam!) on a high setting, press the entire image for 2-3 minutes. Keep the iron moving constantly to avoid scorching the fabric. This heat is what cures the ink, bonding it directly to the fabric fibers.
My Key Takeaway: The heat-setting step is what turns your print from a delicate image into a durable, washable piece of fabric art. If you skip this, almost all the ink will wash out in the first rinse.
Curing and Aftercare
After you’ve heat-set the ink, some brands recommend a final rinse to wash away any excess chemicals left over from the manufacturing process. Just submerge the fabric in a bowl of cold water and gently swish it around. This also has the nice side effect of softening the fabric even more.
Let the fabric air dry completely, then give it one last quick press with the iron to smooth out any wrinkles. That's it! Your custom-printed fabric is now ready to be sewn into your project. When it comes time to wash the finished item, turn it inside out, use a gentle cycle with cold water, and tumble dry on low.
The ability to do projects like this at home is part of a larger trend. In 2024, online sales accounted for over 61% of all photo printing revenue, and experts predict this will grow by 8.4% each year through 2030 as more people get comfortable with these digital tools.
For quilting projects that need a high-quality, consistent base, I often recommend using a solid fabric like this 30s Blue Bella Solids for your printed squares. It really helps ensure a professional-looking finish.
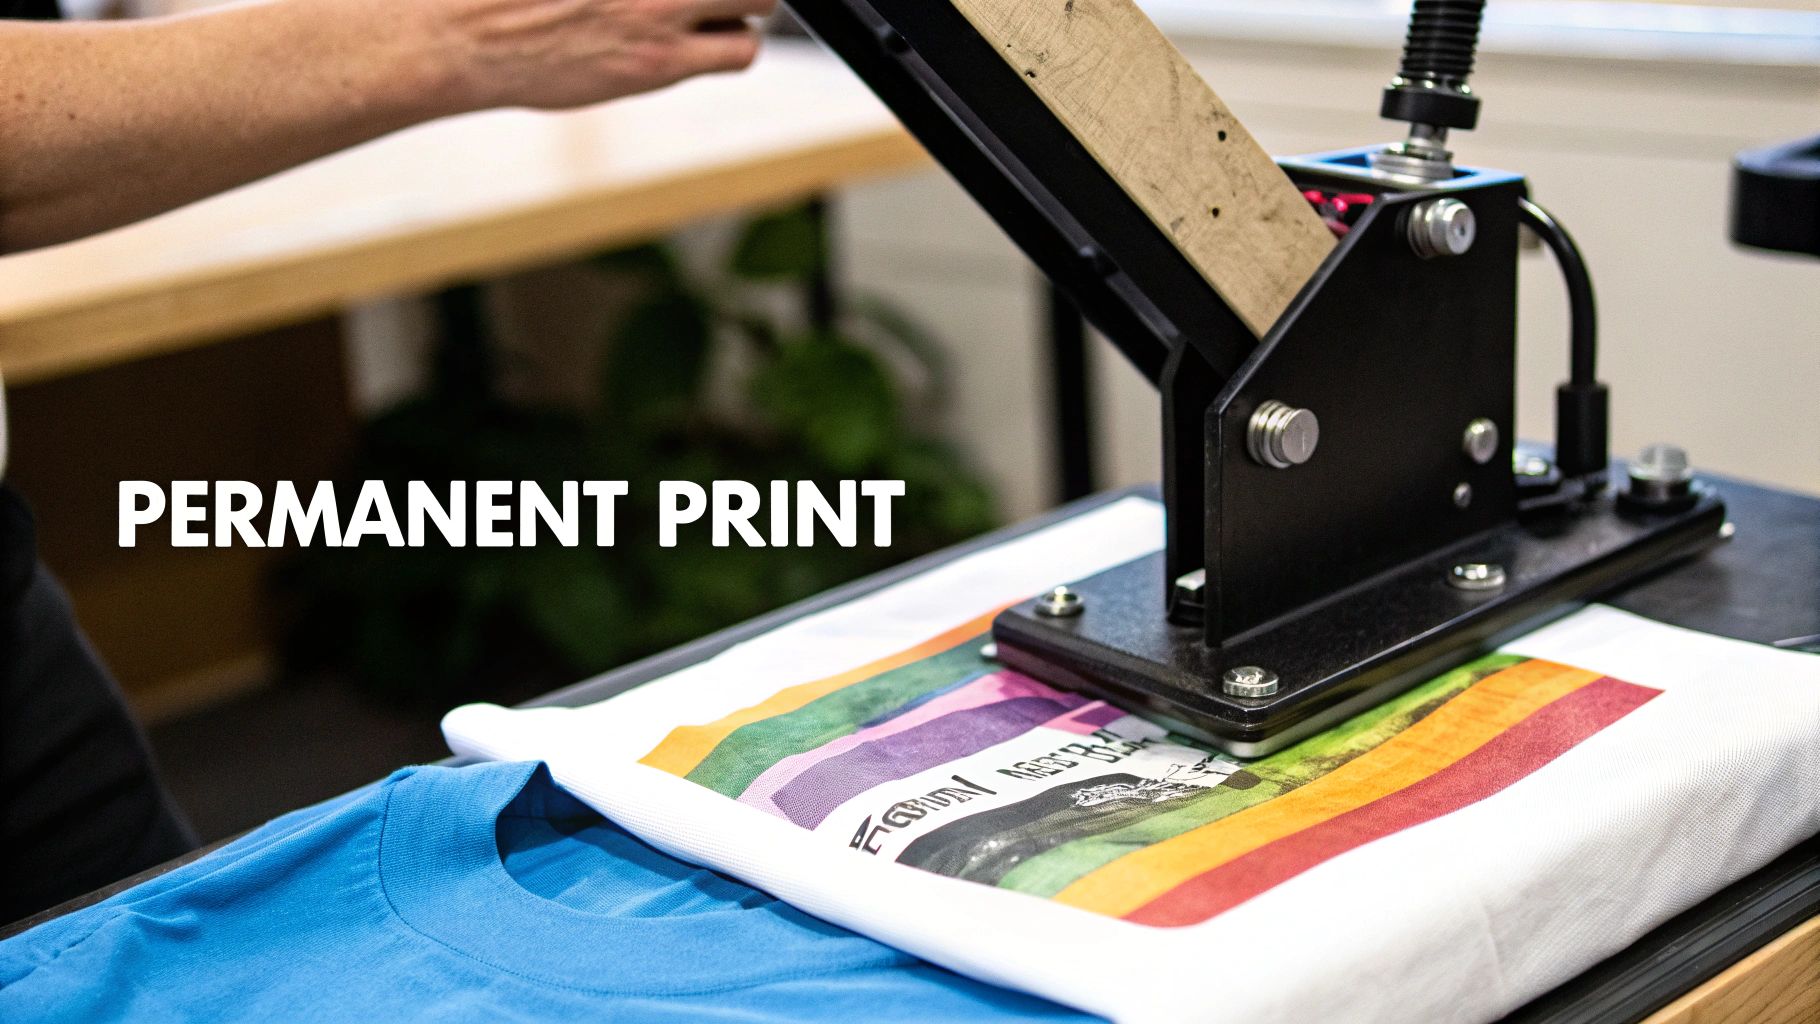
Sublimation Printing for Professional Durability
If you're looking for vibrant, permanent color that will never crack, peel, or fade, then you need to know about sublimation. This is the undisputed champion for professional-grade results.
Sublimation is a different beast altogether. It doesn't just lay ink on top of the fabric. Instead, it uses a unique process where special inks turn into a gas under high heat and pressure, permanently bonding with the fabric's fibers. Your photo literally becomes part of the material.
The result is a print with zero "hand"—meaning you can't feel it at all. It's perfectly smooth and just as flexible as the fabric itself. This is the magic behind professional activewear, detailed cosplay costumes, and those photo-realistic blankets that stay brilliant wash after wash.
Understanding the Essential Gear
Diving into sublimation requires more specialized equipment than the other at-home methods. Your standard inkjet printer just won't cut it. Here’s a quick rundown of what you’ll need to get started.
- Sublimation Printer: This is a dedicated printer that uses only sublimation inks. You can buy models built specifically for this, or you can convert certain inkjet printers (like some Epson EcoTank models) for sublimation use right out of the box.
- Sublimation Inks: These aren't your typical inks. They're special dyes designed to transform from a solid to a gas when heated, allowing them to fuse with fabric fibers.
- Sublimation Paper: This is a special coated paper that holds the ink on its surface instead of absorbing it. It acts as the carrier, releasing the gassed ink when you apply heat.
- A Heat Press: A regular household iron simply can't provide the high, consistent temperature and even pressure needed for sublimation. A heat press is a non-negotiable part of this setup.
Key Insight: Sublimation is a chemical process that works almost exclusively with polyester. The gaseous ink needs polymer-based fibers to bond with. It won’t work on 100% natural fibers like cotton because there’s nothing for the ink to grab onto.
For the brightest, most vibrant photos, you should always use fabric with a high polyester count—ideally 100% polyester. If you use a poly-blend (say, 65% polyester), you'll get a more faded, vintage-style print because the ink will only stick to the polyester threads.
The Sublimation Process Step by Step
Once your gear is ready, the process itself is pretty straightforward. Precision is key, especially when it comes to your heat press.
First, you'll print your mirrored image onto the sublimation paper. Don't be alarmed if the colors look dull and washed out on the paper—that's completely normal! The real magic happens under the heat.
Next, give your fabric a quick pre-press for 5-10 seconds. This smooths out any wrinkles and removes residual moisture, giving you a perfect canvas.
Now, place the printed paper face down on your fabric. A little heat-resistant tape will keep it from shifting around, which is crucial for a sharp image. I also recommend sandwiching your project between two sheets of butcher paper to protect your heat press from any ink "blowout."
Finally, it's time to press. For most polyester fabrics, you'll be looking at around 400°F (204°C) for 60 seconds with medium pressure. When the timer goes off, carefully peel back the paper while it's still hot. You'll be left with a brilliant, permanently infused photo.
Getting Started and Project Ideas
The initial investment for sublimation can feel a bit steep, but it's a rapidly growing corner of the craft and professional world. The digital textile printing market, valued at USD 5.8 billion in 2024, is projected to nearly double by 2030, and sublimation inks are leading the charge, holding over 52% of the market share.
For cosplayers, this technique is a game-changer for creating durable, detailed costumes. You can print intricate armor patterns or vibrant character art directly onto fabrics like spandex. If you're building custom outfits, check out our guide on how to make cosplay armor for ideas on incorporating custom fabric pieces.
Not ready to buy a full setup? A great way to start is by purchasing pre-printed sublimation transfers from sellers online. This lets you experiment with the process using just a heat press before committing to the printer and inks.
Troubleshooting Common Fabric Printing Issues
Let's be honest, even when you follow the instructions perfectly, sometimes things just don't turn out right. It happens to all of us. When your fabric printing project hits a snag, don't panic—most common issues are surprisingly easy to fix.
Think of this as your go-to guide for those frustrating moments. We’ll walk through the most common headaches, from blurry images to peeling transfers, and give you practical fixes to get your project back on track.
Why Is My Printed Image Faded or Muted?
That feeling when you pull the transfer paper away and see a dull, lifeless image is incredibly disappointing. A faded print usually points to one of three things: the quality of your original image, your printer settings, or a problem with the heat press.
First off, check your source file. An image you grabbed from social media or a quick text message just won’t have enough data to print well. For a sharp, vibrant result, your image needs to be at least 300 DPI (dots per inch) at the final print size.
Next, dive into your printer settings before you click "print." The default "normal" or "draft" mode is designed to save ink, which is the last thing you want here. You need to tell your printer to go all out. Choose a "High Quality" or "Best Photo" setting, and make sure to select the right paper type, like "Glossy Photo Paper," even if you're using transfer paper. This little trick forces the printer to lay down more ink, giving you much richer colors.
Finally, if you're using a heat-activated method like sublimation or transfer paper, getting the temperature and time right is non-negotiable. Not enough heat or pressing for too short a time will result in a weak, blotchy transfer. Every brand has its own sweet spot, so follow the manufacturer's directions to the letter.
How to Fix Peeling or Cracking Transfers
There's nothing worse than creating a beautiful custom t-shirt, only to have the design crack and peel after one wash. This problem almost always stems from the pressing step—specifically, uneven heat, not enough pressure, or the wrong kind of pressing surface.
Your standard ironing board is the enemy of a good transfer. Its soft, padded surface is great for clothes, but it absorbs all the downward pressure you're trying to apply, preventing the transfer's adhesive from properly melting into the fabric's fibers.
Crucial Tip: Always press on a hard, heat-resistant surface. A kitchen countertop (with a protective towel), a sturdy wooden cutting board, or even the floor can work. You need a solid base that won't give way when you lean into it.
If you spot an edge lifting after you're done, you can often perform a quick rescue mission. Just cover the design with a sheet of parchment paper and go over the peeling spot with a hot, dry iron for another 10-15 seconds. Focus all your pressure right on that problem area to re-bond it to the fabric.
Investing in a good work surface can save you a lot of headaches. For those who do this often, a large quilter's dual-side cutting mat provides a perfectly flat, solid foundation for pressing projects of all sizes.
What to Do When Colors Look Wrong
Ever print a photo where the brilliant blue on your screen came out looking purple on the fabric? Or a vibrant red turned into a dull orange? This annoying color shift usually boils down to a mismatch between your screen, your printer, and your ink.
Here are a few things to investigate:
- Color Profile Mismatch: Your monitor uses an RGB (Red, Green, Blue) color profile to display images, but your printer uses CMYK (Cyan, Magenta, Yellow, Black) to print them. That conversion process can sometimes cause unexpected color changes. If you're using software like Photoshop, converting your image to a CMYK profile before you print can give you a more accurate preview of the final result.
- Ink and Paper Incompatibility: Using third-party ink cartridges or choosing the wrong paper setting can wreak havoc on your colors. For the most predictable results, use ink and transfer paper from the same brand, and always double-check that you've selected the correct paper type in the print dialog box.
- A Note on Sublimation: If you're working with sublimation, don't be alarmed when your printed transfer sheet looks faded, dull, and just plain wrong. This is completely normal! The true, vibrant colors only appear after they've been activated by the intense heat and pressure from your press. Trust the process.
Got Questions About Printing on Fabric? You're Not Alone.
When you're diving into a new craft like printing photos on fabric, it's natural to have a few questions. I've been there! Let's walk through some of the most common things people ask, so you can start your project with total confidence.
Which Printing Method Will Last the Longest?
If you're looking for a print that will outlast the fabric itself, sublimation is the undisputed champion. Seriously, it's in a class of its own.
Unlike other methods where the ink sits on top of the fabric, sublimation ink turns into a gas under heat and permanently fuses into the polyester fibers. This means the image becomes part of the material. You can't even feel it. It will never crack, peel, or fade, no matter how many times you throw it in the wash. This is why it's the go-to for professional-quality gear like activewear or custom blankets that get a lot of love and use.
Can I Just Use My Regular Inkjet Printer at Home?
Yes, for some of the most popular DIY methods, you absolutely can! Your standard home inkjet printer is all you need to get started with iron-on transfer paper and printable fabric sheets.
It’s as simple as loading these specialty sheets into your printer just like you would a piece of photo paper and hitting "print." It's a fantastic, low-cost way to get your feet wet.
The big exception here is sublimation. A regular inkjet printer will not work for sublimation. That process demands a dedicated printer loaded with special sublimation inks, which have a completely different chemical makeup. So for fun, accessible projects, your trusty home printer is a perfect starting point.
How Can I Make Sure My Printed Photos Don't Wash Out?
Making your prints washer-safe comes down to the specific method you used. There’s no magic bullet, so following the instructions that came with your materials is crucial.
- Inkjet Transfer Paper: Give the print at least 24 hours to "cure" before its first wash. When you do wash it, turn the item inside out, use cold water on a gentle cycle, and either tumble dry on low or hang it to dry.
- Printable Fabric Sheets: The key here is setting the ink after printing. Most brands require you to rinse the sheet in cold water until it runs clear, then heat-set it with a dry iron. This locks the color in for good.
- Sublimation: Good news! Sublimation prints are 100% permanent and washable the second they cool down. The ink is fused into the fibers, so just follow the care instructions for the fabric itself.
If there's one piece of advice to take away, it's this: always follow the manufacturer's instructions. They've tested their products for the best results, so their guidelines on temperature, time, and washing are your best bet for a project that lasts.
What’s the Best Fabric to Use for Photo Printing?
This is a big one, and the answer depends entirely on your printing method. Choosing the wrong fabric is probably the #1 reason a project fails.
Sublimation is the pickiest. It only works on fabrics with a high polyester content—ideally 100% polyester—or on special hard surfaces that have a poly-coating. The ink simply won't bond with natural fibers like cotton or wool.
For the more accessible methods like inkjet transfer paper or printable fabric sheets, you have more flexibility. These work beautifully on natural fibers. 100% cotton and cotton/poly blends are fantastic choices because they hold the ink well and give the transfer a great surface to adhere to.
No matter which method you choose, a smooth, tightly woven fabric will always give you the sharpest, most detailed photo. Try to steer clear of anything with a heavy texture, like terry cloth or chunky knits, as the uneven surface can make your image look blurry or patchy.
At Famcut.com, our passion is empowering the cosplay and sewing community with the tools and knowledge you need to bring your incredible ideas to life. From specialty fabrics to all the essential supplies, we've got your back. Dive into our collection and get inspired for your next creation at https://famcut.com.