


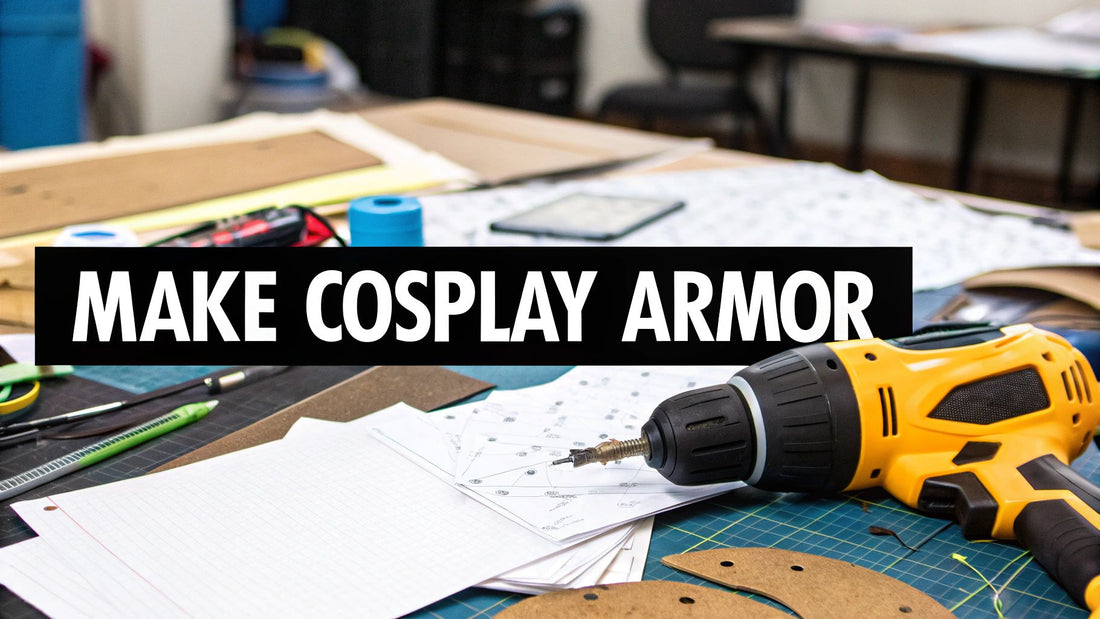
How to Make Cosplay Armor for Beginners
Making a killer suit of cosplay armor boils down to four main stages: planning your design, drafting your patterns, building the pieces out of a material like EVA foam, and then finishing it all off with sealing and paint. It's a process that takes you from a cool idea in your head to a real, wearable piece of art.
Your First Steps into Armor Crafting
Welcome to the wild and wonderful world of armor crafting! If you're here, you're probably wondering if you can actually pull this off. Let me tell you: you absolutely can. My goal here is to give you a clear roadmap, taking you from that initial spark of an idea all the way to a finished masterpiece you can proudly wear to your next convention.
The love for incredible costuming has absolutely blown up over the past few years, which is great news for all of us. It means fantastic materials and tools are easier to get than ever. The numbers back this up, too—the global market for cosplay outfits, armor included, is expected to hit around USD 9.21 billion by 2035. This explosion of interest means there's a huge community and tons of resources out there to help you learn.
Think of this section as your pre-flight check. We're going to get you oriented and build your confidence before you ever pick up a tool.
Understanding the Armor Making Process
Building armor isn't just one skill; it's a mix of different crafts that all come together. Each step builds on the one before it, so taking your time and doing each one right is what leads to that awesome final product. It might seem intimidating, but when you break it down, it's totally manageable.
Here's the basic flow of any armor build:
- Planning and Research: This is where you hoard reference images and figure out what materials will work best for your project.
- Patterning: You'll be making custom templates that are fitted specifically to your body. Get this right, and everything else is easier.
- Building and Assembly: Time to cut, shape, and glue your foam (or other material) into actual armor pieces.
- Finishing and Detailing: The final stretch! This involves sealing the foam, painting, weathering, and adding all those little details that make it pop.
The real secret to incredible armor isn't some magic technique. It's about doing a lot of small steps really, really well. Having patience during the early stages, especially with patterning, will pay you back tenfold when you see how great the final piece looks and feels.
Setting Yourself Up for Success
Before you even think about cutting into a sheet of foam, a little prep work can make all the difference. Honestly, your mindset is just as crucial as your toolkit. Your first project isn't about perfection—it's about finishing. Every mistake is just a lesson that'll make your next build even better.
Believe it or not, a lot of the skills you need for armor patterning have roots in sewing. If you’ve ever worked with fabric patterns, you’re already ahead of the game. For anyone who wants to brush up on those foundational skills, checking out resources like our free sewing lessons can be a huge help. That knowledge crosses over and makes the whole patterning process feel way more natural.
Choosing Your Armor Crafting Materials
The foundation of any great armor build comes down to one thing: your materials. Think of this as stocking your personal armory. Making the right choices here will save you a ton of headaches later and make the whole process of building cosplay armor so much more rewarding. What you pick will directly influence your techniques, budget, and the final look of your creation.
For both newcomers and seasoned builders, EVA foam is king. It's lightweight, easy on the wallet, and ridiculously versatile. You’ve probably seen it as those anti-fatigue floor mats, but it's also sold in rolls and sheets specifically for crafters like us.
Decoding EVA Foam
Get this straight: not all foam is the same. The real difference is its density, measured in kg/m³. A higher number means a firmer, more durable foam that holds details like a champ.
- Low-Density Foam (30-60 kg/m³): This is the squishy stuff you find in thin sheets at craft stores. It’s perfect for adding organic textures or padded areas, but it’s way too soft to hold a solid shape for your main armor plates.
- High-Density Foam (80-100 kg/m³): This is your workhorse. It’s got the rigidity you need for breastplates and pauldrons, it sands down to a beautiful, smooth finish, and it captures crisp, carved details perfectly. Most of those floor mats fall right into this category.
- Ultra-High-Density Foam (200+ kg/m³): This stuff is almost like plastic. It’s fantastic for making props, tiny detailed emblems, or any piece that needs to be super rigid without adding other materials for support.
Thickness is just as critical as density. A common trick I use is to build the base of a piece, like a chestplate, with thicker foam (8-10mm). Then, I layer on thinner foam (2-4mm) for all the raised details and filigree. It adds depth without a ton of extra weight.
Speaking of helpful insights, you can find a lot more general tips and tricks for your builds over at https://www.famcut.com/blogs/tips-and-tricks.
Exploring Thermoplastics Like Worbla
When you're facing down an incredibly complex curve or just need something that can take a beating, thermoplastics are your best friend. Worbla is the brand everyone knows—it's a plastic sheet that becomes soft and moldable when you hit it with a heat gun.
Unlike foam, Worbla can be stretched and shaped over forms (think a plastic bowl to get a perfect dome for a pauldron) and it holds that shape rigidly once it cools. Yes, it’s pricier than EVA foam, but it sticks to itself and can be endlessly reheated and reshaped, which makes it a powerful tool for intricate pieces or for reinforcing foam. I lean on it for parts that need to withstand a lot of abuse at a con.
The demand for high-quality costumes keeps pushing material innovation forward. In fact, the cosplay costume market is projected to hit an estimated value of $4.98 billion in 2025. This growth is a huge reason why we have access to so many advanced materials, giving us more creative freedom than ever before.
To help you decide what's right for your project, here’s a quick comparison of the most common materials I see people using for armor builds.
Cosplay Armor Material Comparison
| Material | Best For | Pros | Cons |
|---|---|---|---|
| EVA Foam | General purpose armor, large pieces, beginners | Lightweight, affordable, easy to cut and shape, forgiving. | Can tear, requires sealing before painting. |
| Worbla | Complex curves, durable pieces, detailed overlays | Extremely durable, self-adhesive, can be endlessly reshaped. | Expensive, requires a heat source, heavier than foam. |
| 3D Printing (PLA/ABS) | Intricate details, props, rigid components | High detail and accuracy, strong, smooth finish possible. | Requires a 3D printer, can be brittle, slow to produce large parts. |
| Sintra (PVC Foam Board) | Hard-surface armor, props, rigid plates | Very rigid, holds a sharp edge, sands smoothly. | Can be brittle, requires a heat gun for shaping, fumes can be toxic. |
Each material has its place in the workshop. Don't be afraid to mix and match them to get the best result for each individual piece of your armor.
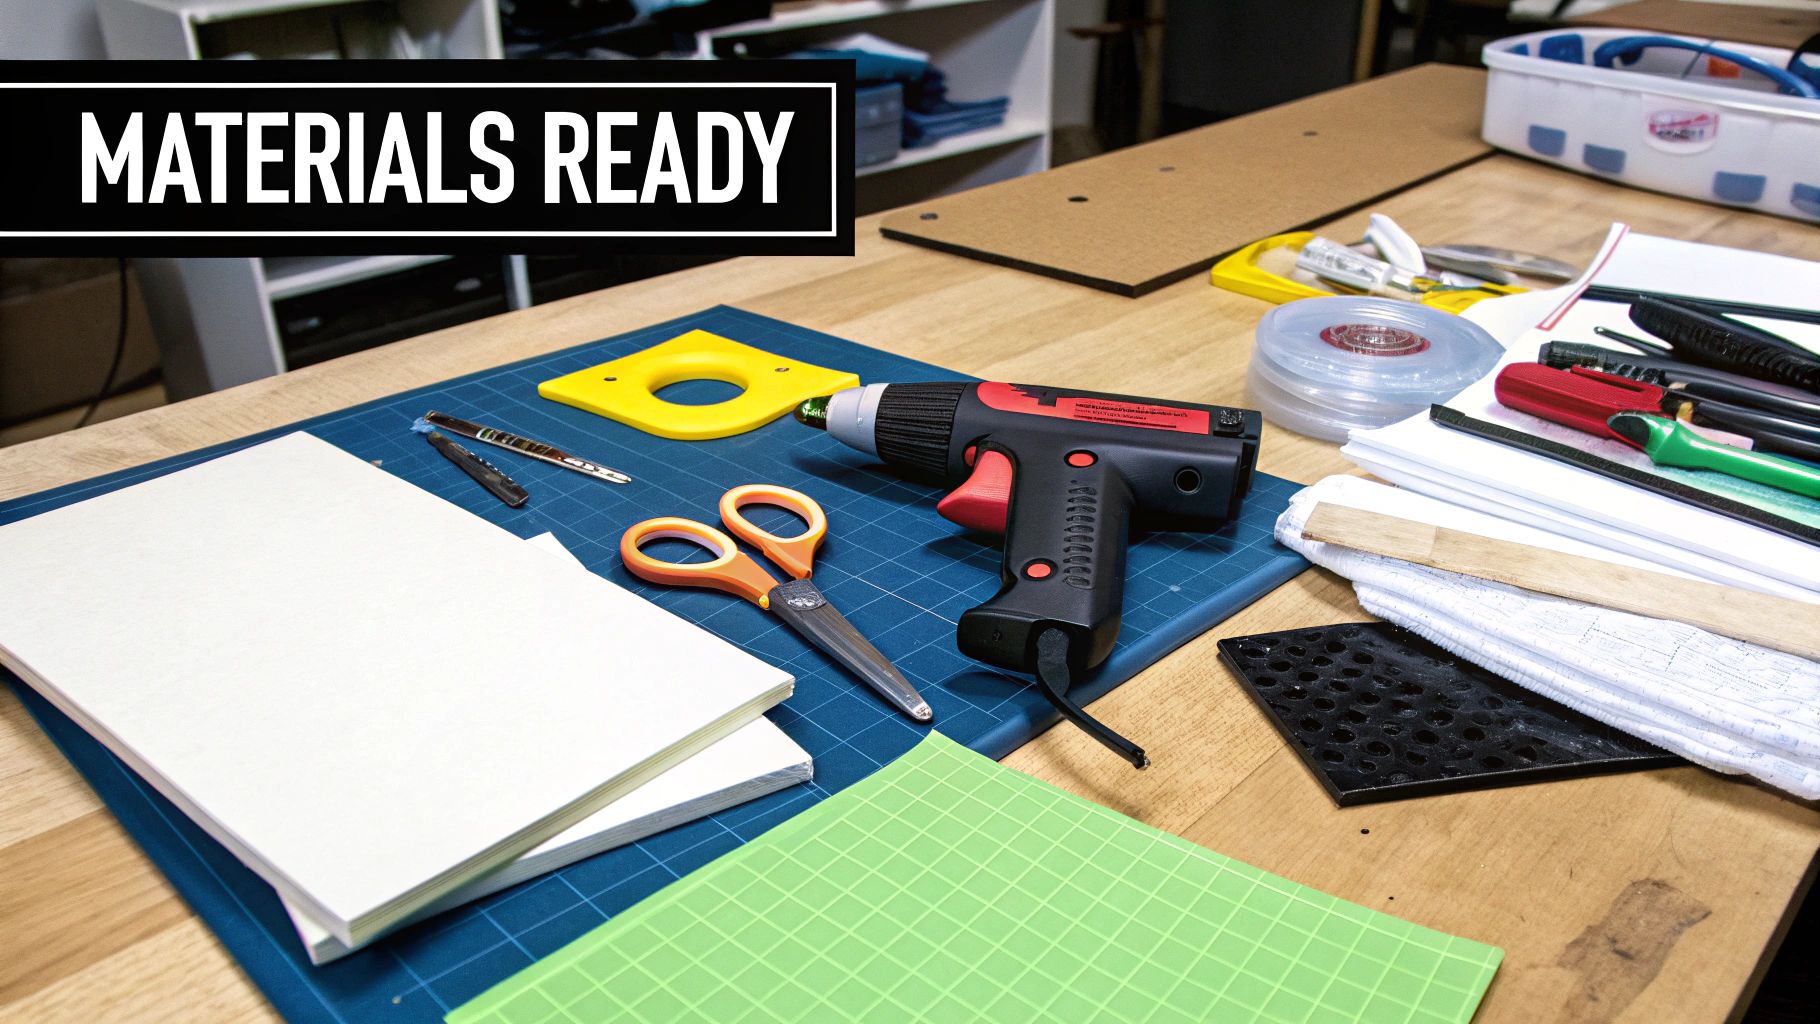
Assembling Your Essential Toolkit
Having the right tools is the difference between a project you love and one you want to throw across the room. You don't need a massive workshop—just a few key items to get started.
Must-Have Tools:
- Safety Gear: I can't stress this enough: a respirator mask with vapor cartridges is non-negotiable when you're working with contact cement or heat-sealing foam. Get some safety glasses, too. Your lungs and eyes will thank you.
- Cutting Tools: A sharp utility knife or box cutter with a pile of replacement blades is your go-to. A dull blade is your enemy—it tears foam instead of cutting it cleanly.
- Heat Gun: This is your primary shaping tool. It activates contact cement, helps you form curves in foam, and is used to seal the foam's surface pores before you even think about painting.
- Adhesive: Contact cement is the industry standard for a reason. It creates a powerful, flexible bond that can handle all the movement you'll do while wearing your armor.
- Rotary Tool (Dremel): This little guy is your best friend for sanding seams smooth, carving in details, creating realistic battle damage, and cleaning up edges. A basic model with a sanding drum attachment is all you need to get going.
Pro Tip: Don't get suckered into buying the most expensive tools right away. A budget-friendly heat gun from the local hardware store does the exact same job as a fancy one. For your rotary tool, look for a starter kit that comes with a variety of bits—it’s the best bang for your buck.
For those super advanced or intricate parts, 3D printing opens up a whole new world. If you decide to go down that rabbit hole, a professional 3D printing materials guide is a great resource for picking the right filament or resin for the job.
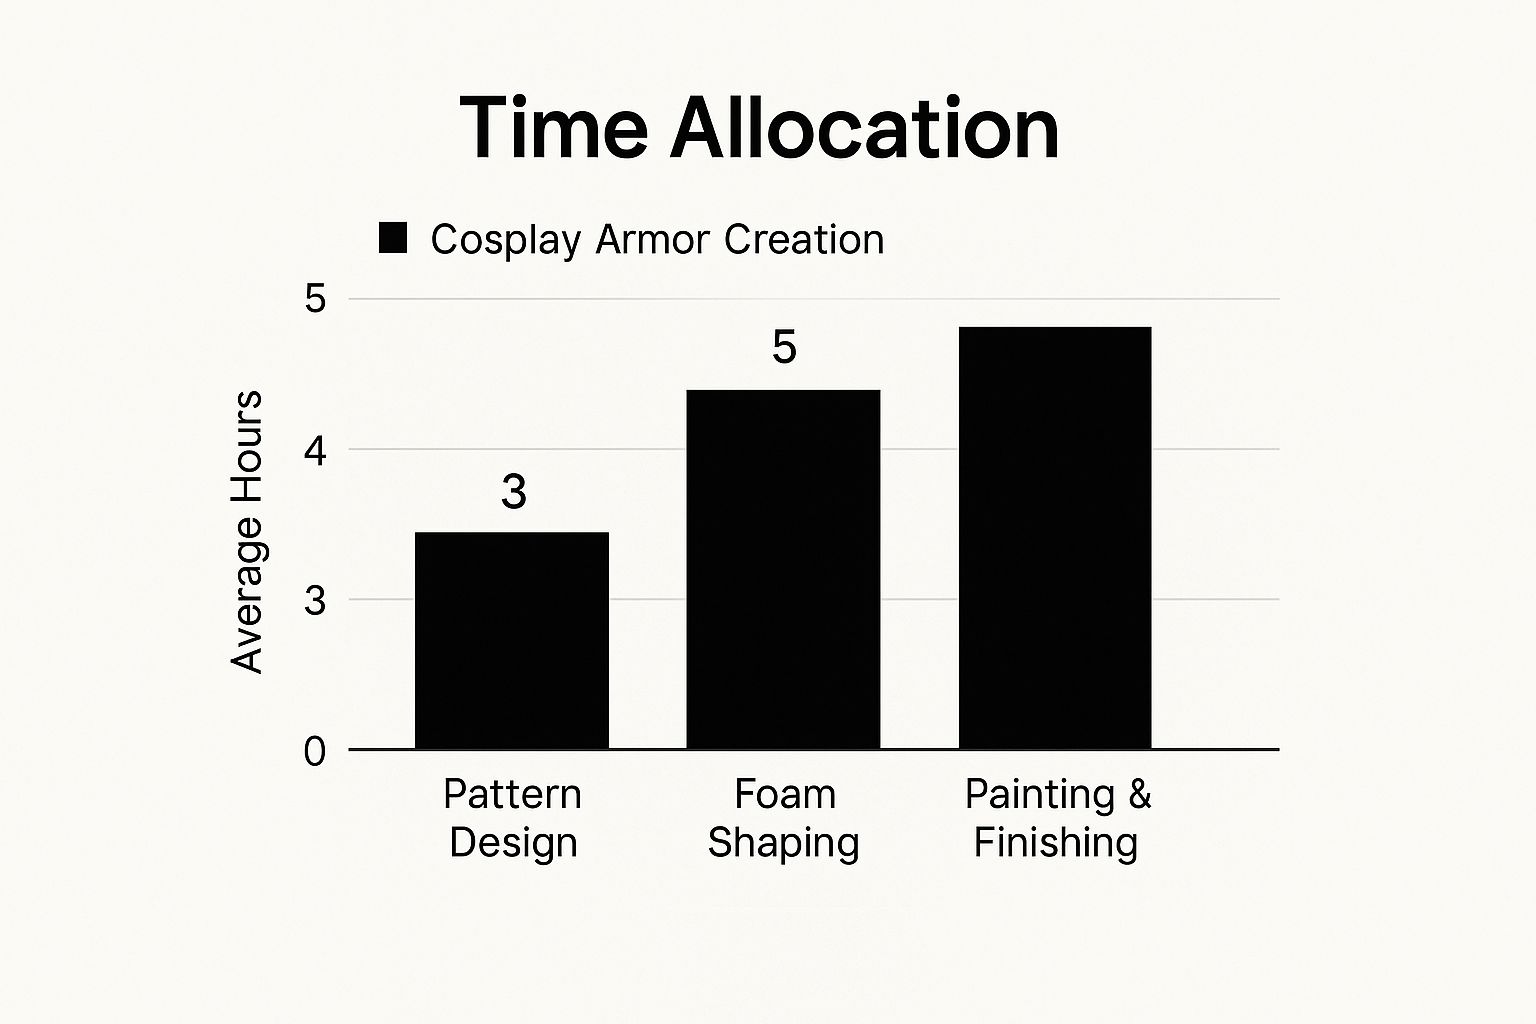
This chart gives you a pretty realistic idea of where your time is going to go. As you can see, the hands-on work of shaping and assembling the foam is almost always the biggest time sink in any armor build.
Every truly great suit of armor, whether it's hammered from steel or heat-shaped from foam, starts with a solid blueprint. A good pattern is what separates armor that looks like it was made for you from armor that just looks... off. This is the step where you custom-fit the design to your own body, making sure every plate and pauldron moves with you, not against you.
Before you even think about cutting into your good foam, you need a reliable template. Sure, you can find patterns online, but nothing will ever fit quite as well as one made for your specific shape. The classic, tried-and-true way to do this is with plastic wrap and duct tape. It’s a method that lets you create a perfect clone of any body part.
The Duct Tape Dummy Method
This process is pretty much the gateway to custom armor patterning. It’s a little messy and you'll definitely need a patient friend to help, but the results are absolutely worth the effort. The goal is simple: create a stiff shell of your arm, leg, or torso that you can draw your designs on and then cut apart.
To start, wrap the body part you’re patterning—let’s say your forearm for a bracer—in a couple of layers of plastic wrap. This is just a barrier to protect your skin and arm hair from the tape’s sticky side. Pull it snug, but not so tight that you're cutting off circulation.
Now, have your helper start wrapping the area with duct tape. They should overlap the strips by about 50% to build up a strong, stable shell. You’ll want at least two full layers, applying the tape in different directions (like horizontally and then vertically) to give it maximum strength. Once you have a solid silver cast of your arm, you're ready to start designing.
Takeaway: The duct tape dummy isn't just a pattern; it's a 3D canvas. It perfectly captures your body's unique curves and shape in a way a measuring tape never could, giving you the most accurate foundation possible for your armor.
Grab a permanent marker and draw your armor design right onto the tape. This is your chance to get creative. Sketch out where the different plates will be, add decorative lines, and mark where any straps or buckles will go. Think about the practical side, too—how will the final piece need to open up to get it on and off?
From Dummy to Paper Pattern
Once you're happy with the design, you have to get it off your body. Carefully use a pair of trauma shears or some sturdy scissors to cut a straight line down one side of the duct tape shell. It's best to cut along a line where your final armor will have a seam anyway. Gently peel the whole thing off, and you'll be holding a 3D replica of your arm with your design on it.
Next, cut along the design lines you drew. As you cut the shell apart, you'll see the curved 3D pieces start to flatten out on your work surface. Some of them won't want to lay completely flat, so you'll need to cut a few "darts"—small V-shaped wedges—into them. These darts are incredibly important; they show you exactly where the foam will need to bend or be joined to recreate the original curve.
Finally, trace these flattened duct tape pieces onto paper or cardstock to create your master pattern. Don't forget to add these critical details before you call it done:
- Label Everything: Seriously, label every single piece. "Left bracer, top plate" or "Right shoulder, front piece." You'll thank yourself later.
- Add Registration Marks: Draw little hash marks or numbers across the seam lines where two pieces will connect. This makes lining them up perfectly during assembly a total breeze.
- Indicate Grain: If you're using a foam with a noticeable stretch or "grain," draw an arrow on each piece to show which way it should run. Keeping the grain consistent helps prevent weird warping.
The Power of a Test Run
Let me say this loud and clear: never, ever take your brand-new pattern and cut it directly from your final material. Always build a quick-and-dirty mockup first. Use cheap craft foam or even just paper to test it out.
This is your chance to tape the pieces together and actually try them on. I can almost guarantee you'll find little things to adjust—a curve might be too tight, a piece might be a little too long, or a dart might need to be bigger. Fixing these issues on your paper pattern is easy. Trying to fix them after you've already cut and glued your expensive foam is a complete nightmare. Honestly, this one extra step is what separates a good build from a great one.
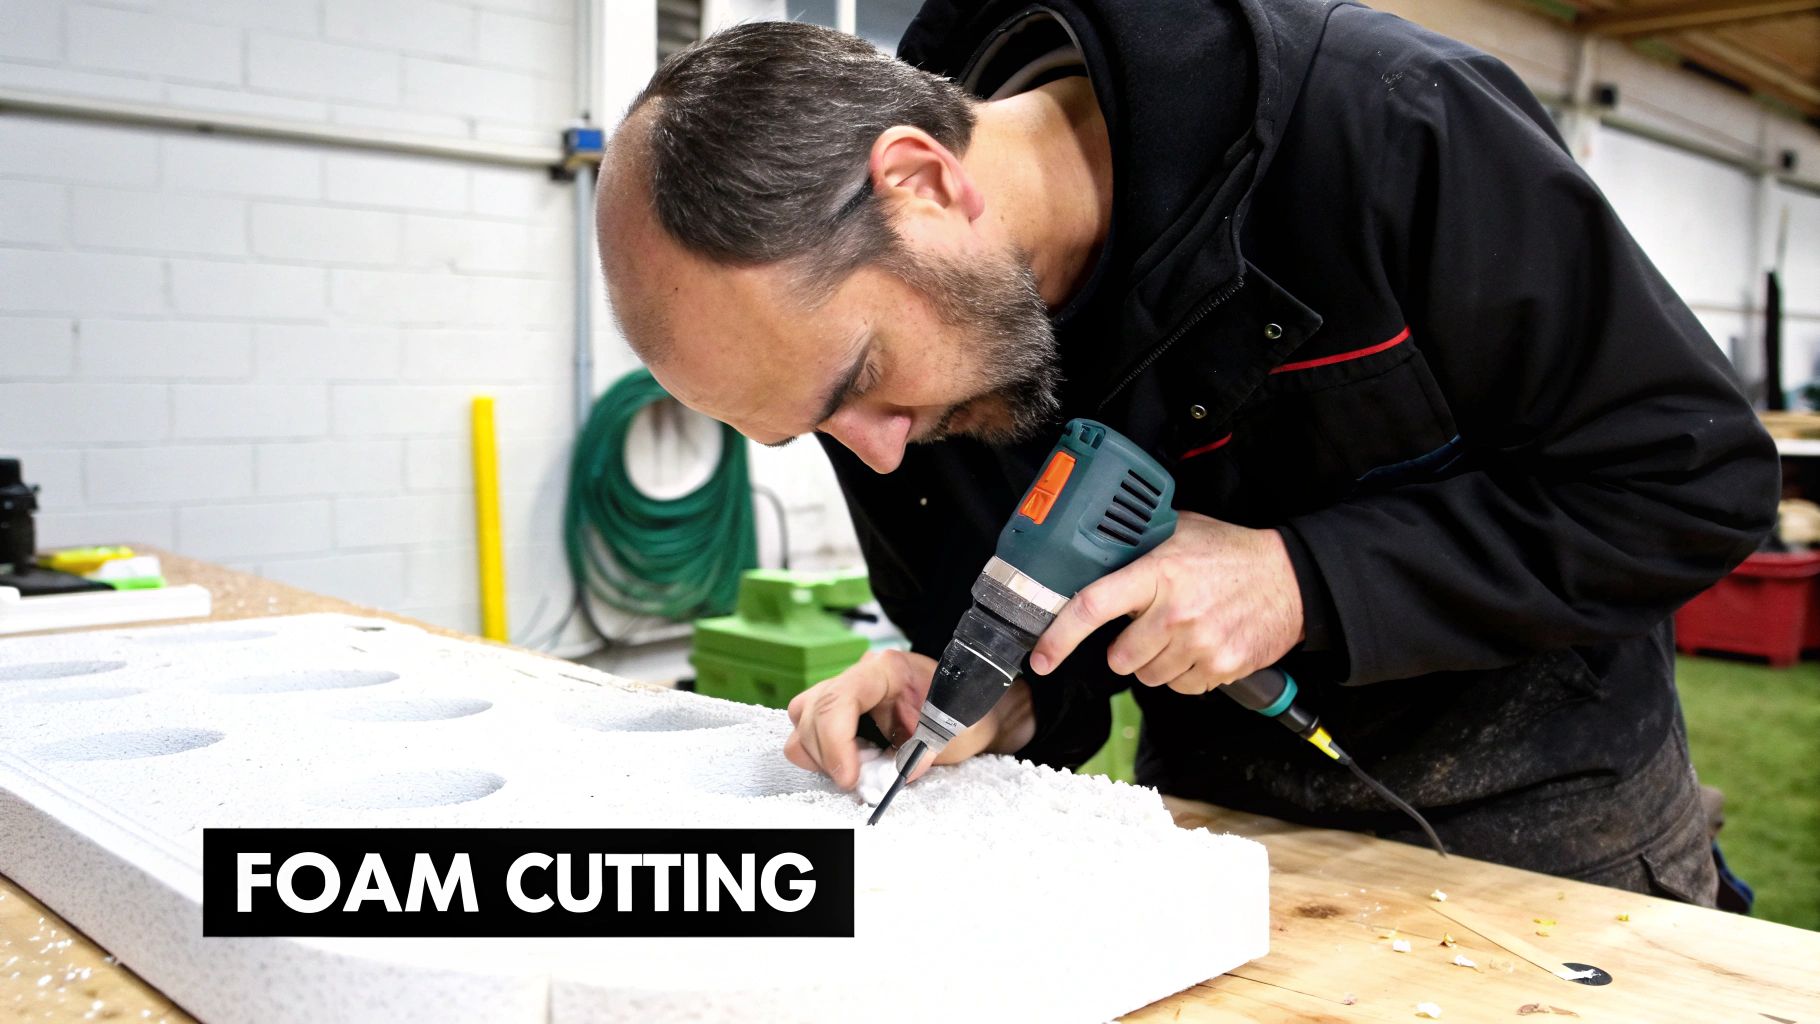
Bringing Your Foam Armor to Life
With your patterns ready to go, it’s time for the fun part: turning those flat sheets of foam into real, three-dimensional armor pieces. This is where your design starts to jump off the page and become something you can actually wear. Getting this right comes down to mastering a few core techniques that you'll use on every single foam project from here on out.
It all begins with a clean cut. Your best friend in this entire process is a sharp utility knife. And when I say sharp, I mean it. A dull blade will just tear and drag through the foam, leaving you with ragged, ugly edges that are a total pain to glue together cleanly. Do yourself a favor and keep a pack of fresh blades nearby, swapping them out the second you feel the slightest bit of resistance.
Mastering Your Cuts and Edges
When you're cutting, try to use long, confident strokes instead of short, choppy ones. Hold your knife at a consistent angle to keep the edge straight and true. For thicker foam, you'll get a much cleaner result by making two or three shallow passes along the same line rather than trying to brute-force the blade through in one go. You get way more control that way.
Now, one of the most critical skills to learn is the beveled cut. This just means angling your blade—usually at 45 degrees—to create a sloped edge. When you join two of these beveled edges, they form a perfect, clean corner or a seamless curve. This is how you avoid that bulky, squared-off look you get from just sticking two flat edges together.
A perfect beveled edge takes a bit of practice. Here's a tip: grab a scrap piece of foam and draw a straight line on it. Now, just practice cutting along that line while holding your knife steady at that 45-degree angle. The goal is to make the cut in one smooth motion. Trust me, it’s this small detail that takes a build from good to great.
Think of it this way: a straight cut creates a simple butt joint, which is fine for flat surfaces. But a beveled cut creates a miter joint, which is absolutely essential for building the complex shapes you see in helmets, shoulder pauldrons, and chest plates.
The Magic of Heat Shaping
One of the coolest properties of EVA foam is that it becomes pliable when you heat it. A heat gun is what unlocks this potential, letting you bend, curve, and mold flat patterns into organic-looking shapes. The process feels surprisingly intuitive once you get the hang of it.
Start by gently passing your heat gun over the foam's surface, but keep it moving so you don't scorch one spot. You’ll actually see the foam’s texture change just a little as it heats up. Once it feels warm and flexible, you can shape it over your knee, a large bowl, or any curved object you have lying around. Just hold it in place for a minute or so until it cools, and the foam will magically hold its new shape.
Here are a few real-world examples of where heat shaping is a lifesaver:
- Creating a Breastplate Curve: After you've cut out the flat pattern for a chest piece, heat it up and gently press it over your knee or a mannequin to get that natural torso contour.
- Forming Bracers and Greaves: A simple piece of PVC pipe is the perfect form for shaping forearm and shin guards into nice, uniform cylinders.
- Doming Pauldrons: To get that classic rounded shoulder armor look, heat a circular piece of foam and carefully stretch it over something dome-shaped, like a big salad bowl or a large styrofoam ball.
This is the step that truly breathes life and realism into your armor. Without it, your pieces would just look blocky and unnatural.
Assembling with Contact Cement
Once your pieces are all cut and shaped, you need a powerful and flexible adhesive to hold everything together. For EVA foam, nothing beats contact cement. This stuff isn't like your typical school glue; it works by creating a powerful chemical bond between two surfaces that have both been coated.
The process is specific, but it's not complicated. Just apply a thin, even layer of contact cement to the edges of both pieces you plan on joining. Then, you have to let it dry completely—it should feel tacky to the touch, but not wet. This usually takes about 10-15 minutes.
Once it's ready, carefully press the two edges together. Be warned: you really only get one shot at this. The bond is instant and permanent, so take your time and align your pieces perfectly. The result is a super-strong, flexible bond that's exactly what you need for armor that has to move with you on a crowded convention floor.
Refining with a Rotary Tool
The final tool in your core construction kit is a rotary tool, which most people know by the brand name Dremel. This little powerhouse is your go-to for sanding seams smooth, carving in fine details, and even adding realistic battle damage.
After gluing your pieces, you'll almost always have a visible seam. A sanding drum attachment on your rotary tool, set to a low speed, can gently grind that seam down until it’s practically invisible. It’s also the perfect tool for carving decorative lines, runes, or filigree right into the foam’s surface. Finally, you can use different grinding bits to add nicks, slashes, and bullet holes, giving your brand-new armor a battle-worn history.
While many skills in armor making are unique, the fundamentals of working with patterns and materials are universal. For anyone looking to broaden their crafting horizons, our free sewing lessons offer a great foundation in pattern work and fabric manipulation that can be surprisingly useful.
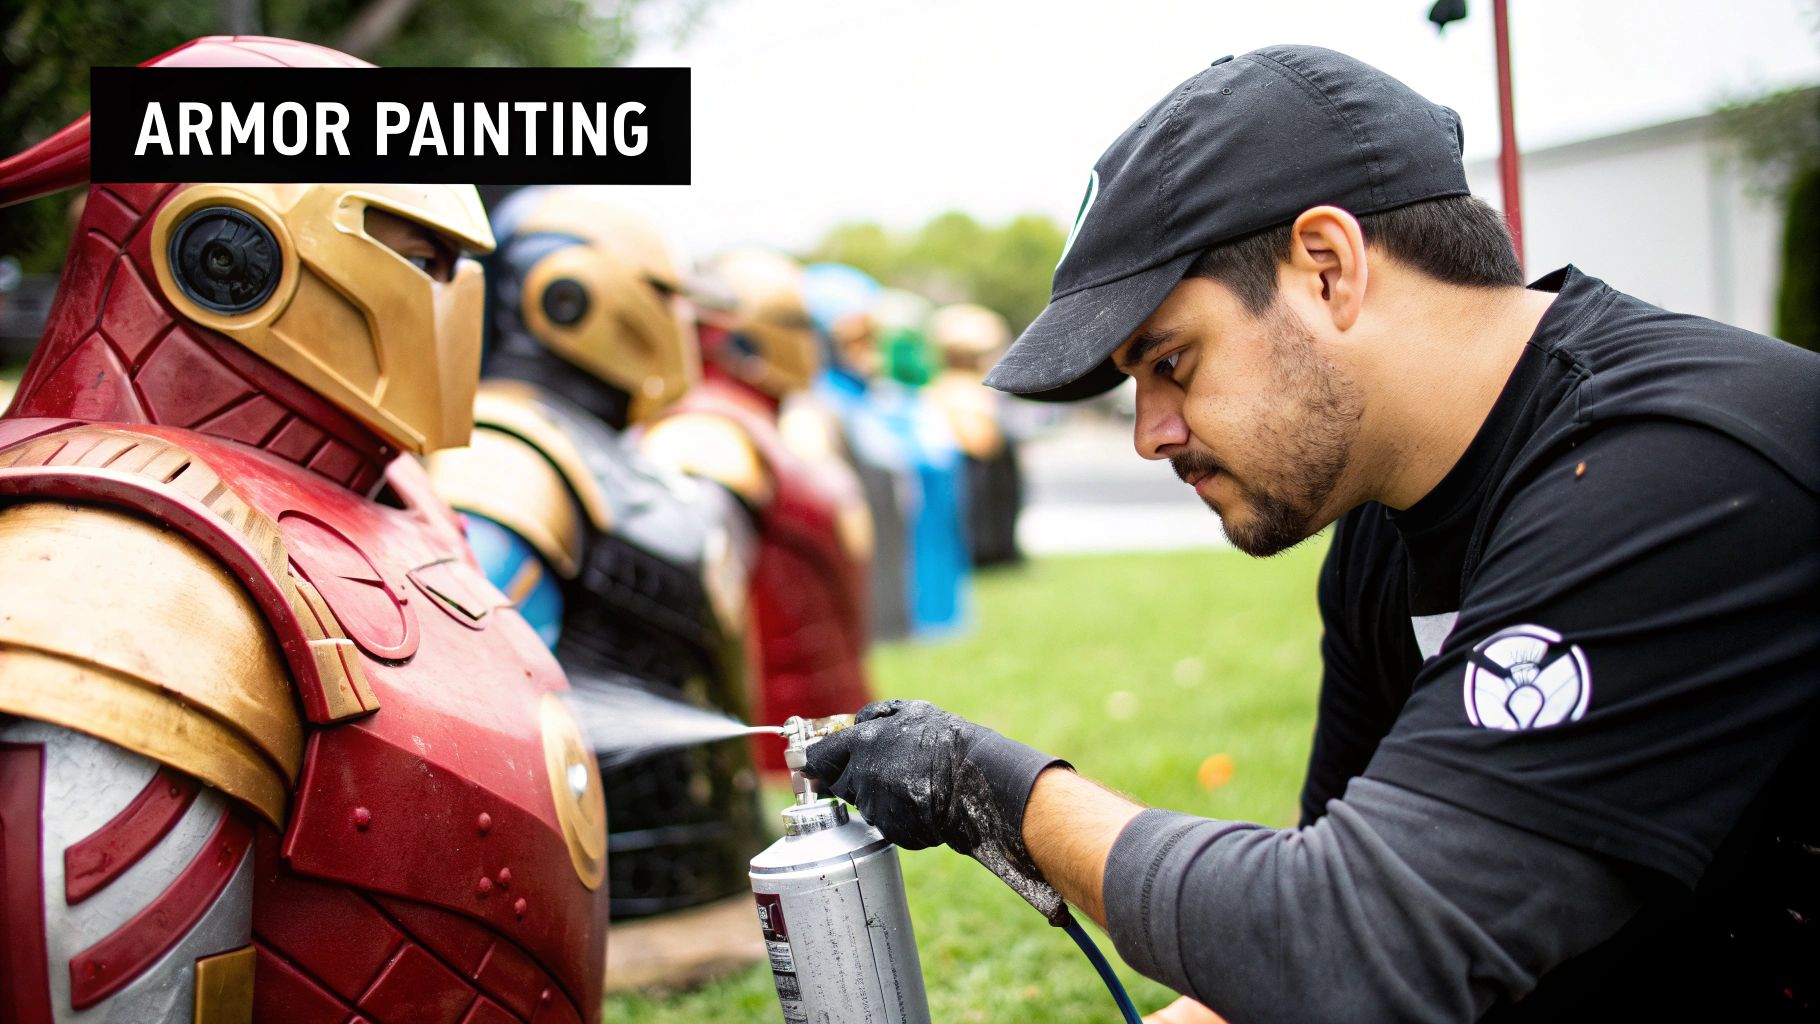
Sealing and Painting Your Creation
A killer finish is what takes a piece of armor from "good" to "unbelievable." This is the magic step where your foam build transforms into something that looks like it was pulled right out of a fantasy realm or a sci-fi blockbuster. The whole process really comes down to layering—sealing the foam, priming the surface, and then patiently building up your colors and textures to tell a story.
Think of raw EVA foam as a really dense sponge. If you just spray paint directly onto it, the foam will literally drink the paint, leaving you with a splotchy, dull finish. Worse yet, the moment that flexible foam bends, the rigid paint you applied will crack and flake right off. Sealing is non-negotiable; it creates a flexible barrier between the foam and your paint, giving you a smooth canvas that can actually survive a day at a convention.
Choosing Your Sealing Method
You've got a few solid options for sealing your armor, and the best choice often comes down to your budget and what kind of piece you're making. Each method gives a slightly different texture and durability.
- Heat Sealing: This should always be your first step, no matter what you do next. Just give the entire surface of the foam a quick pass with your heat gun. You'll see the foam change slightly as the tiny pores close up. This creates a smoother base and means you'll use less of whatever sealant you apply next.
- PVA Glue (or Mod Podge): This is the classic, budget-friendly route. I usually mix PVA glue with water in about a 1:1 ratio and brush on 3-5 thin layers. It dries into a semi-rigid shell that’s perfect for hard-surface armor pieces that don't need to flex much.
- Flexible Coatings (Plasti Dip): This rubberized spray is my personal favorite for most armor builds. It stays incredibly flexible even after it's fully cured, making it ideal for parts that will see a lot of movement, like knee or elbow joints. A few even coats give you a fantastic, paint-ready surface that resists cracking like a champ.
And remember, these methods aren't mutually exclusive. For an ultra-smooth, almost cast-plastic look, I've seen builders put down a few layers of PVA glue first, sand it smooth, and then top it with a final coat of Plasti Dip for that added flexibility.
Pro Tip: Always use Plasti Dip in a well-ventilated space (outside is best) and wear a respirator. Start with a very light "tack coat" from a distance, let it get sticky, and then build up with several more thin, even layers. This is the key to avoiding drips and getting a strong, uniform finish.
Priming for a Flawless Finish
Once your sealant is cured, it’s time to prime. A good primer is what gives your paint something to really bite into, which makes your colors pop. The single most important thing to look for in a primer for foam armor is flexibility.
Your standard can of spray primer from the hardware store will crack the instant the foam bends. You need to look for something like a "filler primer" or a flexible automotive primer. These are designed to fill in microscopic imperfections while staying pliable. A neutral gray is almost always the best choice, as it provides a great foundation for both light and dark colors.
Painting and Weathering to Tell a Story
Okay, this is where the real artistry comes out to play. Your paint job is what gives the armor its soul—is it the polished plate of a royal guard, or the battle-scarred gear of a wasteland survivor?
Always start with your base coat. Here's a little secret for convincing metallic armor: use a gloss black base coat. When you spray your metallic paints, like silver or gold, over a deep black, it creates a sense of depth that you just can't achieve over a gray or white primer. An airbrush is an amazing tool for this, but high-quality spray paints will also get the job done beautifully.
To add shadows and highlights, here are a few of my go-to techniques:
- Airbrushing: Gently mist a darker shade, like black or a deep brown, into the crevices and around the edges of plates. It instantly creates a sense of dimension.
- Dry Brushing: Grab a flat brush, get a tiny bit of a lighter metallic paint on it (like a bright silver), and then wipe almost all of it off on a paper towel. Now, lightly dust the brush over the raised edges and details. They'll catch the light and pop right out.
- Blackwash: This is a classic for a reason. Mix some black acrylic paint with water until it's the consistency of inky water. Brush it over a section, let it sit for about 30 seconds, and then wipe off the excess with a paper towel. The black paint will stay behind in all the recesses, defining every single line and detail.
Finally, weathering is what makes it look real. Use a tiny brush to paint on thin silver scratches along edges where the armor would naturally get banged up. To fake some rust, try stippling on patches of dark brown, orange, and red paint. Every scratch, dent, and smudge helps tell your character's story.
The boom in cosplay has led to some incredible new materials and techniques, allowing us to build armor that's lighter and more detailed than ever. This passion is reflected in the market, too; the global role-play cosplay costume market was valued at about USD 2.8 billion in 2024 and is projected to hit USD 5.2 billion by 2033. It's amazing to see how much this community has grown.
For more crafting wisdom, from picking the right materials to those final finishing touches, be sure to check out our collection of cosplay tips and tricks at https://www.famcut.com/blogs/tips-and-tricks.
Common Questions About Making Cosplay Armor
Getting started in armor making is exciting, but it’s completely normal to hit a few snags. Honestly, every builder, no matter how experienced, has been there. Let's walk through some of the most common questions that pop up, so you can spend less time guessing and more time creating.
One of the biggest hurdles is just knowing where to begin. You see all these incredible materials and finished builds online, and it's easy to get overwhelmed. The trick is to start with something that lets you learn the basics without breaking the bank.
What’s the Best Armor Material for a Beginner?
Hands down, the best starting point is EVA foam. It's the go-to for a reason. You can find it everywhere as those anti-fatigue floor mats, it's super cheap, lightweight, and incredibly forgiving to work with.
All you really need to get going is a sharp utility knife and a basic heat gun. That’s a much lower barrier to entry than something like 3D printing, which has a steep learning curve and a significant upfront cost for the equipment. Or thermoplastics like Worbla, which are fantastic but require a bit more finesse with heat.
With EVA foam, if you mess up a cut or overheat a piece, you’re only out a few bucks and can just try again. That’s a huge relief when you're just learning the ropes.
How Do I Actually Attach Armor to My Costume?
This is probably one of the most critical parts of the whole process. I mean, what’s the point of a gorgeous set of armor if it falls apart the second you walk into a convention? The most reliable and battle-tested methods usually involve nylon webbing straps combined with buckles, parachute clips, or good old-fashioned Velcro.
For pieces like shoulder pauldrons or forearm bracers, you can glue the straps directly into the foam with contact cement before you seal and paint. For bigger sections like chest and back plates, building a separate harness that you wear under the costume is often the most comfortable and secure way to go. I've also had great success using strong neodymium magnets for smaller bits that need to sit flush and be easily removed.
My biggest piece of advice: Figure out your attachment points from the very beginning. Trying to glue straps onto a finished, painted piece is a nightmare and the bond will never be as strong. A little planning here will save you a ton of heartache later.
Why Is My Paint Cracking?
Ah, the dreaded paint crack. It's a heartbreaking sight for any foam armor maker, but it's almost always preventable. The core of the problem is simple: EVA foam is flexible, but most paints you'd grab off the shelf are not. When you move, the foam bends, and the rigid layer of paint on top has nowhere to go but to crack.
The fix involves two crucial steps: sealing and priming with flexible products.
- First, Seal the Foam: You have to create a non-porous barrier so the foam doesn’t just drink up your paint. Several thin coats of PVA glue (like Mod Podge) work, but a flexible rubber spray coating like Plasti Dip is even better. It creates a stretchy skin over the foam.
- Then, Use a Flexible Primer: Once sealed, you need a primer that will also bend. I’ve found that automotive filler primers or flexible spray primers are perfect for this. They create a beautiful, smooth surface that moves with the foam instead of fighting against it.
Skipping these steps is a classic rookie mistake that can undo hours of your hard work. For more creative solutions to common crafting problems, checking out various cosplay-making posts can give you some great ideas.
At Famoré, we've got the high-quality tools you need to bring your armor builds to life. From precision craft knives to all the essentials, we’re here to support you at every stage of your project. You can see our full range of products at https://famcut.com.