


What Is Bias Tape? Your Guide to Perfect Sewing Finishes
If you've ever admired a beautifully finished curved edge on a handmade garment—think a smooth neckline or a perfectly bound quilt edge—you've likely seen bias tape in action. At its core, bias tape is simply a strip of fabric cut on the diagonal.
But that simple diagonal cut is what makes it so indispensable.
Understanding The Magic Of The Bias Cut
Ever tried to wrap a flat, square piece of gift wrap around a basketball? You get a wrinkled, puckered mess. It just won’t conform to the curve. A strip of fabric cut along the regular grainline behaves the exact same way when you try to sew it around a curve like an armhole or a scalloped edge.
To understand why, you have to think about how fabric is made. Woven fabric is a grid of threads. You have the lengthwise threads (warp) and the crosswise threads (weft). This grid is super stable and has virtually no give. Cutting fabric along this grid gives you straight-grain tape, which is great for straight lines but terrible for curves.
The Power Of The 45-Degree Angle
This is where the magic happens. When you cut that same fabric at a 45-degree angle, you’re cutting across that rigid warp and weft grid. This is what's known as cutting on the "true bias."
That simple change in direction unlocks the fabric's hidden potential for stretch. The threads can now shift and move, giving the strip a natural elasticity that allows it to bend and shape itself beautifully around any curve you throw at it.
Bias tape isn't a new invention; it's a time-tested solution that has been a staple in sewing for generations. Its defining characteristic is that 45-degree cut, which gives it a unique flexibility that standard fabric strips simply can't match. This makes it perfect for binding curves smoothly. You can dig deeper into its properties and history over at topp-textil.de.
This infographic offers a great visual breakdown of what bias tape is, the different types you'll find, and what it’s used for.
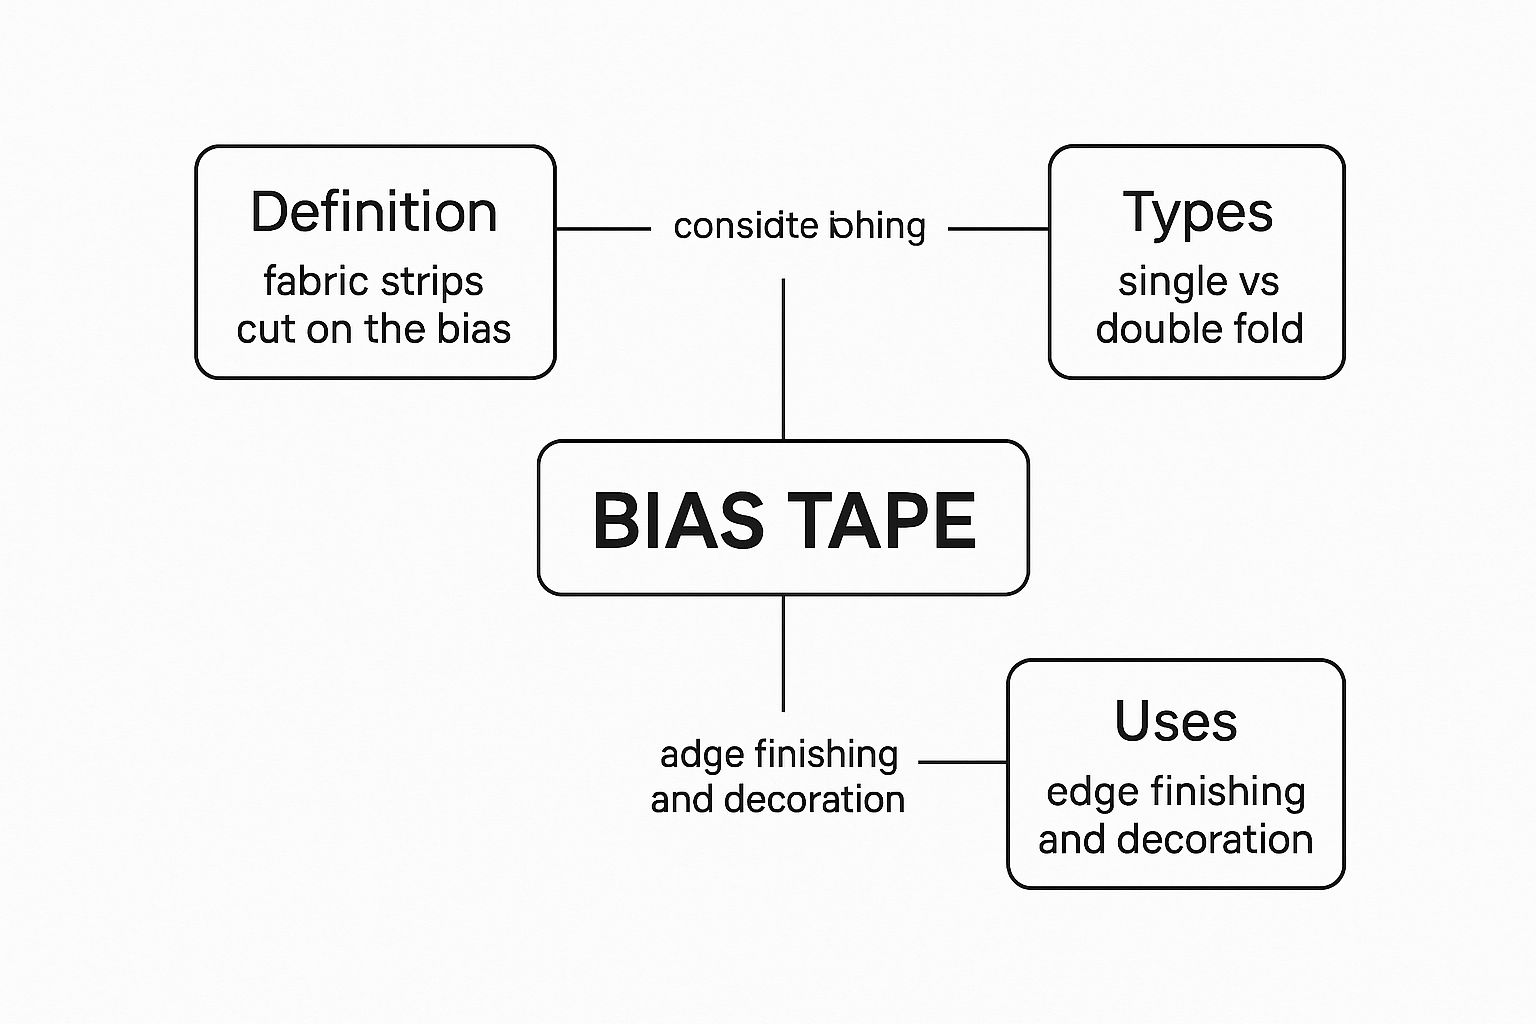
As you can see, that fundamental idea—a strip of fabric cut on the bias—is the key to its incredible versatility. That inherent stretch is precisely why it’s a go-to for everything from finishing quilt edges to adding decorative trim on a cosplay costume.
To really nail down the difference, let’s look at a quick side-by-side comparison.
Bias Tape vs Straight-Grain Fabric Strips
| Characteristic | Bias Tape (Cut at 45°) | Straight-Grain Strip (Cut at 0° or 90°) |
|---|---|---|
| Stretch/Flexibility | Significant stretch and flexibility. | Minimal to no stretch. Very stable. |
| Best For | Curved edges (necklines, armholes, quilt scallops). | Straight edges (hems, straps, borders). |
| Behavior on Curves | Lays flat and smooth without puckering. | Bunches up, wrinkles, and creates bulk. |
| Primary Use | Binding, facing, and decorative trim on curves. | Reinforcing straight seams and creating structure. |
The takeaway is simple: choose the right cut for the job. For anything with a curve, bias tape is your best friend. For straight and sturdy, stick with the straight grain.
What Exactly Is a Bias Cut? Let's Get Into the Weeds
To really get why bias tape is so special, we need to peek under the hood at how woven fabric is made. Think of any standard piece of fabric as a simple grid, like a tiny, flexible checkerboard. This grid is made of two sets of threads that cross over and under each other at perfect right angles.
The threads that run the long way, parallel to the neat, finished edge of the fabric (that's called the selvage), are the warp threads. These guys are the backbone of the fabric; they're held tight during weaving, which makes them incredibly strong and stable.
Running from side-to-side, weaving through the warp threads, are the weft threads. This simple over-under, crisscross structure of warp and weft is what we call the grainline. If you try to pull the fabric along either of these directions, you’ll notice it barely has any give. That stability is fantastic for most seams, but it's a real headache when you need to sew around a curve.
The Magic of the 45-Degree Angle
So, where does the "bias" come in? Imagine drawing a diagonal line right through the squares of that fabric grid. The true bias is the line that cuts across the grain at a perfect 45-degree angle. Cutting your fabric along this line completely changes how it behaves.
Instead of yanking on those rigid, locked-in threads, you're now pulling them from the side. This allows the little threads in the weave to shift and move, giving the fabric a natural stretchiness it didn't have before. It’s not some kind of sewing sorcery—it’s just a clever way of using the fabric's own structure to your advantage.
The bias isn't just a random diagonal. It's the sweet spot on any woven fabric that offers the most stretch. By cutting strips at that 45-degree angle, you unlock its hidden elasticity, turning a flat piece of cloth into something that can beautifully hug a curve without puckering or bunching up.
This simple principle is the entire reason bias tape is the go-to solution for finishing curved edges on everything from necklines to quilt borders.
Why It All Comes Down to the Cut
Getting a handle on this concept is a game-changer for your sewing. That wonderful stretch from a bias cut can be your best friend or your worst enemy. It’s perfect for curves, but it also means the fabric can get stretched out of shape if you're not careful.
Let's break down the different grainlines and what they do:
- Lengthwise Grain (Warp): This is the most stable direction. It has practically zero stretch, which is why pattern pieces for things like pant legs are usually aligned this way. You want them to hold their shape.
- Crosswise Grain (Weft): There's a tiny bit of give here, but it's still very stable. It runs from selvage to selvage.
- True Bias (45-degree Angle): This is where the magic happens. It's the stretchiest direction, making it ideal for creating soft drapes, smoothly finishing armholes, and adding bindings that lie perfectly flat.
When you reach for bias tape, you're choosing a strip of fabric that has been intentionally cut to be as flexible as possible. This lets you put a professional, smooth finish on tricky curved areas where a regular straight-grain strip would just fight you the whole way, creating a wrinkly mess.
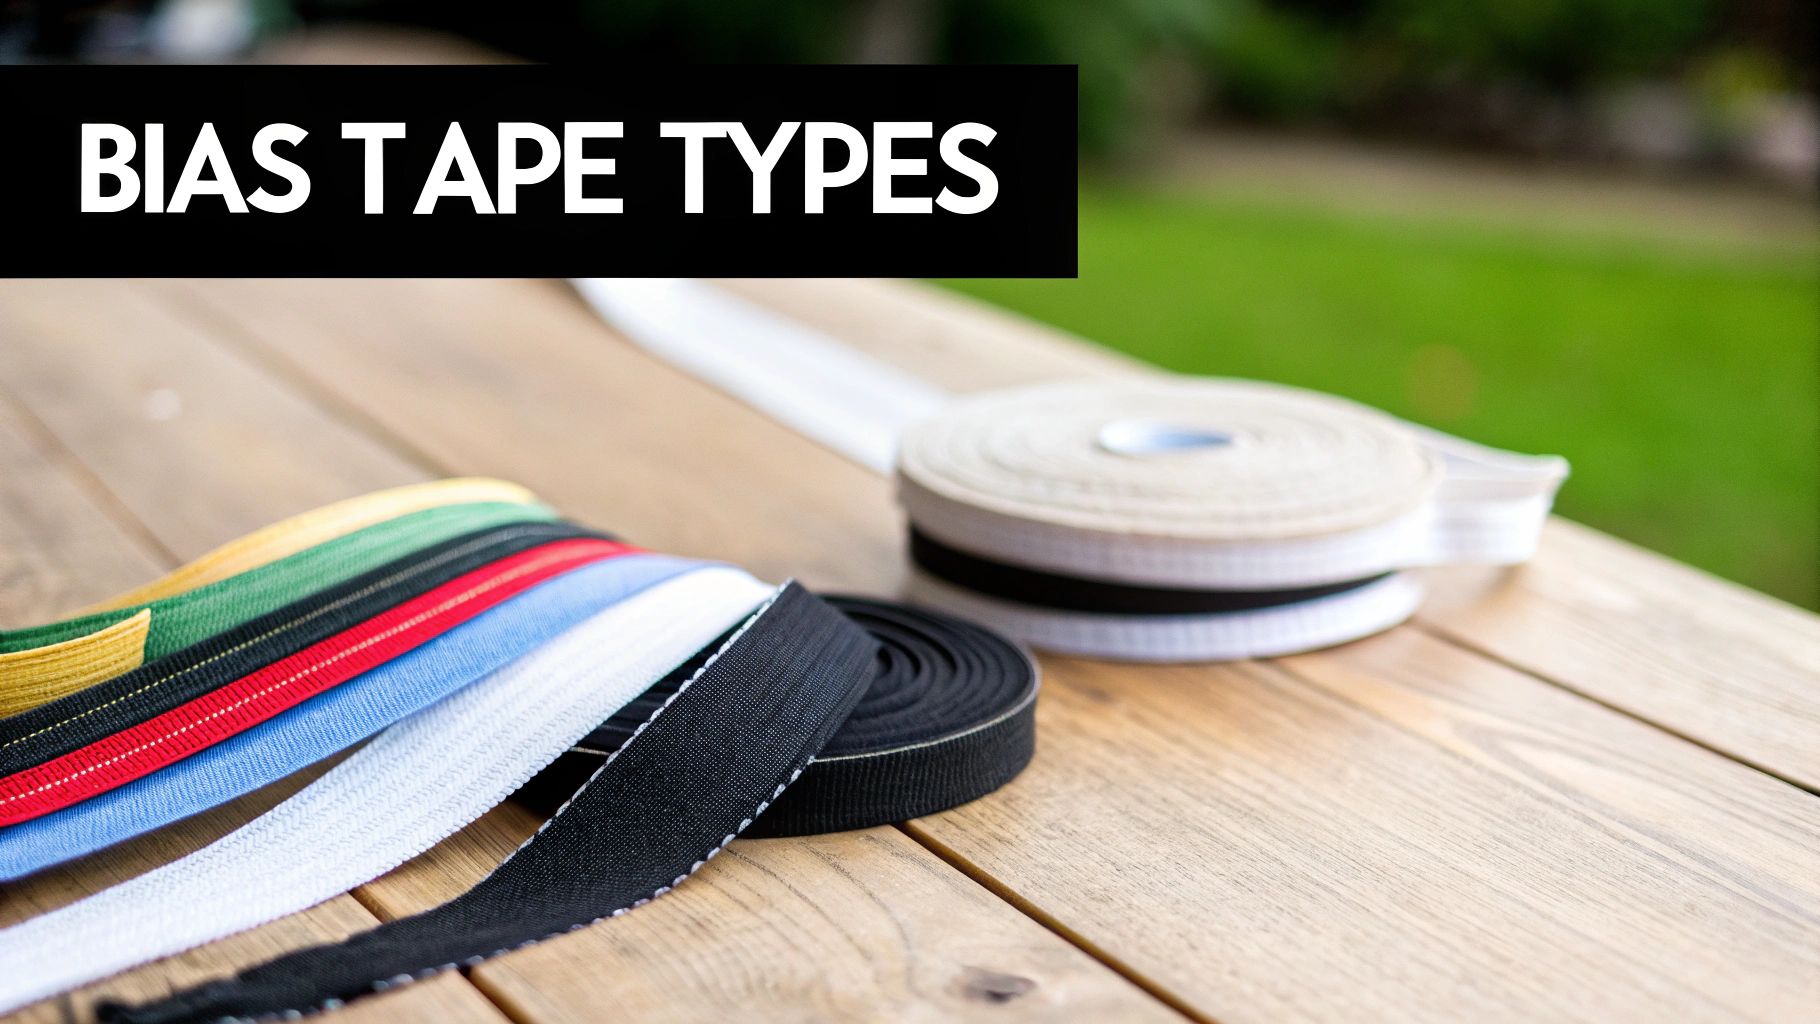
Choosing the Right Type of Bias Tape
Okay, so you get why the bias cut is so magical. Now comes the fun part: picking the right tape for your project. Walking into a sewing store and seeing a wall of bias tape can feel a little overwhelming, but it really boils down to two main players: single fold and double fold.
Figuring out which one you need isn't about which is "better." It's about what job you need it to do. Each has a specific talent, and once you know the difference, your sewing life will get a whole lot easier.
Single Fold Bias Tape
Think of single fold bias tape as the perfect tool for finishing an edge that will be hidden from view. It’s a simple strip of bias-cut fabric where both long, raw edges have been folded in once to meet right at the center.
This type is your secret weapon for getting a clean, flat finish on the inside of a garment. It's fantastic for:
- Facing a curved edge: It’s a classic for finishing necklines and armholes. You just sew it to the edge, flip it to the inside, and stitch it down for a professional look.
- Making casings: Need a neat channel for elastic or a drawstring? Single fold tape is perfect for the job.
- Finishing hems: It gives a durable and tidy finish to curved hems on skirts and dresses, preventing bulk.
Because it only has that one set of folds, it lies incredibly flat, which is exactly what you want for these behind-the-scenes tasks.
Double Fold Bias Tape
Now, let's talk about double fold bias tape. This one starts its life as single fold tape and then gets folded in half again, creating a neat "U" shape that’s ready to hug a raw edge. It's designed to be a finisher.
This is your go-to for binding. That pre-folded shape is made to perfectly encase a raw edge, sandwiching it between the top and bottom layers. It’s the star of the show for projects where the edge is visible, like:
- Binding quilt edges: This is probably its most famous role, creating a durable and beautiful frame for a quilt.
- Finishing bibs and placemats: It neatly seals the edges of projects with multiple layers.
- Adding decorative trim: The visible stitching becomes part of the design on things like apron edges, potholders, or even cosplay accents.
The core difference is simple: Single fold is for facing—turning an edge under to be hidden. Double fold is for binding—wrapping an edge that will be seen from both sides.
Material Matters
Beyond just the fold, the fabric itself is a huge deal. You’ll find bias tape made from all sorts of materials, and your choice will have a big impact on the final look and feel of your project.
You’ll find a tape for almost any purpose, from the practical to the purely decorative.
- Cotton: The workhorse. It’s sturdy, presses beautifully, and is perfect for quilts and everyday clothes.
- Satin: Silky and elegant, this is what you’ll reach for when finishing formalwear, lingerie, or special heirloom projects.
- Knit: This one has extra stretch built right in, making it the perfect choice for finishing necklines on t-shirts or other knit garments without restricting movement.
A good rule of thumb is to always try to match the tape’s material and weight to your main fabric. Using a heavy cotton tape on a delicate silk, for example, would create a stiff, awkward edge. You want them to work together.
Choosing the Right Bias Tape for Your Project
To make it even clearer, let's break down the most common types you'll find and where they shine. This can help you grab the right one with confidence.
| Bias Tape Type | Description | Best For | Example Projects |
|---|---|---|---|
| Single Fold Bias Tape | A bias strip with its raw edges folded once to meet at the center. Lays flat. | Facing, internal finishes, and creating casings. | Necklines, armholes, drawstring bags, curved hems. |
| Double Fold Bias Tape | Single fold tape that's been folded in half again, creating a "U" shape to enclose an edge. | Binding visible edges, creating straps, and decorative finishing. | Quilt binding, placemats, apron edges, potholders. |
| Satin Bias Tape | Made from silky satin fabric (often polyester), available in single and double fold. Has a distinct sheen. | Elegant finishes on formal or delicate garments. | Wedding dresses, lingerie, special occasion blouses. |
| Knit Bias Tape | Made from a stretchy knit fabric. It stretches and recovers with the main fabric. | Finishing edges on knit and stretch garments without restricting them. | T-shirt necklines, stretchy activewear, baby clothes. |
| Fusible Bias Tape | A specialty tape with a heat-activated adhesive on one side. | Appliqué, stained-glass quilting, and holding tape in place before sewing. | Celtic knot designs, appliqué quilts. |
Ultimately, selecting the right bias tape comes down to two key questions: Will the edge be hidden or visible? And what type of fabric am I working with? Answering those two things will point you to the perfect tape every time.
Unlocking Creative Uses for Bias Tape
Sure, bias tape is a workhorse for finishing edges. But if that's all you're using it for, you're missing out on its real magic. Once you start seeing it as a design element in its own right, a whole new world of creative possibilities opens up.
Think beyond its functional role. It’s a fantastic tool for injecting color, adding texture, and giving a professional polish to an incredible range of projects. You can turn a simple t-shirt into a custom piece, add beautiful details to a quilt, or make a cosplay costume look like it leaped off the screen. It’s all about shifting your perspective.
Elevating Everyday Garments
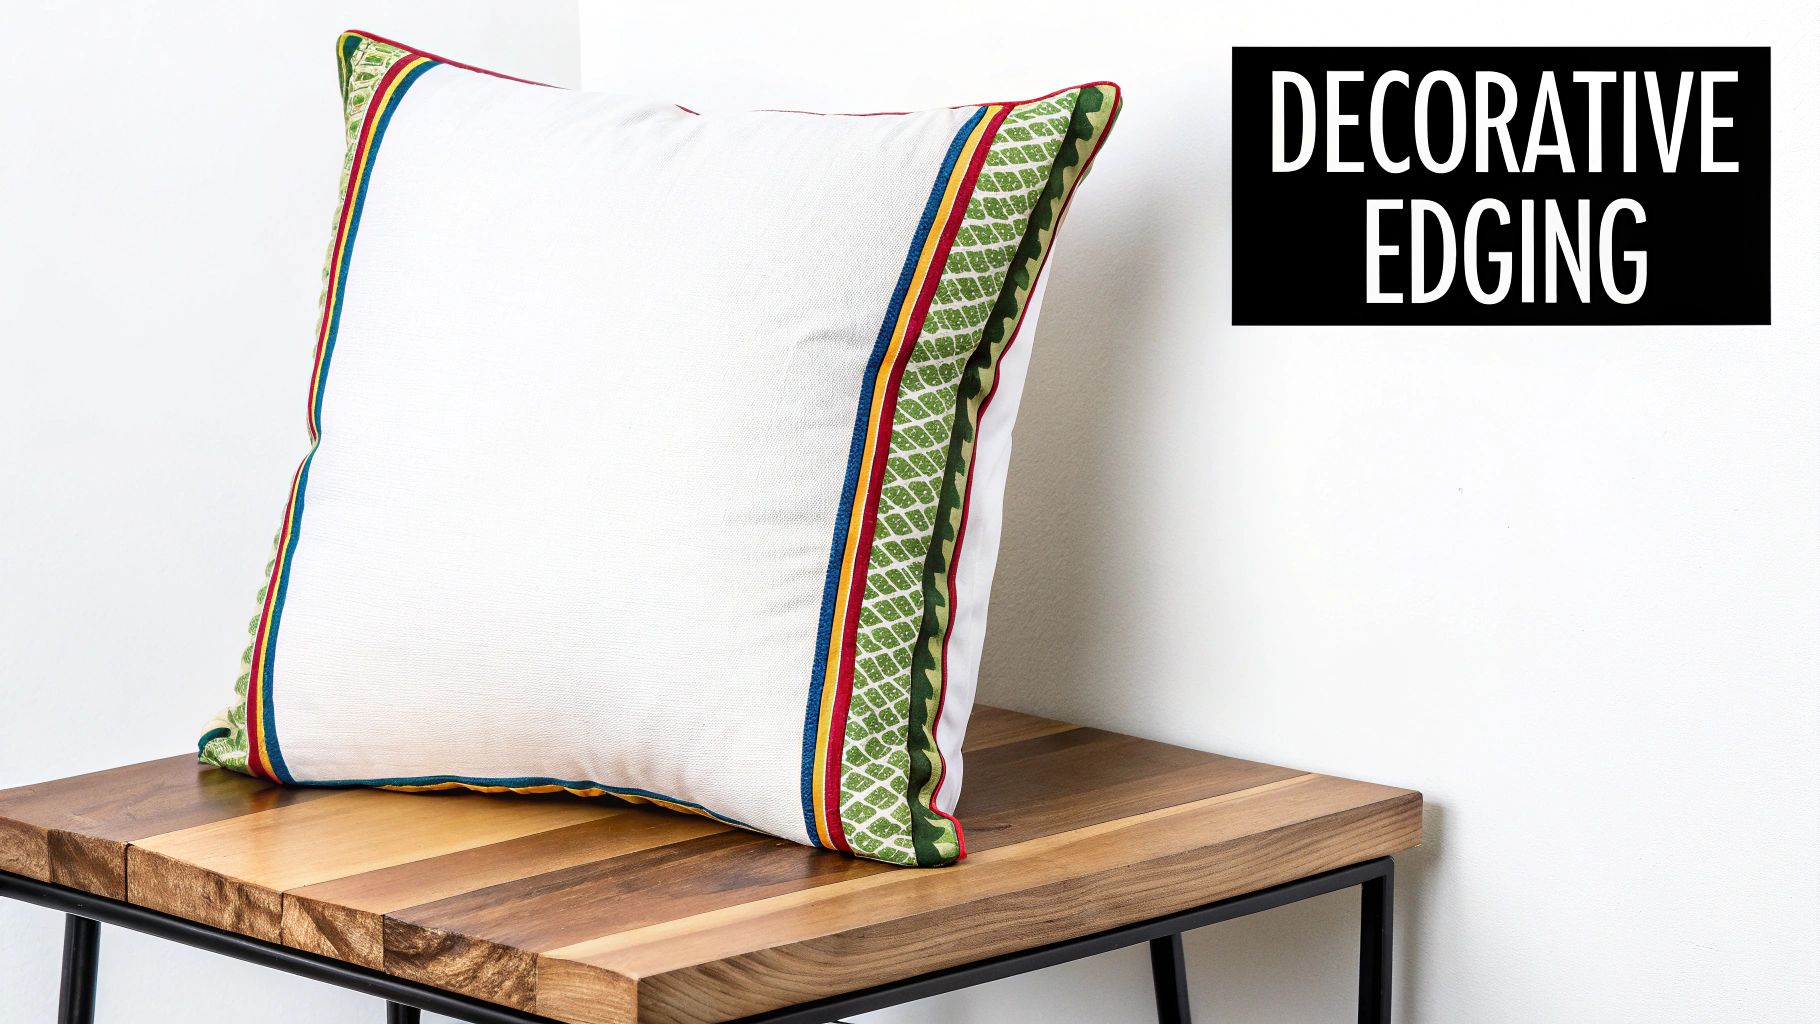
In everyday sewing, bias tape is my secret weapon for adding those little high-end details. Instead of just hiding a seam on the inside, why not use a contrasting color on the outside? Suddenly, you have bold, graphic outlines on pockets, collars, and cuffs. That one simple trick can make a homemade garment look intentional and professionally designed.
It's also perfect for creating custom features that are both beautiful and practical.
- Custom Straps and Ties: Ever tried turning a tiny fabric tube right-side out? It’s a nightmare. Double-fold bias tape is the perfect solution for delicate spaghetti straps or sturdy ties for a wrap dress. It’s strong, consistent, and saves you a ton of frustration.
- Decorative Outlines: Grab a vibrant bias tape and use it to trace the style lines of a jacket or the scalloped edge of a skirt. It’s an instant pop of color that really emphasizes the garment’s shape and construction.
- Button Loops: For a lovely vintage touch, you can make dainty button loops from thin bias tape instead of wrestling with traditional buttonholes on delicate fabric.
The key is to stop thinking of bias tape as just a finisher and start seeing it as an embellishment. When you use it intentionally, you add a layer of detail that can elevate a project from simple to stunning.
Artistic Applications in Quilting
Quilters have known about the artistic power of bias tape for ages, especially when it comes to appliqué. One of the most beautiful techniques you’ll see is stained-glass quilting. By using black or dark-colored bias tape to outline fabric pieces, quilters perfectly mimic the lead came in a stained-glass window.
This method allows for breathtakingly intricate and colorful designs that would be nearly impossible with traditional piecing. The bias tape neatly covers all the raw edges of the appliqué shapes, creating crisp, clean lines and a dramatic effect that turns a quilt top into a true work of art.
A Cosplayer's Secret Weapon
In the world of cosplay, accuracy and impact are everything, and bias tape is an absolute must-have. It’s the perfect material for recreating the sharp, defined edges you see on animated characters' clothing and armor.
Cosplayers use it for everything—adding a crisp trim to a flowing cape, defining the edges on foam armor, or creating stylized details that really pop. Because it bends so smoothly around any curve, it’s ideal for outlining complex shapes and giving a costume that clean, professional finish that looks like it came straight from the source material.
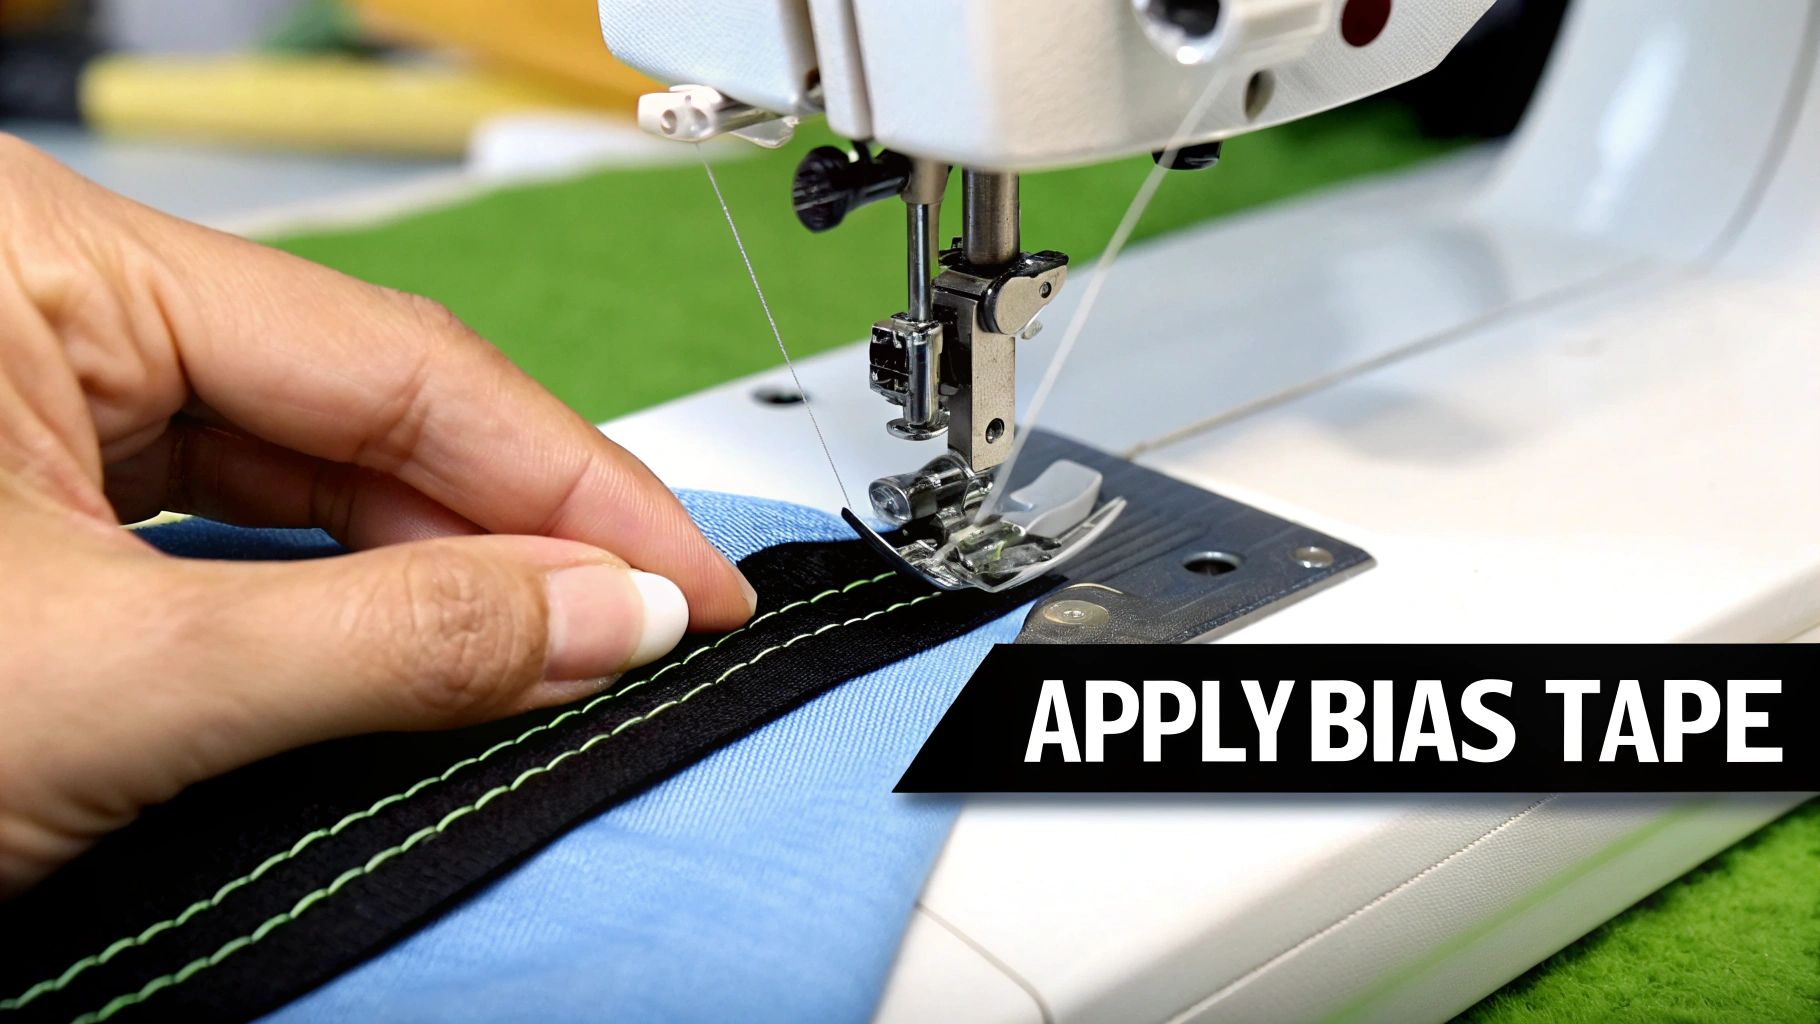
Alright, let's get this bias tape sewn on perfectly. It might seem a little fiddly at first, but once you get the hang of it, you'll be finishing edges like a pro. With a couple of simple tricks, you can master those curves and corners, turning a tricky task into one of the most satisfying parts of sewing.
The whole secret is to work with the tape’s natural stretch, not fight against it.
The most common mistake I see is people accidentally stretching the bias tape as they sew. When you pull the tape, it pulls on your main fabric, and you end up with ugly puckers and waves along your beautiful new edge. The key here is a light touch.
Preparation is Everything
Before you even think about your sewing machine, grab your iron. A little bit of prep work here will save you a world of frustration later, especially when you're dealing with curves like necklines and armholes.
Gently press the bias tape with a bit of steam, physically shaping it into a curve that matches the edge of your fabric. This little pre-shaping step encourages the tape to lie flat right where it needs to go. It makes a huge difference and really cuts down on the urge to pull it tight while you're sewing.
Once you’ve shaped it, it's time to secure it. Don't be shy with your pins or sewing clips! Place them close together to hold everything firmly in place. This stops the layers from wiggling around and helps you keep your stitching line perfectly even from start to finish.
The number one rule for a pucker-free finish is to avoid stretching the tape at all costs. Just let the fabric and tape feed through the machine together. Your job is simply to guide them with your fingertips, not to pull.
Mastering Mitered Corners
Creating a sharp, clean mitered corner is one of those skills that just makes your projects look incredibly polished and professional. It might look complicated, but the technique is surprisingly simple. It’s the ideal finish for anything with right angles, like placemats, napkins, or the binding on a quilt.
Here’s how you can get a perfect corner every single time:
- Stitch to the Corner: Sew the bias tape along the first side. Stop sewing when you are the same distance from the corner as your seam allowance. For example, for a 1/4" seam allowance, stop 1/4" from the raw edge of the next side. Remember to backstitch.
- Fold Up: Take your project out from under the needle. Fold the loose end of the bias tape straight up, away from your project, which creates a neat 45-degree angle at the corner.
- Fold Down: Now, fold the tape straight back down so its raw edge lines up perfectly with the next raw edge of your project. You'll see a tidy diagonal fold underneath. Pin this corner securely.
- Resume Sewing: Place your project back in the machine and start sewing right from the folded edge of this second side. Just repeat this process for any other corners!
This simple fold-and-tuck method hides all the extra fabric inside a crisp diagonal fold, leaving you with a sharp, professional corner that isn't bulky at all.
The Surprising History of Bias Tape
That humble roll of bias tape you have stashed away in your sewing kit? It actually has a pretty fascinating story. For a long, long time, it wasn't something you could just pick up at the store.
For centuries, cutting fabric on the bias was a well-guarded secret among high-end tailors and dressmakers. They used this painstaking, hand-cut technique to create garments that fit like a glove and draped beautifully. It was their secret weapon for achieving a truly luxurious finish.
If a home sewer wanted to use bias strips before the mid-20th century, they were out of luck unless they made it themselves. This meant getting out the ruler and chalk, carefully marking long diagonal lines across their fabric, and then cutting them one by one. It was a tedious job that demanded a steady hand and often left a frustrating pile of wasted fabric scraps. The technique was known, but it was far from practical for the average person.
The Game-Changer: Mass Production
Everything changed when machinery entered the picture. Around the middle of the 20th century, specialized equipment was developed that could cut, fold, and package bias tape on a massive scale. This was a true game-changer for the sewing world.
Suddenly, a tool that was once the domain of professionals was affordable, pre-made, and available to absolutely everyone.
This newfound accessibility helped fuel a massive boom in home sewing, quilting, and all sorts of crafts. What was once a bespoke technique became a household staple. Everyday hobbyists could now give their projects a polished, durable finish that looked just as good as anything bought in a store. It essentially democratized a key element of quality sewing.
The journey of bias tape from a craftsperson's trick to an industrial product mirrors broader trends in global manufacturing. It highlights how a clever bit of textile engineering can scale up to support entire industries.
This industrial growth wasn't just a local phenomenon. Companies that started small grew into massive global enterprises. Take SA Bias Industries, for instance. Founded in 1933 in South Africa, it spent over 90 years evolving from a regional supplier into a major international force. This story really shows how bias tape became a vital piece of the global garment manufacturing puzzle. You can dive deeper into the global history of bias tape production to see how it all unfolded.
Thanks to this evolution, a simple strip of fabric transformed into a tool that's now essential for creators everywhere, giving sewers of all skill levels the power to put a flawless finish on their work.
A Few Common Questions About Bias Tape
Even after you've used it a few times, some practical questions about bias tape tend to pop up. Let's tackle some of the most common ones I hear from other sewers.
Can I Just Make My Own Bias Tape?
You absolutely can, and I highly recommend it! Making your own bias tape is the best way to get a perfect fabric or color match for your project. You don't need much—just a good ruler, a rotary cutter, and a cutting mat.
The whole process is about cutting strips of your fabric at a perfect 45-degree angle to the selvage. How wide you cut those strips depends entirely on what you're making and whether you need single or double fold tape. If you plan on making it often, you might want to grab a set of bias tape maker tools; they make folding and pressing the strips so much easier.
What's the Real Difference Between Bias Tape and Bias Binding?
This is a great question because you'll hear people use these terms as if they mean the same thing. They're related, but there's a small distinction that's helpful to know.
Bias tape is the actual product—that strip of fabric cut on the bias. Bias binding is what you do with it; it's the technique of using the tape to wrap around and finish a raw edge.
So, when you see a beautifully finished quilt edge or a clean neckline, you're looking at a bias binding that was created using double fold bias tape.
Why Does My Bias Tape Pucker When I Sew It?
Oh, the dreaded pucker. This is probably the most frustrating issue people run into, but the cause is almost always the same: you're stretching the tape as you sew. Don't feel bad—it happens to everyone. That bias cut gives the fabric its signature stretch, and it's incredibly easy to pull on it without even noticing.
The trick is to handle the tape very gently. Instead of pulling it to line up with an edge, think of it as "easing" it into place along the curve. Here's a pro tip that has saved me countless times: use your iron to press the tape into a curve before you even get to your machine. This pre-shapes it, helping it lie flat naturally and making you far less likely to stretch it out of shape.