


Your Guide to Tailoring Tools and Equipment
When you're starting out, a few key pieces of tailoring equipment will get you through most projects: a flexible tape measure, a pair of sharp fabric shears, good quality thread, and a trusty steam iron. These are the absolute basics, the foundation of any solid toolkit that will help you create professional-looking garments.
Why the Right Tools Define Your Craft
Ever wonder what separates a garment that looks "homemade" from one that screams "bespoke"? More often than not, it comes down to the tools. The secret to a perfect fit doesn't start with a complicated sewing technique; it begins with having the right equipment on hand.
Think of it like a chef's kitchen. You wouldn't use a butter knife to chop vegetables, right? A chef needs specific knives for different cuts, and a tailor needs particular scissors, needles, and pressing tools to manage different fabrics and create specific shapes. This guide will walk you through the essential categories, showing you how to build a toolkit that turns raw fabric into a wearable work of art.
Building Your Foundational Toolkit
A well-stocked tailoring kit can be broken down into four main jobs. Thinking about it this way helps you invest smartly, making sure you have what you need for every step of the process.
- Measuring and Marking: This is all about the blueprint. Tools like tape measures, rulers, and marking chalk ensure every line is precise before you even think about cutting.
- Cutting and Preparation: There’s no room for error here. Your fabric shears, rotary cutters, and a good seam ripper are the stars of this crucial stage.
- Stitching and Assembly: This is where the magic happens and your garment starts to take shape. Your sewing machine, hand-sewing needles, and strong thread do the heavy lifting.
- Pressing and Finishing: The final, professional polish is all in the press. A steam iron, a tailor's ham, and a seam roll are what you'll need to shape and set the fabric perfectly.
This focus on quality tools is more important than ever. The global tailoring services market was valued at an impressive USD 42.3 billion in 2023 and is expected to climb to USD 60.9 billion by 2032. This boom shows a real and growing appreciation for custom-fit clothing, putting skilled craftspeople in high demand. You can explore the full tailoring market analysis on dataintelo.com to see the trends for yourself.
Investing in high-quality tailoring tools is really an investment in your own skill. Good equipment doesn't just give you better results—it makes the whole process more enjoyable and efficient, letting you focus on your creativity instead of fighting with your tools.
Whether you're a curious hobbyist or a seasoned pro looking to upgrade, consider this your go-to resource for building the ultimate tailoring toolkit.
Precision Starts with Measuring and Marking Tools
Before you ever thread a needle or make that first exciting cut into a beautiful piece of fabric, the success of your garment has already begun to take shape. It all starts with measurement. Think of your measuring and marking tools as an architect’s blueprints—without them, you're just guessing, and the final result will show it.
These simple, often-overlooked instruments are the absolute bedrock of a well-fitted garment. They ensure every single step that follows, from cutting the pattern to sewing the seams, is built on a foundation of accuracy.
It All Starts with the Tape Measure
Getting the measurements right is non-negotiable. This is where you capture the unique curves of a body or transfer the crisp lines of a pattern onto your fabric. Even a tiny error here, say a quarter of an inch, can easily become a major fitting disaster down the line.
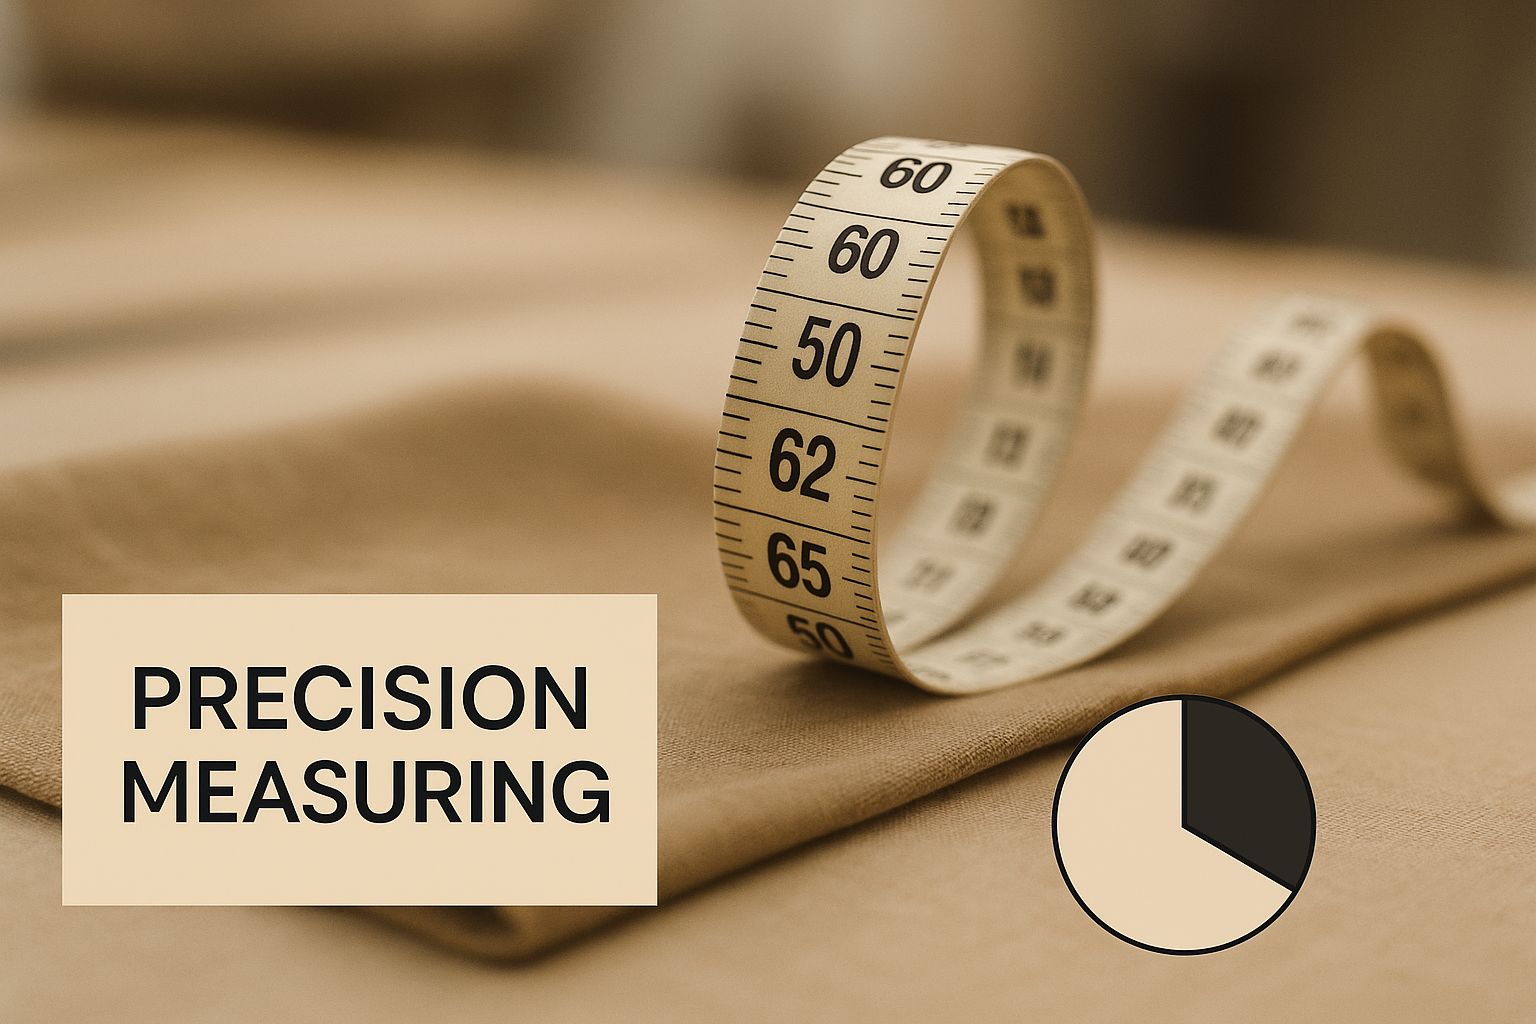
The image above really drives home a core truth for every sewer: your tape measure isn't just a tool. It's how you communicate with both the fabric and the person who will wear the final piece.
Essential Measuring Instruments
That classic, flexible tailor's tape measure is an icon for good reason. Unlike a stiff ruler, it's designed to hug the natural curves of the body, letting you accurately capture vital dimensions like the bust, waist, and hips. A good one is typically made from fiberglass to prevent it from stretching out over time. Pro tip: grab one that has both inches and centimeters marked for maximum versatility.
Of course, tailoring isn't all curves. You need dead-straight lines and perfect right angles, too. That's where a few other key players come in.
- Clear Acrylic Rulers: These are a must-have for pattern drafting and marking straight grainlines. Because they’re transparent, you can see the fabric right through them, making it easy to align everything perfectly with the weave.
- L-Square (Tailor's Square): This tool is your best friend for getting perfect 90-degree angles. It’s fundamental for drafting everything from sharp necklines and collars to placing pockets precisely.
- French Curves: These are the beautifully shaped rulers that help you draw smooth, professional-looking curves for armholes, necklines, and hip lines. They’re the secret to avoiding wobbly, free-handed lines.
I see so many beginners grab a retractable metal tape measure from the hardware store. Please don't! They're made for construction and are far too rigid for tailoring. Using one is a surefire way to get inaccurate body measurements and clothes that just don't fit right.
From Measurement to Mark: Choosing Your Tools
Once your measurements are sorted, you need a way to transfer those lines and notches onto your fabric. The tool you pick is incredibly important and depends entirely on the fabric's color, texture, and how delicate it is. The wrong choice can leave a permanent stain or be completely invisible—neither of which is very helpful!
A well-stocked marking toolkit gives you options. A waxy tailor's chalk, for example, is fantastic on sturdy wool, but it could ruin a delicate silk. It's all about matching the tool to the task at hand.
Here's a quick look at some of the most common marking tools and how to decide which one to use.
Choosing Your Measuring and Marking Tools
A great tailor knows that the right tool can make all the difference. This table breaks down the essentials to help you build a versatile and effective toolkit.
| Tool | Primary Use | Best For Fabrics Like | Pro Tip |
|---|---|---|---|
| Tailor's Chalk | Transferring pattern lines and darts. | Wool, cotton, denim, and other sturdy wovens. | Keep the edge sharp with a chalk sharpener for fine, crisp lines. A dull edge makes a messy, thick line. |
| Disappearing Ink Pen | Making temporary marks for immediate sewing. | Light-colored cottons, linens, and synthetics. | Always, always test on a scrap first. Heat or certain chemicals can sometimes make the "disappeared" ink reappear later! |
| Tracing Wheel & Paper | Transferring detailed pattern markings like darts and pleats. | Medium-weight, smooth fabrics like poplin or twill. | Use a serrated wheel for most fabrics but switch to a smooth one for delicates to avoid snagging or tearing the fibers. |
| Chalk Pencils | Creating precise, fine lines for detailed work. | Most fabrics, especially good for darker colors where chalk blocks can be faint. | These offer much more control than a block of chalk and can be sharpened to a super-fine point for intricate details. |
Ultimately, having a variety of these tools on hand gives you the confidence to tackle any project that comes your way. By mastering this crucial first stage of measuring and marking, you're setting yourself up for a smooth, successful, and much more enjoyable sewing process.
3. Mastering the Cut with the Right Equipment
You’ve measured twice and your fabric is marked. Now comes the moment of truth: the cut. This is where it all gets real. There's no going back from this step, and a clean, precise cut is what separates a professional-looking garment from a homemade mess. It sets the foundation for perfect seams and a beautifully assembled piece. A jagged or hesitant cut? That can doom your project before you’ve even threaded the needle.
It’s no surprise that the demand for well-fitted, custom clothing is on the rise. People are tired of off-the-rack sizes and are moving back toward quality craftsmanship. In fact, the tailoring and alteration market is projected to grow to a staggering $9.89 billion. This boom really highlights how much people value a perfect fit, and to deliver that, you need the right tools for the job. You can get a deeper look into this trend by reading the full market research on tailoring services.
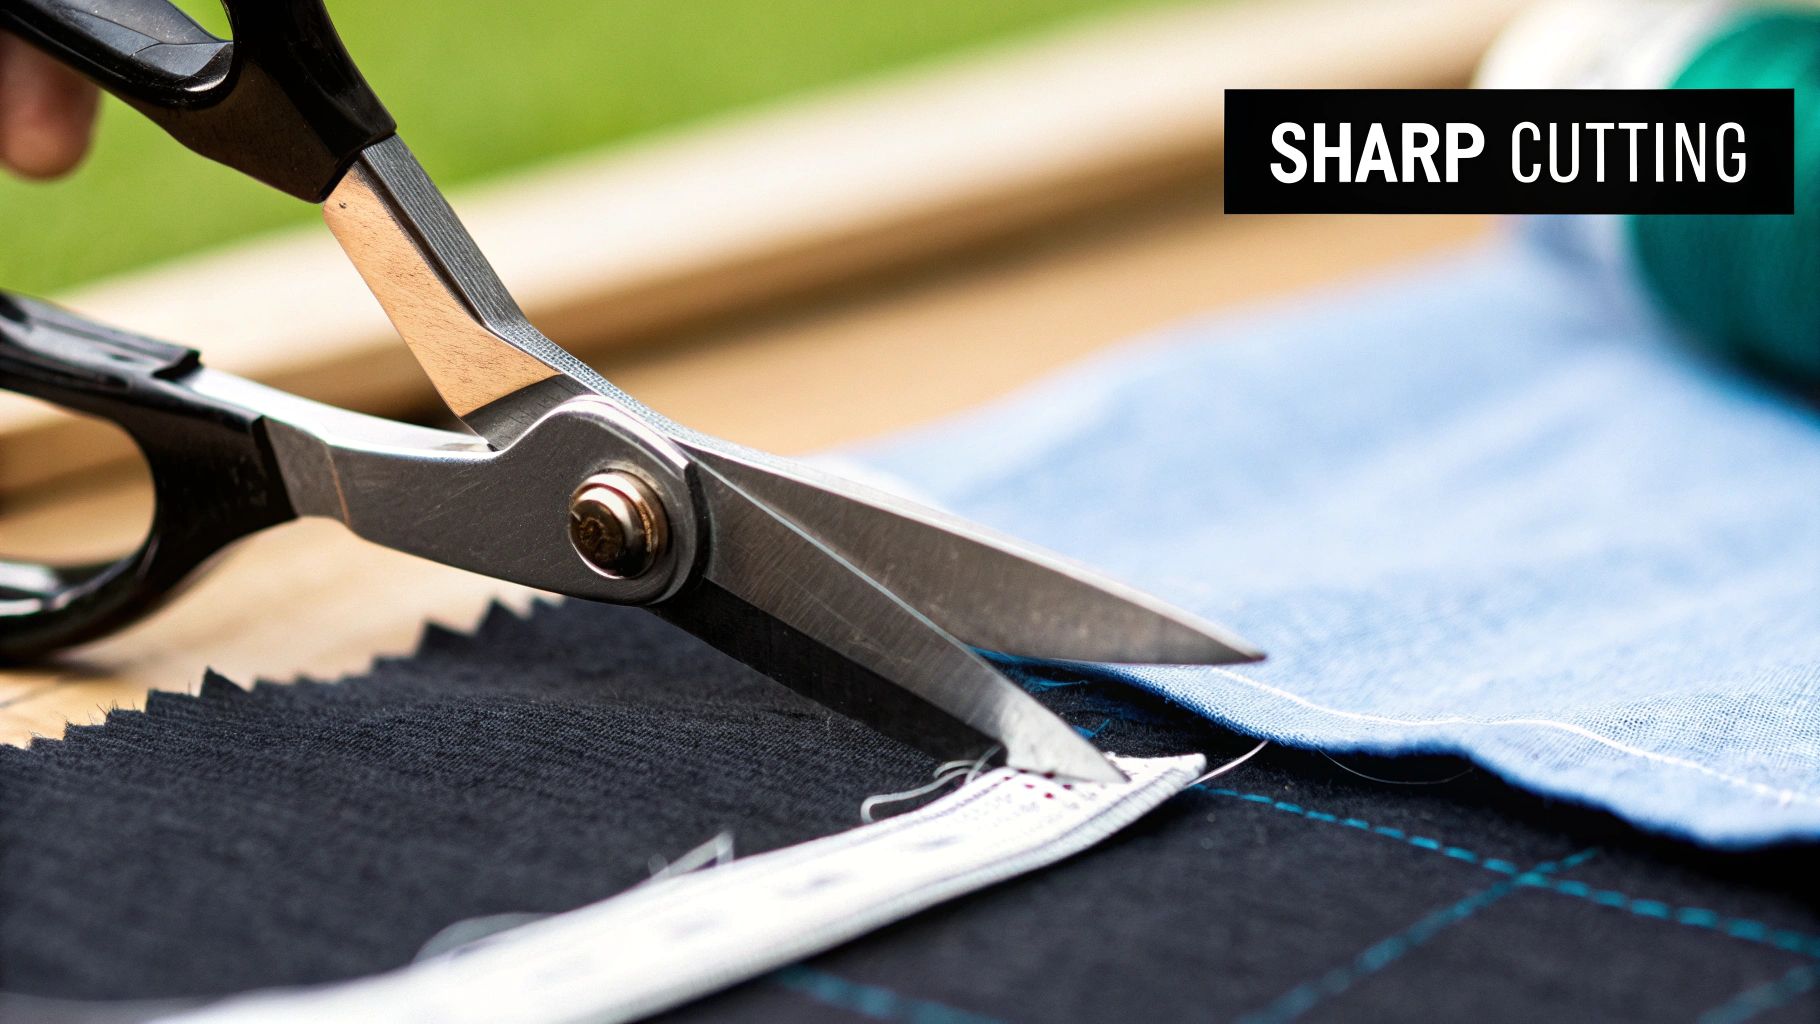
The Anatomy of True Tailor's Shears
On any cutting table, the star of the show is a solid pair of tailor's shears. Forget your kitchen or craft scissors; these are in a completely different league. They are meticulously engineered tools, built for one purpose: slicing through fabric with absolute precision.
What makes them so special? Look at the bent handle. That’s not just for show. This brilliant design allows the bottom blade to rest flat against your cutting table, so you can glide through the fabric without lifting it. Lifting the fabric is the number one reason cuts go wonky. The blades themselves are also different, often featuring a "knife-edge" grind. This means they're sharpened at a very steep angle, allowing them to slice through fibers cleanly instead of mashing them.
If you're serious about sewing, investing in a good pair of 8-inch or 10-inch tailor's shears is non-negotiable. And please, remember the golden rule: they are for fabric only. Never, ever use them to cut paper—it will dull them in a heartbeat.
The Rotary Cutter for Speed and Accuracy
While shears are the classic workhorse, the rotary cutter is a modern game-changer. Think of it as a pizza cutter built for fabric. This tool has a razor-sharp, rolling circular blade that makes cutting long, straight lines incredibly fast and ridiculously accurate.
A rotary cutter never works alone. It's part of a team:
- A Self-Healing Mat: This is the cutter’s essential partner. The mat protects your table and the blade. As you cut, the blade sinks just a tiny bit into the surface, and the mat magically "heals" itself, leaving a smooth surface for your next cut.
- A Clear Acrylic Ruler: You’ll use this to guide the rotary cutter for perfectly straight lines. Its weight also does a great job of pinning the fabric down, preventing any slippage.
When you’re cutting out quilting squares, long strips for bias tape, or any pattern piece with lots of straight edges, this trio is unbeatable. It not only speeds things up but also delivers a level of straight-line perfection that’s tough to match with shears alone.
Specialized Cutting Tools for a Professional Finish
Beyond your main cutters, a few specialized tools will take your work from good to great. These are the detail-oriented specialists in your toolkit that handle the small jobs that make a big difference.
A pair of pinking shears is one of the most useful. These scissors don't cut a straight line; their blades are serrated, creating a zigzag edge. This sawtooth pattern is a fantastic, low-tech way to finish the raw seams on woven fabrics, as it significantly reduces fraying.
For getting into tight spots, nothing beats a pair of thread snips. These are small, spring-loaded clippers designed for one thing: trimming threads right up against the fabric without any risk of snagging. They’re perfect for cleaning up seams, snipping jump stitches in embroidery, or handling any other delicate trimming, keeping your work looking neat and polished to the very end.
Your Sewing Machine and Stitching Essentials
Once you've marked and cut your fabric with precision, you move to the heart of the workshop: the tools that actually bring the garment to life. This is the stage where separate pieces of cloth start becoming something you can actually wear. The sewing machine is the powerhouse of this operation, but it’s the quiet art of hand stitching that gives a garment its soul.
The secret to professional-level work is knowing when to use the machine and when to work by hand. One gives you speed and strength for long, sturdy seams, while the other provides the delicate touch needed for an invisible hem or a flawless finish. They work together, and mastering both is what sets exceptional tailoring apart.
Choosing the Right Sewing Machine
Not all sewing machines are built the same, and the demands of tailoring can be pretty tough. A basic home machine is fine for simple projects with lightweight cotton, but tailoring is a different ballgame. You'll find yourself working with everything from whisper-thin silks to dense wools and heavy denim.
It’s like picking a vehicle. You wouldn't use a compact city car to haul a load of bricks, right? In the same way, a standard sewing machine might choke or skip stitches when trying to power through multiple layers of tweed. That’s where a heavy-duty or industrial machine earns its keep. They have stronger motors that give you the piercing power to sew through thick materials without hesitation.
When you're shopping for a machine with tailoring in mind, here's what to look for:
- A Powerful Motor: This is non-negotiable. It ensures the needle can punch through dense fabrics consistently without straining the machine.
- Excellent Stitch Control: You need the ability to fine-tune your stitch length and width for everything from strong structural seams to clean, decorative topstitching.
- Specialized Presser Feet: A good machine should come with a solid set of feet or at least be compatible with them. A zipper foot, a buttonhole foot, and a walking foot (a lifesaver for slippery or thick fabrics) are essential tailoring tools and equipment.
A common trap is getting wowed by a machine with hundreds of decorative stitches. For serious tailoring, a powerful motor, a sturdy metal frame, and precise speed control are infinitely more valuable than a library of embroidery patterns you'll never use.
The Indispensable Art of Hand Stitching
While the sewing machine does the heavy lifting, hand stitching is where the real artistry comes in. It's the detail work that elevates a garment to a bespoke, high-end level. There are simply some jobs a machine can't do with the same control or subtlety.
Think about sewing a hem on a fine wool skirt. By hand, you can catch just a single thread of the fabric, making the stitches completely invisible from the outside. The same goes for setting in a lining or applying delicate trim. This kind of finesse requires its own dedicated set of tools.
Building Your Hand-Stitching Kit
Your hand-stitching kit is just as crucial as your sewing machine. It doesn't have to be huge, but every single item in it should be high quality.
- Needles: Get a good assortment. Sharps are your all-purpose workhorses, while shorter Betweens are perfect for fine quilting and detail work. Always match the needle to the job—a thick needle will leave ugly holes in a delicate silk.
- Thimble: Don't skip this. Pushing a needle through tough fabric for hours will destroy your fingertip. A well-fitting metal or leather thimble is an absolute must-have for both comfort and efficiency.
- Quality Thread: The thread is the very skeleton of your garment, so this isn't the place to cut corners. Use silk thread for basting (it’s soft and won’t leave an impression when pressed) and a top-notch cotton or polyester for your permanent seams. A little beeswax run along your thread will strengthen it and keep it from tangling, a simple trick that saves a lot of frustration.
In the end, it’s the powerful work of the machine combined with meticulous hand-finishing that truly defines masterful craftsmanship. This balanced approach is what allows a tailor to build garments that are not only beautiful but also built to last a lifetime.
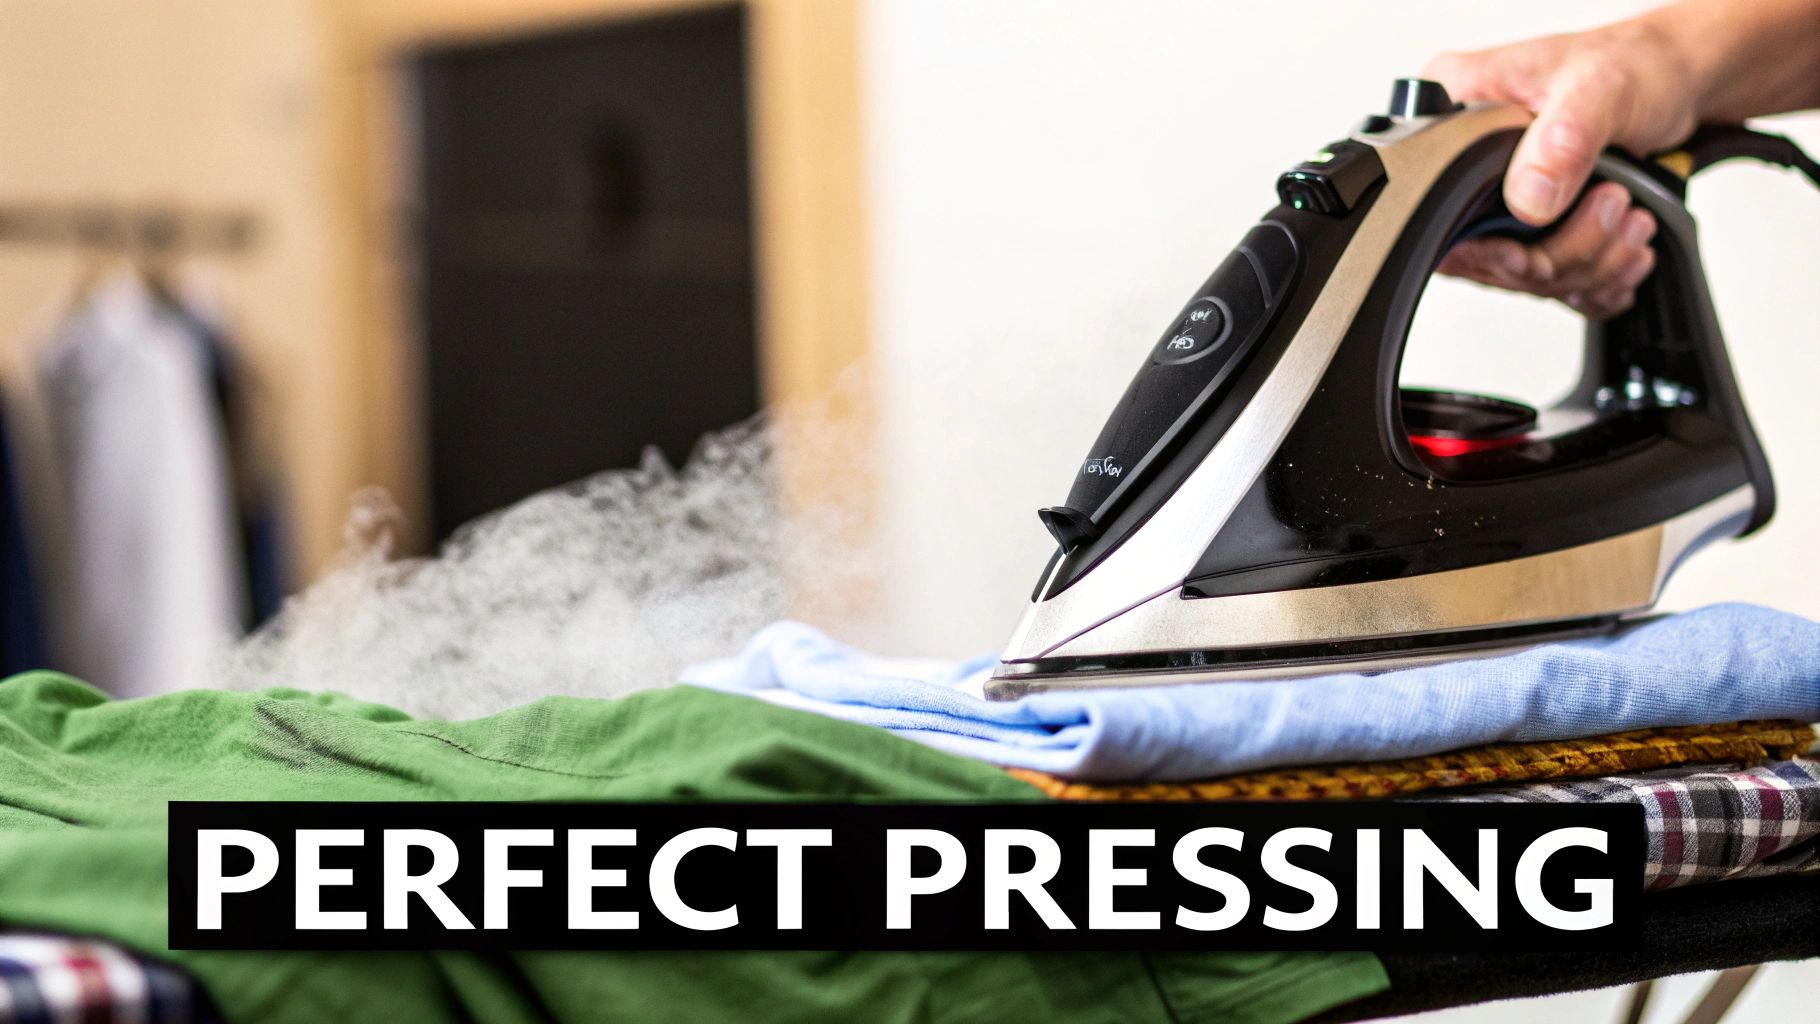
How Pressing Tools Create a Professional Finish
Pressing is the unsung hero of tailoring. It’s the secret step that separates a homemade project from a truly professional garment. Many people think of it as just ironing out wrinkles at the end, but it's so much more than that. Pressing is an active part of the construction process, used to shape, meld, and set the fabric into its final three-dimensional form. You're basically sculpting with heat and steam.
While a good steam iron is your starting point, specialized pressing equipment is what really lets you work with the natural curves and angles of a garment. Trying to press a curved shoulder seam on a flat ironing board is like trying to paint a portrait on a golf ball—you’ll just flatten and distort the very shape you’re working so hard to create. The right tools work with the garment's form, not against it.
This kind of precision is more important than ever. The global apparel industry is projected to hit a staggering $1.84 trillion, and that growth brings a real demand for higher quality and better-fitting clothes. As shoppers expect more, the need for precise tailoring tools and equipment becomes critical. You can learn more by checking out the latest insights on the global apparel industry's growth.
The Essential Pressing Tools
To get that bespoke finish, you’ll need to build a small arsenal of pressing tools that go way beyond a basic iron. Each one is designed for a specific shape or area, making sure every seam and curve comes out perfectly.
- Tailor's Ham: This is a firm, ham-shaped cushion that will quickly become your best friend for pressing any curved seam. It's essential for shaping darts, sleeve caps, collars, and bustlines, letting you apply heat and steam without crushing their three-dimensional shape.
- Seam Roll: Picture a tightly stuffed fabric sausage. That's a seam roll. You use it to press seams open in tight spots where you can't lay the fabric flat, like inside a sleeve or a pant leg. It lets you focus the iron's heat only on the seam allowance, which prevents those ugly imprints from showing on the right side of your garment.
One of the most common beginner mistakes is pressing a sleeve seam flat on an ironing board. It always leaves a sharp, unwanted crease down the length of the sleeve. A seam roll completely solves this, keeping the sleeve perfectly rounded and smooth.
Advanced Tools for Crisp Finishes
Once you've got the hang of the ham and seam roll, a couple of other tools can take your work to the next level, especially when you’re dealing with tricky fabrics like wool or thick cotton. These are the secret to getting razor-sharp creases and perfectly flat seams that actually last.
The Wooden Clapper
This tool might look like a simple block of wood, but what it does is pure magic. A tailor’s clapper is used right after you hit a seam or crease with a blast of steam. You press the dense, untreated wood firmly onto the hot, steamy area, trapping all that moisture in the fabric fibers.
As the wood absorbs the heat and moisture, it sets the fabric into a remarkably sharp, flat, and permanent press. This is how you get those perfectly crisp lapels on a wool blazer or that sharp crease down a pair of tailored trousers.
The Pressing Cloth
A pressing cloth is a simple but non-negotiable piece of gear for protecting your fabric. It’s just a piece of fabric—often silk organza, muslin, or a special Teflon sheet—that you place between the iron and your garment. It serves two crucial purposes:
- It shields delicate fabrics like silk and synthetics from direct heat, preventing scorching or, even worse, melting.
- It gets rid of the risk of creating a "shine" on dark fabrics like wool gabardine, which can be permanently ruined by a hot iron plate.
Using these specialized pressing tools at every stage of construction is what truly defines high-quality tailoring. It's a patient, deliberate process, but it's how you mold and shape the fabric, building a professional finish right into the very structure of the garment.
Your Top Tailoring Tool Questions, Answered
As you start collecting your tailoring tools, you're bound to have questions. It doesn't matter if you're threading your first needle or have been sewing for years; knowing how to pick, use, and look after your gear is what separates good results from great ones. This section gets right into some of the most common questions sewers have, with practical answers to help you work smarter.
Think of your toolkit as a team of specialists. Each tool has a specific job, and when you understand its role, you can really make it shine. Let's dive in.
What Are the Absolute Must-Have Tools for a Beginner?
Walking into a sewing store for the first time can feel a bit overwhelming. The walls are lined with gadgets, and it’s hard to know where to start. The secret? Focus on a small, high-quality set of basics that cover the essentials. You can always grab the specialty stuff later as your skills develop.
For now, your money is best spent on tools for measuring, marking, cutting, and pressing. Get these right, and you’ll have a solid foundation for almost any project you can dream up.
Here’s a look at your essential starter kit:
- A Quality Flexible Measuring Tape: Go for one made from fiberglass. Unlike plastic, it won’t stretch out over time and throw off your measurements. This one is non-negotiable.
- A Clear Acrylic Ruler: This is your best friend for drafting patterns and making sure your grainlines are perfectly straight. The fact that you can see through it is a huge plus.
- Tailor's Chalk or a Water-Soluble Pen: You need a reliable way to get your pattern markings onto the fabric. Chalk is fantastic for wools and textured fabrics, while a pen is often easier to see on smooth cottons.
- Dedicated 8-Inch Fabric Shears: This is a serious investment, and it deserves respect. Use these shears only for fabric. Nothing else. This will keep their edge perfectly sharp.
- A Seam Ripper: Let’s be honest, mistakes happen to everyone. A good seam ripper is your get-out-of-jail-free card, letting you undo stitches without ruining your fabric.
- A Good Steam Iron: In tailoring, pressing isn't just a final step; it's part of the construction process. Your regular household iron is perfectly fine to start with.
With just these few items, you're more than ready to tackle a huge range of beginner and intermediate projects.
How Do I Care for My Cutting Tools to Keep Them Sharp?
There’s nothing more frustrating than trying to cut fabric with dull tools. It leads to ragged edges and sloppy work. A clean, sharp cut is the first step to a professional-looking garment, so taking care of your shears and rotary cutters is essential. The good news? It's easier than you think.
The number one rule is simple, but it’s absolute: never use your fabric shears on anything but fabric. Cutting paper—even once—can create microscopic nicks in the blade, causing it to snag and chew through fabric instead of slicing cleanly.
Here are a few best practices to keep your tools in top shape:
- Store Them Safely: Keep your shears in the sleeve they came in or in a dedicated spot where the blades won't get banged around.
- Keep Them Clean: After you finish sewing, give the blades a quick wipe with a soft, dry cloth. This removes the tiny bits of lint and residue that can build up.
- Oil the Pivot Point: Every so often, put a single, tiny drop of sewing machine oil on the screw where the blades meet. This keeps the cutting action silky smooth.
- Get Them Professionally Sharpened: Depending on your sewing habit, plan on having your shears professionally sharpened about once a year. The difference is night and day.
- Rotary Cutter Care: For safety, always retract the blade when you’re not using it. As soon as you notice it skipping threads or leaving a jagged edge, it's time for a new blade.
Proper care isn't just about making your tools last longer; it's about precision. A sharp blade glides through fabric, giving you control. A dull one makes you force the cut, leading to mistakes and tired hands.
When Should I Upgrade My Home Sewing Machine?
Most of us start on a basic, entry-level machine. They’re affordable, easy to learn on, and perfect for getting your feet wet. But at some point, you might feel like your machine is holding you back. Knowing when it’s time to upgrade is key to letting your skills continue to grow.
The decision usually boils down to three things: power, features, and how often you sew. If you constantly find yourself bumping up against your machine's limits, it might be time to start shopping around.
Think about an upgrade if these sound familiar:
- Your Machine Struggles with Fabrics: Does the motor whine when you try to sew denim, wool, or multiple layers at once? That’s a sign you need a machine with more piercing power.
- You Need More Control: Do you find yourself wishing for features like adjustable presser foot pressure, better speed control, or a flawless one-step buttonhole function?
- Your Sewing Volume Increases: Maybe your hobby has blossomed into a full-blown passion, or you’ve even started taking on paid work. If you're sewing for hours a day, investing in a heavy-duty machine with a sturdy metal frame is an investment in your craft.
What Is the Purpose of a Tailor's Ham and Seam Roll?
Our bodies aren't flat, so our clothes shouldn't be either. Trying to press curves on a flat ironing board is a surefire way to flatten out darts and create weird, distorted shapes. This is exactly why specialized pressing tools like the tailor's ham and seam roll exist.
A tailor's ham is a firmly packed, ham-shaped cushion. Its rounded form is designed to mimic the natural curves of the body—think shoulders, hips, or the bust area. When you press a dart over the ham, you set the seam while keeping its beautiful, three-dimensional shape.
A seam roll is its long, skinny cousin. This tool is perfect for pressing seams open in tight spaces, like inside a pant leg or a sleeve. It lets you direct the iron’s heat only to the seam allowance, which prevents that tell-tale ridge from showing on the right side of the garment. Using these tools is one of the little secrets to achieving that polished, professional finish.
Ready to build your perfect toolkit? At Famcut.com, we offer a curated selection of high-quality sewing supplies and provide expert advice to help you succeed. Explore our collection and join our community of passionate creators today.