


Quilting Stitch in the Ditch: Master Easy Techniques
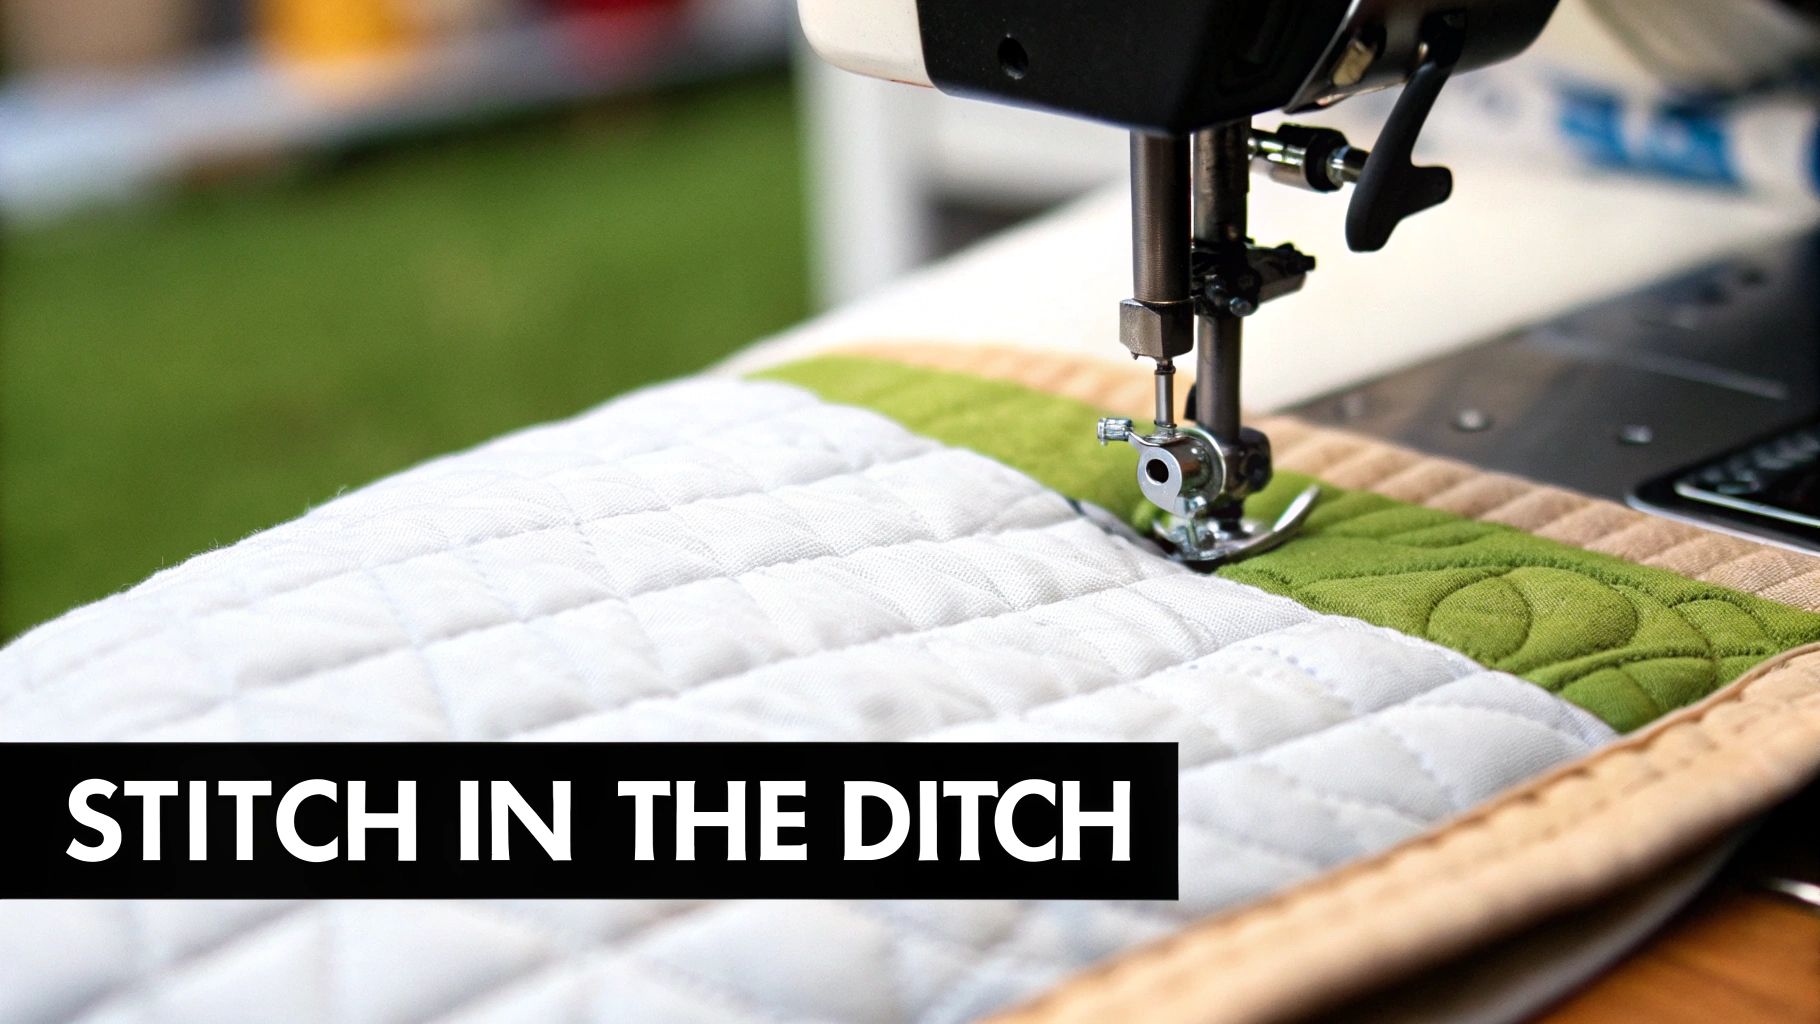
Stitch-in-the-ditch quilting is exactly what it sounds like: machine quilting by sewing directly in the "ditch" where two seams meet. The magic of this approach is that it secures your quilt sandwich—the top, batting, and backing—with stitching that becomes almost invisible from the front. It’s a fantastic skill for adding structure without stealing the show from your beautiful piecing.
Why Stitch in the Ditch Is a Quilter's Secret Weapon
I like to think of stitch-in-the-ditch (or SITD, as you'll often see it called) as the quiet hero of the quilting world. It's the invisible framework that gives your quilt stability and lets the real art—your fabric choices and careful piecing—take center stage. By following the existing seam lines, you securely anchor all three layers of your quilt sandwich.
This isn't some newfangled trick; it's a core skill that grew up right alongside the sewing machine. As machine quilting offered a much faster alternative to hand sewing, techniques like this became essential. In fact, one of the earliest known machine-quilted examples dates all the way back to 1879, showing just how long quilters have relied on it for building strong, beautiful quilts. If you're a history buff, you can explore more about early quilting history to see how these methods evolved over time.
The Purpose Behind the Stitches
So, what's the real point of this subtle approach? The main reason to stitch in the ditch is to secure the quilt without introducing a new design element. It’s a workhorse stitch that simply disappears into the quilt top, giving you a crisp, professional finish.
This makes it the perfect choice for several scenarios:
- Highlighting Patchwork: It lets the geometric patterns and colors of your pieced blocks do all the talking.
- Stabilizing the Quilt: It’s crucial for preventing the layers from shifting or getting baggy over time, especially after a wash.
- Creating a Base for Other Quilting: I often use SITD to lock everything down before I add more decorative, free-motion quilting inside the blocks. It just makes the whole process easier.
Key Takeaway: Stitch-in-the-ditch is the perfect starting point for almost any quilting project. It provides the structure you need, giving you a secure canvas for any fancy decorative quilting you might want to add later.
A Skill for Every Quilter
It doesn't matter if you're working on your very first quilt or you've been at this for years—stitch-in-the-ditch is a technique you'll come back to again and again. For beginners, it’s a beautifully straightforward way to finish a quilt without the stress of trying to master complex free-motion designs. The seam lines are your guide, making it much easier to sew straight, neat lines.
For more experienced quilters, SITD is all about efficiency, especially when you’re wrestling with a large or intricate quilt. You can use it to outline appliqué shapes, define the borders of your blocks, or even add subtle texture to a modern, minimalist quilt. Once you get the hang of this fundamental skill, you’ll have a reliable tool in your quilting arsenal that ensures every project has a polished, durable finish.
Getting Your Gear Ready for Stitch-in-the-Ditch
Before you even think about starting your engine, let's talk about setting up your workspace. Having the right gear on hand is what separates a frustrating quilting session from a smooth, enjoyable one. It’s the secret to getting those crisp, professional-looking lines we’re all after.
You can get by with a basic sewing setup, but a few specific tools will make a world of difference. Think of it this way: you wouldn't use a butter knife to chop an onion. The right tool simply makes the job easier and the results better.
Your Most Important Tool: The Right Presser Foot
If there's one piece of equipment that will make or break your stitch-in-the-ditch experience, it's the presser foot. A standard foot just can't handle the bulk of a quilt sandwich and often causes the layers to shift around, leading to dreaded puckers. To avoid that headache, you have two fantastic options.
- The Walking Foot: This is the MVP for most quilters. A walking foot (sometimes called an even-feed foot) has its own set of feed dogs on top. These work in sync with your machine's feed dogs to grip and pull all three layers of your quilt—the top, batting, and backing—through at the exact same rate. It's your best defense against shifting and bunching.
- The Stitch-in-the-Ditch Foot: For an almost surgical level of precision, this specialized foot is your go-to. It has a distinctive metal guide running down the center. You just run that guide right along the seam line, and it keeps your needle perfectly in the "ditch" with very little effort on your part. It’s a game-changer for accuracy.
Don't Overlook Your Needle and Thread
Your needle and thread choices are just as important as the foot. The wrong combo can lead to all sorts of problems, like skipped stitches, frayed thread, or big, ugly holes in your beautiful piecing.
A 90/14 Quilting or Topstitch needle is the perfect place to start. These are designed with a slightly rounded point that glides through thick layers without shredding the fabric or batting. A non-negotiable rule? Always start a new quilting project with a fresh needle. They get dull much faster than you’d think!
For thread, the goal is to make it disappear. A 50-weight cotton thread is a reliable, all-around choice. I recommend picking a neutral color that blends in with most of your fabrics—a soft grey, cream, or beige often works wonders. If you're working with a quilt that has a lot of high-contrast colors, clear monofilament thread can be your secret weapon, as it becomes practically invisible once stitched.
Prepping the Quilt Sandwich: Your Foundation for Success
Before you make a single stitch, your quilt needs to be properly basted. A quilt sandwich that isn't secure will shift and bunch up, no matter how fancy your presser foot is. Your mission here is to create a flat, stable canvas to work on. Keeping your supplies tidy with smart craft storage solutions also helps make this prep stage much more efficient.
Pro Tip: When pressing your quilt top, press your seams to one side. This creates a subtle "high side" and "low side" to your seam. You'll aim your needle for the low side—the ditch—and the fabric from the high side will gently fold over your stitches, hiding them completely.
There are a few ways to baste, and every quilter has their favorite. Choosing the right one depends on the size of your project and your personal preference.
Comparing Quilt Basting Methods
Deciding how to hold your quilt layers together is a crucial first step. Each method has its own set of advantages and disadvantages. This table breaks down the most common options to help you choose the best fit for your project.
| Basting Method | Best For | Pros | Cons |
|---|---|---|---|
| Pin Basting | All-purpose, great for large quilts | Inexpensive, reusable, easy to remove as you quilt, allows for some adjustability. | Can be time-consuming, you have to work around the pins while quilting, can leave small holes. |
| Spray Basting | Small to medium quilts, wall hangings | Very fast, provides even adhesion across the whole quilt, no pins to remove or work around. | Can be messy, requires good ventilation due to fumes, repositioning can be difficult once set. |
| Fusible Basting | Small projects, appliqué, art quilts | Extremely secure hold, no shifting at all, creates a very flat surface. | Adds stiffness to the quilt, can be expensive, not ideal for traditional bed quilts. |
| Hand Basting | Heirloom or special projects | Very gentle on fabric, offers precise control, gives an authentic, traditional feel. | Extremely time-consuming, requires a different skillset (hand sewing), threads must be removed later. |
Ultimately, the best basting method is the one that gives you a smooth, pucker-free foundation. Whether you choose the speed of spray or the reliability of pins, take your time with this step. A well-basted quilt is the foundation for flawless stitch-in-the-ditch quilting.
Your Guide to Perfect Stitch-in-the-Ditch Quilting
Alright, your quilt sandwich is basted and your tools are all laid out. It's time to head to the sewing machine and bring it all together. This is where the magic really happens, and taking a few moments to get set up properly will make all the difference in achieving that beautifully invisible stitch-in-the-ditch look.
The goal here is a stitch that's strong but disappears into the quilt, letting your piecing and fabric choices shine.
This handy little chart breaks down the whole process, from prep work to the final stitch.
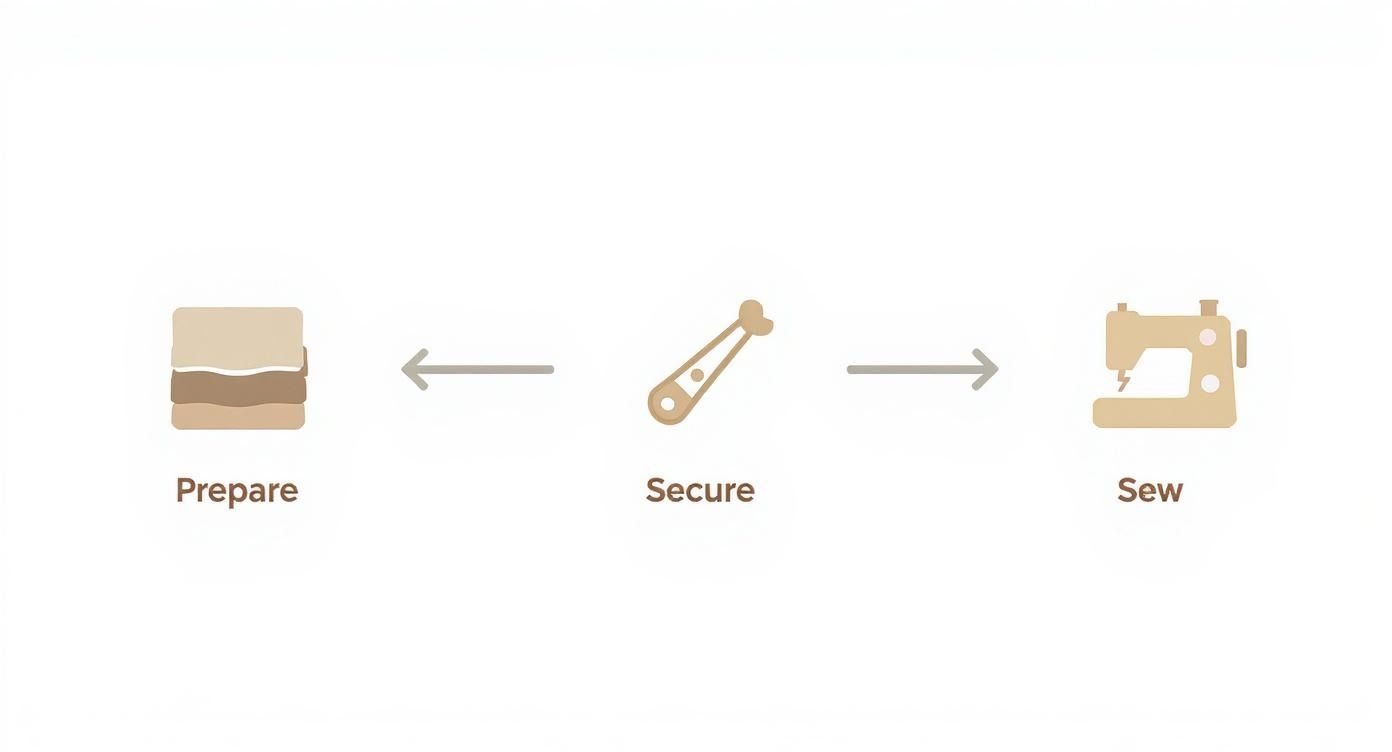
As you can see, it’s really just a simple three-part dance: thoughtful preparation, a secure baste, and then the actual sewing. Each step builds on the last, setting you up for a smooth ride.
Dialing in Your Machine Settings
Before a single stitch goes into your quilt top, let's get your machine's settings just right. First up is the stitch length. For piecing, you're probably used to something around a 2.5 mm stitch, but for quilting, you'll want to shorten that up for a stronger, tighter seam.
The sweet spot for stitch-in-the-ditch is often around 1.6 mm. This creates a secure stitch that locks the layers together without being bulky or obvious. If you want to dive deeper into this, there's some great in-depth quilting advice from seasoned professionals that really gets into the nitty-gritty.
Next, let's talk tension. I always recommend doing a quick test run on a small practice sandwich. Just grab some scraps of the exact same fabric and batting you're using in your quilt. What you're looking for is that perfect, balanced stitch where the top and bobbin threads meet right in the middle of the batting, with no little loops peeking out on either side.
Identifying the Ditch and Starting to Sew
Remember how we pressed our seams to one side earlier? That little step created a "high side" and a "low side" along every seam. That low side is your target—it's the ditch. Your job is to guide the needle right down that tiny groove.
When you're ready to start, don't just hit the gas. Manually lower your needle into the ditch. Pull the bobbin thread up to the top, and hold both thread tails together. Take a few tiny stitches right in place (I do this by setting my stitch length to zero) to lock them in. This little trick prevents your quilting from ever unraveling.
Now, set your stitch length back to your quilting setting (that 1.6-2.0 mm range is a good place to be) and start sewing. Gently guide the quilt with your hands, but let your walking foot do the real work of moving the fabric. You're the pilot, not the engine.
A Practical Example: Let's say you're quilting a classic nine-patch block. A good strategy is to quilt the two long vertical seams first. Stitching these lines from top to bottom stabilizes the whole block before you tackle the shorter horizontal seams. It just makes everything behave a little better.
Navigating Corners and Intersections
When you come up to an intersection or need to turn a corner, the key is to be deliberate. Sew right up to the point where the seams cross, then stop with your needle in the down position.
Lift the presser foot, pivot the quilt a clean 90 degrees, lower the foot again, and you're ready to sew down the new ditch. This "needle-down" pivot is the secret to getting crisp, perfect corners every single time. It keeps your lines connected and stops any awkward gaps from forming.
Finishing Your Line of Quilting
Once you've stitched to the end of a seam, you need to secure your threads just as carefully as you started. Take a few locking stitches by dropping the stitch length back to zero, just like you did at the beginning.
Clip your threads, but leave a tail of a few inches. Later, you can grab a hand-sewing needle and bury those tails right into the batting. It’s this kind of finish that really elevates a quilt from looking homemade to looking professionally handmade. It's worth the extra minute
Working Through Common Ditch Quilting Hiccups
https://www.youtube.com/embed/meCx-O9AA3U
Even with the best prep work, quilting machines can have a mind of their own. You’ll be sailing smoothly down a seam when, out of nowhere, things go wrong. Don’t panic! These little frustrations are just part of the craft, and thankfully, most common stitch-in-the-ditch problems have a pretty simple fix.
Skipped stitches are probably the most common complaint I hear. You look at your beautiful line of quilting, only to find annoying little gaps. Before you start questioning your life choices, check your needle. A dull, slightly bent, or wrong-sized needle is the culprit 9 times out of 10.
Stop what you're doing and swap it out for a fresh 90/14 Quilting needle. If that doesn't solve it, double-check that the needle is inserted all the way up and that the flat side is facing the back of your machine. It’s amazing how often that’s the issue.
Banishing Thread Nests and Fabric Puckers
Ah, the dreaded "bird's nest." You flip your quilt over to admire your work and find a tangled mess of bobbin thread. This is almost always a sign that the machine was threaded incorrectly—specifically, with the presser foot down.
Make it a habit: always thread your machine with the presser foot up. This simple step opens up the tension discs so the thread can slip in and seat itself properly. When you thread with the foot down, the tension isn't engaged, and the machine just spits out all that loose thread underneath.
Puckered fabric is a different animal, and its roots usually go back to your basting. If your layers weren't secured well enough, they'll shift around as you quilt, causing those ugly ripples. Sometimes, if a block is just a little puffy, you can use your quilting to gently "tame" the fullness and flatten it out.
My Two Cents: Most quilting headaches aren't catastrophic mechanical failures. They're usually solved with the simplest fixes: a new needle, re-threading your machine, or checking your basting. Always try the easy stuff first before you start taking things apart!
The Big Debate: Pressing Seams Open vs. To the Side
The way you press your seams on the quilt top makes a huge difference in how your ditch quilting turns out. When you press seams to one side, you create that perfect little groove—a "high side" and a "low side." This gives your needle a natural channel to follow, and the fabric on the high side folds over just enough to hide your stitches. It's my preferred method.
So, what about pressing seams open? It definitely makes for a flatter quilt top, but it creates a real problem for ditch quilting. Stitching directly into the gap of an open seam means your needle might only catch the threads holding the seam together, not the fabric itself. As the quilt gets used and washed, those stitches aren't actually securing the quilt sandwich, which can weaken the seams and compromise the whole quilt's structure over time. You can get a deeper dive into this by exploring the risks of stitching in open seams.
Navigating Bulky Seam Intersections
When multiple seams crash into each other, you get those bulky intersections that feel like speed bumps. Trying to power through them is a good way to break a needle or get a messy stitch. Instead, just slow down and give it a little finesse.
Here’s a trick I use all the time:
- Stitch right up to the edge of the bulky seam and stop with your needle down in the fabric.
- Lift your presser foot.
- Take one or two careful stitches across the intersection, "traveling" along the connecting ditch to get to the other side.
- Drop your presser foot again and keep on quilting.
This "traveling" technique is a game-changer. It lets you move from one ditch to another without breaking your thread, allowing you to quilt an entire block in a single, continuous line. Not only does it look incredibly clean, but it also means you have far fewer thread tails to bury when you're done.
Creative Ways to Use Stitch in the Ditch
While quilting stitch in the ditch is a fantastic workhorse for holding your quilt sandwich together, its real magic happens when you start seeing it as a powerful design tool. It's more than just a utility stitch; it's a subtle way to add structure and definition, turning a functional step into a moment of genuine creative expression.
Think about how it can make your appliqué work sing. When you stitch right in the "ditch" along the edge of your appliqué shapes, the pieces almost seem to lift off the background fabric. You're creating a crisp, almost three-dimensional effect that gives life to things like floral motifs or complex pictorial quilts. The stitching itself disappears, but the textural impact is impossible to miss.
Beyond the Traditional Quilt
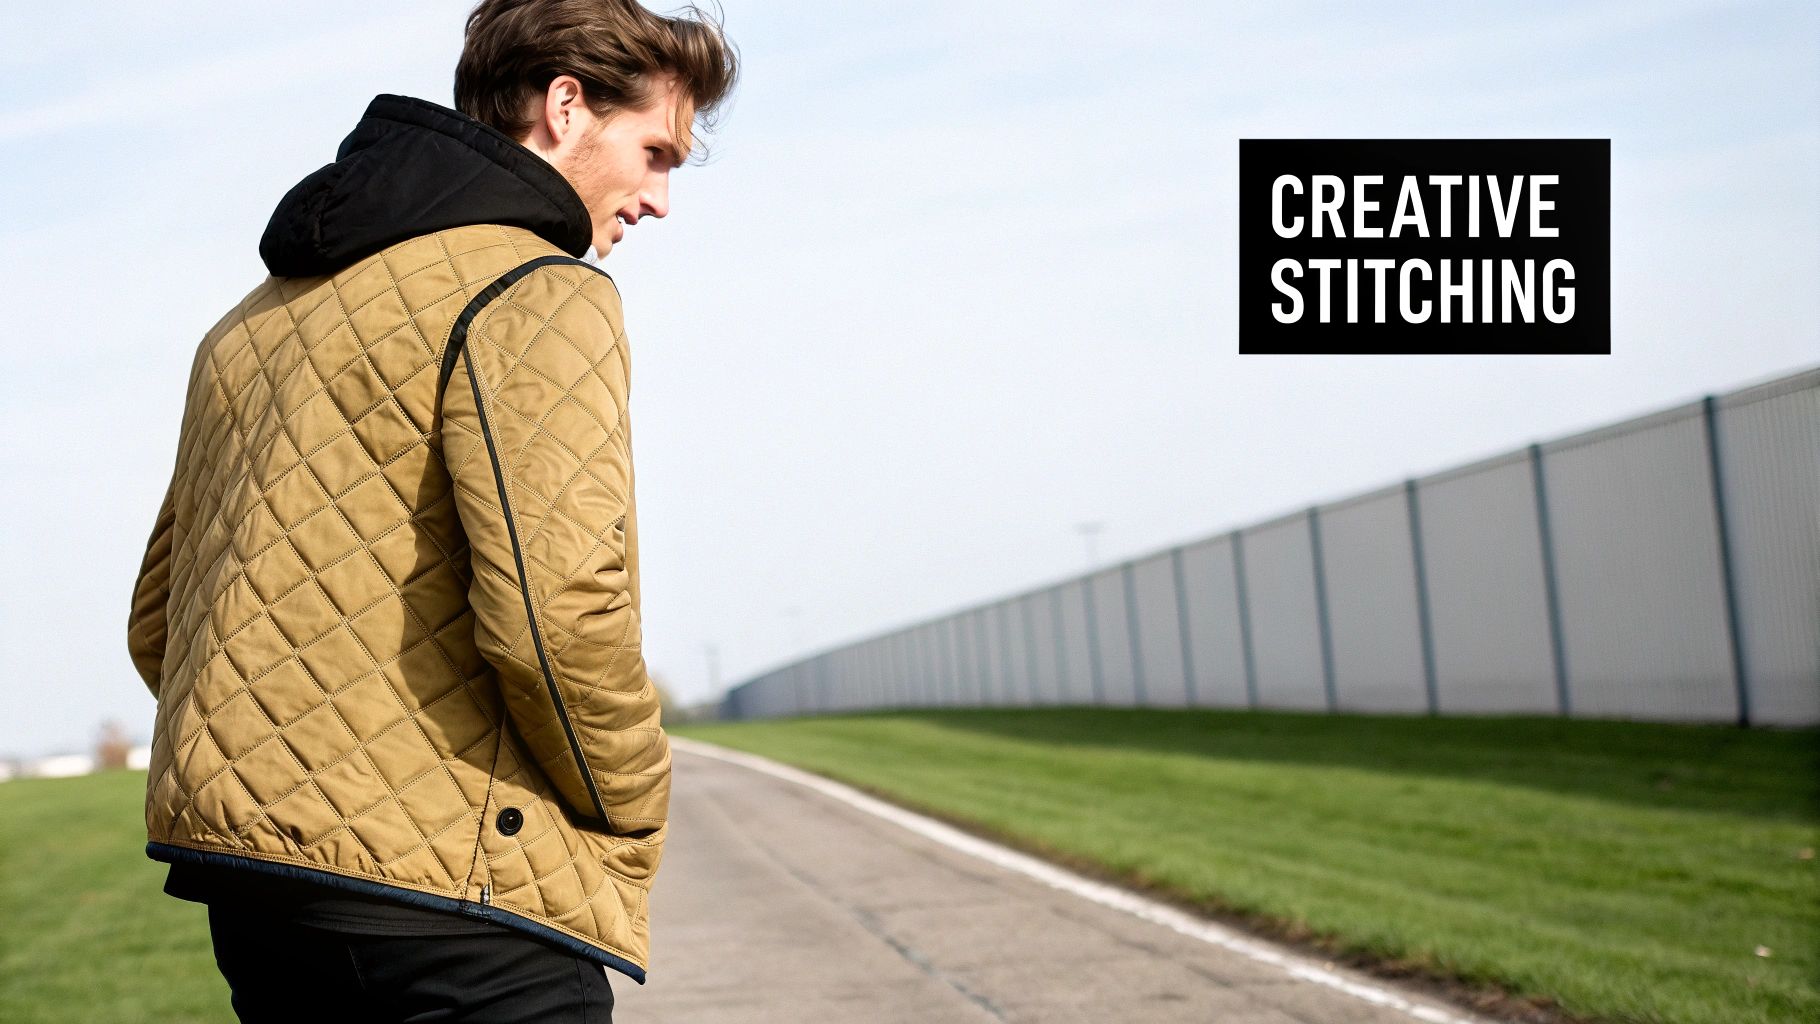
And don't just limit this technique to bed quilts! Once you master it, you'll find yourself using stitch in the ditch to give a clean, professional finish to all kinds of projects.
- Quilted Jackets and Bags: This is my go-to for adding stability to wearable quilted items. It ensures they hold their shape through use and washing, preventing that dreaded sag.
- Table Runners and Placemats: For smaller home decor projects, it’s an incredibly fast and elegant way to get them quilted. You get a beautiful, clean finish without adding quilting that distracts from a gorgeous fabric print.
- Wholecloth Quilts: Even on a quilt with no piecing at all, you can use SITD to trace drawn designs. This creates these wonderful, subtle "ghost" patterns that add a layer of sophisticated texture to a solid piece of fabric.
Here's a simple trick I love: swap your matching thread for a high-contrast color. Suddenly, this "invisible" technique becomes a bold design statement. Imagine a bright red stitch running through the seams of a black and white quilt—it creates a stunning graphic impact that highlights your piecing in a whole new way.
When you make that mental shift—from seeing stitch in the ditch as a chore to seeing it as a creative choice—you unlock so many new possibilities for adding your personal touch to every project. This article originally appeared on Famcut.com.
Let's Talk Stitch in the Ditch: Your Questions Answered
Once you get the hang of the basics, a few common questions always seem to come up. I've heard these from students in my classes for years, so let's walk through them. Getting these details sorted out is what takes your quilting from good to great.
What's the Best Sewing Machine Foot for This?
You can get by with a standard presser foot, but if you want to make your life easier and get a truly professional finish, the right foot is a non-negotiable.
Your best bet is a walking foot. Think of it as the all-terrain vehicle for your sewing machine. It has a set of feed dogs on the foot itself that work in tandem with the machine's feed dogs, pulling all three layers of your quilt sandwich through evenly. This is your number one defense against shifting, bunching, and those dreaded fabric puckers.
Now, if you're aiming for absolute perfection, the dedicated stitch-in-the-ditch foot is your secret weapon. This specialized foot has a metal guide right down the center that runs perfectly in the seam line. It physically prevents your needle from straying, keeping your stitches flawlessly hidden. For an invisible finish, this tool is worth its weight in gold.
Do I Really Need to Quilt Every Single Ditch?
Nope, definitely not! It’s a common misconception that you need to stitch down every seam. Remember, the main job of stitch-in-the-ditch quilting is to secure the three layers of your quilt.
Your batting package is your guide here. It will tell you the maximum quilting distance required—for example, it might say "quilt up to 8 inches apart." As long as you stitch enough of the main, structural seams to meet that requirement, you're golden. Stitching every single ditch is purely a design choice for extra texture and definition, not a structural necessity.
Can I Do Stitch in the Ditch by Hand?
Absolutely! Long before sewing machines, this was the only way it was done. The principle is exactly the same, you’re just using a needle and thread instead of a machine. You'll create a simple running stitch, aiming to sink each stitch right into that seam line.
To tackle this by hand, you'll want a short, strong needle (often called a "between") and a good thimble to protect your finger as you push through the layers. It’s a much slower, more methodical process, but many quilters find it incredibly relaxing. Plus, it adds a beautiful, traditional feel to a quilt that a machine just can't replicate.
What Thread Color Makes the Stitches Disappear?
This is where the magic happens. Choosing the right thread is crucial for making your stitches truly invisible. Your goal is to find a color that just melts into your quilt top.
Here are my go-to choices:
- Go Neutral: A light grey, a soft beige, or an off-white is often the perfect chameleon. These shades tend to blend into a surprisingly wide range of colors.
- Try Monofilament: This is a clear, nylon thread that works by reflecting the color of the fabric beneath it. It's an excellent option for busy, multi-colored quilts where one single thread color won't cut it.
Of course, you can always break the rules! If you want to make a statement, try using a contrasting thread color. A bold stitch can beautifully outline your piecing, turning your quilting lines into a deliberate and striking design element.
At Famcut.com, we love helping quilters find the perfect tools and fabrics to bring their ideas to life. From specialty feet to the perfect thread, we've got you covered. Check out our curated selection of quilting supplies and fabrics to get started on your next project.