


How to Sew Invisible Stitch: Achieve Flawless Seams
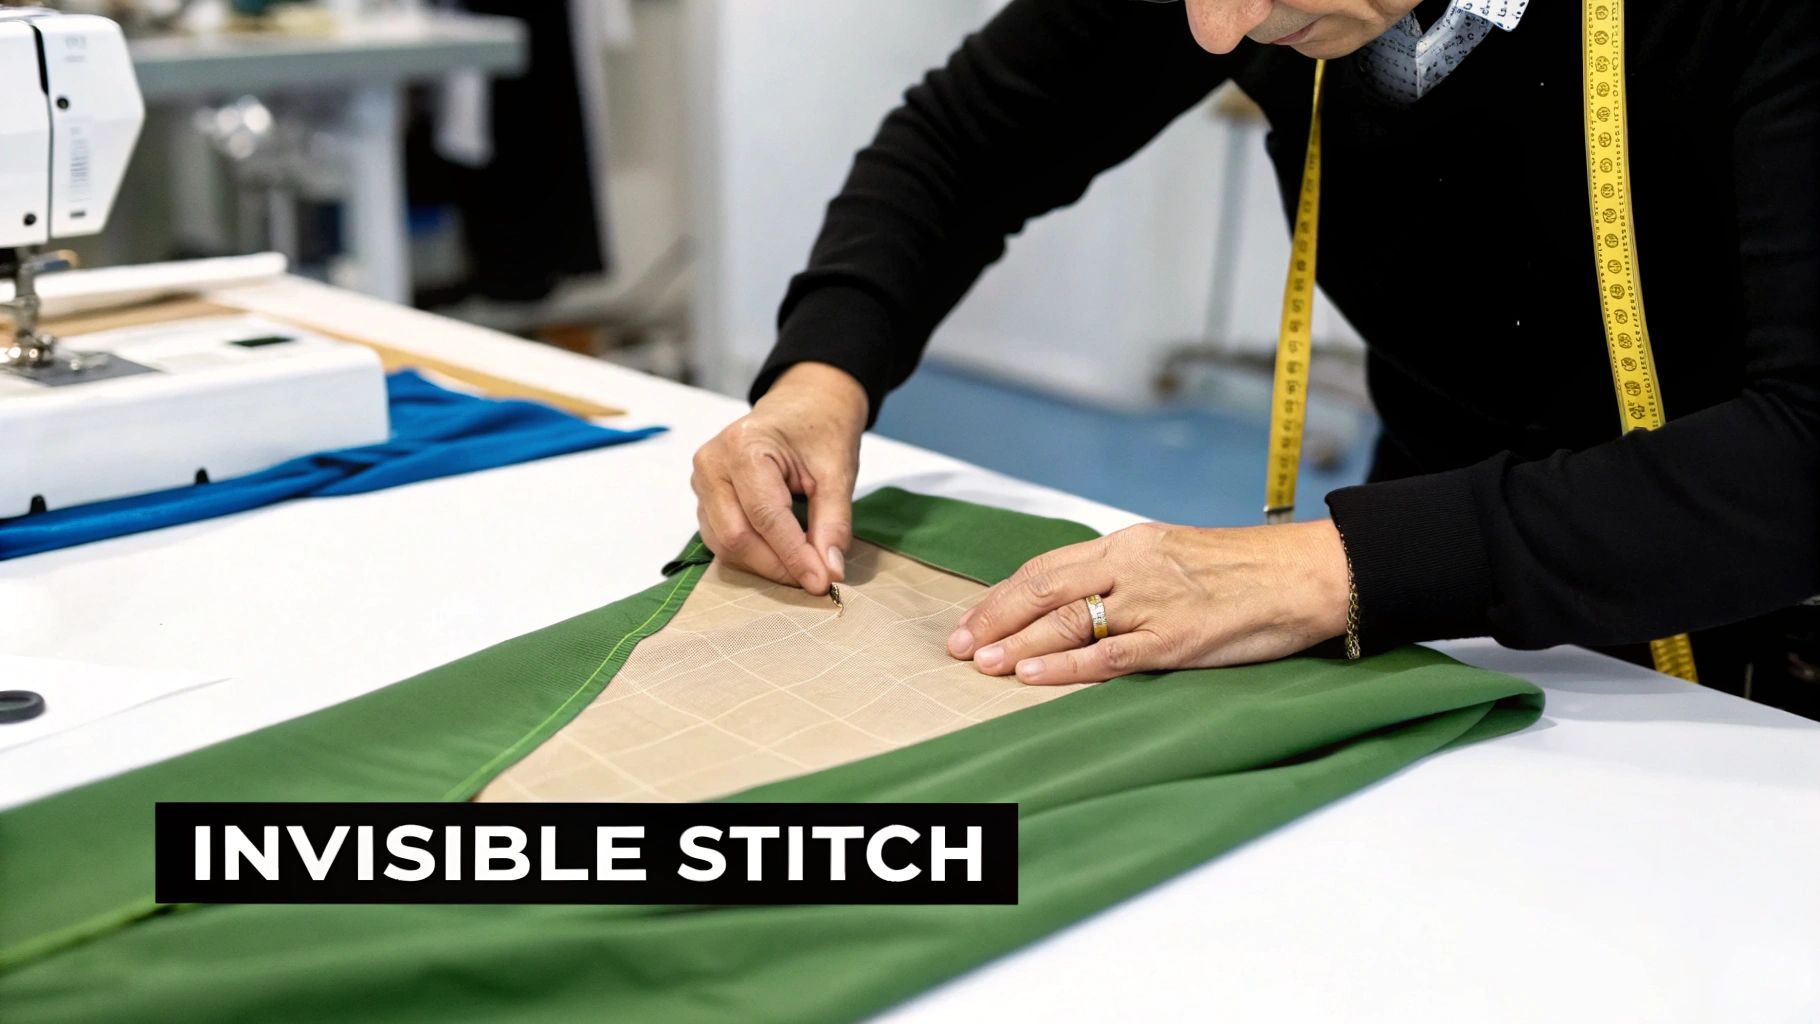
Have you ever looked at a beautifully finished garment or a perfectly closed stuffed animal and wondered, "Where's the seam?" The secret is almost always the invisible stitch.
This classic hand-sewing technique, which you might also hear called the ladder stitch or slip stitch, is one of the most valuable skills you can have in your sewing arsenal. It's the key to flawlessly hemming clothes, closing up plush toys, and mending upholstery with seams that are, for all intents and purposes, completely undetectable.
The Invisible Stitch: A Seam That Simply Vanishes
At its core, the invisible stitch is what separates a good sewing project from a great one. It's a clever technique that creates a clean, hidden seam by picking up just a few threads from the folded edges of your fabric. As you gently pull the thread taut, the two pieces of fabric snug up against each other, and your stitches disappear right into the fold.
The result? A finish so clean it looks like it was never sewn by hand at all.
This isn't just a simple mending trick; it's a cornerstone of high-quality garment making. While sewing machines are fantastic for speed and strength, hand-finishing skills like this have never gone out of style, especially in the world of luxury fashion. Top-tier tailoring houses still depend on artisans for these delicate finishes, which is a big part of what justifies the premium price tag. You can read more about the history of sewing techniques and see just how vital hand-stitching remains.
When to Use an Invisible Stitch
So, when do you put the sewing machine aside and pick up a needle and thread? The invisible stitch really shines in situations where a machine-sewn seam would be too obvious, bulky, or just plain impossible to execute.
It’s the perfect choice for jobs like these:
- Creating flawless hems on everything from flowy dresses to sharp trousers.
- Seamlessly closing the final opening on pillows, quilts, and stuffed toys after you've filled them.
- Attaching appliqués or patches to a project without any stitches showing on the front.
- Mending torn linings or fixing seams on delicate, pre-made garments.
The real magic of the invisible stitch is its combination of delicacy and strength. It gives you the unique ability to close a final seam from the outside of a project, offering a level of precision and control that a machine just can't match for certain finishing touches.
The Craftsmanship Advantage
Learning this one stitch instantly adds a new level of professionalism to your work. It’s a skill that gives you the confidence to tackle more complex projects, knowing you can achieve that polished, store-bought look every single time.
It’s a quiet nod to true craftsmanship, proving that sometimes, the best tool for the job is still a simple needle and thread. This technique elevates your handmade items from "homemade" to truly treasured, durable pieces.
Getting Your Toolkit Ready for a Perfect Stitch
Before you even think about sewing that first invisible stitch, let's get your workspace set up. Trust me, having the right tools on hand from the start is the difference between a clean, professional finish and a project that makes you want to pull your hair out.
Think of it this way: a chef wouldn't try to mince garlic with a bread knife. The same principle applies here. You don't need a lot of fancy gear, but the few things you do need are crucial.
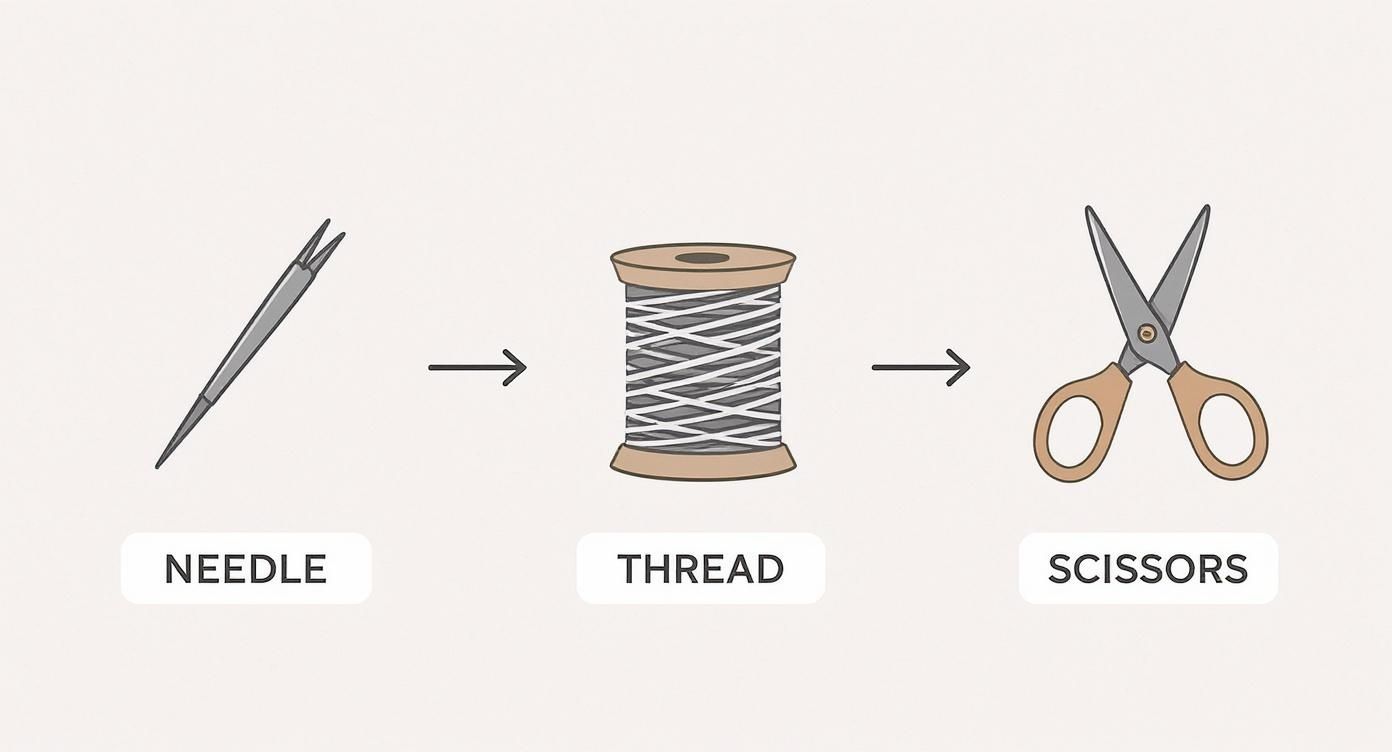
The Heart of the Matter: Needle and Thread
Your needle and thread are the two most important players in this game. Getting this combination right is what makes the stitch truly "invisible."
- Your Needle: Grab a sharps needle. These are designed to be, well, sharp and fine, so they slip through woven fabrics without leaving a gaping hole. I usually start with a size 8 or 9—it’s a great all-rounder. If you're working with something super delicate like silk or chiffon, you'll want to go even finer.
- Your Thread: The goal here is for the thread to vanish. You'll need a good quality thread that is a perfect color match for your fabric. Here's a pro tip: if you're ever stuck between two shades, always go for the one that's slightly darker. It tends to recede into the fabric better than a lighter shade. An all-purpose polyester works for most things, but if you're hemming a silk blouse, using silk thread will give you an absolutely seamless result.
Ever get frustrated with thread that keeps tangling and knotting up on you? A tiny disc of beeswax or thread conditioner is a lifesaver. Just pull your thread length through it once. This simple step coats the thread, making it glide smoothly and behave itself.
The Supporting Cast of Tools
Beyond the needle and thread, a few other items will make your life a whole lot easier and your work much more precise. These aren't just extras; they’re essential for getting that high-quality finish.
Fabric Scissors Please, please use a dedicated pair of sharp fabric scissors. You need clean, crisp cuts on your fabric to get those neat, folded edges for your seam allowance. Dull scissors will just chew up the fabric, leaving you with a frayed mess that’s impossible to work with.
Pins or Clips You've got to hold those folded edges in place while you work.
- Straight Pins: Your classic go-to for most fabrics. Perfect for getting precise placement.
- Wonder Clips: These are fantastic for really thick fabrics like wool or delicate ones like leather or vinyl where pins would leave a permanent mark.
An Iron and Pressing Surface This is non-negotiable. A well-pressed seam is the secret weapon behind a perfect invisible stitch. When you press the folds crisply before you start sewing, you create a sharp, defined guide for your needle. This makes it so much easier to catch just a tiny bit of fabric with each stitch.
Remember, the prep work is half the battle. A crisply pressed hem that’s securely pinned is already on its way to being a flawless hidden seam before you’ve even threaded your needle.
Oh, and one last thing—a thimble! It might feel a bit old-school, but it saves your fingertip from getting sore as you push the needle through thicker fabrics. If you're just getting started and want to brush up on some core skills, we've got a great collection of free sewing lessons for beginners that will help build your confidence.
Mastering the Invisible Stitch Technique
Alright, let's get into the magic of the invisible stitch. We're going to focus on the most versatile method out there: the ladder stitch. Don't worry about those confusing old sewing diagrams; we'll walk through the actual motion so you can build that muscle memory.
This is your secret weapon for closing the final gap on a throw pillow, mending your kid's favorite stuffed animal, or finishing a lined jacket with a truly professional touch. The entire point is to make your stitches vanish right into the fabric.
H3: Anchoring Your Thread The Right Way
A perfect seam begins with a knot nobody can see. The last thing you want is a little bump right at the start of your beautiful, invisible seam.
To pull this off, you need to hide your knot inside the seam allowance. Press your seam open, and bring your threaded needle up from the wrong side, making sure to only go through the fabric of the seam allowance. This anchors your thread securely without leaving a single trace on the outside of your project.
Once the needle is through, you can tuck the thread's tail neatly inside the item before you even start stitching the main seam. It’s a small detail, but it makes a huge difference in the finished look.
H3: Finding Your Rhythm With The Ladder Stitch
The stitch gets its name because, before you pull it tight, the threads look like the rungs of a tiny ladder. Once you get the hang of it, the rhythm is simple, repeatable, and surprisingly relaxing.
You'll be working to join two folded edges of fabric. Here's the basic movement:
- First Stitch: From your anchor point, bring the needle across and pick up a tiny bit of fabric from the fold on the opposite side. I mean tiny—just a few threads, maybe 1/8 inch (about 3mm) long at most. The smaller your stitch, the more invisible it will be.
- Crossing Over: Pull the needle all the way through. Now, bring the needle directly across to the side you started on, keeping it parallel to your last stitch.
- Second Stitch: Take another tiny stitch through the fold on this side, making sure it’s the same small size as the first one.
- Repeat: Just keep going! Continue this back-and-forth motion, creating those parallel "rungs" between the two fabric folds.
Pro Tip: Keep your thread tension pretty loose as you form these stitches. If you pull too tightly on each individual stitch, you risk puckering the fabric. The real magic happens when you pull the thread to close the seam all at once.
H3: The Big Reveal: Cinching The Seam
After you’ve sewn about an inch or so of these ladder-like stitches, it's time for the best part. Hold the fabric on either side of the seam and give your thread a gentle, steady pull.
You’ll watch the two folded edges come together perfectly. Just like that, the "rungs" you made will disappear completely, tucking themselves into the fabric folds. It’s an incredibly satisfying moment! Keep sewing in one-inch sections and gently cinching the thread as you go until the entire opening is closed.
Having the right tools makes all the difference. A sharp needle, good quality matching thread, and precise scissors are the foundation for getting those clean, professional results you're after.
H3: Securing Your Work With A Hidden Knot
Finishing your seam properly is just as crucial as starting it. You need a knot that’s strong but also completely hidden.
When you reach the very end of the opening, create one last tiny stitch, but don't pull the thread all the way through. This leaves a small loop of thread. Pass your needle through that loop twice, then pull it tight. This forms a secure little knot that sits right on the seam line.
To make it truly disappear, stick your needle right next to the knot and tunnel it about an inch through the inside of the seam allowance or stuffing. Bring the needle out, pull the thread taut, and snip it close to the fabric. The tail will pop back inside, leaving a flawless, invisible finish. The right needle can make this process a lot less frustrating; options like these John James easy threading needles are a great example.
H3: Ladder Stitch vs. Slip Stitch: Key Differences
While people sometimes use these terms interchangeably, the ladder stitch and slip stitch are slightly different, and knowing when to use each will really elevate your sewing skills. Here's a quick breakdown to clear things up.
| Feature | Ladder Stitch | Slip Stitch |
|---|---|---|
| Primary Use | Closing seams on pillows, stuffed toys, and linings | Hemming garments like skirts and trousers |
| Fabric Position | Joins two separate, folded edges | Attaches one folded edge to a flat surface |
| Stitch Path | Travels between the two folds of fabric | Travels inside the fold of the hem |
| Visibility | Completely invisible when pulled tight | Nearly invisible, catches just 1-2 threads of the main fabric |
For most projects where you’re closing an external seam from the outside, the ladder stitch we've just covered is exactly what you need. It gives you a strong, durable, and completely hidden closure that makes your projects look incredibly polished. Practice this a few times, and you'll find it quickly becomes one of the most valuable skills in your sewing toolbox.
Putting Your New Skill to Work: Practical Applications
Alright, you've practiced the mechanics and you know how to sew an invisible stitch. Now for the fun part: moving from those little fabric scraps to real-world projects. This is where the magic really happens, and your handmade items go from looking good to looking truly professional.
Knowing when to use this stitch is just as crucial as the technique itself.
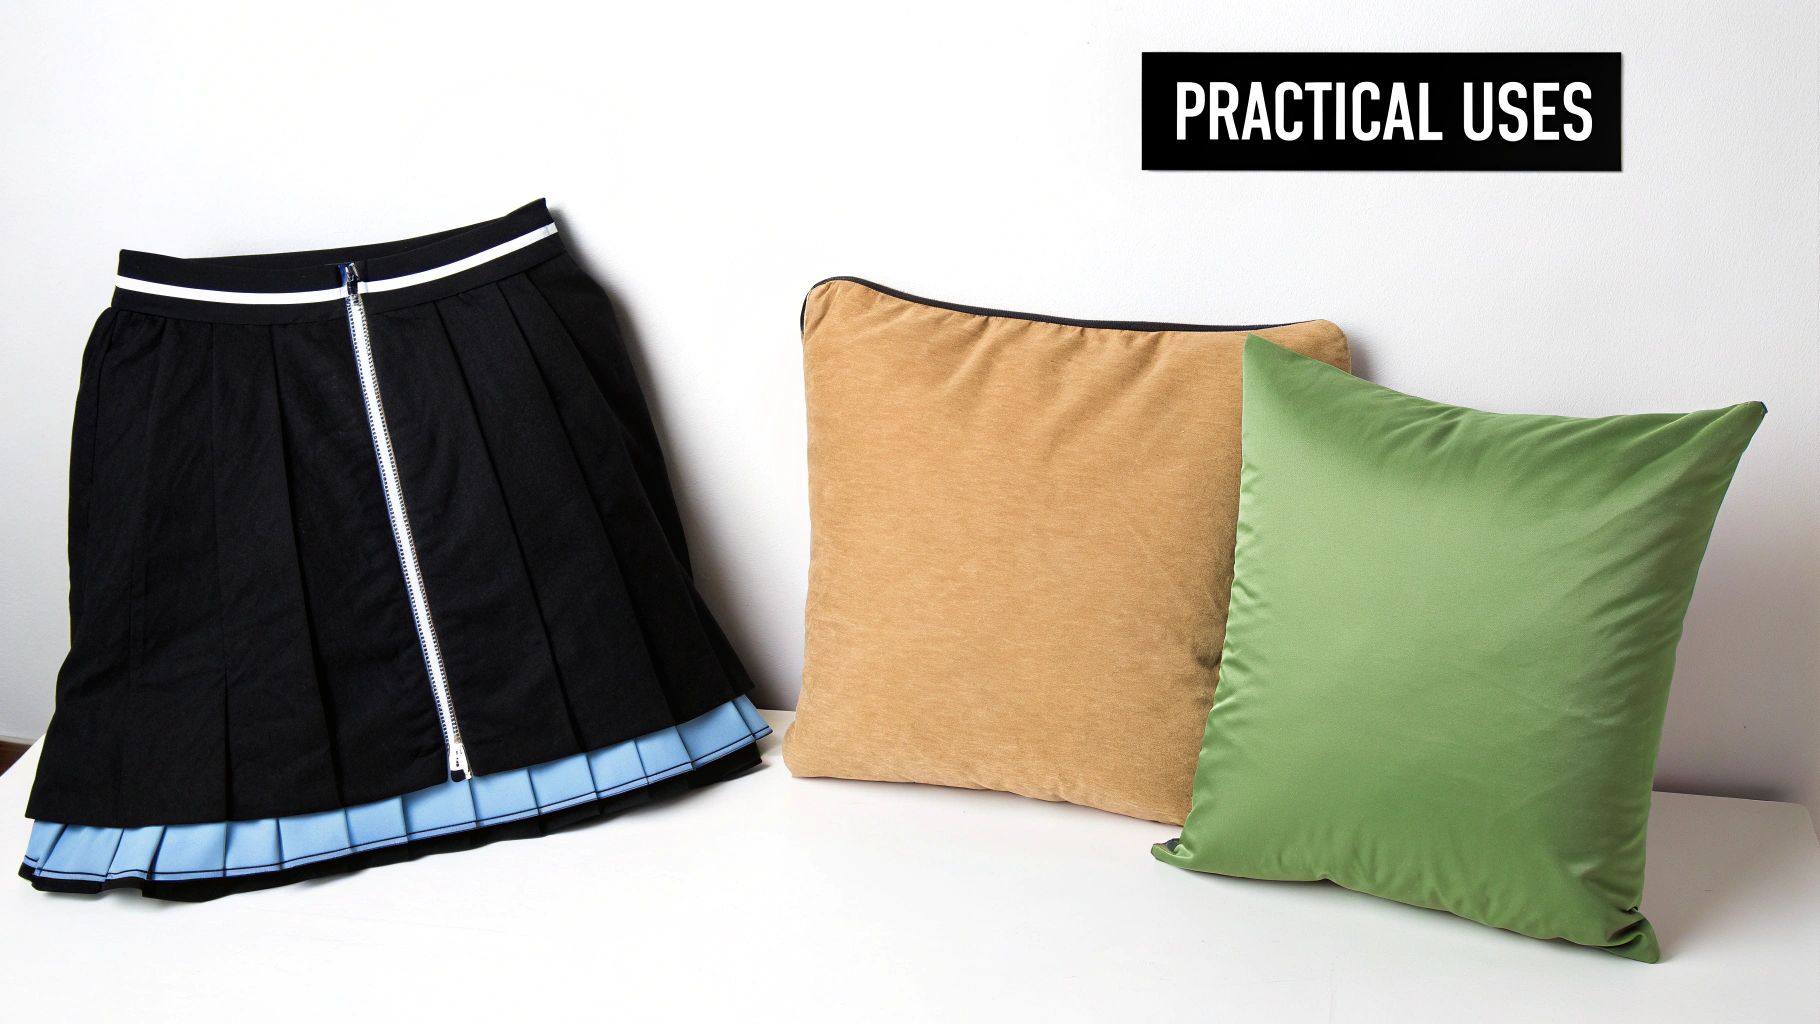
The applications are practically endless, but a few key scenarios come up time and time again. These are the situations where a standard machine stitch would be too bulky, too obvious, or just plain impossible to pull off.
Hemming Garments for a Flawless Drape
This is probably the most common job for an invisible stitch. Think about the hems on skirts, trousers, and dresses. A machine-stitched hem can often look a bit stiff or create a noticeable line from the outside, especially on flowy fabrics. The invisible stitch, on the other hand, lets the hem just... float.
- Lightweight Fabrics: For anything like silk, chiffon, or delicate rayon, a hand-sewn invisible hem is non-negotiable. It keeps the fabric from puckering and totally preserves its natural movement. I recommend making your stitches tiny and spacing them about 1/2 inch apart to give the hem support without weighing it down.
- Heavyweight Fabrics: The same principle applies to wool trousers or even denim, but you have a bit more wiggle room. You can make your stitches slightly larger and space them further apart. The main thing is to avoid pulling the thread too tight, which can cause little dimples to appear on the outside.
Closing Pillows and Stuffed Toys
Ever stuffed a throw pillow or a soft toy and then stared at that last little gap, wondering how on earth to close it without an ugly, lumpy seam? The ladder stitch is your answer. It’s designed specifically to close an opening from the outside, leaving a seam that is completely undetectable.
This is where picturing the "ladder" really clicks. As you sew back and forth between the two folded edges and gently pull the thread taut, you'll watch the seam magically disappear, looking as if it was never open.
This technique is a lifesaver for any 3D project, from decorative cushions to handmade teddy bears. It’s the secret to that seamless, store-bought finish.
Attaching Patches and Appliqué Subtly
Sometimes you want to add a patch or a piece of appliqué without any visible stitching around the edges. While a decorative border stitch can be a great design choice, other times you want the element to look like it’s almost fused to the fabric.
The invisible stitch is perfect for this. You just carefully turn the raw edges of your patch under and use tiny, hidden stitches to secure it. This works beautifully for:
- Tacking down delicate lace appliqué on a formal dress.
- Applying felt cutouts to a quilt or wall hanging.
- Discreetly mending a small hole by covering it with a fabric patch from the inside.
Finishing Lined Garments and Bags
When you make a lined jacket, coat, or bag, you almost always leave a small opening in the lining to turn the whole project right-side out. Closing that final gap neatly is a must, and the invisible stitch is the industry-standard method.
It creates a clean closure that just melts into the lining fabric. You’ll also use this stitch to attach linings at the cuffs or hem, guaranteeing no stitches show on the garment's exterior. It’s a small detail that screams high-quality construction.
This same dedication to a flawless finish applies when installing certain closures. For those more advanced projects, knowing your components, like a high-quality poly invisible zipper, can take your work to the next level.
Sorting Out Those Common Sewing Snags
Even after years at the sewing table, I still run into a hiccup or two. It happens! When you’re just getting the hang of the invisible stitch, a few little issues tend to pop up. But the good news is that every single one is easy to fix and, honestly, a great way to learn.
So, don't get frustrated if your first few tries look a little… visible. A bit of patience and knowing what to look for are all you need to get that flawless, professional finish you’re aiming for.
"Why Can I Still See My Stitches?"
This is, without a doubt, the number one question I hear. You pull the thread, expecting magic, but instead, you’ve got a dotted line staring back at you.
Nine times out of ten, the problem is simple: you’re taking too big of a "bite" out of the fabric with your needle. The whole trick to an invisible stitch is to catch just a whisper of the fabric—literally one or two threads—right from the top of the fold. If your needle goes too deep, the stitch has no choice but to show on the right side when you pull it taut.
The fix is all about slowing down and focusing on precision.
- Get a good view: Make sure your workspace is well-lit. You need to be able to see the individual fibers of the fabric you're working with.
- Change your angle: Instead of poking the needle straight in, try to skim it right under the surface of the fold. Think of it as grazing the fabric.
- Practice on a scrap: Before you move to your actual garment, grab a folded piece of the same material. A few practice runs will help you get a feel for just how little fabric you need to pick up.
Already sewn a section and it's not looking right? Don't stress. Just gently unpick the seam. Using a quality seam ripper is key here to avoid snagging or damaging your fabric. For those really delicate jobs, a tool like a dual seam fixer and thread remover can be a lifesaver, letting you take out stitches without putting any strain on the material.
How to Deal With Puckered Seams
Another classic problem is a seam that looks wavy or gathered instead of lying perfectly flat. This one all comes down to tension.
Puckering happens when you pull the thread way too tightly when closing the seam. It’s tempting to give it a hard yank to make sure it’s secure, but too much force just scrunches up the fabric. You want to bring the two edges together until they just kiss—not strangle them.
The perfect tension is just enough to make the stitches disappear without distorting the fabric. I always think of it like gently closing a door, not slamming it shut. A smooth, even pull is all it takes.
Try working in smaller sections. Sew an inch or two, then gently cinch the thread. This gives you way more control and keeps you from applying too much pressure along the whole seam at once. If you do get a pucker, you can often fix it by gently pulling the fabric on either side of the seam to flatten it out before you tie off your knot.
Dodging the Dreaded Thread Tangle
Is there anything more annoying than a thread that ties itself into impossible knots? It’s a huge time-waster and can create weak spots in your seam.
The main culprit is almost always a piece of thread that's just too long. It seems more efficient to cut a massive length so you don't have to re-thread, but anything over about 18 inches (45 cm) is basically an open invitation for tangles. The thread naturally twists on itself as you sew, and eventually, you get a knot.
I’ve got two go-to solutions for this:
- Use shorter lengths of thread. Seriously, it’s much less frustrating to re-thread your needle a couple of times than it is to battle a tangled mess.
- Condition your thread. Grab a small disc of beeswax or a thread conditioner and run your thread through it. This simple step coats the fibers, slashing friction and making them way less likely to tangle. It’s a game-changer.
Adapting Your Stitch for Different Fabrics
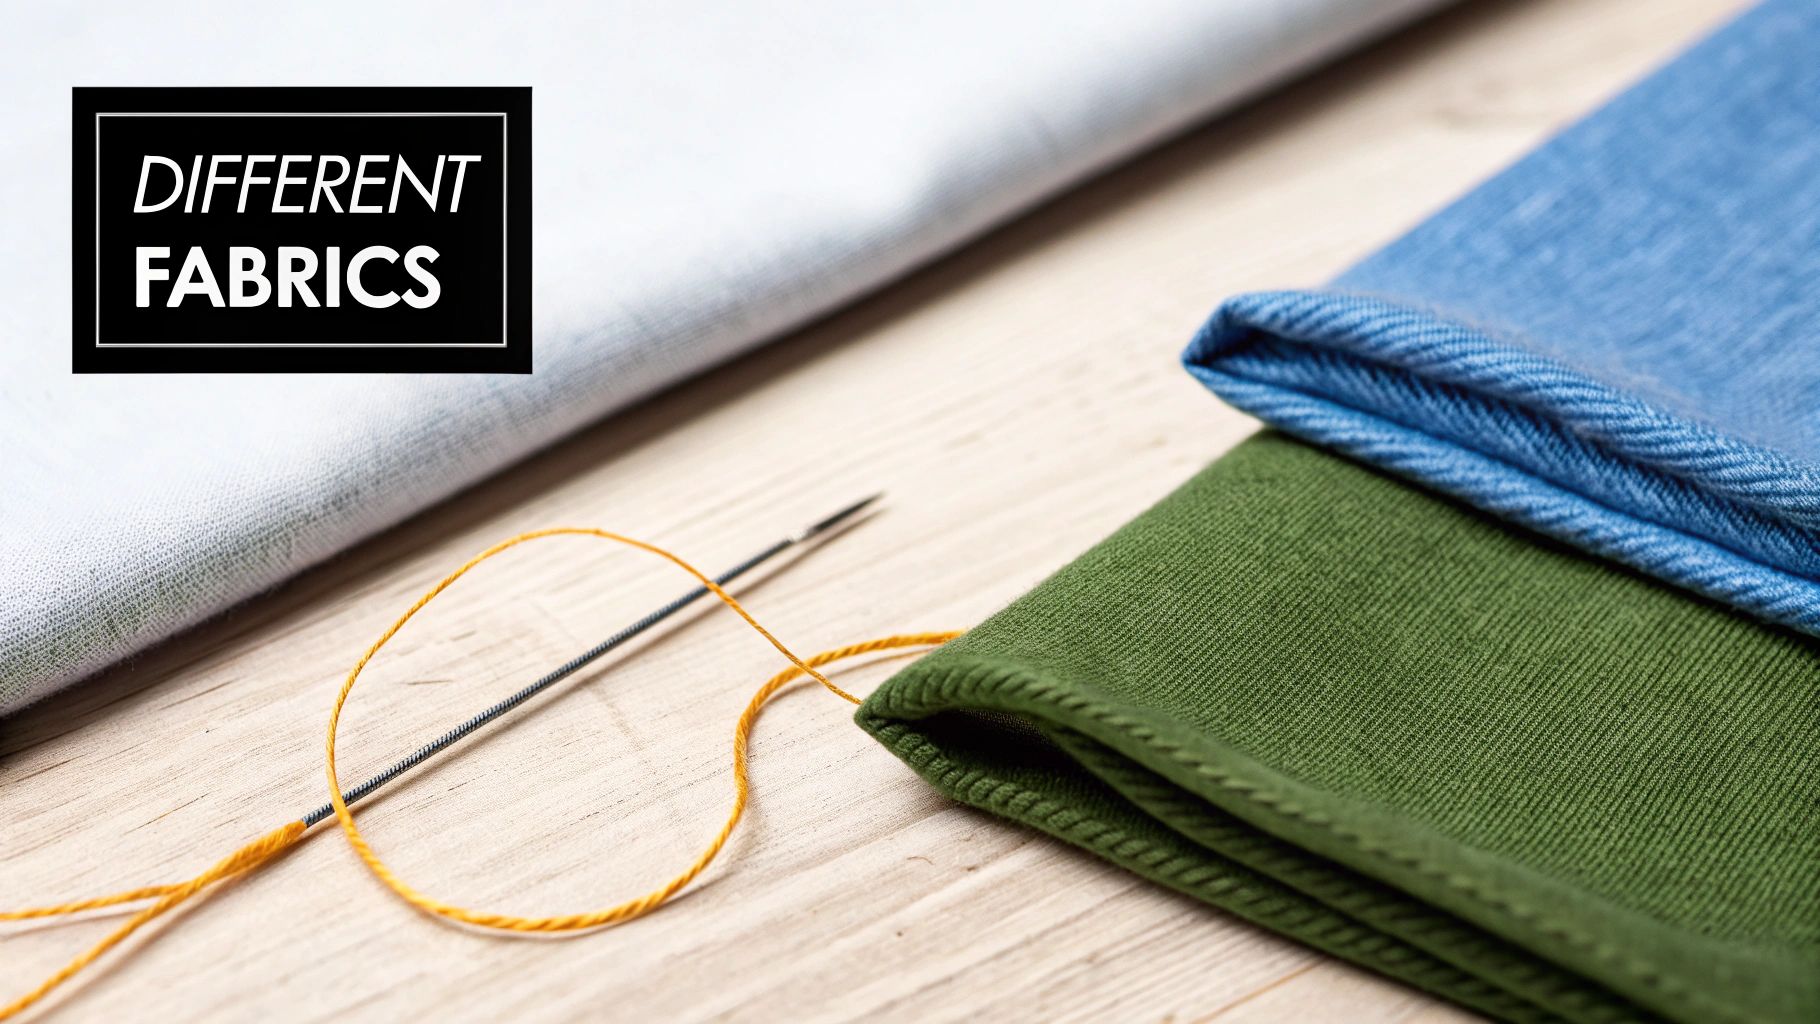 The ladder stitch is a fantastic tool to have in your sewing kit, but a one-size-fits-all approach just won't cut it. To truly master the invisible stitch, you have to learn how to read your fabric and adjust your technique accordingly. It’s this intuition that really elevates your sewing from good to great.
Before you even thread your needle, take a moment to consider the material. Is it a fine silk that might snag? A rugged denim that needs a strong hand? Or a stretchy knit that requires flexibility? Each one demands a different strategy.
Handling Delicate and Lightweight Fabrics
When you're working with silks, chiffons, or fine rayons, a gentle touch is non-negotiable. These fabrics will show every pucker and pull, so your tools need to be just as delicate.
I always reach for a superfine needle—a size 9 or 10 works wonders—and a spool of silk thread. The fine needle glides through the weave without leaving gaping holes, and the silk thread practically melts into the fabric. Pressing your seam allowances is also critical for a crisp finish. A precision tool like the Oliso M3 Pro Mini Iron with Trivet is perfect here, as it gives you control to create sharp folds without scorching the delicate material.
Stitching Heavyweight and Sturdy Materials
Now, let's talk about the other end of the spectrum: tough materials like wool, denim, and canvas. These fabrics are far more forgiving, but they demand tools that can stand up to their heft.
Grab a stronger, thicker needle (a size 8 sharps or even a dedicated denim needle) and a good all-purpose polyester thread. Trust me, trying to force a fine needle through canvas is a recipe for a bent or broken tip. Your stitches can be a bit larger and spaced further apart on these materials, as the texture of the fabric does a great job of hiding the thread.
With heavy fabrics, the goal is durability without the bulk. You want a seam that will hold up to wear and tear but still look clean and professional from the outside.
Conquering Stretchy Knit Fabrics
Ah, knits. They're a favorite for comfort, but their stretchiness can make invisible mending a real challenge. A standard, tight stitch will snap the moment the fabric is stretched. The trick is to build some give right into your seam.
When you're sewing knits by hand, keep your tension loose. As you form each stitch, pull the thread just enough to close the gap—don't yank it tight. This little bit of slack allows the seam to stretch right along with the fabric, preventing those dreaded popped threads and keeping your repair truly invisible, even in motion.
A Few Common Questions About Invisible Stitches
As you get the hang of this technique, you'll probably run into a few specific questions. That's a good thing—it means you're really thinking about how to get that perfect, professional-looking finish. Let's tackle some of the most common ones I hear from other sewers.
Can I Use It on High-Stress Seams?
This is a great question because it gets right to the core of what this stitch is for. While an invisible stitch is surprisingly sturdy, its real job is finishing, not heavy-duty construction.
For seams that need to take a lot of punishment—think the shoulder seam on a shirt or the inseam on a pair of jeans—you absolutely need the strength of a machine stitch or a hand-sewn backstitch. Those are your workhorses.
The invisible stitch is your secret weapon for low-stress situations where looks matter most:
- Finishing the hem on a skirt or a pair of trousers.
- Neatly closing that last little gap on a throw pillow or stuffed animal.
- Attaching appliqué details or patches without visible stitches.
Basically, use it anywhere you need a beautiful finish, and the seam itself won't be under a ton of tension.
What's the Difference Between a Slip Stitch and a Ladder Stitch?
You'll often hear these two terms used as if they're the same thing, and it can be pretty confusing. They are very similar, but there's a small difference in how you use them.
A ladder stitch is your best bet when you're joining two folded edges that are sitting parallel to each other. Imagine you're closing up the final seam on the side of a stuffed toy—that's a perfect job for a ladder stitch.
A slip stitch, on the other hand, is the classic choice for hemming. You run the needle through the fold of the hem, then come out to pick up just a tiny thread or two from the main fabric. The back-and-forth motion is fundamentally the same, but the application is slightly different.
The easiest way to remember it is this: For closing a gap from the outside, the ladder stitch is your friend. For creating a barely-there, "floating" hem, the slip stitch is what you want. Both will give you that discreet finish you're after.
How Do I Stop My Thread from Tangling?
Ah, the tangled thread—every sewer's worst enemy! The best thing you can do is start with a shorter length of thread. It’s tempting to cut a long piece so you don't have to re-thread, but anything longer than 18 inches is just asking for trouble. A long thread will naturally twist on itself and form knots as you work.
Here’s another little trick that makes a huge difference: run your thread through a bit of beeswax or a dedicated thread conditioner before you start sewing. It’s a quick, simple step that coats the fibers, making them glide through the fabric smoothly and drastically reducing the chances of tangling. It’s a real game-changer.
At Famcut, we know that confidence in your skills starts with having the right tools for the job. Whether you're mastering a new stitch or diving into your next big project, we're here to support you. Come explore our wide selection of high-quality fabrics, notions, and sewing supplies at https://famcut.com.