


How to Sew Elastic Waistband: how to sew elastic waistband for a perfect fit
When you get right down to it, a great elastic waistband comes down to three things: picking the right elastic for your fabric, measuring it so it fits just right (snug, but not a sausage casing), and using the right tools and stitches for the job. If you can nail these basics, you’ll be turning out professional-looking waistbands on everything from cosplay skirts to your favorite lounge pants.
Setting Yourself Up for Waistband Success
Before you even think about threading your machine, the prep work you do will make or break your waistband. Getting this foundation right is what turns a potentially frustrating task into a satisfying one. It’s all about making smart choices with your materials from the get-go.
This isn’t just about grabbing the first spool of elastic you see. You have to consider how it’s going to play with your fabric. A flowy chiffon cosplay skirt needs a completely different touch than a pair of sturdy cotton twill shorts, and your elastic choice is a huge part of that.
Choosing Your Perfect Elastic
Honestly, the type of elastic you choose is probably the single most important decision you'll make for your waistband. The big three you'll encounter are woven, braided, and knit, and each one behaves differently.
- Woven Elastic: Think of this as your heavy-duty, "non-roll" champion. It's firm and doesn't narrow when you stretch it, which makes it perfect for casings in tougher fabrics like denim or canvas.
- Braided Elastic: This one has a tendency to get thinner when stretched. Because of that, it's best suited for being hidden away inside a casing, like in simple pajama pants or a basic gathered skirt.
- Knit Elastic: Soft, plush, and super versatile. Knit elastic is a great choice when you need to sew it directly onto the fabric or when you're working with lightweight materials. It keeps its width when stretched and feels comfortable against your skin.
With everyone wanting more comfortable clothes, the sheer variety of elastics has exploded. The global market for elastic waistbands was valued at USD 4.2 billion in 2023 and is projected to reach USD 6.8 billion by 2032. For us home sewers, that's great news! It means we have more access than ever to amazing specialty and eco-friendly elastics.
Your Quick Guide to Choosing the Right Elastic
Use this quick reference table to select the best type of elastic for your specific sewing project, from cosplay to everyday wear.
| Elastic Type | Best For | Key Characteristic | Common Widths |
|---|---|---|---|
| Woven | Heavy-duty casings (denim, canvas), outerwear | Very firm, does not narrow when stretched ("non-roll") | 1/2" to 3" |
| Braided | Lightweight casings (pajamas, loungewear) | Loses width and ribs when stretched | 1/4" to 1" |
| Knit | Sew-on applications, lightweight fabrics, activewear | Soft, retains width when stretched, comfortable on skin | 1/4" to 4" |
| Fold-Over | Finishing raw edges on knits (underwear, leggings) | Has a center line for easy folding, decorative finishes | 5/8" to 1" |
Picking the right one from the start saves a lot of headaches down the road.
Essential Tools and Measurements
Once you’ve got your elastic, it's time to measure up and grab your tools. For a good, comfortable fit, a solid rule of thumb is to cut your elastic 2-4 inches shorter than your actual waist measurement. The best way to be sure is to cut it, overlap the ends, and wrap it around your waist to see how it feels before you commit to sewing.
Pro Tip: Always, always pre-shrink your elastic! Just like fabric, some elastics will shrink up after their first trip through a hot wash. A quick soak in hot water and letting it air dry can save you from a perfectly fitted waistband that suddenly becomes uncomfortably tight.
Next, get your toolkit ready. A bodkin is a fantastic little tool for threading elastic through a casing, but a large safety pin works just as well in a pinch. And here's a non-negotiable tip: if you're working with knits or other stretchy fabrics, you absolutely need to use specific knit or stretch needles in your machine. They have a special ballpoint tip that pushes the fabric fibers aside instead of piercing and breaking them, which is the secret to avoiding skipped stitches and fabric damage.
The Classic Casing: A Timeless Technique
The elastic casing is a fundamental skill for a reason—it’s clean, professional, and unbelievably versatile. This method tucks the elastic away inside a fabric channel, giving you a comfortable and polished finish that works for everything from pajama pants to simple skirts and cosplay bottoms. It’s often the first technique people learn, and honestly, it remains a go-to for both beginners and seasoned sewists alike.
Getting this technique right is all about precision and a little bit of patience, especially when you're prepping your fabric and threading the elastic through.
This visual guide breaks down the initial prep into three simple, crucial actions.
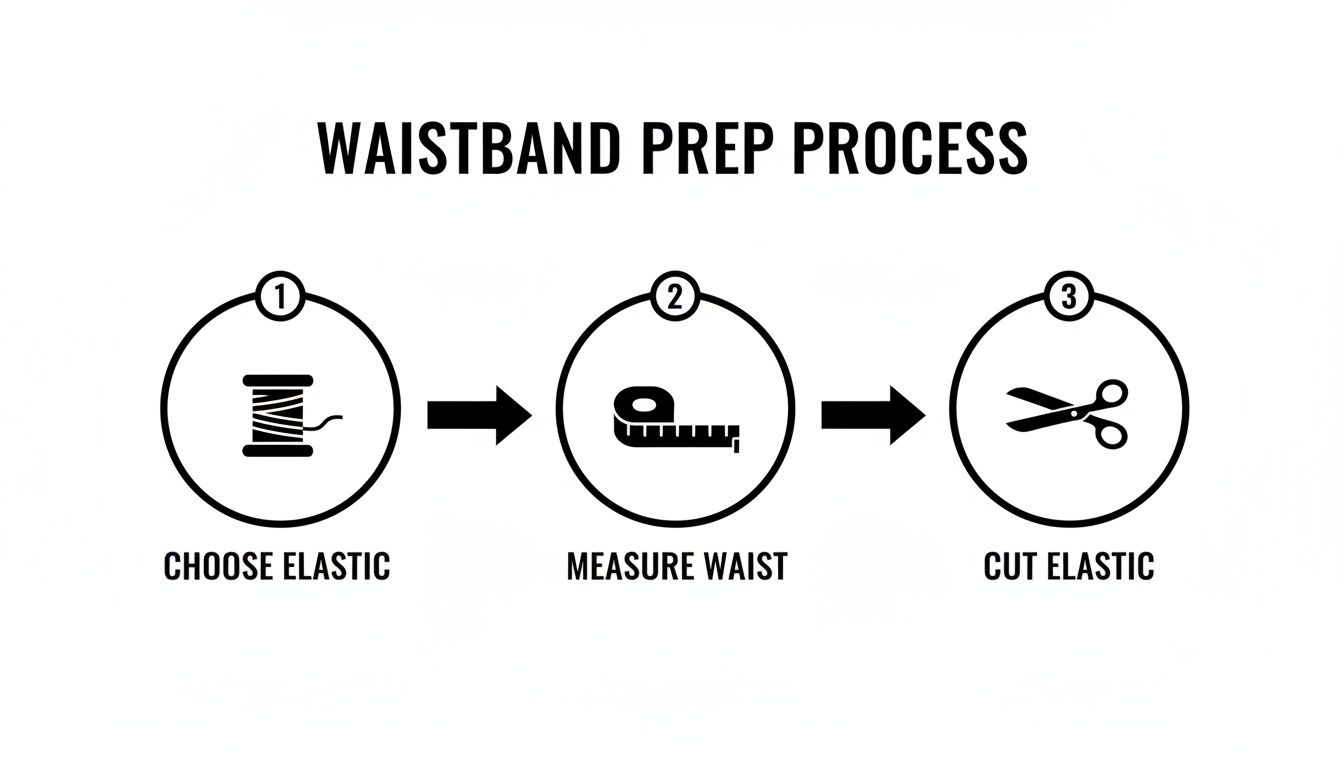
Nailing these three steps—choosing the right elastic, measuring your body accurately, and cutting with precision—is what sets you up for a flawless waistband.
Forming the Perfect Channel
The first real sewing step is to get the waist edge of your garment ready. If you’re working with a woven fabric that frays, I always recommend finishing that raw edge first with a serger or a simple zigzag stitch. This small step now prevents headaches later by stopping any fraying that could weaken your casing over time.
Next, you'll create the casing itself. The width of this channel is critical. It needs to be just a little bit wider than your elastic so it can be threaded through easily, but not so wide that the elastic can twist and flip inside.
A good rule of thumb is to make the casing 1/4 inch (about 6mm) wider than your elastic.
Here's how to create that perfect channel:
- Press the Seam Allowance: Start by folding the finished top edge of your fabric down toward the wrong side by about 1/4 inch. Press it flat with an iron. This creates a neat, enclosed edge that will sit inside your casing.
- Fold the Casing: Now, fold that same edge down again. This time, fold it by the width of your elastic plus that extra 1/4 inch. So, if you're using 1-inch elastic, your second fold will be 1 1/4 inches. Press this fold firmly to create a crisp line.
Stitching and Threading Your Elastic
With your casing all pressed and ready, it's time to stitch it down. Sew close to the first folded edge (the one now on the inside of the garment), working your way all around the waist.
Crucial Tip: Leave a 2 to 3-inch opening in your stitching. This is the gap you'll use to thread the elastic through. I like to place this opening near a side seam where it’s less noticeable.
Now, grab a bodkin or a large safety pin and attach it to one end of your measured elastic. This little tool is your best friend here, acting as a guide to make pushing the elastic through the fabric channel a whole lot easier.
Gently feed the elastic through the opening, bunching the fabric along the elastic as you go. The most common frustration here is a twisted elastic, so be mindful and try to keep it flat as it moves through the casing. Once the leading end of the elastic comes all the way through and emerges from the same opening, you're on the home stretch.
Securing and Closing the Waistband
Hold on tight to both ends of the elastic so they don't accidentally snap back into the casing! Overlap the ends by about one inch and stitch them together securely. I recommend sewing a small box or an "X" shape with your machine—this really beefs up the connection and ensures it won't pop open with wear.
After the elastic is joined, let it slip back inside the casing. Take a moment to distribute the gathers evenly around the entire waistband so everything looks balanced and professional.
The last step is to close that little opening you left in the casing. You can zip it shut with your machine by stitching very close to the edge. Or, for a completely invisible finish, use a hand-sewing needle and a quick slip stitch. And just like that, your classic elastic casing is done
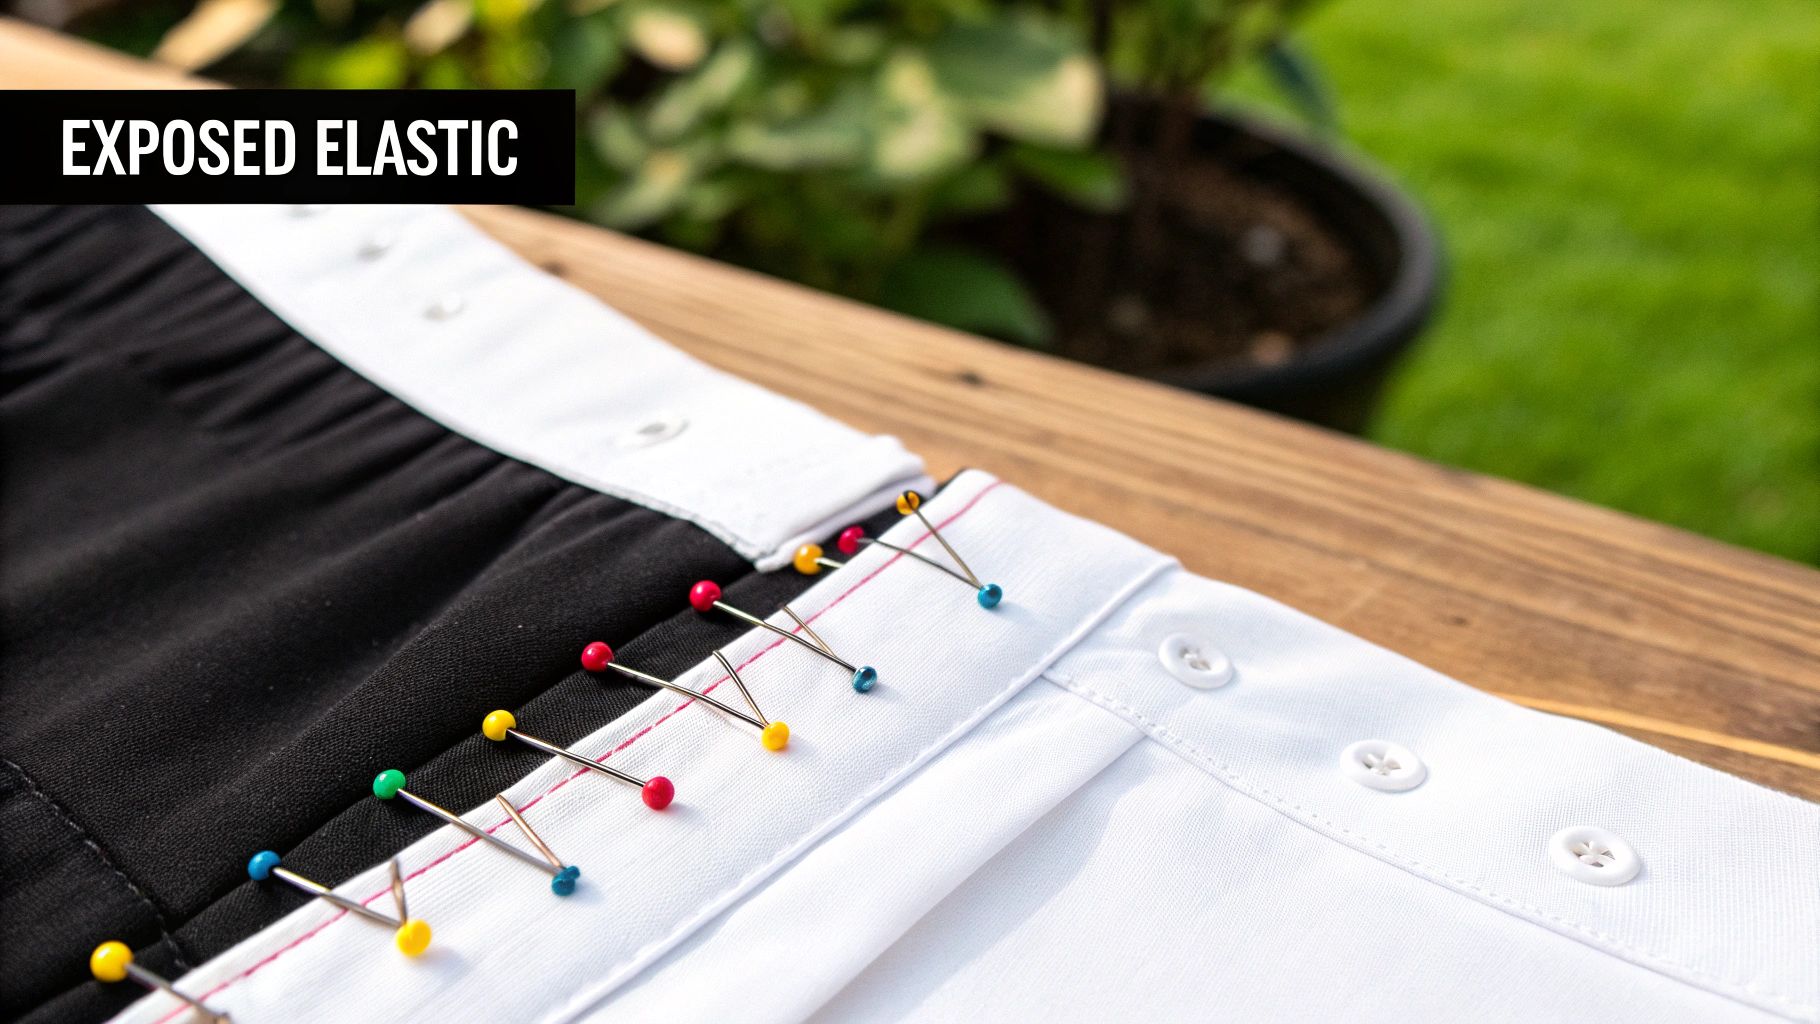
Creating a Modern Exposed Elastic Waistband
If you're aiming for a high-end, athletic, or decorative finish on your garments, the exposed waistband is your best friend. This is the technique behind that modern, store-bought look. It’s all about attaching a wide, often decorative, elastic directly to the outside of your fabric, turning a functional component into a bold design element.
It’s a go-to for activewear and loungewear, but it's also brilliant for cosplay pieces where the waistband itself is part of the costume's aesthetic. Think of those soft, branded logo elastics on high-quality athletic shorts or a fun glitter elastic on a pair of kids' pajama pants.
This style has become a staple, especially as the line between athletic and casual wear continues to blur. While demand for elastic waistbands peaks in spring and summer for casual pieces and again in the fall for cozy loungewear, mastering this skill is valuable year-round. A clean exposed waistband is always in fashion. For more insights into apparel trends, you can check out resources like Market Intel Reports.
Prepping the Elastic Loop
Before you even think about attaching the elastic to your garment, you need to turn it into a clean, sturdy loop. This first step is crucial for a strong foundation and a seamless look.
- Cut Your Elastic: Measure your elastic so it fits snugly around your waist. A good rule of thumb is to make it 2-3 inches shorter than your actual waist measurement.
- Join the Ends: Overlap the two ends of the elastic by about 1/2 inch.
- Secure the Seam: Forget a simple straight stitch—it'll pop under pressure. Instead, use a zigzag stitch to sew a small box or an "X" shape over the overlapped section. This creates a much stronger join that can handle all the stretching it will go through.
A Quick Tip on Elastic Choice: For this technique, you want an elastic that not only looks great but also feels comfortable against the skin. Soft knit elastics, jacquard elastics with cool woven-in designs, and specialty logo elastics are all fantastic choices. I'd recommend staying away from braided elastic for this; it tends to narrow when stretched and just won't give you that same clean, professional finish.
The Quartering Method for Perfect Gathers
The secret to an exposed waistband without any awkward, lumpy sections is the quartering method. It's a simple marking technique that guarantees your fabric is distributed evenly all the way around the elastic. I swear by this method—it’s a total game-changer for getting professional results every single time.
Here’s the breakdown:
- Mark the Elastic: Fold your elastic loop in half and pop a pin at each fold. Now, bring those two pins together to find the halfway points between them—your quarter points—and mark those with pins, too. You should have four pins dividing your elastic into equal sections.
- Mark the Fabric: Do the exact same thing to the waist opening of your garment. Find and mark your center front, center back, and both side seams.
- Match and Pin: Now, just align the four pins on your elastic with the four marks on your fabric. You'll be placing the elastic on the outside of the garment, letting its bottom edge overlap the fabric's raw edge by about 3/8 inch. Pin those four points securely.
Stitching for Stretch and Durability
Alright, time for the fun part: sewing the elastic onto the garment. The most important thing here is to use a stitch that can stretch. If you use a standard straight stitch, the thread will snap the first time the waistband is pulled.
These are your best options:
- Zigzag Stitch: This is the most common and accessible choice. A medium-width, medium-length zigzag is perfect.
- Three-Step Zigzag: This stitch packs even more stretch and coverage, making it an excellent choice for things like workout gear that need to endure a lot of movement.
- Serger/Overlocker: If you have one, a serger is the gold standard here. It stitches, finishes the raw edge, and trims the excess seam allowance all in one clean pass.
As you sew, you’ll need to gently stretch the elastic between your pins so that it lies flat against the fabric section you're working on. The key is to only stretch the elastic, not the fabric. Let the machine's feed dogs do the work of pulling the fabric through naturally while you focus on managing the elastic's tension. Once you've sewn all the way around, your waistband is securely attached and ready for action.
Taking It to the Next Level: Fold-Over and Shirred Elastic
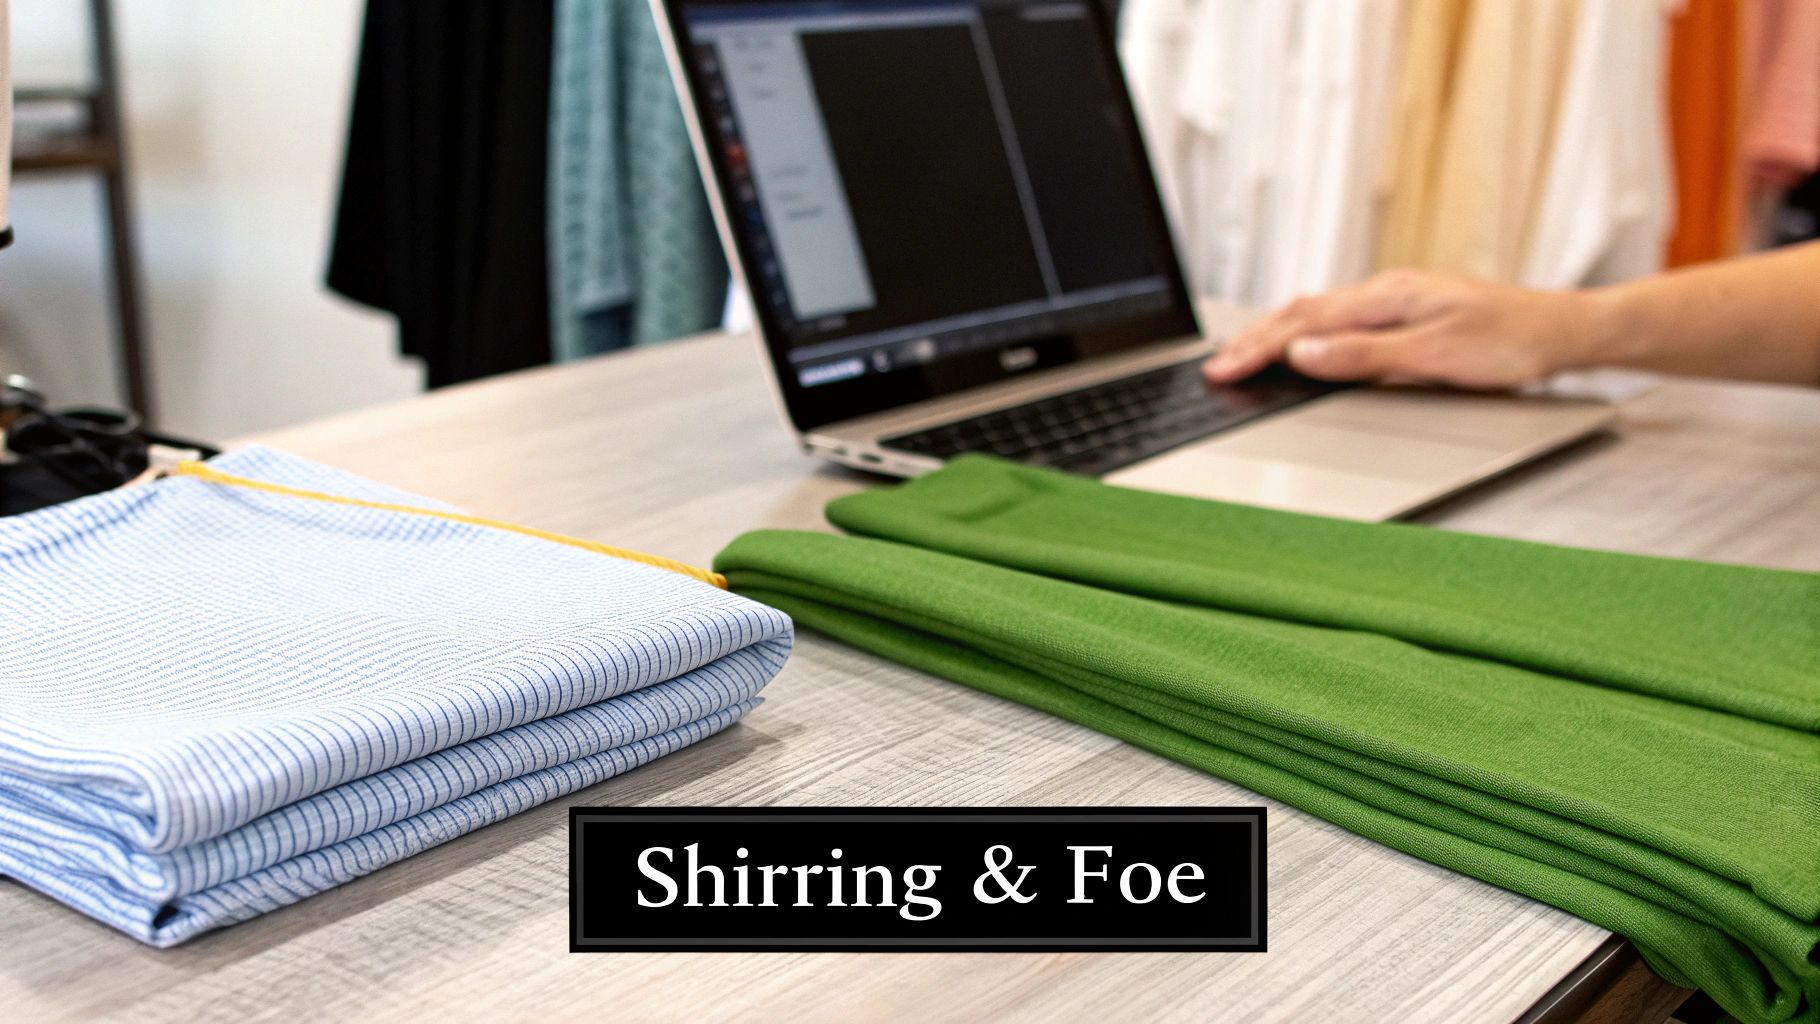
So, you've gotten the hang of casings and exposed waistbands. That's fantastic! Now you're ready to tackle some techniques that give your projects a truly custom, high-end finish. Two of my favorites for this are fold-over elastic and shirring. They're more than just ways to make something stretchy; they introduce texture, detail, and a professional polish.
Fold-over elastic, or FOE as you'll often see it called, is a brilliant solution for neatly finishing the raw edges of knit fabrics. It comes with a handy little groove pressed right down the middle, which acts as a perfect guide for folding it evenly over a fabric edge. This is my absolute go-to for things like yoga pants, athletic headbands, or any sleek cosplay leggings where you want a clean, flat edge without a bulky hem.
The key with FOE is to stretch it just a little bit as you sew. This slight tension is what creates that snug, secure fit that moves right along with you. A zigzag or a three-step zigzag stitch works best here, making sure you catch both the top and bottom edges of the elastic as it sandwiches the fabric. It’s a neat trick that finishes an edge and adds the elastic all in one go.
Mastering the Art of Shirring
Shirring is a totally different beast. Instead of a band, this technique uses a special elastic thread that you wind onto your machine’s bobbin. You end up with rows of beautiful, delicate gathers that add a soft stretch to lightweight wovens. Think of the waistline on a breezy summer dress, the yoke of a peasant blouse, or the billowy cuffs on a bishop sleeve—that's the magic of shirring.
First things first: you have to hand-wind the elastic thread onto your bobbin. Don't stretch it. Just wind it on smoothly and evenly. After popping the bobbin in your machine, you might need to bump up your top thread tension a notch to get the gathers just right.
Sew your first row with a longer straight stitch, somewhere around a 3.5 to 4.0 mm length. For the next rows, just use the edge of your presser foot as a guide to keep your lines straight and evenly spaced, usually about 1/4 to 1/2 inch apart.
Pro Tip: Here’s my favorite part. Once all your rows are sewn, hover a steam iron an inch or so above the shirred section. The blast of hot steam will make the elastic thread shrink up instantly, pulling the fabric into perfect, even gathers. It feels a bit like magic every single time!
It's also worth noting that the materials we work with are always changing. While most elastics are produced in East Asia, a growing demand for sustainability has opened up a world of new choices. You can now find eco-friendly options made from recycled polyester and organic fibers, particularly from North American and European suppliers. You can find more about these material trends on Archive Market Research.
Both fold-over elastic and shirring are incredible skills to add to your sewing arsenal. They can elevate a simple project into something that looks polished and professional, with a unique character and a much more comfortable fit.
Solving Common Elastic Waistband Problems
Even when you've done everything right, waistbands can have a mind of their own. The good news is that most of the common frustrations have simple fixes that don't involve ripping out all your hard work. Let's walk through how to troubleshoot the issues I see pop up most often.
One of the most maddening things is when the elastic twists and rolls inside the casing after you've sewn it all up. It feels awful to wear and just looks messy. But don't worry, you don't have to start from scratch.
To fix a twisted elastic, grab your seam ripper and carefully open a small hole in the casing, right on top of a side seam where it will be less noticeable. From there, you can use your fingers or a pair of hemostats to wiggle the elastic until it lies flat again. Once it’s straight, secure it for good by "stitching in the ditch" right through the side seam. That little vertical stitch catches the elastic, is practically invisible, and will stop it from ever twisting on you again.
Adjusting for the Perfect Fit
So you've finished, you try it on, and the fit is just... wrong. A waistband that digs in or droops down can ruin a garment you were excited about.
If the waistband is too loose, the fix is usually pretty quick. Just open a small section of the casing, pull the elastic out, and overlap the ends a little more than you did before. Stitch the elastic securely at this new, tighter length, trim off the extra, and sew the casing closed.
For a waistband that’s uncomfortably tight, the solution takes a bit more effort. You’ll need to open the casing, carefully unpick the seam holding the elastic ends together, and then sew in a small "bridge" piece of matching elastic to give you some extra length. This is exactly why I always stress testing the fit of your elastic loop before you enclose it—it saves a major headache later.
Key Takeaway: Uneven, lumpy gathers are almost always because the quartering method was skipped. Taking the time to divide both the fabric and the elastic into four equal sections and pinning them together is the single best way to get beautifully balanced gathers every single time.
Preventing Popped Stitches
There's no worse sound than the snap of threads popping as you stretch a waistband on a knit garment. This happens because a standard straight stitch has zero give. When the fabric and elastic stretch, the thread can't, so it breaks.
The fix is built right into your sewing machine. You just need to choose a stitch that can stretch.
- Zigzag Stitch: This is your go-to, all-purpose stretch stitch. It works for nearly everything.
- Three-Step Zigzag: This one is even more durable and offers more stretch, making it my choice for activewear or kids' clothes.
- Lightning Bolt Stitch: Some machines have this specialty stitch, and it’s designed specifically for maximum stretch on things like elastic.
By using one of these from the get-go, you ensure your seam can stretch right along with the fabric, keeping your waistband secure no matter what.
Frequently Asked Questions About Elastic Waistbands
Even with the best instructions, a few questions always seem to surface when you're in the middle of a project. I've gathered some of the most common ones I hear from fellow sewers to give you quick, practical answers and help you feel more confident at the machine.
Think of this as your final check-in before you show off your finished piece. Getting these little details right is what separates a good garment from a great one.
How Much Shorter Should My Elastic Be?
A reliable rule of thumb is to cut your elastic 2 to 4 inches shorter than your actual waist measurement. This range is a fantastic starting point for most projects and fabrics, giving you that perfect balance of snug and comfortable.
If you're working with something super stretchy like a soft knit elastic, or if you just like a looser fit, aiming for just 2 inches shorter is probably your best bet. On the flip side, for a sturdier non-roll woven elastic or for something like workout leggings that absolutely cannot slip, taking off up to 4 inches will give you the security you need.
My Go-To Tip: Always, always test the fit before you sew the elastic into a circle. Just overlap the ends by about half an inch and pin them. Then, wrap it around your waist where the garment will sit. This is the only way to truly know how it will feel, and it's your last chance to make an easy adjustment.
Can I Just Use a Regular Straight Stitch?
This is a great question, and the answer is a classic "it depends." If you're sewing a channel or casing into a non-stretch woven fabric, then yes, a straight stitch is exactly what you should use. It's clean, simple, and perfect for the job.
However, if you're sewing the elastic directly onto the fabric, especially a stretchy knit, a straight stitch will spell trouble. The moment you stretch that waistband, those rigid stitches will snap. I've seen it happen countless times.
For attaching elastic directly, you need a stitch that can stretch with it.
- A zigzag stitch is the most common and reliable choice.
- A triple stretch stitch (it looks like three tiny straight stitches next to each other) is even stronger and great for activewear.
- A three-step zigzag is another durable option that I love for its flexibility.
What if My Elastic Twists Inside the Casing?
Ugh, the dreaded twisted elastic! It's one of the most annoying things that can happen after you think you're finished. The best way to deal with this is to prevent it from happening in the first place by using a wider, "non-roll" woven elastic, which is specifically designed to resist flipping.
But if it happens anyway, don't despair! You can usually fix it without ripping out the whole casing. The trick is to "stitch in the ditch" at the side seams after the elastic is in. This means you'll sew a few vertical stitches directly on top of the side seam line, going through the waistband, casing, and the elastic itself. This locks the elastic in place at a few key points, making it much harder for it to twist around during washing or wear.
At Famcut, we’re passionate about helping you succeed in all your creative endeavors, whether you're building an elaborate cosplay or sewing a simple quilt. Check out our huge selection of quality fabrics, notions, and tools to get your next project started. Visit us at https://famcut.com to find everything you need.