


A Beginner's Guide to Hand Sewing: how to sew applique by hand
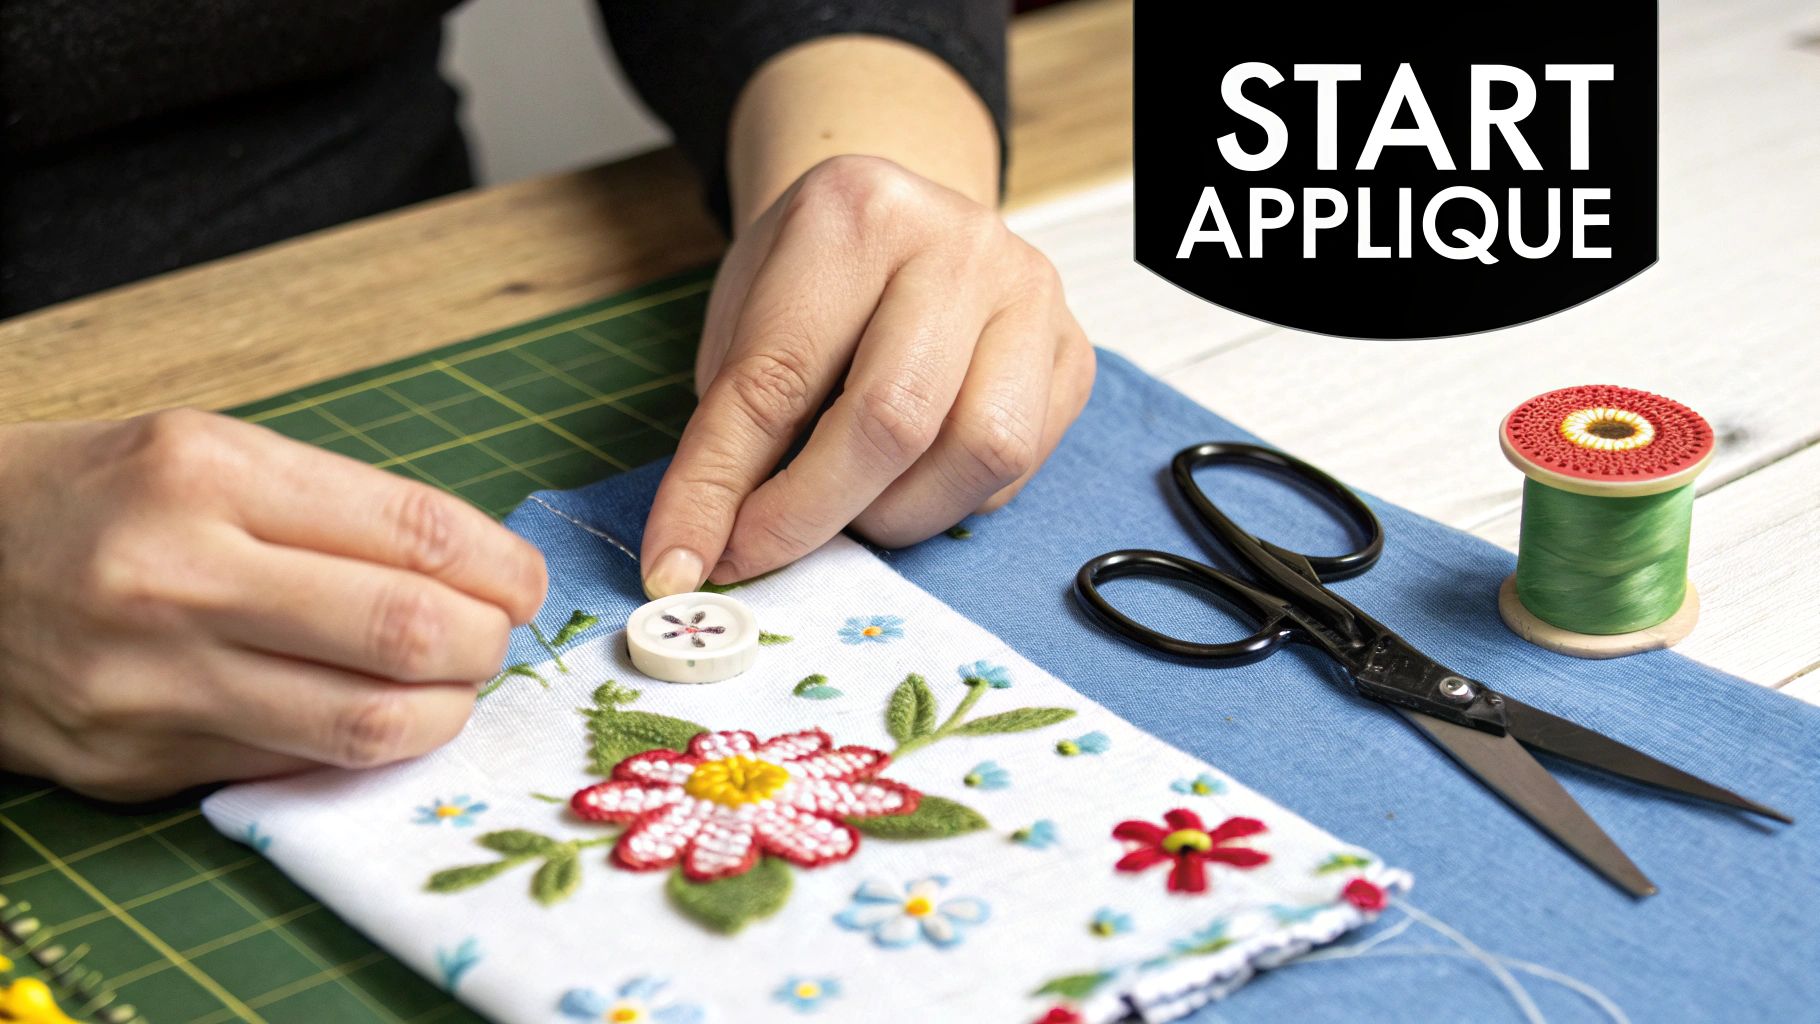
At its core, hand appliqué is simply the art of stitching smaller pieces of fabric onto a larger background piece. You'll prepare your shapes, position them, and then use small, neat stitches—like the slip stitch or a decorative blanket stitch—to hold them in place. The magic is in the details: a fine needle and thread that either disappears or adds a beautiful, decorative touch.
Your Journey into Hand Appliqué Begins Here
Welcome to the wonderfully tactile world of hand appliqué. If you've ever admired a quilt with intricate patterns or a piece of clothing with a unique fabric design, you've likely seen appliqué in action. This guide is here to pull back the curtain on this timeless technique, showing you exactly how to sew appliqué by hand to create stunning, textured art.
Hand stitching is far from an outdated craft. It offers a level of precision and a peaceful, meditative rhythm that a sewing machine just can't match.
Whether you’re a quilter dreaming of making an heirloom piece or a cosplayer in Atlanta adding the perfect finishing touch to a costume, this skill is incredibly rewarding and easier to learn than you might think. This is your starting point for adding a truly personal, artistic flair to any fabric project.
Why Hand Appliqué Still Matters
In an age of fast fashion and mass production, the charm of something truly handmade is more powerful than ever. Hand appliqué isn't just a sewing technique; it’s a way to slow down and connect with your work on a much deeper level.
The deliberate, rhythmic process gives you complete control, letting you ease around tight curves and pivot on sharp corners with a grace a clunky sewing machine foot can only dream of. It’s the perfect method for:
- Detailed Artwork: Think of creating intricate pictures on quilts, wall hangings, or hoop art.
- Personalized Items: Adding unique monograms, custom patches, or fun motifs to clothing and bags.
- Heirloom Quality: Crafting special pieces that are meant to be cherished and passed down for generations.
This isn't just a niche hobby, either. The global embroidery market, which includes hand-sewn appliqué, saw impressive growth of 44% between 2021 and 2025. This trend points to a real desire for the decorative, personalized textiles that hand appliqué creates so beautifully. You can dig into more data on this growing market over at cognitivemarketresearch.com.
The real beauty of hand appliqué is its simplicity. All you really need is a needle, thread, and fabric to turn a plain piece of cloth into something special. It's a portable skill that requires very little upfront investment.
What You Will Learn
I've structured this guide to be a clear roadmap, taking you through every single step of the hand appliqué process. We’ll cover everything from choosing the right needle and thread to putting the final stitch in your very first project. My goal is to give you the skills and confidence to bring your creative ideas to life.
As you dive into appliqué, you might find your creative curiosity sparked for other crafts, too. Many people find their next passion on learning platforms, like those featured in this list of the Top 9 Online Courses For Hobbyists.
But for now, let's start by getting our tools in order.
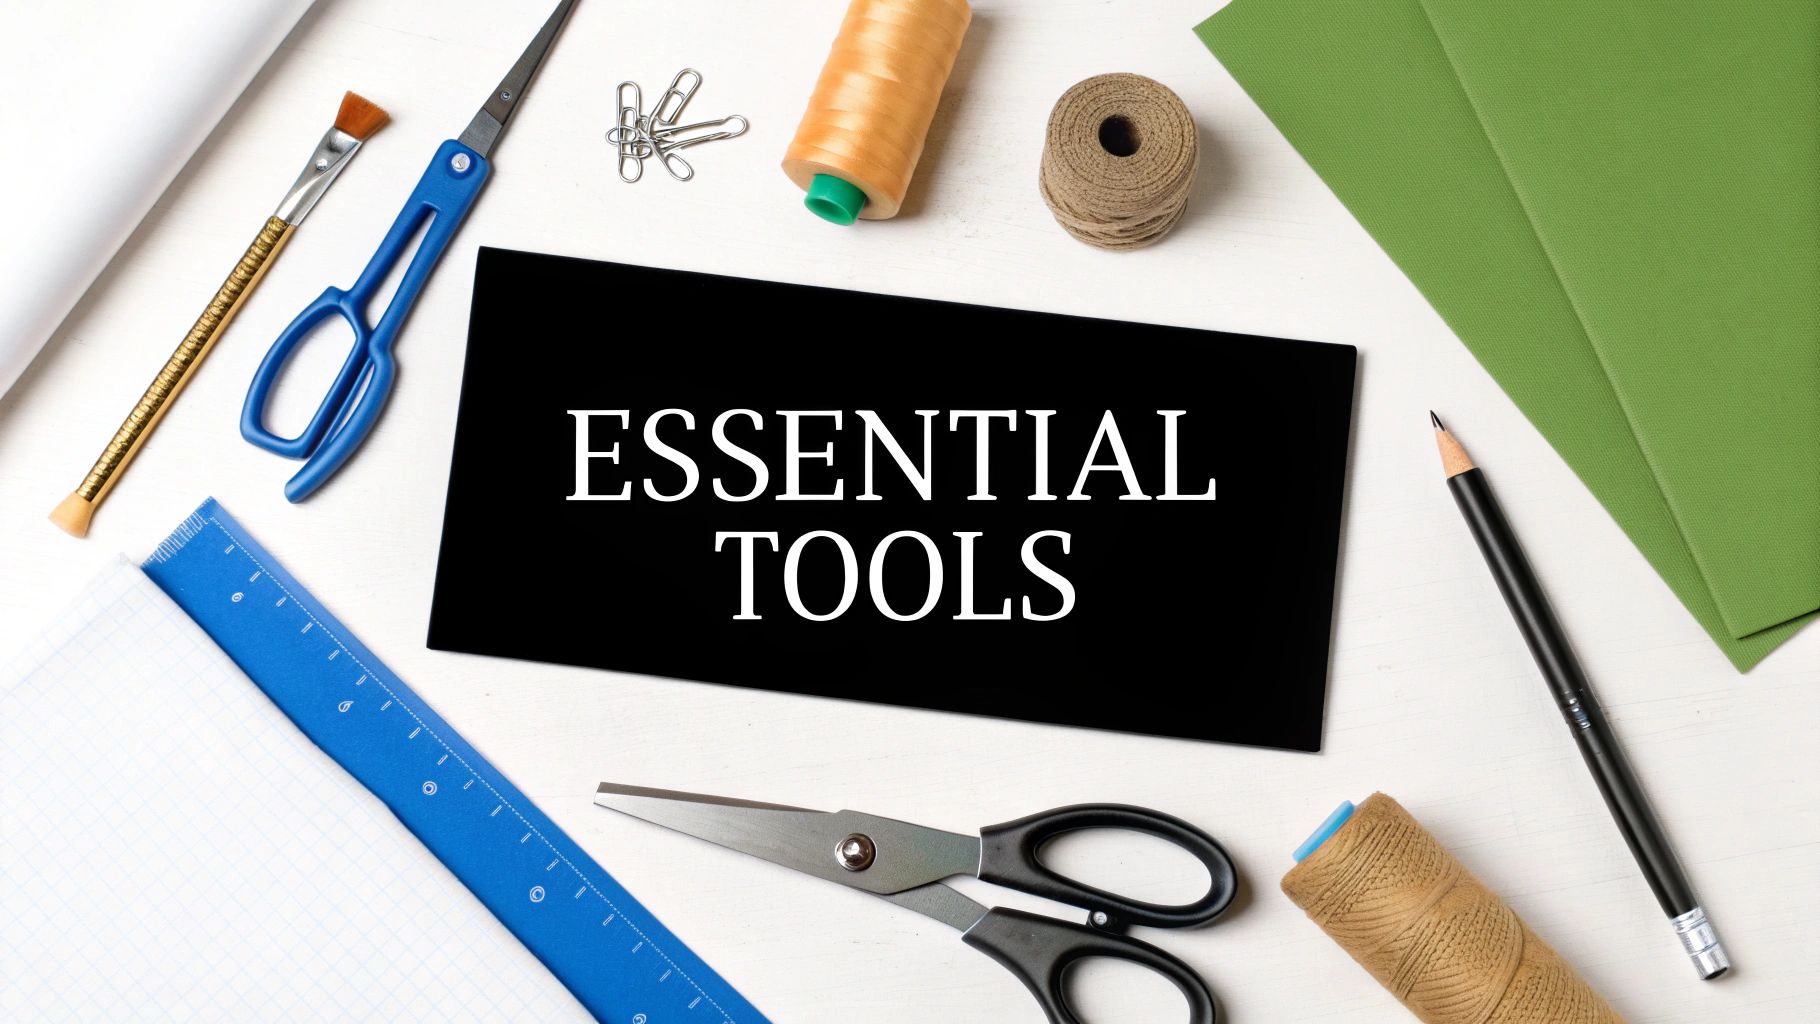
Gathering Your Essential Hand Applique Tools
Before you can dive into the fun part, you’ll need to gather a few key supplies. Setting yourself up with the right tools from the start is the difference between a frustrating afternoon and a relaxing, creative session. Think of it like prepping your ingredients before you start cooking—it just makes everything flow better. The good news is you don’t need a huge investment to get started, just a handful of items that will do the heavy lifting for you.
Hand sewing has seen a huge resurgence lately. It’s an incredibly accessible way to get into quilting and garment making, which is why some popular instructional books sold out in under 19 minutes during the pandemic. That wave of interest hasn't slowed down, proving that quality handwork is a skill people truly cherish.
To help you get started on the right foot, here's a quick checklist of the must-have supplies for your hand appliqué adventures.
Essential Hand Applique Supply Checklist
| Tool or Material | What to Look For | Pro Tip for Best Results |
|---|---|---|
| Needles | "Straw" or "milliner's" needles, size 10 or 11. They're long, thin, and glide through fabric easily. | The longer shaft gives you great leverage for turning under fabric edges as you stitch. |
| Thread | Fine, 100% cotton thread in a 50 or 60-weight. | Always match your thread to the appliqué piece, not the background fabric. This helps your stitches disappear. |
| Fabric | High-quality, 100% cotton with a tight weave (like quilting cottons). | Pre-washing your fabric helps prevent any shrinking or color bleeding after your project is complete. |
| Scissors | Small, sharp scissors with a fine point, often sold as "applique scissors" or embroidery snips. | Their small size is crucial for navigating tight curves and clipping sharp corners with precision. |
| Marking Tool | Water-soluble pens, chalk pencils, or a fine-tipped permanent marker (for templates only). | Always test your marker on a scrap of fabric first to make sure the marks will fully disappear later! |
| Pins/Adhesive | Short, fine applique pins or a lightweight fusible web. | Fusible web is a beginner's best friend for holding pieces in place, but pins offer more flexibility for adjustments. |
Having the right tools makes all the difference, and you'll find that having a dedicated kit makes it easy to pick up your project whenever you have a spare moment.
The Soul of Your Project: Needles and Thread
Your needle and thread are the true workhorses here. The wrong needle can snag your fabric or leave big, obvious holes, while thread that’s too thick or the wrong color will scream for attention.
- Needles: I always recommend "straw" or "milliner's" needles. Their long, thin shafts and small eyes are designed to glide through fabric without much fuss. A size 10 or 11 is the perfect starting point for most projects.
- Thread: The goal is invisible stitches. To achieve this, choose a fine, 100% cotton thread that matches your appliqué piece. A 50 or 60-weight thread is the sweet spot—it’s strong enough to hold up but thin enough to melt into the fabric.
Prepping for Success: Fabrics and Marking Tools
The fabric you choose is your canvas, and your marking tool is what transfers your vision onto it.
For fabrics, you can't go wrong with high-quality, 100% cottons with a nice, tight weave, like quilting cottons or batiks. They behave beautifully—they’re stable, press well, and won’t fray like crazy. It’s best to avoid anything too slippery or loosely woven until you’ve got a few projects under your belt.
When it comes to marking your designs, you need something that will disappear when you're done.
- Chalk pencils or water-soluble pens are fantastic for marking on the right side of the fabric. The lines simply brush away or vanish with a dab of water.
- A fine-tipped permanent marker should only ever be used for tracing onto your freezer paper or fusible web—never let it touch your actual project fabric!
My Golden Rule: Always, always test your marking tool on a scrap of your project fabric first. This little step takes two seconds and can save you from the heartache of a permanent line on your finished piece.
Precision is Key: Cutting and Holding Tools
Clean, precise appliqué is all about accurate cutting and making sure your pieces don't wiggle around while you sew.
This is where a small, sharp pair of applique scissors comes in. Sometimes called embroidery snips, their fine point allows you to get into tight curves and corners with a level of accuracy you just can’t get from a big pair of dressmaker's shears.
Finally, you have to keep those little fabric shapes in place.
- Applique Pins: These are much shorter and finer than regular sewing pins. They’ll secure your pieces without being bulky or getting in the way of your hands as you stitch.
- Fusible Web: This is a modern game-changer. It’s a paper-backed, iron-on adhesive that temporarily sticks your appliqué to the background. It's a huge help for beginners, though many seasoned stitchers prefer the old-school method of basting for more control.
As you build your toolkit, you might get curious about other fiber arts, too. For example, if you're a knitter, you know how important the right gear is, and you might find useful tips on things like choosing your perfect yarn cone winder. Ultimately, equipping yourself properly is the first real step toward success in any craft you pursue.
Getting Your Fabric Ready and Your Design in Place
Gorgeous hand appliqué doesn't just happen. The real magic, the secret to those smooth, pucker-free results, begins way before you even think about threading a needle. If you want a fun, frustration-free stitching session, spending a little extra time on prep is the single best thing you can do.
Think of it as laying the groundwork for your project. A solid foundation means the final piece will look clean, professional, and stand the test of time. Cutting corners here often leads to headaches later—things like shrinkage, wonky shapes, and general disappointment.
The One Step You Can't Afford to Skip: Pre-Washing
I know, I know. You get that beautiful new fabric home and you just want to start cutting. But trust me on this: pre-washing is non-negotiable. Nearly all fabrics, especially 100% cotton, are going to shrink a bit the first time they hit the water.
Imagine stitching an unwashed appliqué piece onto an unwashed background. If they shrink at different rates in the first wash, you'll end up with a puckered, distorted mess. Pre-washing also gets rid of any sizing or chemicals from the factory that can make fabric stiff and difficult to needle. Just give it a quick wash and a good press with a hot, steamy iron, and you'll have a stable, predictable canvas to work with.
Transferring Your Pattern Accurately
With your fabric prepped and pressed, it’s time to move your design onto the appliqué pieces. Precision is everything here if you want to end up with the crisp, clean shapes you're picturing in your head. There are a few tried-and-true ways to do this, and the best method really just depends on your pattern and your personal preference.
Here are a few of my favorite techniques:
- The Window or Lightbox Trick: This is as simple as it gets and perfect for basic shapes. Just tape your pattern to a sunny window or a lightbox, lay your fabric on top, and trace the design right onto the fabric with a good water-soluble marker.
- Fabric Carbon Paper: Another solid choice. You just sandwich a sheet between your pattern and your fabric, then trace the lines with a stylus or even a dull pencil. It's a quick and direct transfer.
- The Freezer Paper Method: This is the holy grail for many of us who do a lot of appliqué. It’s the key to getting incredibly sharp edges because the paper itself becomes your stitching guide. It's an absolute game-changer for intricate designs with tight curves or sharp points.
For precise, turned-edge appliqué, the freezer paper method is my go-to. It temporarily sticks to the fabric when ironed, giving you a perfect, firm edge to fold your seam allowance over as you stitch.
Why I Swear By Freezer Paper
Let's break down the freezer paper method, since it gives you so much control. First, trace your appliqué shape onto the dull side of the freezer paper. Then, cut the shape out right on the line—don't add a seam allowance to the paper template.
Next, place the shiny side of your freezer paper template onto the wrong side of your appliqué fabric. A quick press with a hot, dry iron will make the waxy coating gently stick the paper to the cloth. Now you can cut out your fabric, but this time, you'll add a scant seam allowance of about 3/16 to 1/4 inch around the outside of the paper template.
That little bit of extra fabric is what you'll be turning under the edge of the freezer paper as you sew. The paper gives you a perfect, unyielding guide to follow, which is how you get those flawless points and beautiful, smooth curves that really make hand appliqué sing.
Mastering the Essential Hand Applique Stitches
This is where the real magic happens. The stitches you choose will physically and visually bind your design, turning separate pieces of fabric into a cohesive work of art. Learning to appliqué by hand is all about getting comfortable with a few key stitches, and each one brings its own unique character to a project.
The video below offers a fantastic visual walkthrough of the fundamental techniques we're about to cover. Sometimes, seeing it in action makes all the difference.
Before you even thread your needle, remember that all your prep work—washing, pressing, and cutting—sets the stage for a smooth stitching experience.

Getting this part right is non-negotiable. Properly prepared fabric prevents puckering and ensures your appliqué shapes are perfectly stable before you begin the detailed work of stitching them down.
The Slip Stitch: The Gold Standard
If you're a quilter or you’re aiming for that invisible, heirloom-quality finish, the slip stitch will be your best friend. This is the heart and soul of traditional needle-turn appliqué, and it’s designed to be so tiny and discreet that it practically disappears.
After knotting your thread, bring the needle up from the back of your background fabric so it emerges right at the folded edge of your appliqué piece. The trick is to have the needle just “catch” a few threads of that fold.
Next, travel a short distance—about 1/8 to 1/4 inch—through the background fabric, keeping your needle parallel to the appliqué's edge. Bring the needle up again, once more catching just the very lip of the fold. This movement creates a tiny, almost imperceptible stitch on the front and a slightly longer, hidden one on the back.
The secret to a perfect slip stitch is consistency. Aim for small, evenly spaced stitches. As you work, use the tip of your needle to gently turn the seam allowance under just ahead of where you're stitching. This "needle-turning" motion becomes a smooth, fluid rhythm with practice.
The Blanket Stitch: For a Decorative Touch
Sometimes you want your stitches to be part of the design. The blanket stitch is a beautiful, decorative choice that creates a clean, finished border around your appliqué. It's perfect for folk-art quilts, whimsical wall hangings, and adding a charming, handcrafted look to things like children’s clothing.
To make a blanket stitch, start by bringing your needle up from the back, just inside the edge of your appliqué shape. Take the needle down through the background fabric directly behind where the thread came up, then bring the tip back up through the appliqué a short distance away. Before you pull the needle all the way through, loop the working thread behind the needle. As you gently pull the stitch taut, you’ll form a neat “L” shape right on the edge.
This stitch is fantastic for securing edges that might fray, since it wraps the border in thread. It looks especially lovely when sewn with a contrasting, slightly thicker thread, like a cotton pearl, to really make the design pop.
The Whip Stitch: For Speed and Strength
When durability is more important than invisibility, the whip stitch is an excellent workhorse. This is a favorite among cosplayers adding patches to jackets or crafters making felt toys that need to withstand play. It’s a straightforward, strong stitch that gets the job done quickly and securely.
You'll work by bringing the needle up from the back of the background fabric, bringing it over the edge of the appliqué piece, and going back down into the background. This creates a series of small, angled stitches that "whip" over the raw edge.
While it’s definitely visible, a neat and evenly spaced whip stitch has a rustic charm all its own. It's incredibly practical for any project that will see a lot of wear and tear, providing a much stronger hold than a more delicate stitch.
Comparing Common Hand Applique Stitches
Choosing the right stitch can feel overwhelming, but it really comes down to the final look you're after. Are you going for invisible and elegant, or bold and decorative? This table breaks down the big three to help you decide.
| Stitch Type | Best Used For | Final Look | Durability Level |
|---|---|---|---|
| Slip Stitch | Heirloom quilts, fine art pieces, invisible seams | Clean, professional, and nearly invisible | Moderate |
| Blanket Stitch | Decorative projects, folk art, felt crafts, reinforcing edges | Visible, charming, and ornamental | High |
| Whip Stitch | Cosplay patches, durable toys, quick and strong attachments | Visible, rustic, and functional | Very High |
Ultimately, your project's function and aesthetic will guide your choice. For a delicate wall hanging, the slip stitch is perfect. For a toddler's patched-up jeans, the whip stitch is the clear winner.
Navigating Curves and Corners
Stitching around a smooth curve requires a little finesse. The key is to make your stitches slightly smaller and closer together than you would on a straightaway. This lets you gently guide the fabric around the bend without creating awkward flat spots or puckers.
Sharp points and deep valleys need special attention. For a crisp outer point, take a tiny securing stitch right at the very tip. For an inner corner or "V" shape, you absolutely must clip the seam allowance almost to the point before you stitch. This simple snip releases the fabric's tension, allowing it to lie flat so you can neatly tuck the edges under and lock them down with a couple of close stitches.
Finishing Your Work and Troubleshooting Common Issues
You’ve taken that last stitch, and your appliqué piece is finally secure. It’s a great feeling, but don't put your needle down just yet. A few simple finishing touches are what separate a nice handmade project from a truly professional-looking handcrafted piece.
This is where you lock in your work, give it a final press, and fix any little quirks that might have popped up. Trust me, even seasoned stitchers run into puckers and frays, so knowing how to handle them is a crucial skill.

Securing and Pressing Your Appliqué
First, let's make sure those stitches aren't going anywhere. Flip your project over to the back. To create a secure knot, just take a tiny stitch through the background fabric or the back of the appliqué piece. Before you pull the thread loop tight, pass your needle through it two or three times. This creates a small, strong knot that won't pull through. Snip the thread close, and you're done.
Now for the final press. The key here is to be gentle. You don't want to iron your beautiful work into oblivion and flatten out all the lovely dimension you just created.
Instead, try this method:
- Lay your project face down on a thick, fluffy towel.
- Set your iron to the right temperature for your fabric, and use steam if you can.
- Press gently from the back. The soft towel acts as a cushion, protecting your stitches from getting squashed while the steam sets everything perfectly.
Solving Common Appliqué Problems
No matter how careful you are, things can go a little sideways. Don't worry—most of the common issues have surprisingly easy fixes. Think of these as learning moments, not failures.
Problem 1: Puckered Background Fabric This is the classic appliqué woe. It almost always happens when you pull your stitches just a little too tight, causing the background fabric to gather and wrinkle around your design.
- The Fix: If it’s just a minor pucker, you can often gently smooth it out with your thumbnail. For more serious wrinkling, your only real option is to carefully snip the stitches in that section and re-sew them with a much more relaxed tension.
Problem 2: Fabric Fraying at the Edges Seeing little threads peeking out from under your stitches? This usually means your turn-under allowance was too slim or you're working with a loosely woven fabric that loves to unravel.
- The Fix: A liquid seam sealant like Fray Check is your best friend here. Apply it very sparingly to the frayed edge—using a toothpick for precision helps avoid getting it on the front of your fabric. Going forward, always aim for a turn-under allowance of at least a scant 1/4 inch.
Every single person who does appliqué runs into these problems. The real skill is learning to approach them with patience. A willingness to troubleshoot is what turns a beginner into a confident maker.
It's amazing to think that as you're learning these skills, you're part of a massive global tradition. The Asia-Pacific region holds 41% of the global embroidery market, and China alone exported a staggering $303 billion in textiles in 2022. You can explore more about the global textile market on marketdataforecast.com. It shows just how valued these skills are worldwide.
More Quick Fixes for Hand Appliqué
Problem 3: Uneven or Visible Stitches If you feel like your stitches are screaming for attention instead of disappearing, you might be taking inconsistent bites of fabric or grabbing too much from the folded edge.
- The Fix: Simply slow down. Focus on making each stitch the same size and grabbing just one or two threads from the appliqué's folded edge. It really helps to practice on a scrap piece until you find a rhythm that feels natural and gives you those nearly invisible stitches.
Problem 4: The Appliqué Piece Shifted You pinned, you basted, but somehow the piece still drifted out of place as you were sewing. It happens.
- The Fix: If it's just a tiny shift, you can probably ease it back into position as you finish sewing. But if it's noticeable, it's worth the effort to fix it. You’ll have to unpick the stitches, reposition the piece with extra pins or a dot of basting glue, and start that section again. It feels like a pain, but you’ll be much happier with the result.
Answering Your Hand Appliqué Questions
No matter how clear the instructions are, you're bound to run into a few head-scratchers when you first start doing appliqué by hand. I've been there! Let's walk through some of the most common questions that pop up in my classes. Think of this as having an expert sitting right beside you, ready with the answers.
Getting these little details right is what separates a good-looking piece from a great one. We'll cover everything from tricky curves to wobbly stitches, so you can get back to sewing with confidence.
How Do I Pick the Right Thread Color?
This is probably the number one question I get, but the answer is surprisingly simple. Your main goal, especially if you're using an "invisible" stitch like the slip stitch, is to make that thread completely disappear.
The trick is to match your thread to the appliqué piece, not the background fabric. So, if you're stitching a red heart onto a white background, you need red thread. This way, the tiny bit of thread that shows on the appliqué’s edge will blend right in. If you can't find a perfect match, always go for a shade that's slightly darker than your fabric—lighter threads tend to pop and catch the eye.
Here's a little pro tip: Audition your thread before you commit. Unwind a few inches and lay it across your appliqué fabric. Do this in good, natural light if you can. The thread that seems to melt into the fabric is the one you want.
What's the Secret to Handling Tight Curves?
Stitching a perfectly smooth circle or navigating a sharp curve can feel like a real challenge. The secret isn't some complicated stitch; it’s all about adjusting your technique as you go. As you work your way around a curve, you need to make your stitches a bit smaller and place them closer together.
This simple adjustment works wonders for two reasons:
- It gives you far more control over the fabric’s edge.
- It prevents that faceted look, where a curve ends up looking like a series of tiny, straight lines.
Keep the tip of your needle busy, constantly tucking the seam allowance under right before you make the next stitch. A slow, steady hand is your best friend here. If you try to rush through the curves, you'll almost certainly end up with puckers or wonky edges.
My Stitches Look Uneven. What Am I Doing Wrong?
Don't worry, uneven stitches are practically a rite of passage for beginners, and it's something you can fix just by being a little more mindful. Usually, the culprit is inconsistent tension or taking different-sized "bites" of fabric with each stitch.
First off, check your grip. If you're pulling each stitch super tight, you're not just creating puckers; you're also making your stitches look strained and irregular. You're aiming for stitches that are taut, not tight. They should lie flat against the fabric without causing any pulling.
Next, focus on rhythm and consistency. Try to make every stitch the same length as it travels through the background fabric. At the same time, aim to catch the exact same amount of fabric from the appliqué's folded edge each time—we're talking just a thread or two. Practicing on a scrap piece of fabric is a fantastic way to build that muscle memory and find a comfortable, even rhythm.
Should I Use Fusible Web or Baste My Pieces Down?
This really comes down to personal preference. Both methods are great for holding your appliqué pieces steady while you sew, and each has its own pros and cons.
Using Fusible Web
- The Good: It's quick, easy, and gives you a rock-solid hold, which is a huge help for beginners. It also neatly seals the turned edge, preventing any fraying.
- The Catch: It can make your appliqué piece feel a little stiff. And once you iron it down, it's there for good—no repositioning!
Pin or Thread Basting
- The Good: This traditional method keeps the appliqué soft and pliable. Plus, you can easily make small adjustments if you need to nudge a piece into the perfect spot.
- The Catch: It definitely takes more time, and you might find that your pieces can shift around a bit more than they would with fusible web.
Many seasoned stitchers are die-hard fans of basting because of the control it gives them. But honestly, there is absolutely nothing wrong with using fusible web. It’s an incredible tool, especially when you're just learning how to sew appliqué by hand and want to put all your focus on perfecting your stitches.
At Famcut.com, we absolutely love helping people succeed on their creative path, whether you're an experienced quilter or a cosplayer in the Atlanta area just getting started. We offer fun classes, top-notch materials, and a great community to help you make your vision a reality.
Come explore all our resources and supplies at https://famcut.com.