


How to Sew a Zipper by Hand A Beginner's Guide
When you learn how to sew a zipper by hand, you're essentially taking a few simple steps: marking your fabric, holding the zipper in place with some temporary basting stitches, and then locking it in with a sturdy stitch like the backstitch. It's a technique that gives you total control, which is exactly what you want for a perfect, professional-looking finish—especially on those finicky fabrics that a sewing machine tends to chew up.
Why Hand-Sewing a Zipper Is a Game Changer
Sure, a sewing machine is fast. But learning how to put in a zipper by hand is one of those skills that really takes your projects from "homemade" to "handmade." This isn't just about fixing something that broke. It's about adding a technique to your toolkit that offers incredible precision and a finish so clean it looks like it belongs on a high-end garment.
The biggest advantage here is control. When you’re the one guiding the needle, every single stitch goes exactly where you want it to. This is a lifesaver when you're working with notoriously difficult materials.
- Delicate Fabrics: Think about silks, chiffons, or velvet. A machine's feed dogs can easily stretch or pucker these fabrics. Hand sewing lets you place each stitch gently, keeping the fabric's natural drape intact.
- Tricky Seams: Ever tried to install a zipper on a curve? Or into a thick wool coat? It's so much easier by hand. You can navigate those bumps and bends with a level of accuracy a machine just can't replicate.
- Pattern Matching: If you're working with stripes, plaids, or any other pattern that needs to line up, hand sewing is your best friend. You can ensure the lines match perfectly across the zipper for a truly seamless look.
The Mark of Quality and Craftsmanship
Beyond just being practical, a hand-sewn zipper is a sign of true craftsmanship. It’s the go-to method in couture and bespoke tailoring, where a flawless, invisible finish is the entire point. It's also a vital skill for anyone who works with vintage clothing, as it allows you to make repairs that honor the garment's original construction.
This isn't just a niche technique, either. It’s a globally respected practice. In India, for instance, it’s estimated that over 60% of small tailoring shops still rely on hand sewing for zippers, especially for custom orders where precision is more important than speed. The same goes for luxury fashion houses in Europe, where hand-sewn zippers are a staple of bespoke work.
Hand sewing isn't a step backward; it's a step toward complete control over your craft. It’s the difference between a functional closure and a flawless design element that enhances the entire garment.
A Skill for Every Sewer
Ultimately, mastering this gives you a huge confidence boost. When you know you can install a zipper without even plugging in a machine, no project feels out of reach. You can tackle detailed cosplay costumes, tailor a thrift-store find to perfection, or add a professional touch to a handmade bag.
Hand sewing a zipper can also be a really relaxing and satisfying process. If you find joy in working with your hands, you might also enjoy exploring other creative hobbies. And for more great advice from our experts, be sure to check out our complete collection of sewing tips and tricks here: https://www.famcut.com/blogs/tips-and-tricks.
Gathering the Right Tools for the Job
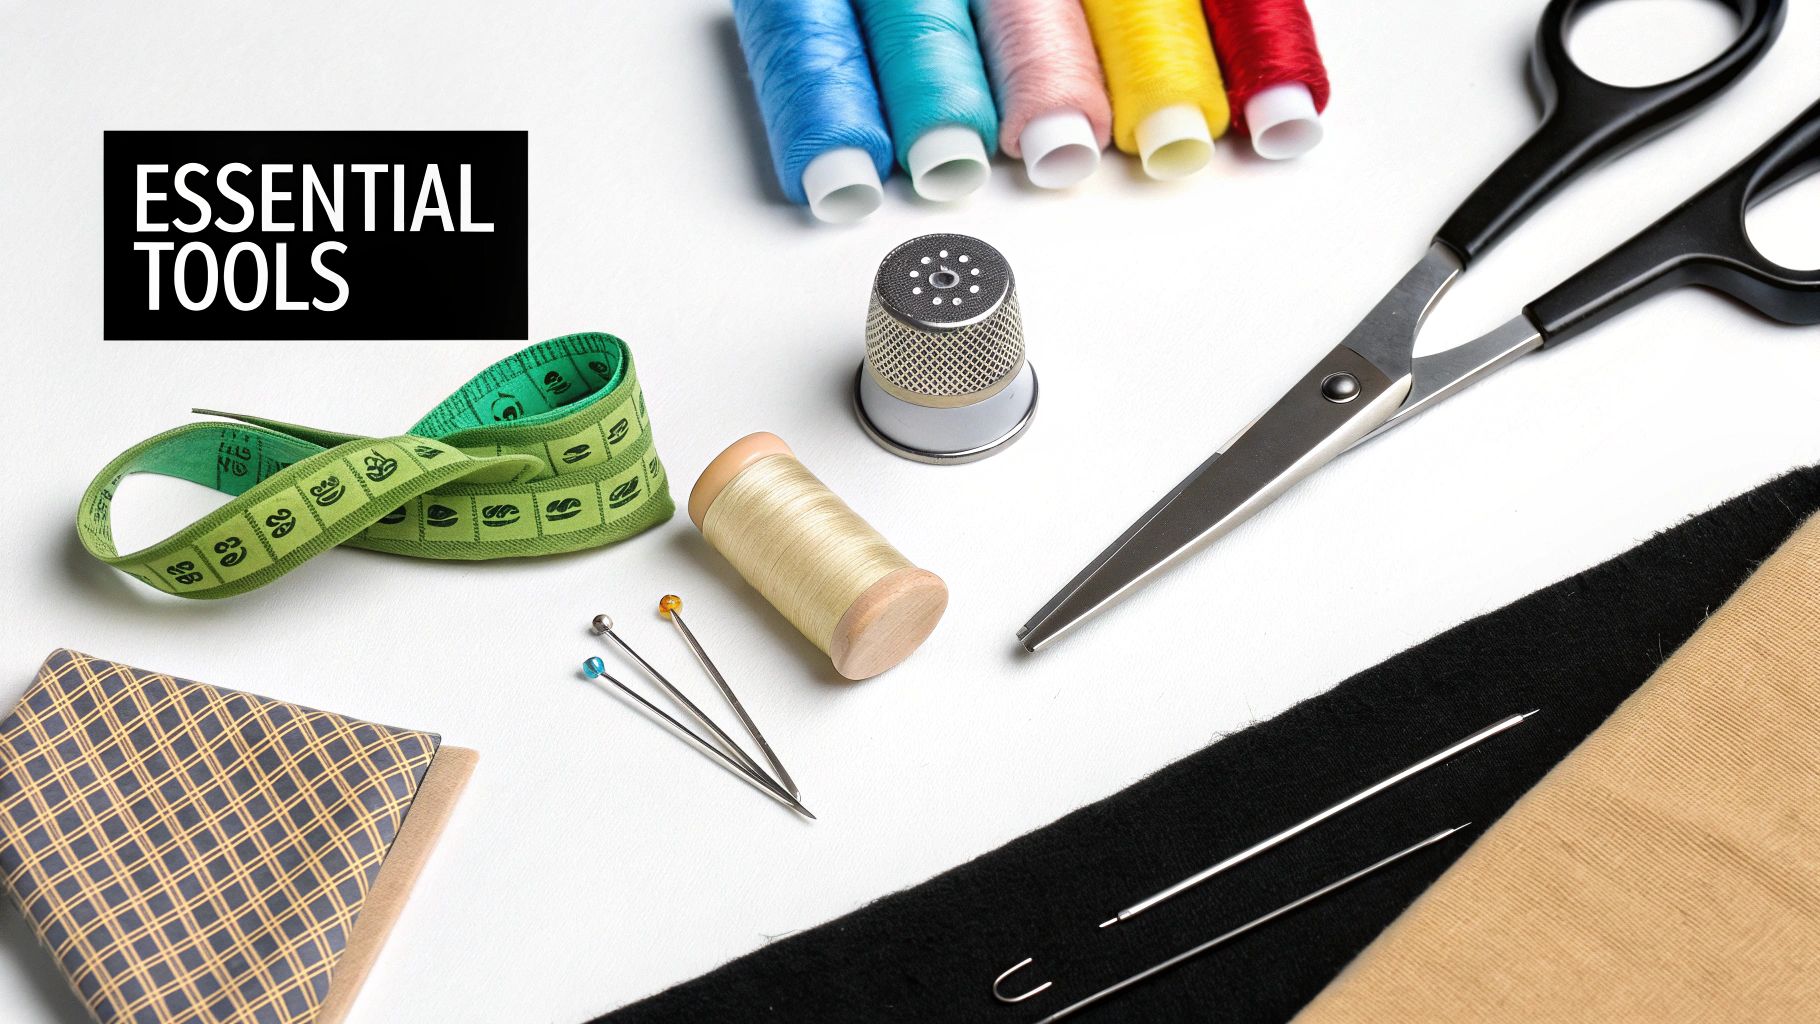
Before diving into sewing a zipper, let's talk about setting yourself up for success. Having the right tools on hand isn't just about making the job easier; it's the difference between a frustrating mess and a clean, professional finish.
Think of it this way: a sharp needle glides through fabric like a hot knife through butter, while the right thread will keep your zipper secure for years to come. Each tool has a purpose, so let’s get your kit sorted.
Needles, Threads, and Other Notions
At the heart of any hand-sewing project are the needle and thread. But for a high-stress area like a zipper, not just any old needle and thread will do.
Here’s what you'll want to grab:
- Hand-Sewing Needles: A variety pack is your best friend here. Look for a pack of "sharps"—they’re a fantastic all-purpose needle for most woven fabrics. You'll appreciate having a finer needle for delicate materials and a tougher one for things like denim.
- Strong Thread: Your standard all-purpose thread might not be up to the task. For zippers, you need something with more muscle. I always reach for button and craft thread or even upholstery thread. It's built to handle the constant pulling a zipper goes through.
- Beeswax or Thread Conditioner: This is one of those little secrets that makes a huge difference. Just run your thread through a small block of beeswax before you start. It strengthens the thread and, more importantly, keeps it from tangling into a frustrating bird's nest while you work.
Don't underestimate the power of a good thimble. It might feel awkward at first, but it protects your finger and gives you the leverage to push the needle through thick layers of fabric and zipper tape with ease and control.
Marking and Cutting Tools
Precision is everything when it comes to installing a zipper. Clean cuts and accurate marks are non-negotiable if you want to avoid a crooked, puckered result.
A tailor’s chalk pencil or a disappearing ink fabric pen is essential. These tools let you draw fine, clear lines for your seam allowance and zipper placement, giving you a perfect roadmap for your stitches.
You'll also need a good pair of fabric scissors—and only use them for fabric! Cutting paper or plastic with them will dull the blades in a heartbeat, causing them to chew up your material instead of slicing cleanly. A small, sharp pair of embroidery scissors is also great for snipping threads close to the fabric for that tidy, finished look. If you're looking to build up these foundational skills, checking out some free sewing lessons is a great place to practice the basics.
Choosing the Right Zipper for Your Project
Now for the main event—the zipper itself. Picking the right one depends entirely on your project. A delicate invisible zipper that disappears into a seam is perfect for a dress, but you'd want a tough metal zipper for a heavy-duty tote bag.
Understanding the different types will help you make the perfect choice every time.
Choosing the Right Zipper for Your Project
A breakdown of common zipper types and their best use cases to help you select the perfect one.
| Zipper Type | Common Materials | Best For | Hand-Sewing Tip |
|---|---|---|---|
| Coil | Polyester | Skirts, dresses, pillows, bags | Flexible and easy to sew through the tape. |
| Molded Plastic | Plastic | Jackets, sportswear, children's clothes | Durable but teeth can be bulky to stitch around. |
| Metal | Brass, Nickel, Aluminum | Jeans, heavy-duty bags, leather jackets | Very strong but requires a sturdy needle. |
| Invisible | Nylon Coil | Formalwear, fitted skirts, blouses | The tape is designed to be sewn very close to the coil. |
Taking a moment to match the zipper to the fabric and function of your project is a small step that pays off big in the final result.
Getting Your Fabric and Zipper Ready

Here's a little secret from years of sewing: the key to a flawless zipper isn't in the final stitch, but in the prep work. It's so easy to get excited and jump right into sewing, but rushing this stage is the number one reason zippers end up crooked, seams pucker, and frustration levels skyrocket.
Taking just a few extra minutes to get your fabric and zipper perfectly set up will make the actual sewing a thousand times easier and more precise. Think of it as drawing a detailed map before a road trip. With clear lines and a stable foundation, your needle will know exactly where to go. This is what truly separates a wobbly, homemade-looking job from a polished, handmade piece you can be proud of.
Mark Your Fabric with Precision
First things first, you need to create clear guidelines for yourself. Trying to eyeball a zipper's placement is a surefire way to end up with a slanted, wonky finish. So, grab your favorite fabric marking tool—tailor's chalk or a disappearing ink pen are perfect for this—and a see-through ruler.
Start by pressing your seam allowances open with a hot iron. This gives you a crisp, flat canvas to work on. Lay your zipper face down along the seam, making sure the metal zipper stop sits just below the top edge of your fabric.
Now, use your ruler and marking tool to draw a faint, straight line down each side of the seam allowance, right where the edges of the zipper tape will lie. These lines are your new best friends. They'll guide every stitch and keep that zipper perfectly straight.
Finish the Seam Edges to Stop Fraying
Before you attach that zipper, take a good look at the raw edges of your seam allowance. Over time, and especially after a few trips through the wash, those threads can start to unravel and weaken the entire zipper installation. You're putting in the time to sew this by hand; let's make sure it lasts.
A simple hand-overcast stitch is a fantastic way to secure those edges. All you do is loop your thread over the raw edge, creating a row of diagonal stitches that bind the fibers together. It doesn't have to be beautiful—it'll be hidden inside—but this one small step adds a ton of durability.
Pro Tip: For fabrics that love to fray (I'm looking at you, linen and loose-weave cotton), a thin line of Fray Check along the raw edges is a lifesaver. Just let it dry completely before you start sewing, and it will create a clear seal that stops unraveling in its tracks.
The Critical Art of Basting
Now we've arrived at the most important step in zipper prep: basting. Basting is simply using long, temporary stitches to hold your zipper perfectly in place while you do the permanent sewing. It's your ultimate defense against the dreaded wavy zipper.
Line up your zipper with the guidelines you marked earlier. Thread a needle with a contrasting color (so it's easy to spot and remove later) and make long running stitches, about 1/4 to 1/2 inch long, down both sides of the zipper tape. Make sure you're only stitching through the tape and the seam allowance, not the main fabric.
Keep these stitches loose—their only job is to be a placeholder. Once basted, your zipper should lie completely flat, with no bumps or ripples. It's now locked in place and ready for the strong, permanent stitches that will make it shine.
And if you're looking to build up a stash for future projects, checking out a curated vintage and modern zipper bundle can be a great way to get a variety of styles on hand.
Mastering Your Essential Hand Stitches
With your zipper neatly basted into place, it's time for the really satisfying part: laying down the permanent stitches that will lock it all together. This is where your project truly comes to life. While there are tons of hand stitches out there, you only need a couple of superstars in your repertoire to handle just about any zipper you can think of.
These two stitches are the real workhorses. One gives you incredible strength—nearly as tough as a machine seam—while the other creates a delicate, invisible finish that’s perfect for dressier clothes. Once you know when to use each one, you’ll be able to confidently tackle anything from a rugged backpack to a fine silk dress.
The Backstitch: Your Powerhouse for Durability
When a zipper needs to be tough, the backstitch is your go-to. It’s hands-down the strongest hand stitch you can learn, creating a solid, unbroken line of thread that looks and acts a lot like a machine's lockstitch. That makes it the perfect choice for any zipper that’s going to see some action.
Just think about the zippers on jeans, jackets, or heavy-duty tote bags. They all take a beating. The backstitch forms a seam that won’t pull apart or gap, ensuring your handiwork is not only beautiful but built to last. It’s the stitch you can really trust.
Here's how to create a perfect backstitch:
- First, bring your needle up from the back of the fabric.
- Take a small stitch backward, poking the needle down about 1/8 inch behind where the thread came up.
- Now, push the needle forward underneath the fabric, bringing it back up about 1/8 inch in front of your very first stitch.
- To continue, just put the needle back down into the same hole where your last stitch ended, and repeat the motion.
This "two steps forward, one step back" rhythm is what creates a chain of connected stitches on top and a slightly overlapping line on the back. The result is a seriously strong seam. Just remember to keep your stitches small and even—that's the key to its strength.
The Slip Stitch: The Secret to an Invisible Finish
If the backstitch is all about strength, the slip stitch is all about elegance. This is your secret weapon when you want the zipper to completely disappear into the seam. It’s absolutely perfect for formalwear, skirts, and any garment where a visible stitch line would just ruin the look.
The magic happens because the thread travels hidden inside the folded edge of your fabric and the zipper tape. All you see—if you can see anything at all—is a tiny, nearly invisible speck of thread catching the outer fabric. When you use a matching thread color, the stitches become completely undetectable from the outside. This is exactly how couture garments get that flawless, high-end finish.
The real trick to an invisible slip stitch is to pick up only one or two threads of the main garment fabric with each stitch. It feels like you're barely grabbing anything, but that's the whole point. This minimal contact is what keeps it hidden.
Getting the slip stitch right just takes a little finesse.
- Hide your knot: Start by tucking the knot inside the seam allowance fold so it’s out of sight.
- Travel in the fold: Slide your needle through the folded edge of the fabric for about 1/4 inch.
- Catch the zipper tape: Bring the needle out and pick up a tiny bit of the zipper tape right across from where your thread emerged.
- Go back into the fold: Pop the needle back into the fabric fold right next to your last stitch and travel another 1/4 inch inside that fold.
- Keep it going: Continue this pattern, which creates a little "ladder" of stitches between the fabric and the zipper, gently pulling them together.
This stitch is more about precision than power. Take your time, and you'll be creating stunningly clean zipper finishes.
And if threading needles drives you crazy, investing in some high-quality easy-threading needles can be a real game-changer. They honestly save so much time and frustration.
With these two stitches under your belt, you're officially ready to sew a zipper by hand for any project that comes your way.
Exploring Different Zipper Application Techniques
Once you've got the backstitch and slip stitch down, you can start putting them to work installing actual zippers. Think of these different application styles as recipes—they use the same basic ingredients (your stitches) but create entirely different results. Learning these classic methods will really broaden your sewing horizons, giving you the ability to pick the perfect finish for any project that comes your way.
We're going to dive into three of the most common and versatile ways to sew in a zipper. Each one gives a distinct look and has its own best-use cases, depending on the garment and fabric. Getting comfortable with them means you'll always know which one to pick for that polished, professional touch.
The Classic Centered Zipper
When you picture a standard zipper, the centered application is probably what comes to mind. It's clean, symmetrical, and beautifully straightforward, which makes it a fantastic starting point for beginners. For this style, the two folded edges of the fabric meet right down the middle, neatly covering the zipper teeth and creating a single, crisp seam line.
You’ll see this style everywhere—on the back of dresses, skirts, cushion covers, and little pouches. Its biggest strength is its simplicity. After you’ve basted the zipper into place under the pressed-open seam, you'll use that trusty backstitch to create a strong, lasting hold. The goal is to sew a clean rectangle around the zipper, keeping your stitch line about 1/4 inch from the center seam on both sides and across the bottom.
The Traditional Lapped Zipper
For a more tailored, vintage-inspired finish, the lapped zipper is a go-to. This technique is a classic for a reason: it’s both incredibly durable and adds a lovely design detail. Instead of having the fabric edges meet in the middle, one side overlaps the other, completely hiding the zipper under a tidy flap.
This is the kind of zipper application you’ll often find on the side seams of classic trousers or A-line skirts. That little overlap provides an extra layer of security and creates an elegant, asymmetrical look. To make it happen, one seam allowance gets folded under and stitched right up against the zipper teeth. The other side is then folded over to form the "lap" and topstitched down, again using a strong backstitch for durability.
If there’s one secret to a perfect lapped zipper, it’s all in the pressing. Getting that overlap crisply ironed is absolutely essential for a sharp, professional-looking edge. If you rush this part, you'll likely end up with a soft or uneven flap.
You can see the difference between the workhorse backstitch we use for these structural applications and the more discreet slip stitch here.
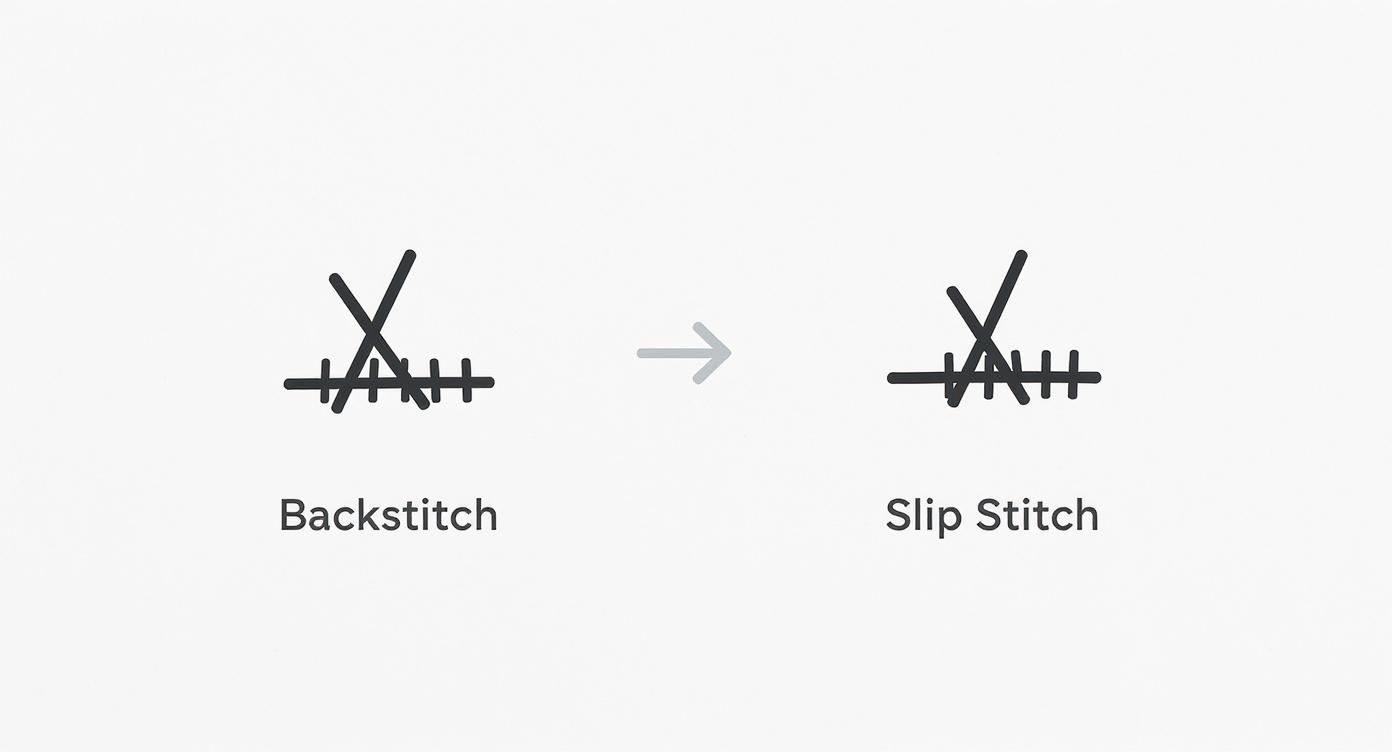
The image really shows how the backstitch is built for strength, while the slip stitch is all about being invisible. This helps you decide which one is right for the job at hand.
The Seamless Invisible Zipper
When you want a truly high-end, seamless look, nothing beats an invisible zipper. Just as the name implies, when you install one correctly, the zipper completely disappears into the seam. The only thing you’ll see is the delicate little pull tab. The zipper's teeth are designed to coil away to the back, letting the fabric edges meet perfectly for a completely uninterrupted line.
This is the gold standard for formal wear, fitted dresses, and elegant blouses—anywhere a visible zipper would just feel out of place. It might look intimidating, but learning how to sew a zipper by hand this way is totally doable. The real trick is to gently uncurl the zipper teeth with your fingers as you sew, using a slip stitch or a tiny pick stitch to attach the zipper tape to the seam allowance. You have to get your needle in as close to those teeth as you possibly can. To get started, you can find a great selection of these specialized fasteners, like a poly invisible zipper by Coats & Clark.
And don't think you're alone in wanting to master this skill! It's estimated that in the United States, a staggering 4.5 billion zippers are used every single year. What's more, sewing surveys show that over 30% of home sewers actually prefer to hand-sew zippers on delicate fabrics or vintage projects where a machine could do more harm than good. The interest is huge—a single YouTube tutorial on this very topic has over 2 million views.
If you're looking to apply these skills to a full garment, you might get some great construction tips from this guide on making your own hoodie from scratch.
Ultimately, each of these techniques—centered, lapped, and invisible—is a tool for solving a different design puzzle. By giving them a try, you’ll build the confidence to add a perfect, functional closure to any project you can dream up.
Got Questions? Let's Troubleshoot Your Hand-Sewn Zippers
Even when you've got the basics down, zippers can still throw you a curveball. Don't worry, it happens to all of us! Every sewer, no matter how experienced, hits a snag now and then.
Let's walk through some of the most common questions I hear from fellow stitchers. Think of this as your personal troubleshooting guide—a way to get unstuck and back to creating something you're proud of.
How Can I Make My Stitches Look Neater?
This is probably the number one frustration I see. The good news is that neatness is just a matter of practice and a few good habits. The quickest way to improve is to give yourself a guide. Use a ruler and a fabric marker or chalk pencil to draw a very faint line right where you want your stitches to land.
Following a pre-drawn line works wonders for keeping things straight. Also, focus on finding a steady rhythm and making each stitch the same length. It's the consistency that makes a seam look professional, not how fast you sew.
A thimble is an absolute game-changer for even stitching. It lets you push the needle through with smooth, consistent pressure, which gets rid of the little jerks and wobbles that create uneven stitches. Also, be careful not to pull your thread too tight; a gentle tug to secure the stitch is all you need. Over-tightening is what causes those dreaded puckers.
What's the Strongest Hand Stitch for a Zipper?
When you need a zipper to be absolutely bomb-proof, nothing beats the backstitch. It is, without a doubt, the champion for strength and durability.
The backstitch creates a solid line of thread where each stitch overlaps the last one, closely mimicking the lockstitch of a sewing machine. This makes it the go-to choice for any project that will see a lot of wear and tear.
I always use a backstitch for things like:
- Jeans and Trousers: That fly front takes a lot of stress, and you need a stitch that won’t quit.
- Bags and Backpacks: These items carry weight and get zipped and unzipped constantly.
- Fitted Outerwear: A good jacket needs seams that can handle plenty of movement without popping.
For maximum strength, keep your backstitches small—about 1/16 to 1/8 inch is ideal. Pair that with a heavy-duty thread (like a button or upholstery thread), and you'll have a hand-sewn zipper that's built to last.
How Do I Stop Fabric From Puckering Around My Zipper?
Puckering is almost always a sign that something shifted during the sewing process. The single best way to prevent it is to baste your zipper in place before you even think about your final stitches. This simple step is non-negotiable; it holds everything flat and stable, preventing the fabric or zipper tape from stretching out of shape as you work.
Another culprit is accidentally stretching the fabric as you sew. Try to maintain a light, relaxed grip. If you're working with a naturally stretchy or flimsy fabric, stabilizing the seam allowance is a pro move. Just iron a thin strip of lightweight fusible interfacing onto the seam allowance where the zipper will sit. This gives your stitches a solid foundation and virtually eliminates any chance of puckering.
Can I Hand Sew a Separating Zipper?
Absolutely! A separating zipper, the kind you find on a jacket or a hoodie, isn't much different from a standard one. The most important thing to get right here is perfect alignment.
You’ll be sewing each side of the zipper tape to the garment one at a time. Before you start, zip it up and lay it exactly where it needs to go. Use pins, or even better, a chalk marker, to mark key points on both the zipper tape and the garment. Be sure to mark the top, the bottom, and any seams it crosses, like a waistline.
Baste one side of the zipper first. Then, close the zipper and double-check that the second side lines up perfectly with all your marks before you baste it down. A strong backstitch is a must here to make sure the zipper can handle the daily abuse a jacket endures. Trust me, learning how to hand sew a zipper into a jacket is an incredibly empowering skill to have.
At Famcut.com, we're passionate about providing the tools and knowledge you need to bring your creative visions to life. From cosplay to quilting, find everything you need for your next sewing adventure at https://famcut.com.