


How to Sew a Flat Felled Seam for a Professional Finish
Ever wondered how jeans get those iconic, tough-as-nails seams? The secret is the flat-felled seam. It’s a classic technique that creates a super durable, fully enclosed finish with two distinct, parallel lines of stitching. This is how you make garments that don't just look professional—they're truly built to last.
Why Flat-Felled Seams Are a Game Changer
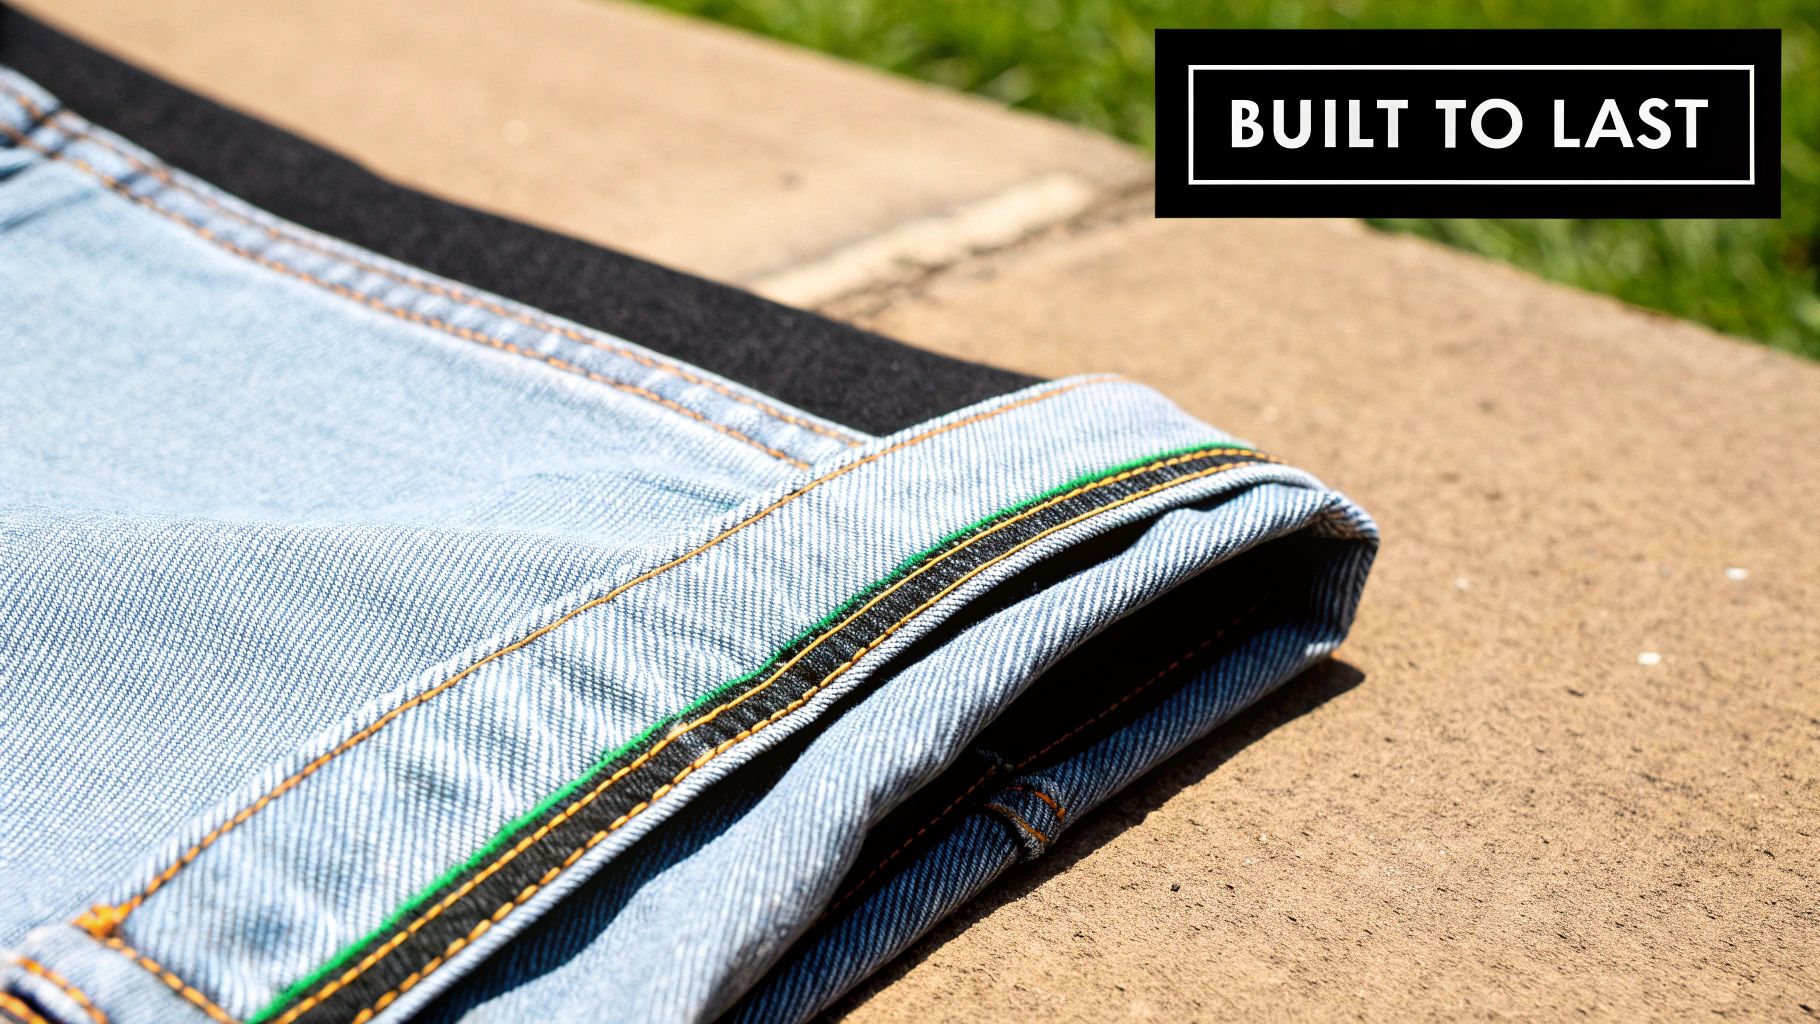
If you've ever really looked at a great pair of jeans or a crisp button-down shirt, you’ve seen a flat-felled seam in action. It's so much more than a way to join two pieces of fabric. It’s a structural workhorse that strengthens the entire garment. By tucking all the raw edges neatly inside the seam, it leaves the inside looking just as clean and tidy as the outside.
This is exactly why it's a go-to for anyone making rugged workwear, durable outdoor gear, or even elaborate cosplay costumes. There are a few big reasons for its popularity:
- Unmatched Durability: With two rows of stitching holding multiple layers of folded fabric, this seam is practically bulletproof. It can take a serious amount of stress and pulling without giving up.
- A Chafe-Free Finish: Because all the raw edges are hidden away, the inside of the garment is perfectly smooth. This makes it a fantastic choice for unlined jackets, shirts, and activewear where comfort is key.
- Professional Appearance: Those clean, parallel lines of topstitching are a hallmark of high-quality construction. It’s a detail that instantly gives your projects a polished, ready-to-wear look.
A Time-Tested Technique
This method is anything but new; it’s a cornerstone of garment construction that has been around for centuries. The flat-felled seam dates back to at least the 1830s, long before home sewing machines were a thing.
As described in The Workwoman’s Guide from 1840, dressmakers and tailors relied on this technique to create strong, hard-wearing finishes for shirts and trousers by completely encasing those fray-prone raw edges. It was an ingenious solution that combined strength with a neat appearance.
Learning to sew a flat-felled seam is a fantastic investment in your skill set. Mastering techniques like this adds a seriously professional tool to your sewing arsenal and contributes to a broader range of practical skills that are incredibly rewarding to learn. With this one skill, you can elevate your projects from simply "handmade" to truly high-end.
Setting Up for a Perfect Flat Felled Seam
Let's be honest, a beautiful flat-felled seam doesn't just happen. The secret to getting that clean, professional finish starts way before you sit down to sew. Getting your setup right is what separates a frustrating struggle from a seam you can be proud of.
First, let's talk about your sewing machine. Think of it as your partner in this process. For the topstitching part of this seam, I almost always lengthen my stitch slightly. A standard stitch can look a bit cramped, but bumping it up to 3.0-3.5mm gives it room to breathe, especially on beefier fabrics like denim or canvas. It just looks so much cleaner and helps the fabric glide through without puckering.
Your Toolkit for Nailing This Seam
While your sewing machine does the heavy lifting, a few specific tools will make your life so much easier. You can get by with a standard presser foot, but if you want to level up your game, these are my non-negotiables.
- Edge-Stitching Foot: This foot is an absolute game-changer. It has a little guide that you run right along the folded edge, guaranteeing your topstitching is perfectly straight and evenly spaced. No more wobbles.
- Sharp Scissors or a Rotary Cutter: You're going to be trimming one side of the seam allowance very, very close to your stitching. A dull blade will just chew up the fabric and make a mess. Trust me on this.
- Seam Gauge or Small Ruler: Precision is everything here. You need to be consistent when you're measuring and trimming, and a good seam gauge is the best tool for the job.
- A Good, Hot Iron with Steam: You and your iron are going to become best friends. Pressing is critical at every stage to get those crisp, flat folds that are the hallmark of this seam.
My Biggest Tip: Don't skip the pressing! Seriously. A good, hot press sets each fold in place before you even get back to the machine. It does half the work for you and makes sure the fabric behaves exactly as you want it to.
Choosing the Right Needle and Thread for Your Fabric
The wrong needle and thread can completely ruin your seam. It’s a classic mistake that leads to skipped stitches, broken thread, and a seam that won't last—which is the whole reason we're sewing a flat-felled seam in the first place!
Think about it: sewing a pair of heavy denim jeans is a totally different ballgame than stitching a delicate cotton shirt. You need a needle that can punch through the fabric without a fight and a thread that can handle the stress.
To make it simple, here’s a quick-glance table I use to pair up needles and thread for the fabrics most commonly used with this seam.
Needle and Thread Pairings for Common Fabrics
This table provides quick recommendations for selecting the right sewing machine needle and thread type based on the fabric you are using for your flat felled seam.
| Fabric Type | Recommended Needle | Recommended Thread |
|---|---|---|
| Denim or Canvas | Jeans/Denim Needle (Size 90/14 or 100/16) | Heavy-Duty or Topstitching Thread |
| Cotton Shirting | Universal Needle (Size 80/12) | All-Purpose Polyester Thread |
| Linen or Twill | Universal or Microtex Needle (Size 80/12) | All-Purpose Polyester or Cotton Thread |
| Lightweight Poplin | Universal Needle (Size 70/10 or 80/12) | All-Purpose Polyester Thread |
Taking just a few minutes to get these details right sets you up for success. With your machine tuned, your tools ready, and the right needle in place, you're ready to create a durable, beautiful flat-felled seam.
Sewing the Classic Flat Felled Seam
Alright, let's get down to the fun part—actually sewing this incredibly strong and polished-looking seam. The whole process for a flat-felled seam is pretty logical, but the very first step can feel a bit strange if you’re used to standard sewing. You’ll need to forget everything you know about putting “right sides together” for a moment, because we’re starting this one backward.
The entire technique really just boils down to a simple rhythm: stitch, press, trim, fold, and topstitch. Your iron is going to be your best friend here, just as important as your sewing machine. Using it generously between each stage is the secret to getting those perfectly crisp folds that make a flat-felled seam look so professional.
The Initial Seam Construction
First things first, grab your two pieces of fabric and place them with their wrong sides together. I can’t stress this enough—it's the most crucial and easiest step to forget! Pin them securely so nothing slides around while you’re sewing.
Getting the seam allowance right is key here. The gold standard is 5/8 inch (1.5 cm). This gives you plenty of fabric to trim and fold without making the seam feel too bulky. You can get away with a 1/2-inch seam allowance, but it’s a bit more fiddly, especially if you're new to this technique.
With your fabric pinned, go ahead and sew a basic straight stitch, keeping that 5/8 inch seam allowance consistent all the way down.
This simple workflow shows how the process flows from prepping the fabric to the back-and-forth between your machine and your iron.
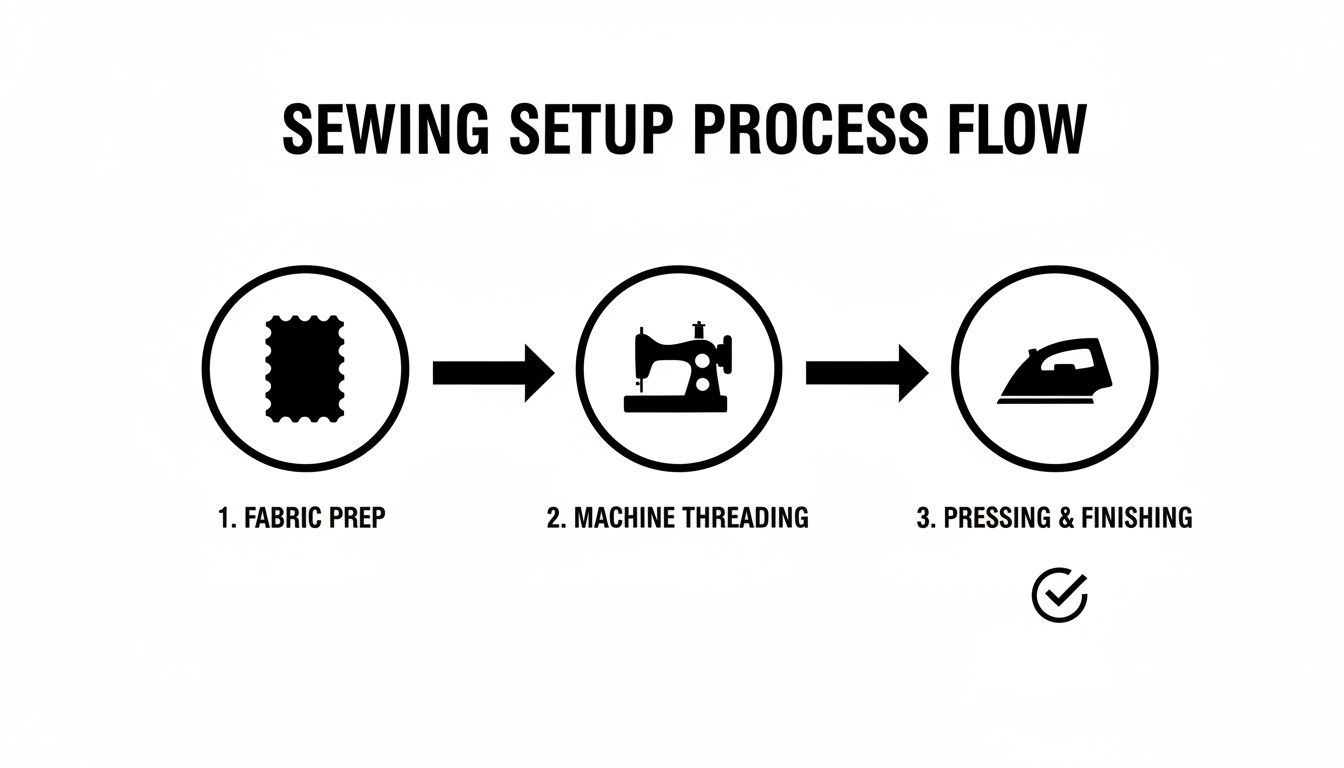
As you can see, pressing isn't just something you do at the very end; it’s a critical part of building the seam correctly.
Pressing and Trimming for Precision
Once you've stitched that first seam, head over to your ironing board. The first thing you'll want to do is press both seam allowances open. This little step helps "set" the stitches and makes the next fold much cleaner. After that, press both seam allowances together, over to one side.
Now it's time to trim. You have to decide which seam allowance will be on top. For something like the side seam on a shirt, you'd typically press it toward the back of the garment. For jeans, the direction can vary, but the most important thing is to be consistent.
- The Wider Allowance: This is the one you just pressed to the top side. Leave it as is—at its full 5/8 inch width.
- The Narrower Allowance: This is the one hiding underneath. This is the one you need to trim.
Grab a sharp pair of fabric scissors and carefully trim that bottom seam allowance down to about 1/4 inch (6 mm). Take your time here! Good lighting is a huge help, and you definitely want to avoid accidentally snipping through the main fabric.
Folding and Encasing the Seam
With one side trimmed down, you’re ready to create the "fell." Take the wider, untrimmed seam allowance and simply fold its raw edge over to meet the trimmed edge. It should neatly tuck under, completely covering the raw edge of the piece you just cut.
Pro Tip for a Perfect Fold: Put the pins down for a second and let your iron do the work. Press this fold firmly into place. A hot iron and a bit of steam will create a sharp crease that practically holds itself, making the final topstitching a breeze.
This fold is what gives the seam its strength and clean finish. You're basically creating a little fabric tunnel around the raw edges that you'll then stitch flat. Once it's nicely pressed, you can add a few pins to keep everything from shifting for the final step.
The Final Topstitching
Head back to your sewing machine one last time. The goal now is to stitch that folded edge down, securing all the layers flat against the garment. For the best look, you want to sew as close to that folded edge as you can—I usually aim for about 1/8 inch (3 mm) away.
This is where a specialty presser foot, like an edge-stitching foot, really shines. It has a little guide that runs right along the fold, giving you a perfectly straight line of stitches without any effort. If you don't have one, no worries—just sew slowly and keep your eye locked on the edge of the fold.
Once that last line of stitching is done, give the whole seam a final press with your iron. And that's it! You've just created a classic, durable, and professional-looking flat-felled seam that’s ready to stand up to years of wear and tear.
Creative Uses for Your New Sewing Skill
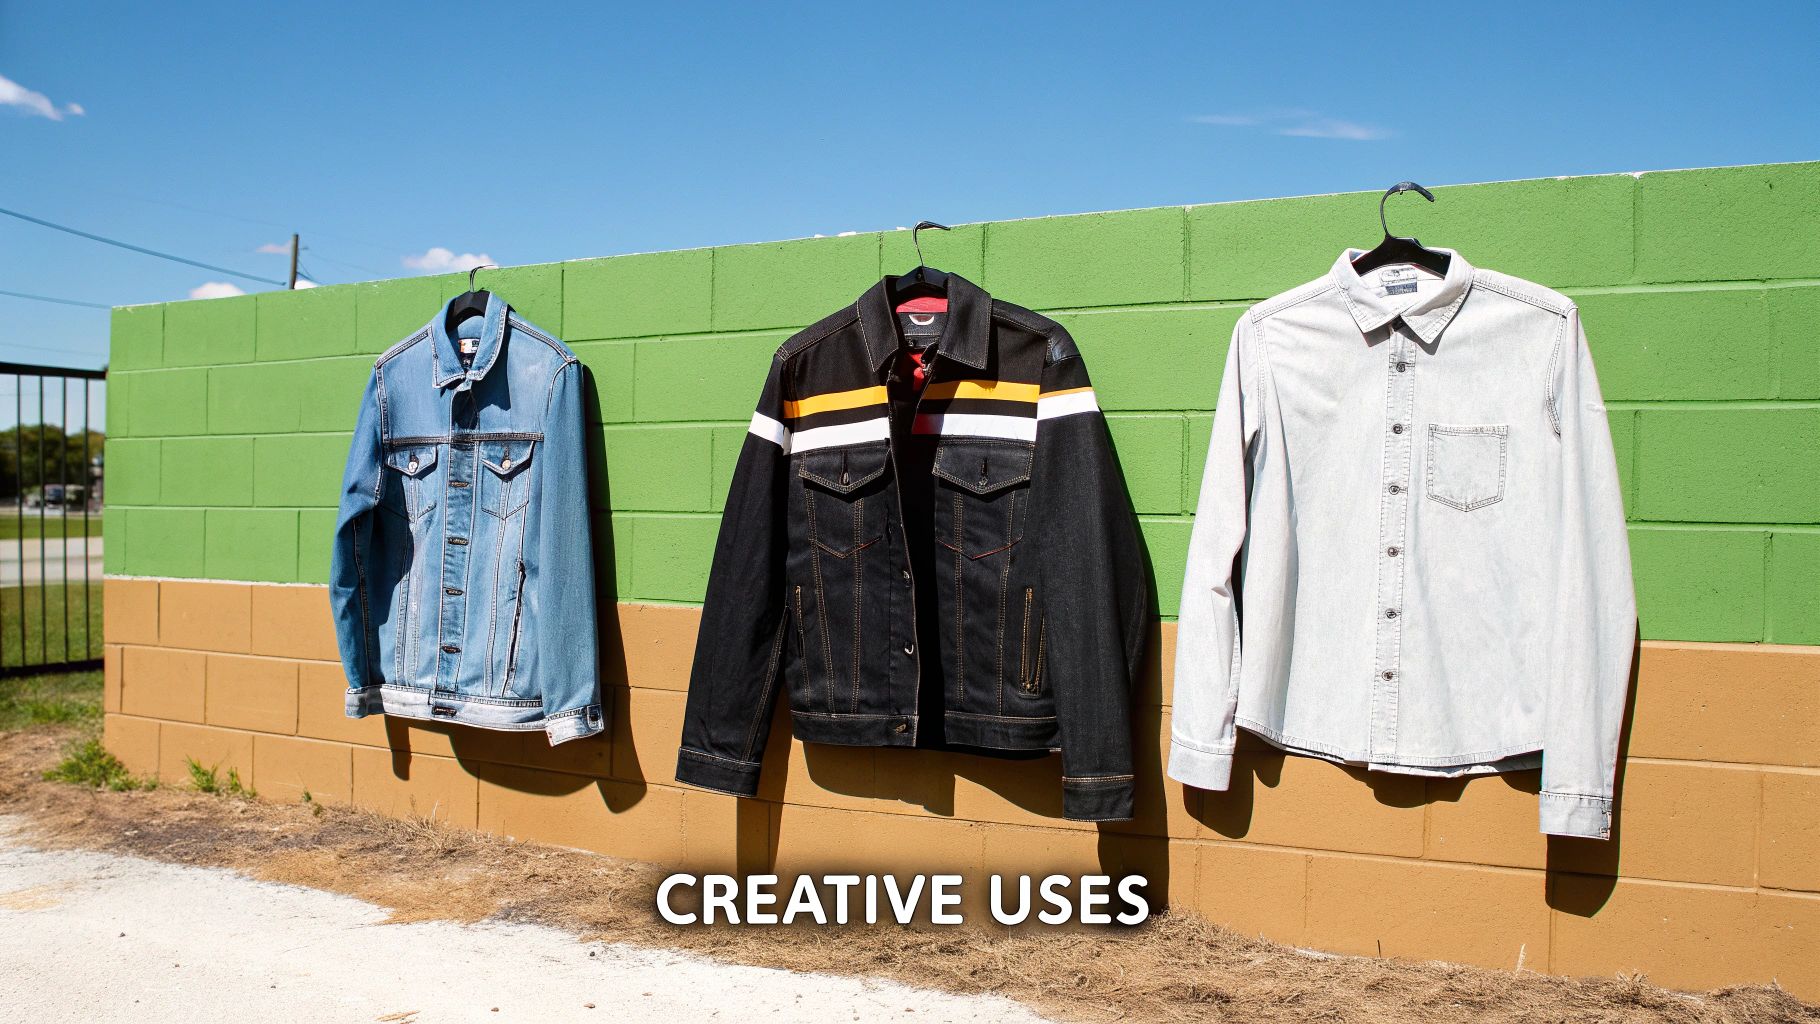
Alright, you've nailed the classic flat-felled seam. Now for the fun part: putting it to work. Before we jump into specific projects, let's talk about a popular trick of the trade: the mock flat-felled seam. This is a fantastic shortcut that gives you that iconic double-stitched look from the outside but with a lot less fuss.
Think of it as the faster, slightly less polished cousin of the traditional version. Instead of meticulously encasing the raw edges, you just press both seam allowances to one side, finish the raw edge (a serger or zig-zag stitch works great), and topstitch everything down. It’s perfect for projects where only the exterior matters, like the yoke of an unlined jacket or when you're wrangling thick fabric that would get way too bulky with a true felled seam.
When to Use a Mock Flat Felled Seam
Knowing when to opt for the mock version will save you a ton of time and potential headaches. I find myself reaching for this technique in a few common situations.
- Heavyweight Fabrics: When you're sewing with hefty denim, canvas, or thick wool, a true flat-felled seam can create a stiff, uncomfortable ridge. The mock version cuts down on that bulk significantly, making the garment much more comfortable to wear.
- Time-Sensitive Projects: Let's be honest, sometimes you just need to get it done. The mock seam is faster. Less trimming and precise folding means you can power through your project without sacrificing that rugged, topstitched aesthetic.
- When Only One Side Shows: If the inside of your garment will be hidden by a lining, there’s no real need for the perfectly enclosed finish of a classic flat-felled seam. Save yourself the effort!
Key Takeaway: The mock flat-felled seam is your go-to for getting the look of a classic seam with less bulk and in less time. It's a smart, practical choice for heavy fabrics and lined garments where you need durability without the extra layers.
Real-World Applications for Garment Makers
This skill is a game-changer for making durable, long-lasting clothes. Two areas where this technique really proves its worth are in making jeans and cosplay.
For anyone who loves sewing their own denim, the flat-felled seam is practically a requirement. There’s a reason it’s the industry standard. When Levi Strauss & Co. adopted this seam in the late 1800s, it was a massive leap forward, replacing uncomfortable rivets with a finish that was both stronger and more comfortable. This innovation is a major reason why over 70% of premium jeans still use this construction; it helps them withstand 30% more wear cycles than older methods. For a deeper dive, you can explore the history of this iconic feature by learning more about sewing a flat felled seam from Madam Sew. Use it on yokes, inseams, and side seams to create jeans that are truly built to last.
The Cosplayer’s Secret Weapon
Cosplayers know that durability is everything. A costume has to survive an entire convention weekend of walking, posing for photos, and general chaos. The flat-felled seam is an absolute lifesaver for creating structured, resilient pieces that won't fall apart at the worst possible moment.
Here's where it really shines:
- Sturdy Cloaks and Capes: Those long, flowing seams on a cape are prime spots for stress and tearing. A flat-felled seam gives them the strength they need to hold together.
- Structured Jackets and Armor Panels: When you're making a military-style uniform or a structured sci-fi jacket, this seam provides crisp, clean lines that hold their shape perfectly.
- Durable Trousers: For any character's pants, whether it's military BDU's or an adventurer's rugged trousers, this seam ensures the inseam and side seams can handle any action pose you throw at them.
By using this technique in your builds, you ensure your creations not only look incredible but are tough enough to survive any adventure.
Working Through Common Flat Felled Seam Mishaps
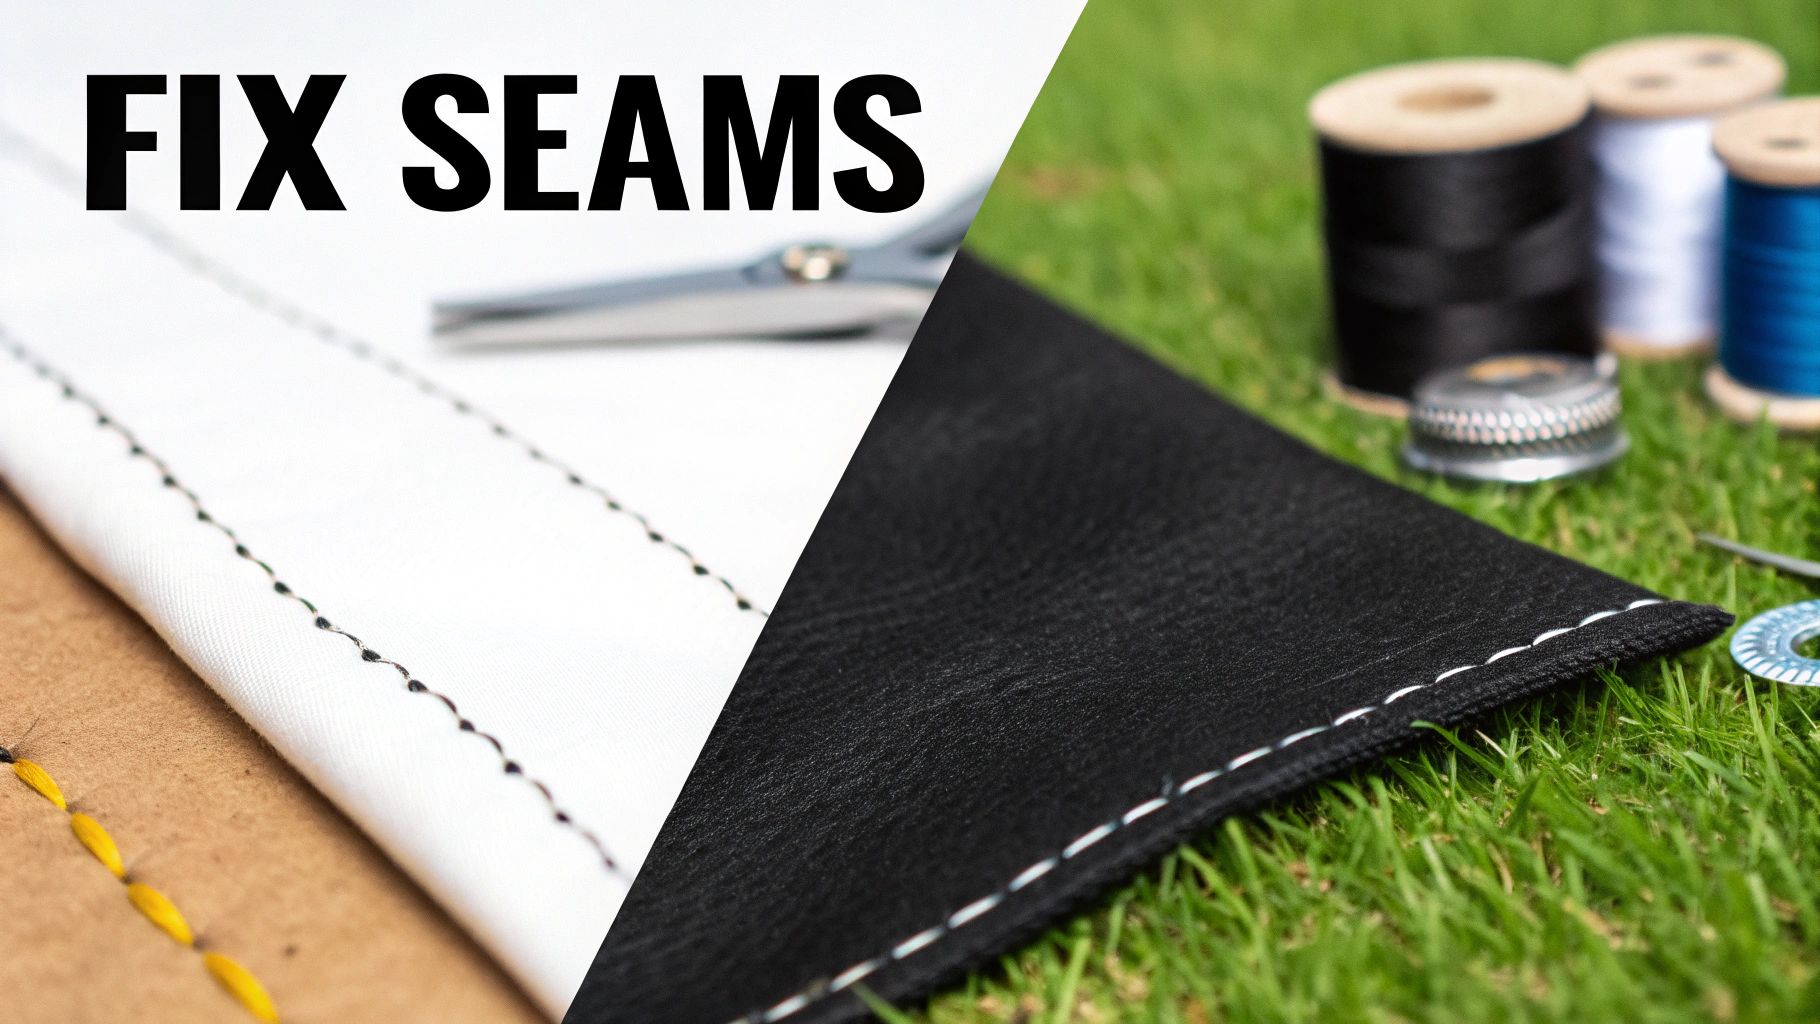
Even after sewing thousands of these, I still hit a snag now and then. A perfectly executed flat-felled seam is a thing of beauty, but wobbly stitches, puckered fabric, or a seam that's just too bulky can be incredibly frustrating. The good news is that these are common hurdles, and they're almost always easy to fix once you know what to look for.
A dead giveaway of a seam sewn by a beginner is that final line of topstitching—if it's wavy or uneven, it stands out. This almost always boils down to one simple thing: you weren't using a consistent guide while sewing. You need a reliable reference point to keep that line perfectly straight.
Taming Uneven Topstitching
If your topstitching wanders off course, don't just reach for the seam ripper and hope for the best on your next attempt. A few small adjustments to your technique will solve this for good. Your sewing machine is your best ally here.
- Try an Edge-Stitching Foot: Honestly, this is the easiest fix. This specialty foot has a little metal guide that runs right along the folded edge of your seam. It physically prevents you from veering off track, resulting in flawlessly straight stitches.
- Draw a Guideline: No special foot? No problem. Grab a fabric marker or chalk pencil and draw a faint line exactly where you want your stitches to go. It’s a simple but effective way to stay on target.
- Adjust Your Needle Position: Most modern machines let you shift the needle left or right. Try moving it over until the edge of your standard presser foot lines up perfectly with the seam's folded edge. You’ve just created your own guide without buying a thing.
Battling Puckers and Bulk
Puckering is another classic headache, especially on lighter fabrics like cotton shirting or lawn. When the fabric bunches up under your topstitching, it's usually a sign that your machine's tension is off. The fix? Try lowering your upper thread tension just a little. This lets the stitch form more gently, allowing the fabric to lie smooth and flat.
On the flip side, you have bulk—the arch-nemesis of anyone working with heavy-duty fabrics like denim or canvas. If your finished seam feels like a stiff, uncomfortable ridge, it’s because there’s simply too much fabric crammed inside.
My Go-To Fix for Bulky Seams: I deal with this before I even start topstitching. When you're grading the seam allowances, instead of trimming that bottom layer to the standard 1/4 inch, take it down even further. Trimming it to a scant 1/8 inch makes a world of difference, removing just enough material to help the final seam press beautifully flat.
And one last trick: a tailor’s clapper is your secret weapon for those beastly seams. After you give the seam a good shot of steam with your iron, immediately press the clapper down on it firmly. This heavy block of wood traps the steam and heat, setting a crisp, flat press that an iron alone can never quite achieve. It's the final touch for mastering a flat-felled seam on even the toughest materials.
The effort is worth it. With its interlocking stitches, the mechanical superiority of this seam provides incredible strength. In fact, standardized tests have revealed it has 50% greater resistance to tearing than a French seam. You can dive deeper into the technical advantages of flat felled seams at coblaith.net.
Answering Your Flat-Felled Seam Questions
Once you get the hang of the basic technique, you'll inevitably run into some specific questions on your own projects. That's a good thing! It means you're thinking like a pro. Let's tackle some of the most common queries that pop up so you can sew your next seam with total confidence.
Figuring out which seam finish to use is a huge part of getting a professional result. The flat-felled and the French seam are probably the two most well-known enclosed seams, but they really couldn't be more different.
What’s the Difference Between a Flat Felled Seam and a French Seam?
The main distinction comes down to looks and strength. A flat-felled seam is designed to be seen. It puts two parallel lines of stitching right on the outside of the garment, creating a tough, utilitarian look that lies perfectly flat. That's why it's the gold standard for high-stress items like denim jeans, workwear, and rugged outdoor gear.
A French seam, on the other hand, is the opposite—it’s all about elegance and discretion. It's a delicate, narrow seam that gets tucked away entirely on the inside of the garment. From the outside, you only see a single, clean stitch line. This makes it perfect for lightweight or sheer fabrics like chiffon, silk, or voile, where you need a beautiful, clean finish that won't fray or be visible through the fabric.
Can You Sew a Flat-Felled Seam on a Curve?
You sure can, but this is where your patience and precision really come into play. Sewing a flat-felled seam on a curve—think of a jacket's armhole or a classic shirt yoke—is a true mark of skill.
The trick is to carefully clip into the seam allowance of the inner curve before you press and topstitch. These little snips give the fabric room to spread and lie flat, which is the only way to avoid those dreaded puckers. Go slowly, use more pins than you think you need, and press everything meticulously at each stage. It’s the key to a smooth, professional-looking curve.
A Quick Tip for Tight Curves: When you're wrestling with a really tight curve, try using a slightly narrower seam allowance from the start. A 1/2-inch allowance is often much easier to control than the standard 5/8-inch, since you have less fabric to fold and tuck into place.
What Is the Best Seam Allowance for a Flat-Felled Seam?
The go-to standard across the industry is 5/8 inch (1.5 cm). This measurement really is the sweet spot, giving you just enough fabric to work with for a clean fold and stitch.
Here’s why it works so well: after you sew the first seam, you trim one side down to about 1/4 inch (6 mm). The remaining 5/8-inch side is the perfect width to fold over that trimmed edge, encase it completely, and leave you with a final topstitched seam that's just over 1/4 inch wide. Stick with 5/8 inch whenever possible; it’s the most reliable choice.
Here at Famcut.com, our goal is to help you master the techniques that make your cosplay and sewing projects shine. We've got tons of resources and a great community to help you level up your skills. Find your next great idea over at https://famcut.com.