


How to Make Quilt Labels Your Heirlooms Deserve
Finishing a quilt is a moment of pure satisfaction, but there's one final step that truly completes your masterpiece: adding a label. Whether you hand-write it, embroider it, or print it on fabric, this small patch carries the story of your creation. Think of it as the artist's signature on a painting—it transforms your beautiful work into a documented heirloom.
The Enduring Power of a Well-Made Quilt Label
A quilt label is so much more than a simple tag. It's the final chapter you write, the official mark that turns a craft project into a piece of history for your family, friends, or even future quilt lovers. It's your way of saying, "I made this, and it matters."
This final touch honors the hours of skill and heart you poured into every single stitch. Beyond the sentimental value, a good label adds a layer of practicality and legitimacy to your work, securing its place in history.
Preserving History and Adding Value
A label does more than just say who made the quilt. It provides the context that breathes life into its story for generations. Imagine a great-grandchild finding your quilt tucked away fifty years from now. The label is their direct connection to you—it tells them who you were, where you lived, and when you created this piece of their family's story.
This documentation also adds real, tangible value. A thoughtfully made label can significantly boost the worth of your quilt. Labeled quilts often fetch 25-40% higher prices at auctions and markets. As a concrete example, in 2023, Christie's auction house reported that authenticated, labeled antique quilts averaged $2,500, while their unlabeled counterparts sold for around $1,600.
With an estimated 9-11 million active quilters worldwide, a simple label helps your work stand out and get the credit it deserves. You can dig deeper into quilting market trends and statistics to see just how much documentation matters.
"A quilt without a label is a story half-told. It's the final, loving whisper that ensures the maker's voice is never lost to time."
The Practical Side of Labeling
Storytelling aside, a label serves some very important practical needs. One of the most helpful things you can include is care instructions. A few words on how to wash and dry the quilt can prevent accidental damage and make sure your creation lasts for decades.
Here are a few other practical reasons to always add a label:
- Documentation for Shows: If you ever want to enter your quilt into a show, a label is almost always a requirement for entry.
- Proof of Artistry: It establishes your quilt as a unique piece of textile art with its own provenance, just like a painting or sculpture.
- A Personal Touch for Gifts: When you give a quilt as a gift, the label makes it even more meaningful and personal for the recipient.
Ultimately, a quilt label is your legacy in miniature. It’s a testament to your creativity and a timeless gift to the future.
Choosing the Right Tools and Materials
Before you even think about what to write on your quilt label, you need to gather the right supplies. Having the proper tools isn't just about making the job easier; it’s about creating a label that looks professional and will actually last as long as the quilt itself. Think of it as setting the foundation for that perfect finishing touch.
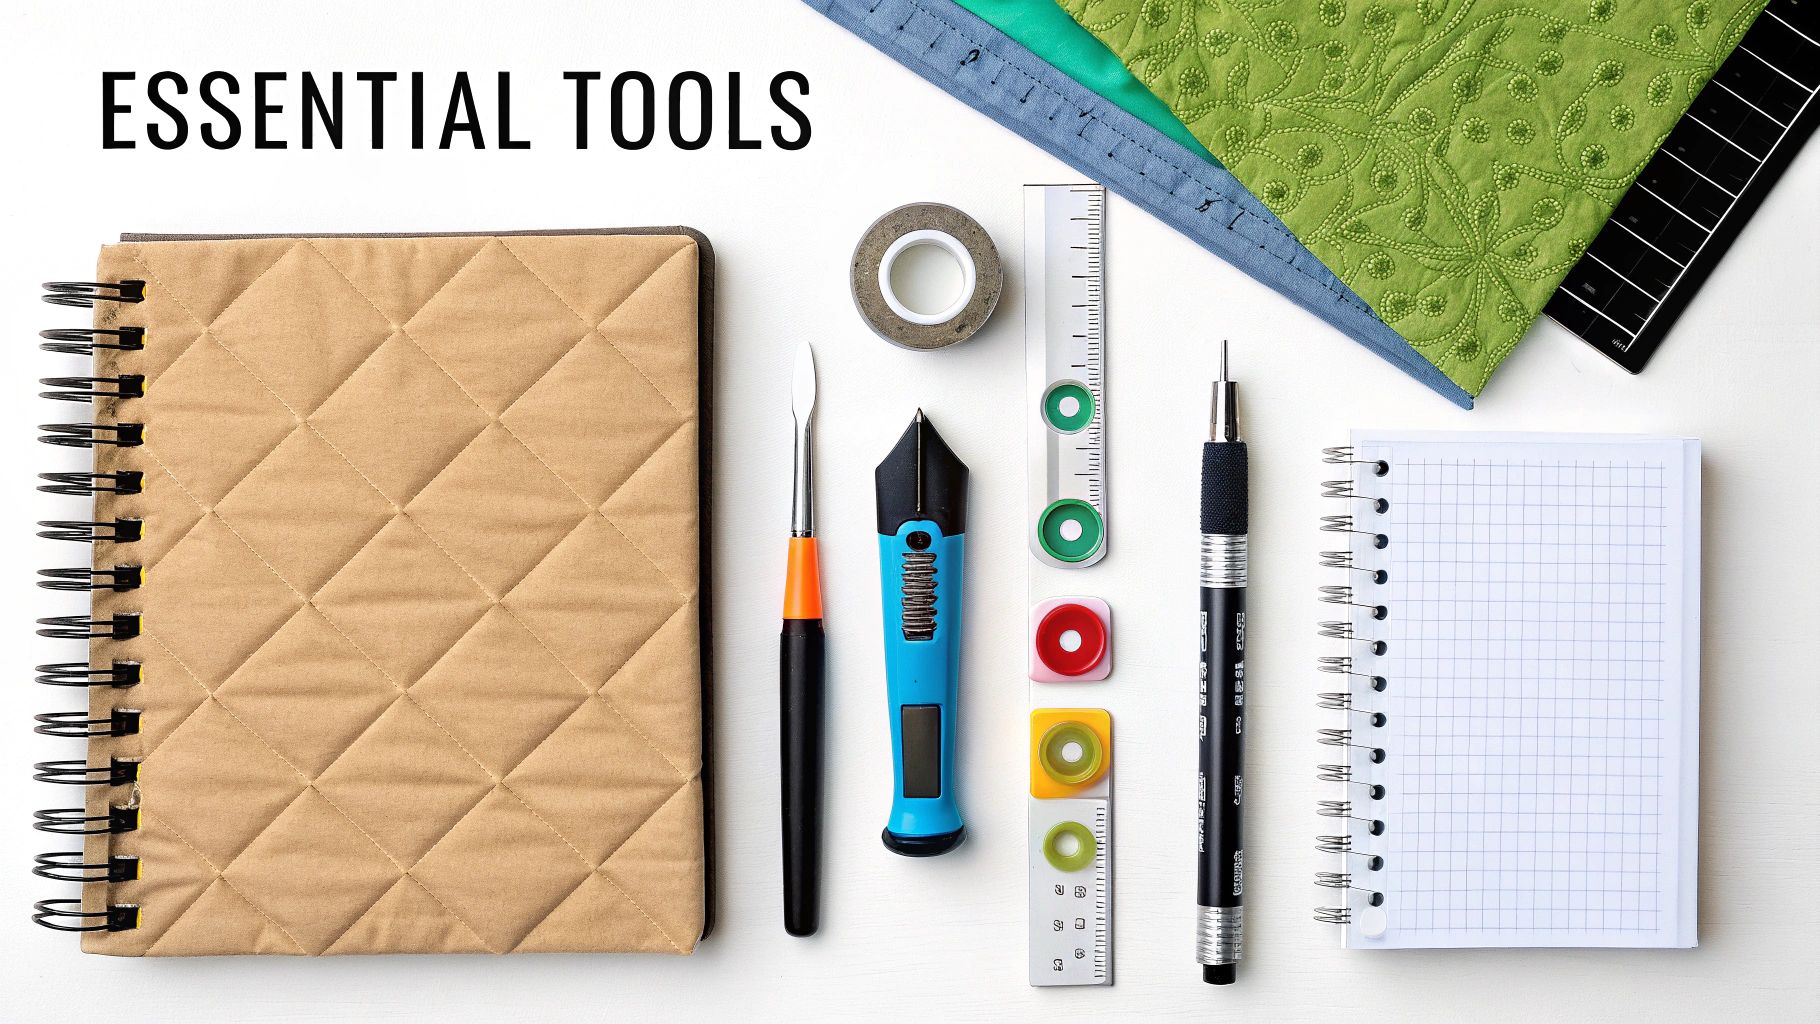
Let's walk through what you'll want to have on hand and, more importantly, why each item makes a real difference in the final result.
Core Fabric and Marking Tools
The fabric for your label is the canvas for your story. A light-colored, high-thread-count cotton is usually the best bet because it gives you a smooth, tight surface for writing or printing.
One of my personal favorites is PFD (prepared-for-dyeing) cotton. It's completely free of the sizing and chemicals found in most other fabrics, which means ink soaks in beautifully without bleeding or resisting.
When it's time to write, don't just grab any old pen from your junk drawer! You need something permanent and archival to stand the test of time.
- Permanent Fabric Pens: I always recommend archival, acid-free pens like the Pigma Micron series. They're specifically made for fabric and are designed not to bleed, fade, or wash out.
- Don't Skip the Heat Set: This is critical. Once your ink is dry, press the label with a dry iron. This one step locks the pigment into the fibers, making it truly permanent through all the washes to come.
- Always Test First: Before you commit to your final label, do a quick test on a scrap of the same fabric. It takes two seconds and can save you from the heartache of a smeared or bleeding mess.
Your label is a historical document. Using archival-quality pens and acid-free materials isn't just for looks; it's about preservation. It ensures the story you're telling won't fade away.
Choosing the right combination of fabric and marking tools is a huge part of the process. Here’s a quick breakdown to help you decide what’s best for your project.
Quilt Label Material Comparison Guide
| Material Type | Best For | Pros | Cons |
|---|---|---|---|
| PFD Cotton | Handwriting, inkjet printing, embroidery | Accepts ink beautifully, no chemicals to interfere with permanence. | Can be harder to find in local shops. |
| Light-Colored Muslin | A rustic, traditional look; hand embroidery | Widely available, affordable, soft. | Can be a bit thin; may need stabilizer. |
| Fusible Interfacing | Adding stability to any fabric | Prevents puckering, easy to apply, makes thin fabric sturdier. | Adds a bit of stiffness to the label. |
| Pigma Micron Pens | Fine, detailed handwriting | Archival quality, multiple tip sizes, won't bleed or fade. | Ink must be heat-set to become permanent. |
| Embroidery Floss | Hand-stitched labels with texture | Huge color variety, traditional heirloom feel. | Time-consuming, requires stitching skill. |
Ultimately, the best choice depends on the final look you're going for and the method you're most comfortable with.
Stabilizers and Cutting Essentials
To get that crisp, clean text and keep your fabric from stretching or puckering while you work, a stabilizer is your best friend. The right one really depends on your method.
If you're writing by hand or doing machine embroidery, a lightweight fusible interfacing ironed onto the back of your label fabric is perfect. It gives just the right amount of body without making it too stiff. For quilters running fabric through an inkjet printer, ironing it onto a sheet of freezer paper is the classic trick—it makes the fabric stiff enough to feed through the printer smoothly.
Finally, for a polished look, you need to cut precisely.
- Rotary Cutter and Mat: Nothing beats a sharp rotary cutter, a clear quilting ruler, and a self-healing mat for getting perfectly straight, clean edges.
- Sharp Scissors: A small, sharp pair of scissors is a must-have for trimming threads and snipping corners with accuracy.
Getting these specific items together before you start will make the entire process so much smoother. With the right tools for the job, making a quilt label transforms from a final chore into a truly enjoyable last step in your quilting journey.
Finding Your Perfect Quilt Label Method
There's no single "right" way to make a quilt label. Honestly, the best method really comes down to your personal style, the tools you have on hand, and the story you want your quilt to tell. Some techniques are quick and modern, while others are a bit more traditional and take time. Each one offers a unique way to sign your beautiful work.
Let's walk through some of the most popular ways quilters create their labels. I’m sure you’ll find an approach here that feels just right for your skill level and the final look you're going for.
The Timeless Appeal of Hand Embroidery
If you want to add a truly personal, heartfelt touch, hand-stitching your label is the way to go. This is the most traditional approach, and it just feels right—like you’re infusing the very last step with the same care and love you put into every seam of the quilt itself.
For clear, readable letters, a simple backstitch or stem stitch works beautifully. I always recommend using a lightweight stabilizer on the back of your label fabric; it makes a huge difference in preventing puckering and keeping your stitches nice and even. This method is perfect for a simple label—maybe just your name and the year—where the beautiful texture of the stitching becomes a small piece of the art.
My Go-To Tip: Don't overcomplicate it. A fine-tipped, water-soluble marking pen is your best friend for this. Lightly trace your words onto the fabric before you even thread your needle. This ensures everything is perfectly spaced and aligned. The best part? The marks wash right out, leaving only your gorgeous embroidery behind.
The Precision of Machine Embroidery
For those of you with an embroidery machine, making a quilt label is a breeze. It’s fast, incredibly precise, and the creative possibilities are practically endless. You can get super-detailed designs, play with all kinds of fonts, and even add little decorative motifs that tie back to the quilt's main design. It's an ideal choice when you need to make several matching labels or if you just love that crisp, professional finish.
The real secret to success here is proper stabilization. Don’t skimp on it! A good quality stabilizer, either a cut-away or tear-away style, is essential for supporting the fabric and preventing any skipped or wonky stitches. Many modern sewing machines even have built-in alphabets, so you can program your text directly without any extra software.
Modern Convenience with Printable Fabric
For a truly custom and detailed label, you can’t beat printing directly onto fabric. This method opens up a whole new world of design—think custom fonts, intricate graphics, or even a small photograph. It’s a fantastic option if you want to include a longer personal message or detailed washing instructions.
And this method is built to last. It’s amazing how far the technology has come. In fact, a whopping 92% of professional quilters now use computer-printed labels because they’re so easy to read and have a lifespan of 20+ years. Compare that to some older hand-inked labels, which a 2022 Textile Research Journal study found had a 60% fade rate.
You can easily create your own at home. Just stabilize a piece of muslin with freezer paper and run it through your printer using pigment ink, which is 95% fade-resistant. It's just one of the many trends shaping the quilt market today.
Here are a few ways you can print on fabric:
- Pre-Treated Fabric Sheets: These are a dream to work with. They’re basically paper-backed fabric sheets that you can run through any standard inkjet printer. They’re super user-friendly and give consistently great results.
- The Freezer Paper Trick: This is a classic DIY method. You just iron a piece of your fabric onto the shiny side of freezer paper, trim it down to printer-paper size, and feed it through.
- Iron-On Transfers: Another great option is using iron-on print transfer paper. With this, you print your design in reverse onto the transfer paper, then simply iron it onto your label fabric. This is wonderful for getting crisp graphics or text onto any light-colored cotton.
No matter which path you take, the goal is always the same: to create a lasting signature that tells your quilt's story for generations to come.
What Should Your Quilt Label Say?
So, you’ve put the last stitch in your quilt top and wrestled it through the quilting machine. Now for the final, crucial touch: the label. What do you actually write on it? This is where your quilt’s story really begins, blending simple facts with your own unique personality. A thoughtful label is the signature on your art, a message that will travel with your quilt for generations.
Deciding what to include is personal, but some details are just too important to skip if you want to preserve the quilt's history. Think of it as the "who, when, and where" that your great-grandkids will be thrilled to discover someday.
The Absolute Must-Haves
Every quilt label, at its core, should be a historical document. These are the non-negotiable details that give your quilt a place in time.
- Your Name: This is non-negotiable. Put your full name on it. You're the artist!
- The Date: At the very least, include the year the quilt was finished. If you want to be more specific, add the month or even the exact date.
- Your Location: Simply adding the city and state where you made it gives the quilt a sense of place and origin.
Just those three bits of information elevate your quilt from a beautiful but anonymous blanket to a piece of textile art with a documented history. It's what makes it a true heirloom.
Making It Personal and Meaningful
Once you have the basics down, you can start layering in the details that make the label—and the quilt—truly special. This is your chance to share the story behind the stitches, adding a sentimental value that facts and figures just can't capture.
Here are a few ideas to get you started:
- The Quilt's Name: Did you give your creation a special title? Or maybe you used a classic pattern worth mentioning?
- Who It's For (and Why): If it’s a gift, a simple note like, "For Sarah on her wedding day, June 8, 2024" or "For Michael, with love" makes it incredibly personal.
- A Heartfelt Note: Sometimes a short, sweet message says it all. Think "Made with love and countless cups of coffee" or a favorite quote.
A label can also be incredibly practical. Adding care instructions is a game-changer for helping your quilt last. For the quilting community at Famcut, adding clear washing instructions is a smart move. In fact, data from Springs Industries shows that clear care labels in retail can reduce damage claims by a whopping 67%.
You could even design a label in Canva with key stats like "Quilted Dec 2025, 50x70in, Thread Count 200," and then use a product like Prym iron-on hem tape, which adheres 97% firmer, to attach it securely. Understanding these little details is part of what’s shaping the modern quilt market.
Your label is your voice, speaking across time. What do you want it to say? Whether it’s a simple "Handmade by Jane Doe, 2025" or a detailed story, every word you add enriches your quilt's legacy.
Mastering Placement and Attachment Techniques
You've poured your heart into designing the perfect label—now for that final, satisfying step. Attaching your label securely and professionally is what truly cements its place in your quilt's story, ensuring it lasts a lifetime. The placement and stitching method you choose really can elevate the overall finish of your work.
The most traditional spot for a quilt label, and for good reason, is on the back of the quilt, in one of the bottom corners. This keeps it discreet but easy to find for anyone curious about the quilt's origins. For quilters entering shows, this placement is also a practical standard that helps organizers easily identify quilts during judging and hanging.
This handy visual breaks down the essential "who, what, and when" to include on your label before you attach it.
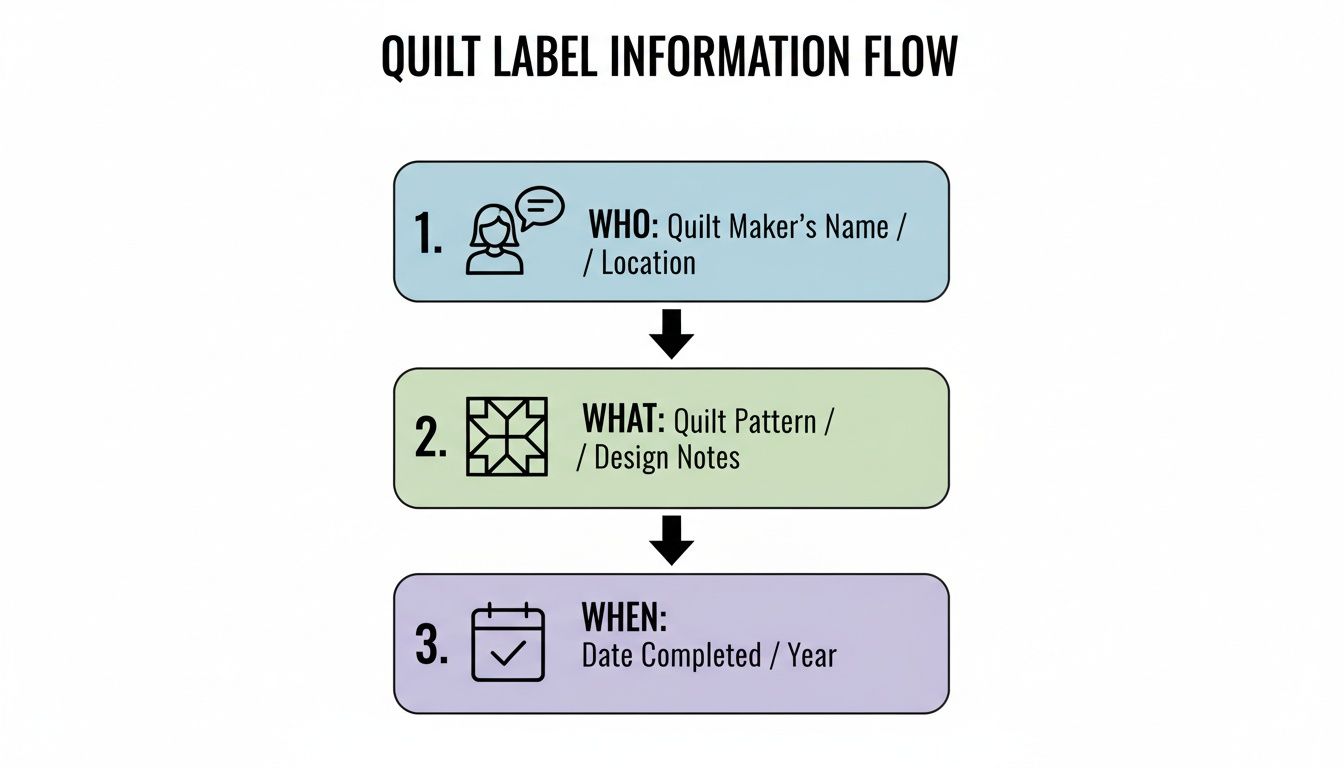
As the flowchart shows, the maker's info, quilt details, and completion date are the core building blocks of a complete quilt story.
Preparing Your Label for Attachment
Before you even think about stitching, you have to deal with the raw edges of your label. This one simple step is the key to preventing fraying over time and giving your label a polished, professional look that won't unravel in the wash.
The easiest way to do this is to create a seam allowance of about 1/4-inch to 1/2-inch on all four sides. Grab your iron and carefully press these edges under to the back. For perfectly straight, consistent folds, a hem gauge ruler is a fantastic little tool, but a line marked on a simple index card works just as well in a pinch. This process leaves you with a clean, folded edge ready for stitching.
Hand Sewing for an Invisible Finish
For a classic, heirloom-quality touch, hand sewing is the way to go. The real art here is creating a stitch that’s incredibly strong yet nearly invisible from the front of the quilt.
The whipstitch or appliqué stitch is your best friend for this task. Using a fine needle and thread that matches your quilt backing, you can secure the label with small, even stitches.
- Thread Choice: Pick a thread color that blends right into your quilt backing fabric. The goal is camouflage.
- Stitch Technique: The secret is to catch just a few threads of the quilt backing with your needle, then pass it through the folded edge of your label. This simple trick prevents the stitches from popping through to the front of the quilt.
- Corner Detail: As you reach each corner, use the tip of your needle to carefully tuck any stray threads under. This helps maintain a crisp, clean point.
Pro Tip: Before you start sewing, consider signing your name and the date directly on the quilt backing right where the label will go. It’s an extra layer of permanent documentation—a hidden signature that’s only revealed if the label is ever removed.
Quick and Secure Attachment Methods
If hand sewing isn't your thing, or if you're just short on time, don't worry. There are other fantastic methods that work just as well.
A machine-stitched appliqué offers a durable and super neat finish. Just position your prepared label on the quilt back and stitch close to the folded edge. You can use a simple straight stitch or even a decorative one for a little extra flair. This method is fast and creates a very secure bond.
For a completely no-sew option, fusible web is a game-changer. Cut a piece of fusible web just a smidge smaller than your finished label. Iron it to the back of the label, peel off the paper backing, then press it firmly onto the quilt back. This creates a strong, permanent bond that’s perfect for quilts destined for lots of love and use.
Your Quilt Label Questions, Answered
Even seasoned quilters run into the same little questions when it's time to create a label. It's that final, crucial step, so it’s natural to want to get it just right. Let's walk through some of the most common hurdles I hear about so you can finish your quilt with confidence.
What’s the Best Pen for Writing on a Quilt Label?
You’ll want to reach for an archival, acid-free permanent fabric pen. My go-to, and a favorite in just about every quilting circle, is a Pigma Micron. The ink is specifically formulated to be permanent, so it won’t bleed when you write or fade away after a few washes.
The single most important thing you can do is heat-set the ink with a dry iron once you’re done writing. This small step is what truly fuses the ink to the fabric fibers, locking it in for good. Always double-check the pen’s instructions, and do a quick test on a scrap of your label fabric first. It’s a simple way to avoid any surprises on your finished label.
Think of your label as a historical document for your quilt. Using an archival pen is the best way to make sure the story you're telling doesn't literally fade away in the wash.
How Can I Keep My Fabric Label From Fraying?
Nothing ruins a beautiful label faster than a frayed edge. The most reliable method I’ve found is to build a 1/4-inch seam allowance into your label's size. Once your label is ready, just press that extra fabric to the back with an iron before stitching it down. You get a perfect, clean finish every time.
If you prefer a machine-finished edge, a tight zigzag or satin stitch works beautifully. For a quick no-sew fix, a liquid seam sealant like Fray Check is an option. Just be mindful that it can make the fabric a little stiff where you apply it, so a light touch is key.
Is It Too Late to Add a Label to a Finished Quilt?
It's never too late to sign your work! Adding that piece of history to a quilt you’ve already finished is completely doable. You have a couple of great options.
- Hand-Stitch it on Top: This is the most straightforward approach. Just create your label, turn the raw edges under, and use a blind stitch or an appliqué stitch to sew it right onto the quilt back. Your stitches will be nearly invisible.
- Tuck it Into the Binding: For a truly integrated look, you can carefully unpick a few inches of the binding with a seam ripper. Slide one edge of your label underneath the binding, then neatly hand-stitch the binding closed again. It’ll look like it was there from the very beginning.
At Famcut.com, we know every stitch tells a story, and that includes the final label. You'll find a wide selection of premium fabrics, threads, and tools perfect for your next quilting masterpiece. Start your next project with the best materials at https://famcut.com.