


How to Hang Quilts for a Flawless Wall Display
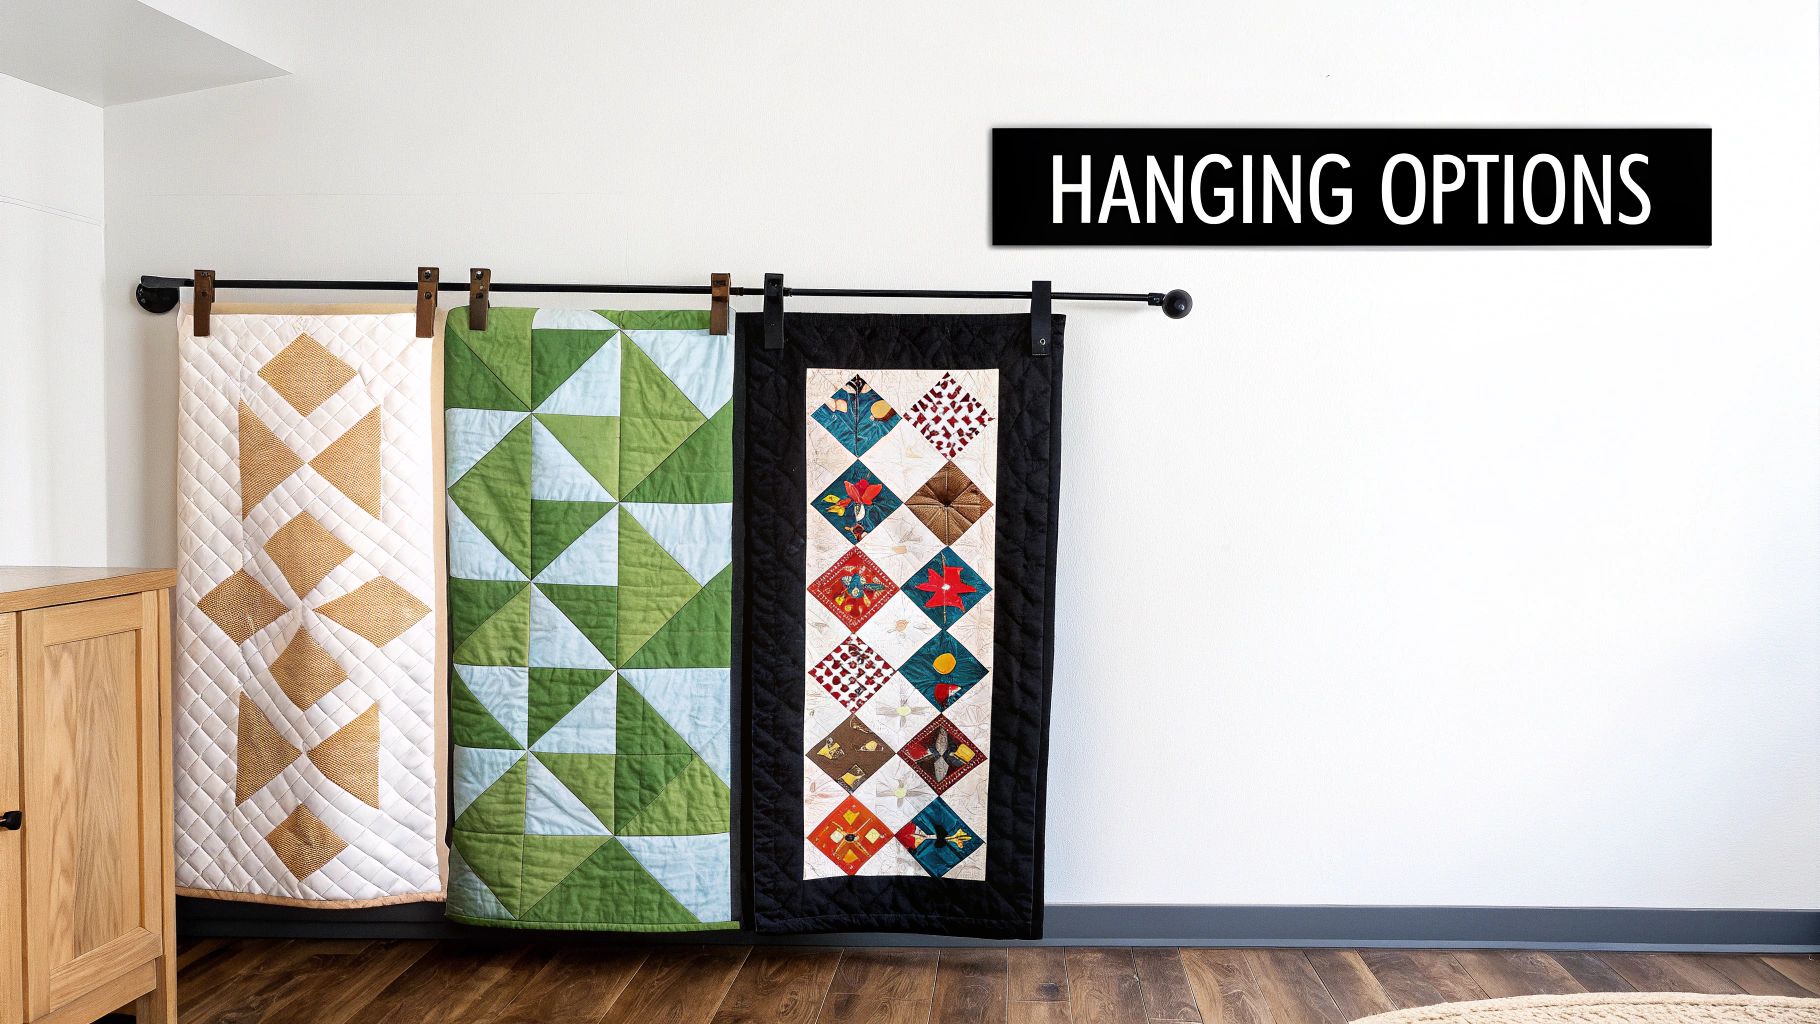
When you're figuring out how to hang a quilt, the piece itself will tell you what it needs. The go-to techniques usually involve a sewn-on sleeve with a rod, Velcro mounts, or sturdy clips. Each one is a great choice, but for different kinds of quilts, depending on their size, weight, and how much you want to focus on preservation.
Why Your Hanging Method Matters
Before you even think about grabbing a hammer, let's talk strategy. Picking the right hanging method is easily the most important decision you'll make for displaying your quilt. An old, heavy antique quilt needs a completely different kind of support than a small, modern wall hanging.
If you choose poorly, you could end up with a sagging quilt, stretched fibers, or even permanent damage down the road. The whole point is to give the quilt even, consistent support all the way across its top edge. This ensures it hangs perfectly flat and stays that way for years.
Your decision really boils down to a few key things:
- Quilt Size and Weight: Bigger, heavier quilts need serious, weight-distributing support, which is where a sleeve and rod really shine. Lighter pieces give you a lot more flexibility.
- Quilt Age and Condition: If you're dealing with an antique or a fragile piece, you need to be gentle. Preservation-focused methods that don't stress the seams are a must.
- Your Wall Type: Is it drywall, plaster, or brick? Each one calls for different hardware to get a secure mount.
- Aesthetic Preference: Do you want the hardware to be totally invisible, or are you okay with it being part of the display?
This decision guide can help you visualize the best path forward, whether your quilt is heavy, lightweight, or a delicate heirloom.
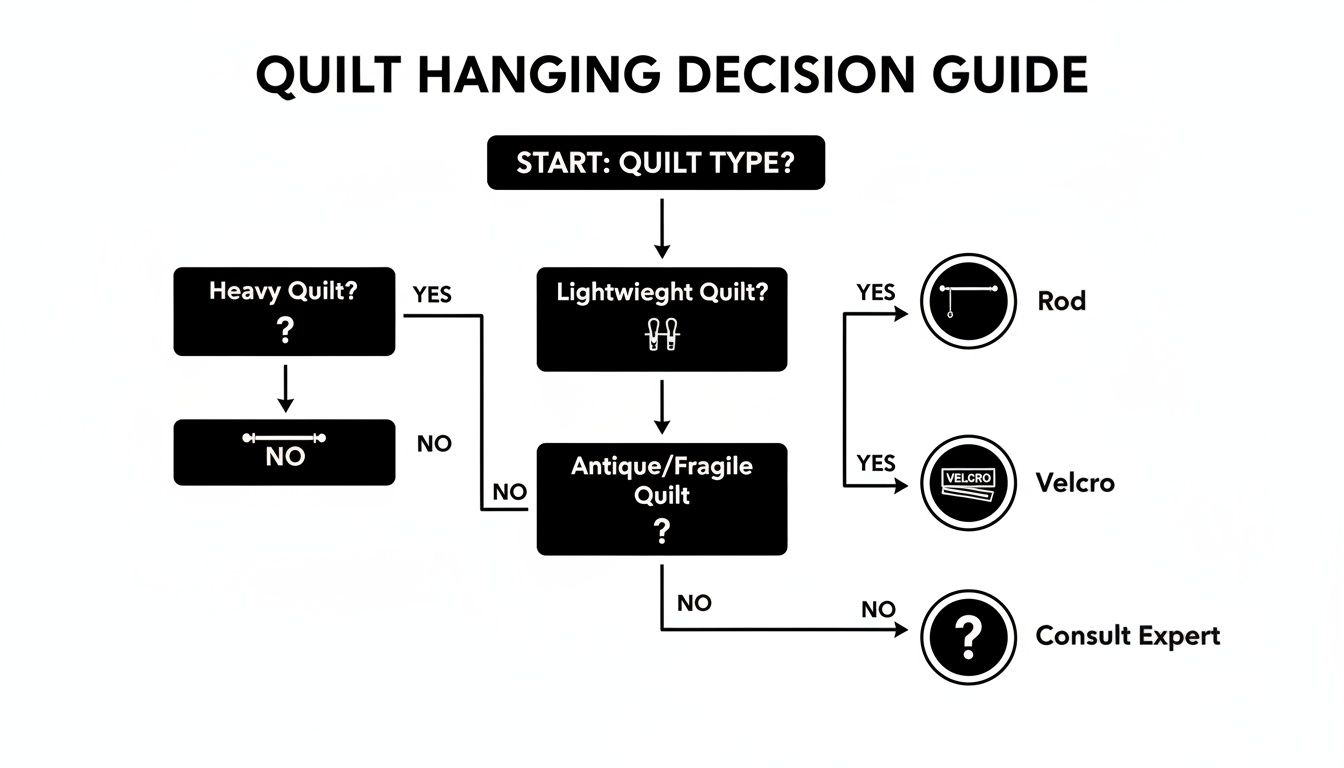
As you can see, rods are fantastic for heavy quilts, clips work well for lighter ones, and Velcro is often the best bet for antiques because it distributes the weight so evenly.
Preservation-Focused Techniques
When preserving a quilt is your number one priority, it pays to look at what the pros do. Textile experts and museum curators often lean on Velcro mounts because of the incredible support they offer. It’s been shown that this method can hold up to 50 pounds per square yard without creating the stress points that cause sagging over time.
In fact, Velcro has become the standard in many museums. It consistently outperforms traditional sleeves, which showed 20-30% more sagging in long-term tests across thousands of textiles. Considering the American Quilter's Society reports that 40% of displayed quilts are wall hangings, picking a method that protects your work is a big deal. For a deeper dive into these museum-quality techniques, the George Washington University Museum website is a fantastic resource.
Key Takeaway: The best hanging method isn't just about what looks good—it's about protecting the very structure of your textile art. Always match the hanging technique to what your specific quilt needs to thrive.
To help you decide at a glance, here's a quick comparison of the most common ways to hang quilts.
Comparison of Quilt Hanging Methods
| Hanging Method | Best For | Hardware Visibility | Wall Impact |
|---|---|---|---|
| Sleeve & Rod | Large, heavy, or antique quilts | Low to Moderate | Requires drilling for brackets; minimal long-term damage. |
| Velcro Strip | Fragile or antique quilts; uneven top edges | Invisible | Adhesive can damage paint; requires a wooden slat on the wall. |
| Quilt Clips | Small, lightweight, or modern art quilts | High (decorative) | Multiple small nail holes for each clip. |
| French Cleat | Very heavy or large art quilts; gallery displays | Invisible | Requires securely mounting a wood cleat to wall studs. |
Each of these methods has its place, so think about your quilt's unique character and your wall space before you commit. The right choice will make all the difference in how your masterpiece looks and lasts.
Getting Your Quilt Ready to Hang
Before you even think about grabbing a hammer and nail, the most crucial work happens right at your sewing table. Getting your quilt properly prepped is absolutely essential if you want a beautiful display that also protects your hard work. Honestly, skipping this step is the fastest route to a sad, saggy quilt.
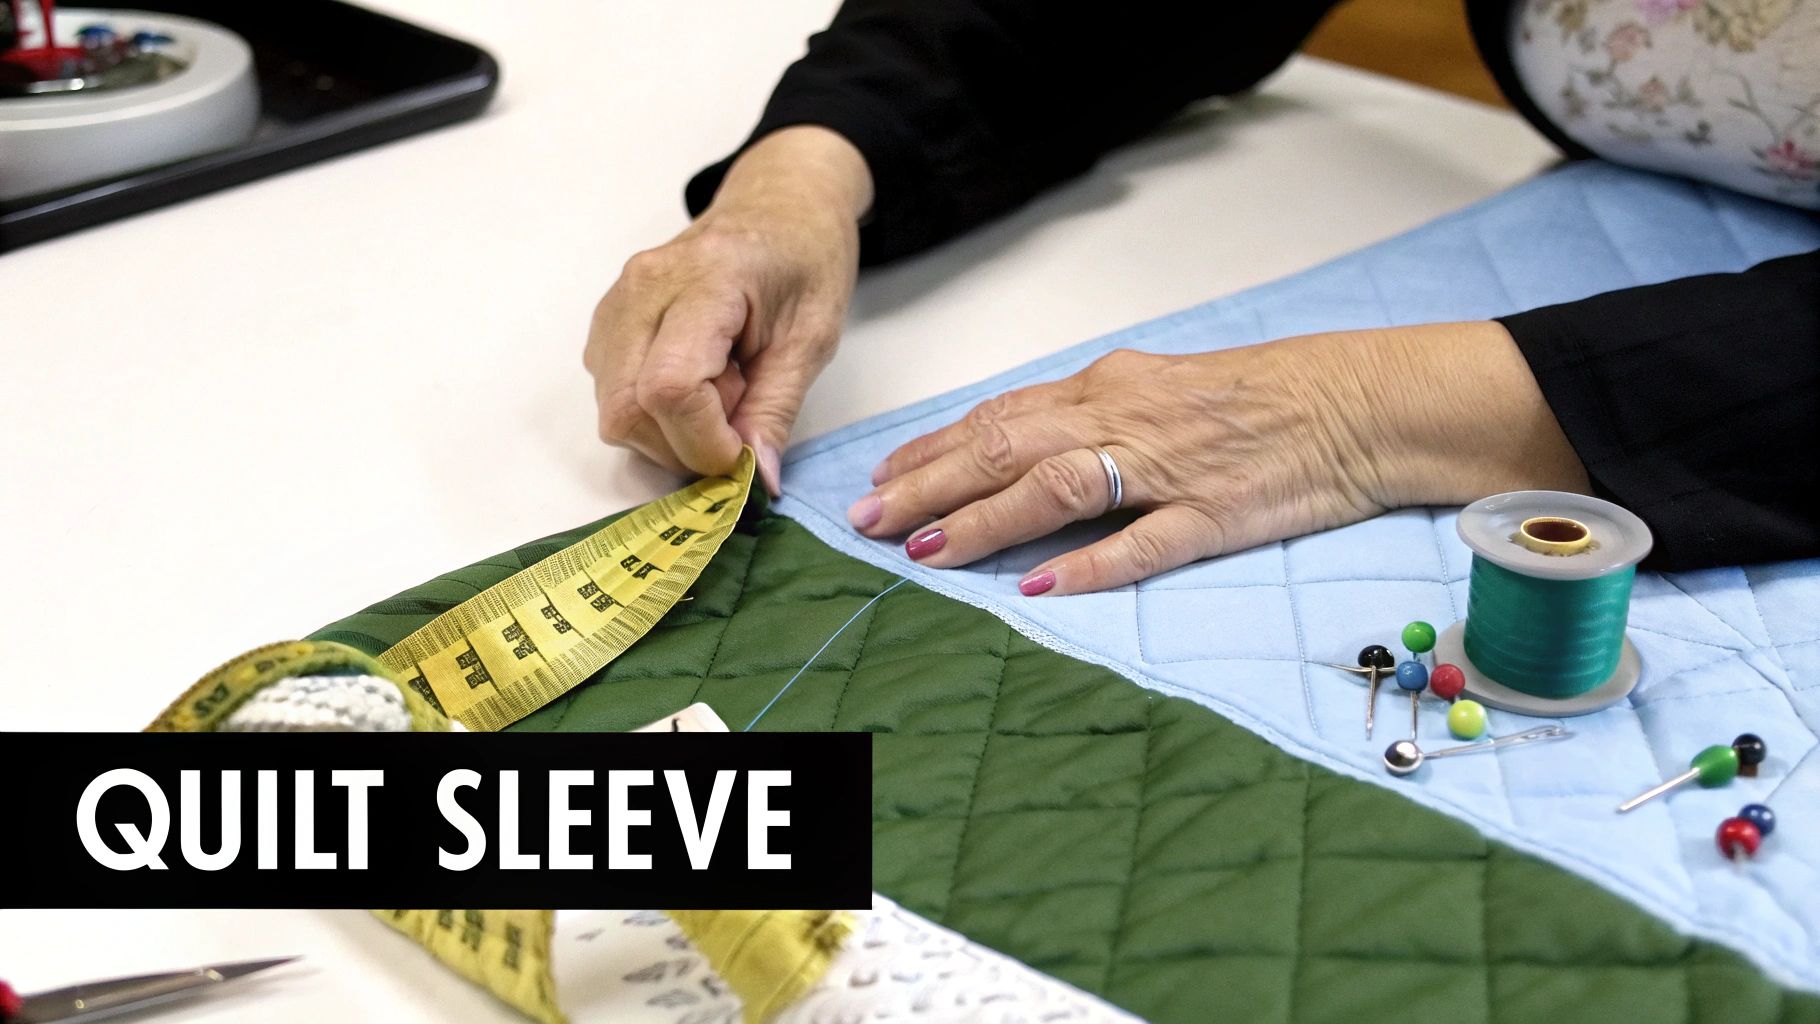
The whole idea is to add something to the back of the quilt that spreads its weight out evenly. For most quilts, the absolute gold standard is a good old-fashioned quilt sleeve. It's just a simple fabric tube sewn onto the back, allowing a dowel or rod to slide right through for perfect, end-to-end support.
Making a Quilt Sleeve That Actually Works
A well-made sleeve is the secret ingredient for a quilt that hangs flat and drapes beautifully. The trick is to get the dimensions just right—wide enough for a rod, but with enough slack so the quilt doesn't buckle or pucker. If it's too tight, you’ll get weird tension spots and an uneven hang.
Here’s my go-to method for getting it right every time:
- Cut Your Fabric: Grab a piece of sturdy cotton—muslin is perfect for this—and cut a strip that's 9 inches wide.
- Figure Out the Length: You want the sleeve to be about one inch shorter than the total width of your quilt. This little trick keeps the sleeve from poking out the sides when it’s on the wall.
- Finish the Ends: On each short end of the fabric strip, fold the raw edge over by a quarter-inch and press it. Fold it over another quarter-inch to hide the raw edge and stitch those hems down.
- Create the Tube: Now, fold the long strip in half lengthwise with the wrong sides of the fabric facing each other. Give it a good press. You should now have a 4.5-inch wide, double-layered strip with nicely finished ends.
A Tip from Experience: Always, always pre-wash your sleeve fabric! If you don't, you risk it shrinking later on, which can pull and distort your beautiful quilt top.
Attaching the Sleeve for a Perfect Finish
How you attach the sleeve is just as critical as how you make it. You need to secure it firmly, but you also have to build in a little bit of "play." This small amount of ease is what prevents that dreaded slump along the top edge of the quilt.
Start by centering the sleeve along the top of your quilt back, placing it about a half-inch down from the binding. Pin just the top edge of the sleeve in place.
Grab a needle and thread that matches your quilt backing. Using a blind stitch, carefully hand-sew the top edge of the sleeve to the quilt backing and the batting. Be careful not to let your stitches pop through to the front!
Now for the crucial part. Before you sew the bottom edge, you need to create that slack. Smooth the sleeve downward, but don't pull it tight. Instead, allow for about a quarter-inch of extra room or ease before you pin the bottom edge. This little bit of slack lets the quilt hang straight down from the rod, rather than being pulled forward.
Finally, hand-sew the bottom edge of the sleeve just like you did the top, making sure your stitches only catch the backing and batting. That's it! Your quilt is now perfectly prepped for a rod and ready to be shown off.
Your Essential Guide to Tools and Hardware
Getting your tools and hardware lined up before you start doesn't just make the job go smoother—it’s the secret to a secure, professional-looking display. Think of this as your go-to checklist for everything you'll need, from the basic measuring tools you already own to the specific hardware that will hold your masterpiece.
Your toolkit here is pretty simple. You’ll definitely want a trusty tape measure, a pencil for making marks, a stud finder, a drill, and a level. While a fancy laser level is fantastic for sprawling quilts, a standard bubble level will get the job done perfectly for most projects.
Choosing the Right Rod or Dowel
The rod you choose is the unsung hero of your quilt display. Its main job is to carry the full weight of your quilt without bending or bowing over time, because nothing ruins the effect faster than a sagging rod.
For a smaller, lightweight quilt—say, up to 45 inches wide—you can often get away with a simple ¾-inch wooden dowel. But for anything wider or heavier, you’ll want to step up to a sturdier curtain rod made of metal or a thicker wood, usually 1 inch or more in diameter. A good rule of thumb is to pick a rod that’s at least an inch longer than the sleeve on each side, giving it plenty of room to rest in the brackets.
Your hanging rod doesn't have to be purely functional; it can be part of the art. Think about materials that echo your room's style—a rustic birch dowel for a farmhouse vibe or a sleek metal rod with decorative finials for a more modern feel.
Securing Your Quilt to the Wall
This is the part that makes most people a little anxious, but it’s more straightforward than you might imagine. The real key is to match your hardware to your wall type. Using the wrong anchor is a surefire way to find your beautiful quilt in a heap on the floor.
Your stud finder is your most valuable tool here. Whenever you can, screw the rod brackets directly into the wall studs. It's the most secure anchor you can get.
If you can't hit a stud, don't worry. You have options:
- Drywall (No Stud): For quilts under 10 pounds, a simple plastic drywall anchor is perfect. They're designed to expand behind the drywall, creating a surprisingly strong grip.
- Plaster Walls: Older plaster walls can be tricky and brittle. The trick is to pre-drill a pilot hole and use a screw-in anchor specifically made for plaster to avoid any cracking.
- Heavy Quilts: If your quilt is over 15 pounds, don't take any chances. A heavy-duty toggle bolt is your best bet. These have spring-loaded wings that pop open behind the drywall, spreading the weight over a much larger surface area.
While we're talking about quilts, these principles for mounting things securely apply to almost anything you hang. For a more detailed look at the tools and hardware for other large items, you might find a practical guide to hanging heavy items safely really helpful. Matching the hardware to the weight and the wall is always the golden rule.
Mastering Measurement for a Perfect Hang

This is the moment where a little bit of careful measuring pays off big time. Nothing ruins the effect of a beautiful quilt faster than hanging it crooked. The goal here isn't just to get it on the wall, but to make it look like it truly belongs there.
First things first, let's talk height. The old gallery trick is to hang art so its center sits at average eye level, which is usually around 57 to 60 inches from the floor. But rules are made to be broken, right? If your quilt is going over a sofa or a headboard, you'll want the bottom edge to be 6 to 8 inches above the furniture. This little bit of breathing room keeps it from looking crammed and creates a nice, connected feel.
The Two-Point Measurement Trick
Here’s a simple technique I swear by for getting a perfectly level line every time. Once you know your target height for the hanging rod, measure down from the ceiling to that spot on both the left and right sides where your brackets will go.
Why from the ceiling? Because floors and baseboards can be notoriously uneven, especially in older homes. Measuring down from the ceiling gives you a line that’s parallel to the room’s architecture, which our eyes perceive as straight.
A laser level is your best friend for this, particularly with big quilts. It throws a crisp, perfectly straight line across the wall and eliminates all the guesswork. If you don't have one, a classic bubble level and a yardstick get the job done just as well.
Pro Tip: Before you even think about drilling, grab some painter's tape. Outline the exact dimensions of your quilt on the wall. This lets you step back, walk around the room, and see how the placement feels before you make a permanent hole.
Centering for a Polished Look
Proper centering is what separates a good display from a great one. It’s what gives your quilt that intentional, gallery-quality look.
If the quilt is the star of a blank wall, just find the midpoint of the wall and align it with the center of your quilt. Easy. If it’s hanging over a piece of furniture like a console table or a bed, find the center of that piece and use it as your anchor point instead.
These fundamental principles aren't just for quilts—they apply to any piece of art. For a deeper dive into leveling and other hanging techniques, it's worth checking out a guide to hanging items with precision. Taking these extra few minutes to measure carefully ensures your quilt gets the beautiful display it truly deserves.
Protecting Your Quilt While It's on Display
Having your beautiful quilt up on the wall is one of the best ways to enjoy it, but once it's out of storage, you become its primary caretaker. Think of your quilt as a piece of textile art, and your main job is to guard it against its biggest threat: sunlight.
The ultraviolet (UV) rays in direct sunlight are ruthless when it comes to fabric dyes, and they will cause fading that you can never reverse. Even a room that feels "bright" but doesn't get a direct beam of sun can cause damage over time. Your best bet is always an interior wall that avoids the intense morning or afternoon light pouring through a window.
Guarding Against Light and Environmental Damage
Beyond just finding a shady spot, there are a few more things you can do to really protect a piece you love.
- UV-Filtering Window Film: This is an amazing, nearly invisible solution. You can apply a special film to your windows that blocks up to 99% of damaging UV rays without making your room noticeably darker.
- Rotate Your Collection: I never let one quilt hang in the same spot for years. Give your quilts a break! Swapping them out seasonally not only freshens up your decor but also gives the fibers time to rest away from light and gravity.
- Keep the Air Flowing: Always hang your quilt so there’s a little bit of space behind it. You don't want it pressed flat against the wall. That small air gap prevents moisture from getting trapped, which is a big deal in humid climates where mildew can become a problem. For that same reason, never hang a quilt in a kitchen (grease and steam) or a bathroom (humidity).
The idea of hanging quilts for preservation isn't new. Early homesteaders often hung quilts on walls for insulation, but it also protected them from the wear and tear of being used on a bed, helping them last longer. You can learn more about the history of quilt preservation on the National Park Service website.
A Simple and Gentle Care Routine
Once your quilt is hanging, taking care of it is pretty straightforward, but consistency is key. A little bit of gentle dusting now and then will stop dirt and dust from working their way deep into the fibers.
The easiest way I've found to do this is with a vacuum cleaner. Just pop on the upholstery brush attachment, but before you start, cover the brush head with a piece of clean nylon mesh or cheesecloth and secure it with a rubber band. Set the vacuum to its lowest suction setting and just hover the nozzle over the quilt's surface—don't press down.
This light cleaning, along with giving the quilt a "rest" off the wall every so often, is the best way to keep your masterpiece looking vibrant for years. That resting period is especially important for antique or very delicate quilts, as their threads are much more vulnerable to the constant, subtle stress of gravity.
Questions That Pop Up When Hanging a Quilt
Even the best-laid plans can leave you with a few lingering questions. It’s totally normal to second-guess yourself, especially when you’re about to hang a cherished family heirloom or your latest prize-winning creation. Let’s tackle some of the most common questions I hear from fellow quilters.
Getting these little details right is what separates a good display from a great one—and ensures your quilt stays safe for years to come.
Can I Just Use Command Strips and Avoid Making Holes?
Ah, the siren song of the damage-free Command strip. While they’re brilliant for so many things, I strongly advise against using them for most quilts. The standard hooks create little pressure points that will absolutely stretch and distort your fabric over time. It's a slow-motion kind of damage, but it’s often irreversible.
Now, if you have a tiny, feather-light mini-quilt, you might get away with using several of the Velcro-style Command strips spaced closely along the top. But honestly, it's a gamble. The adhesive can fail with changes in humidity or temperature, and a sudden fall could cause far more harm than a couple of tiny nail holes ever would.
My Two Cents: For any quilt with real value or noticeable weight, stick with a traditional quilt sleeve and rod. It’s still the gold standard for a reason. It distributes the weight perfectly, keeping your masterpiece secure and beautifully flat against the wall.
How Should I Hang a Really Old or Fragile Quilt?
When you're dealing with an antique, you have to think like a museum conservator. The fibers and stitching are delicate and can’t handle the same stress as a modern quilt. The absolute best and safest method is what I call the museum-mount Velcro technique. It gives you incredible support without putting any strain on those old seams.
Here’s how the pros do it:
- Prep the Velcro: Get a 2-inch wide strip of archival-safe, sew-on Velcro (you only need the soft, fuzzy "loop" side). Machine-sew this strip onto a piece of pre-washed cotton or muslin that's just a little bit wider.
- Attach it to the quilt: Now, carefully hand-sew this entire unit to the back of the quilt, right along the top edge. The key here is to use long, loose stitches that only catch the backing and the batting. Never, ever let those stitches pierce through to the front of your quilt.
- Mount the other side: Grab a thin, lightweight wood slat or board and secure it to your wall. Then, you can either staple or glue the corresponding "hook" side of the Velcro onto that wooden slat.
When you press the quilt's Velcro strip onto the wall-mounted strip, the wooden slat provides perfectly even support across the entire width. This completely gets rid of any sagging or stress points, making it the safest way to preserve and display a treasured piece.
What’s the Best Way to Hang a Quilt on a Textured Wall?
Textured walls—think "popcorn" ceilings or rough plaster—can be a real headache. They make any kind of adhesive, including Command strips, pretty much useless. The uneven surface just doesn't allow for a solid bond.
Your most reliable friend here is the classic quilt sleeve and rod. The trick isn't the sleeve, but the hardware. You'll need to use robust wall anchors to make sure the rod's brackets are securely fastened into the wall, not just sitting on the bumpy surface. Toggle bolts or heavy-duty screw-in drywall anchors are perfect for this job.
If you're facing a really irregular wall, like exposed brick or stone, you have a fantastic alternative. Consider installing a picture rail molding up near the ceiling. From there, you can hang the quilt on elegant cables or decorative cords. This lets the quilt float just in front of the wall, so it hangs perfectly straight without ever touching the tricky surface below. It's a sophisticated, gallery-style look that turns a potential problem into a stunning design feature.
At Famcut.com, we understand the passion and precision that goes into every quilting project. Whether you're a seasoned quilter or just starting your creative journey, find all the high-quality materials, tools, and expert advice you need at https://famcut.com.