


Easy Block Quilt Pattern: Beginner Guide to the easy block quilt pattern
So, you’re ready to make your first quilt. It’s an exciting moment! But staring at a wall of gorgeous fabric can feel a little overwhelming. Where do you even begin?
My advice is always the same: start simple. An easy block quilt pattern is the best way to dive in, and you can’t get more classic or straightforward than the Nine Patch. It’s a wonderfully satisfying project that teaches you all the core skills without any of the confusion.
Getting Started Without The Guesswork
Let’s be honest, the beginning of any new craft should be fun, not frustrating. You want a project that builds your confidence and teaches you the foundational techniques you'll use for years to come. For generations of quilters, the Nine Patch has been that perfect first step.
The block is exactly what it sounds like: just nine simple squares arranged in a three-by-three grid. That's it! This makes the design incredibly forgiving and a breeze to piece together. It's a wonderful entry point into the world of creative arts, giving you a tangible success right away.
What I love about the Nine Patch is its history. This isn't some new-fangled pattern; it's a block that has been a cornerstone of American quilting for nearly 200 years. In fact, its history goes back to the mid-19th century, when it was often the very first block children learned to sew. If a kid with a needle and thread could do it back then, you absolutely can today.
Choosing Your Fabric
This is the fun part, but it's also the most important decision you'll make. For your first quilt block, do yourself a huge favor and stick with 100% quilting cotton. It behaves beautifully, presses to a crisp finish, and doesn't stretch all over the place—all things that make your life easier when you're learning.
Here are a few tips from my own experience for picking fabrics:
- Go for Contrast: You’ll need at least two different fabrics—one light and one dark. The magic of the Nine Patch happens when those colors play off each other. Think classic navy and cream, or maybe a soft gray paired with a vibrant floral.
- Make it Easy with Pre-Cuts: Want to skip a bunch of cutting and guarantee your squares are perfect? Grab a "pre-cut" pack! Charm packs (5-inch squares) or layer cakes (10-inch squares) are lifesavers for beginners.
- Trust Your Hands: When you’re at the shop, feel the fabric. Good quilting cotton is smooth and has a bit of weight to it; it doesn’t feel thin or coarse. Better fabric frays less and is simply a joy to sew with.
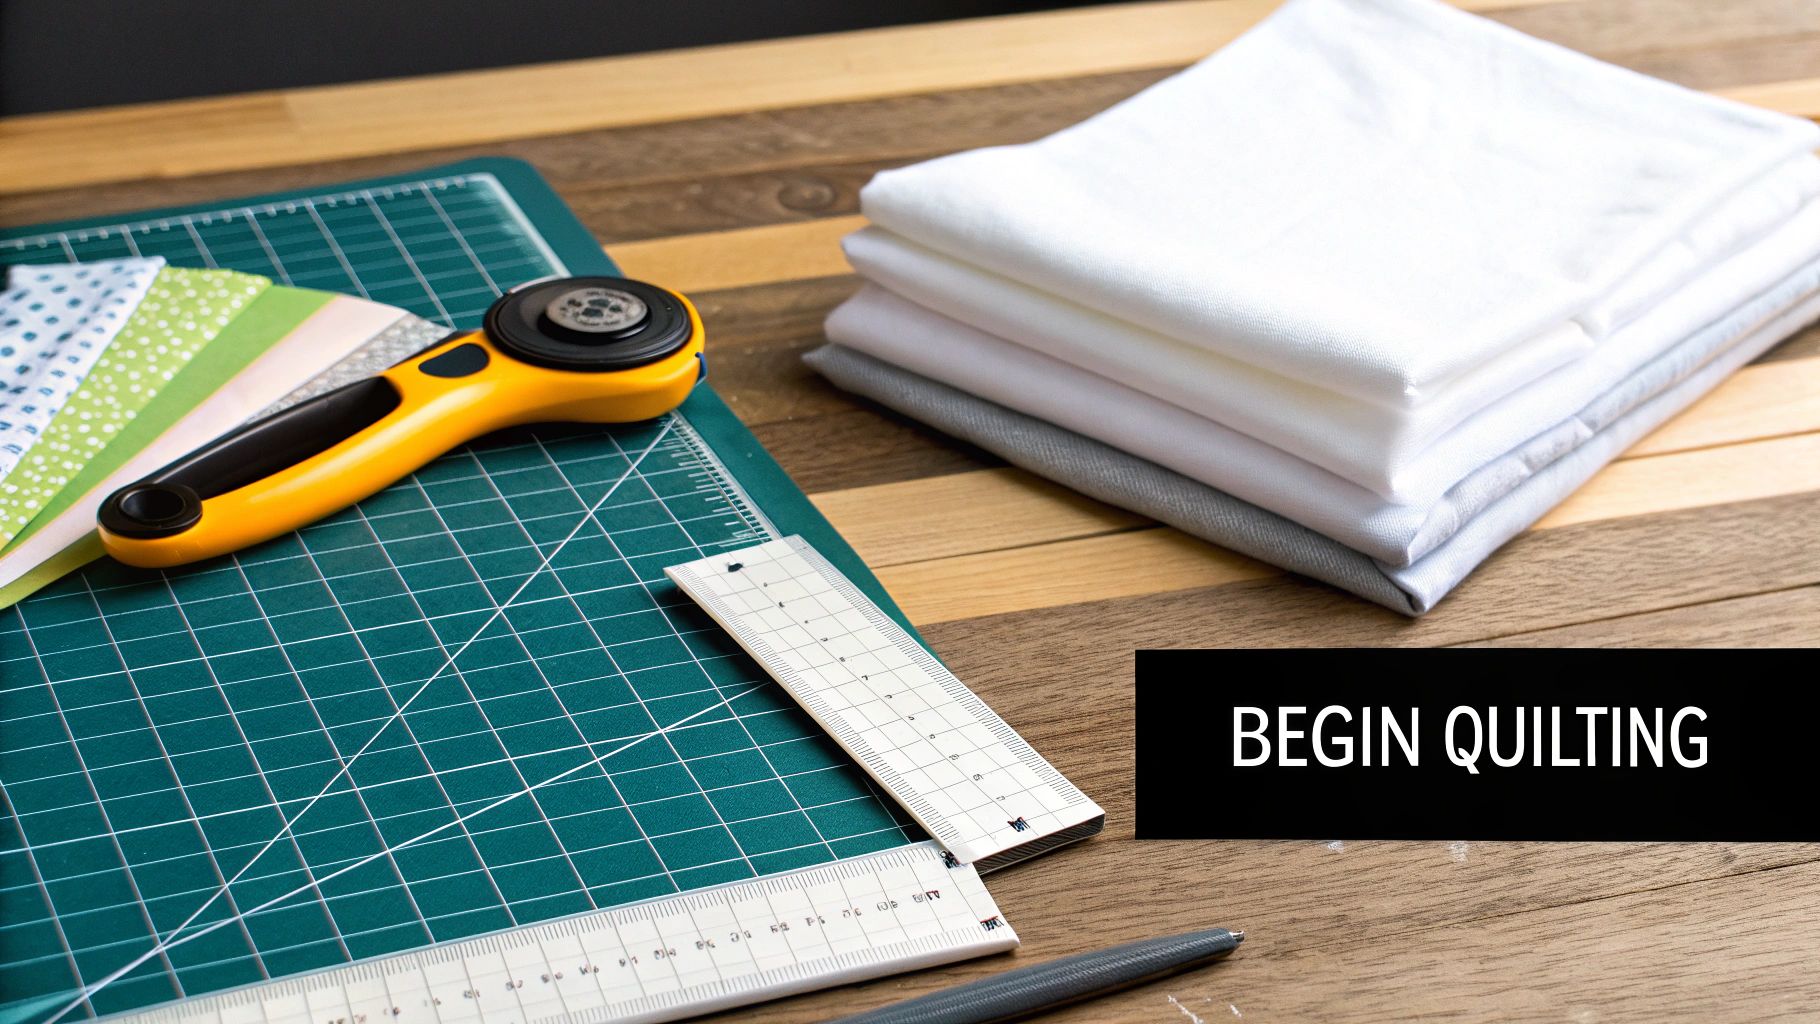
Essential Tools for Success
You don't need to buy out the entire quilt shop to get started. A few key tools will set you up for success. The absolute must-haves are a rotary cutter, a self-healing cutting mat, and a clear acrylic ruler. This trio is the secret to cutting fabric accurately and way faster than you ever could with scissors.
A sharp rotary blade is your best friend. Seriously. If your blade starts snagging the fabric or skipping threads, it's dull. Change it immediately. A dull blade leads to wonky cuts and a whole lot of frustration.
Think of this guide as your launchpad. By focusing on a simple, proven pattern and gathering just a few key supplies, you can skip the guesswork and get right to the fun part: creating something beautiful with your own two hands.
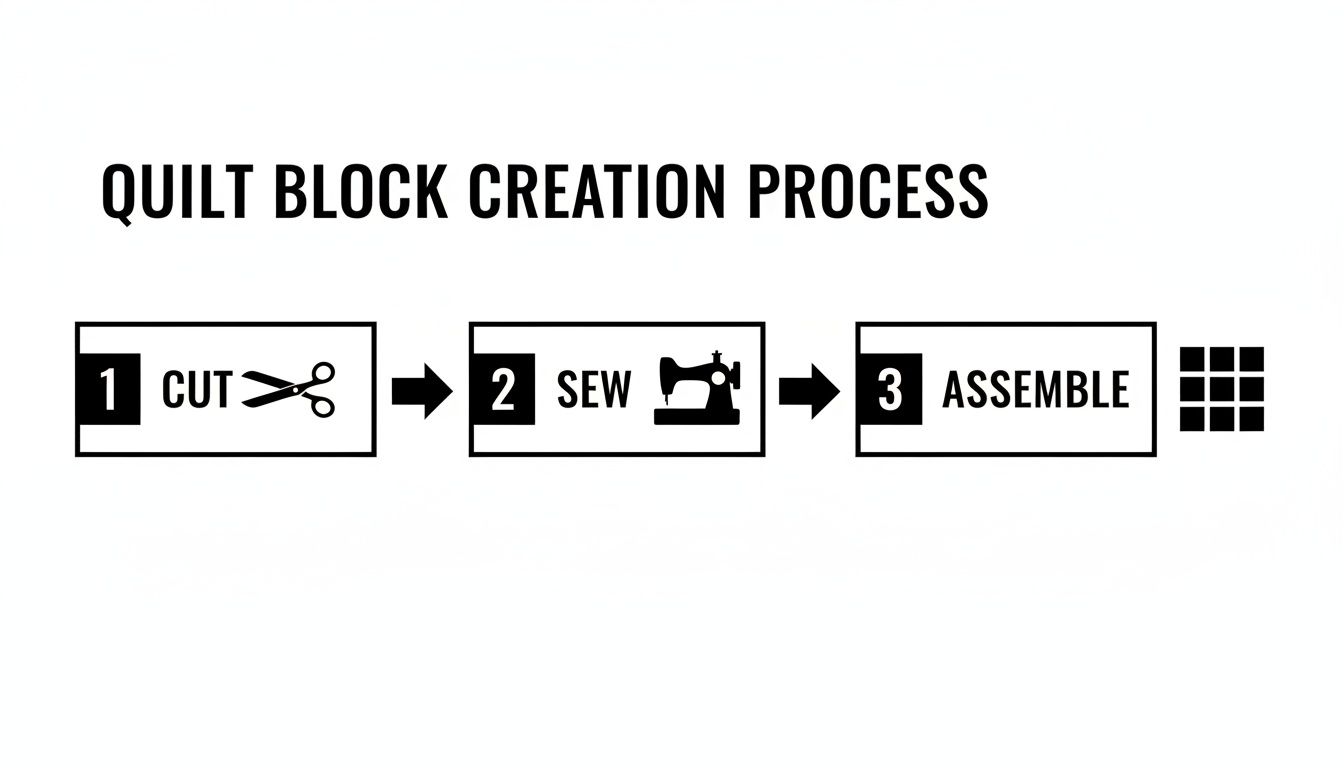
Making Your First Nine Patch Block
Alright, this is where the fun really begins. You've picked out your fabrics, and now it's time to turn them into something beautiful. We're going to tackle a classic Nine Patch, an easy block quilt pattern that’s been a favorite for generations. Let’s break it down into simple, manageable steps so you can build your skills and confidence one stitch at a time.
We'll be making a standard 12-inch finished block. Remember, that means it will actually measure 12.5 inches before you sew it into the rest of your quilt top to account for seam allowances.
Cutting Your Fabric for a Perfect Block
Accuracy is everything in quilting, and it all starts with the cut. For a traditional Nine Patch checkerboard, you'll need a total of nine squares. Grab your rotary cutter and a good ruler—they're your best friends for getting perfectly square pieces.
Here’s a simple cutting chart to guide you. All these measurements already include the standard 1/4 inch seam allowance, so there's no guesswork involved.
Cutting Chart For A 12-Inch Finished Nine Patch Block
Use this chart for precise fabric cutting. All measurements include a 1/4 inch seam allowance for a 12.5-inch unfinished block.
| Fabric Type | Cut Size Per Square | Number Of Squares To Cut |
|---|---|---|
| Dark Fabric | 4.5" x 4.5" | 5 squares |
| Light Fabric | 4.5" x 4.5" | 4 squares |
Once everything is cut, do a quick "dry run." Lay your nine squares out on your cutting mat in a three-by-three grid. The dark squares should be in the four corners and the very center, with the light squares filling in the gaps. This little visual check is a great habit to get into—it helps you catch any layout mistakes before you ever touch the sewing machine.
The All-Important Quarter-Inch Seam
If there's one skill that will make or break your quilt blocks, it's sewing a consistent quarter-inch seam. I'm not exaggerating! It’s the secret sauce that makes all your points match up beautifully. If your seams are even a thread too wide or too narrow, it can throw off the final size of your block.
The easiest way to nail this is with a quarter-inch presser foot, which has a little metal guide to keep your fabric perfectly aligned. Don't have one? No problem. You can make your own guide by stacking a few sticky notes or placing a strip of painter's tape on your machine's throat plate, exactly 1/4 inch away from the needle.
My Go-To Tip: Before you start on your actual block pieces, always test your seam on a couple of scraps. Sew them, press the seam open, and get your ruler out to measure it. If it’s not a perfect quarter-inch, adjust your guide. Taking a minute to do this will save you from a world of frustration later.
Assembling The Rows
Now, let's get sewing. The most organized way to build this block is by tackling it one row at a time.
- Row One: Grab the first and second squares from your top row. Place them right sides together and stitch along one edge with your perfect quarter-inch seam. Next, open them up and add the third square to the second one in the same way.
- Row Two & Three: Simply repeat that process for the squares in your middle row, and then again for the bottom row.
You’ll end up with three separate strips made of three squares each. Hold off on pressing for just a moment—we have a specific trick for that coming up next.
Joining the Rows with Nested Seams
This is the part that feels like magic. To get those sharp, perfect corners where four squares meet, we'll use a little technique called nesting seams. It sounds fancy, but it's incredibly simple and makes a huge difference.
First, take your three rows to the ironing board.
- For Row 1 and Row 3, press the seam allowances away from the center square.
- For Row 2, press the seam allowances toward the center square.
See the pattern? This alternating direction is the key.
Now, place Row 1 and Row 2 with their right sides together. You'll literally feel the seams from each row lock into place against each other. This little "nest" keeps the fabric from sliding around and guarantees your vertical seams will line up perfectly. Pin right at those nested points and sew the rows together.
Do the exact same thing to attach Row 3 to the bottom of Row 2. Once it's all sewn, take it back to the ironing board for one last, gentle press from the top. And just like that, you've finished your first Nine Patch block
The Secrets to Perfect Pressing and Assembly
We’ve all been there—you cut and sew your pieces with total precision, only to have the final block look a little… off. More often than not, the culprit isn’t your cutting or your sewing, but your pressing. This is where a good block becomes a great one, and it’s a small detail that makes a huge difference in how flat and professional your quilt top looks.
So, the big question: press seams open or to one side? While you’ll find quilters who swear by both, my advice for beginners is to press your seams to one side. It’s a secret weapon. This simple technique actually strengthens your seams and, more importantly, creates a tiny ridge that helps you “nest” your seams when joining rows. It makes lining everything up so much easier.
This simple workflow is the heart of quilting.
It’s a great reminder that each step builds on the last. A little precision at every stage really pays off in the end.
Set Your Seams For Success
Here's a habit that will instantly improve your piecing: "setting the seam." It sounds fancy, but it couldn't be easier. Once you've stitched a seam, lay it on your ironing board just as it came off the machine. Before you do anything else, just press the hot iron right on top of the stitch line.
This quick press works wonders. It helps the thread meld into the fabric fibers, essentially locking it in place. It also prevents the fabric from getting all stretched out and wonky when you go to press it to one side. It’s a tiny, 3-second step that makes a world of difference for stability and accuracy.
A huge mistake I see quilters make is "ironing" their seams by dragging the iron back and forth. This is a surefire way to stretch your beautiful pieces out of shape. Always press—place the iron down, hold it for a moment, and then lift it up to move to the next section.
The Alternating Seam Direction Trick
Getting all those little corners to meet perfectly in a Nine Patch block is one of the most satisfying feelings in quilting. And guess what? There’s a trick for that, and it all happens at the ironing board. The key is to press the seams in your rows in opposite directions.
It’s a simple but brilliant concept. For a classic Nine Patch, here’s the plan:
- Top and Bottom Rows: Press the seams of these two rows outward, so they point away from the center square.
- Middle Row: Press the seams for this row inward, pointing toward the center square.
When you do this, you create little opposing ridges. As you lay two rows right sides together, you’ll feel the seams just “nest” or lock right into one another. It's like they click into place! This little physical guide ensures your vertical seams will line up flawlessly, giving you those crisp, perfect points without any fuss. Taking a few extra moments to press this way truly sets you up for a beautiful finish every time.
Creative Twists on the Classic Nine Patch
Once you’ve got the basic Nine Patch down, you’ve officially unlocked a whole world of design possibilities. This isn't about memorizing a dozen new, complicated patterns; it's about seeing the incredible creative potential packed inside the one you already know. Think of this foundational block as a true chameleon, ready to be adapted into countless stunning designs.
The move from whole cloth quilts to pieced block designs was a huge moment in American quilting history, really picking up steam after 1840. This shift made quilting accessible to just about anyone, turning it from a specialist's art into a beloved craft for all. You can dive deeper into this fascinating transformation in the history of quilting. The humble Nine Patch was a star player in that movement.
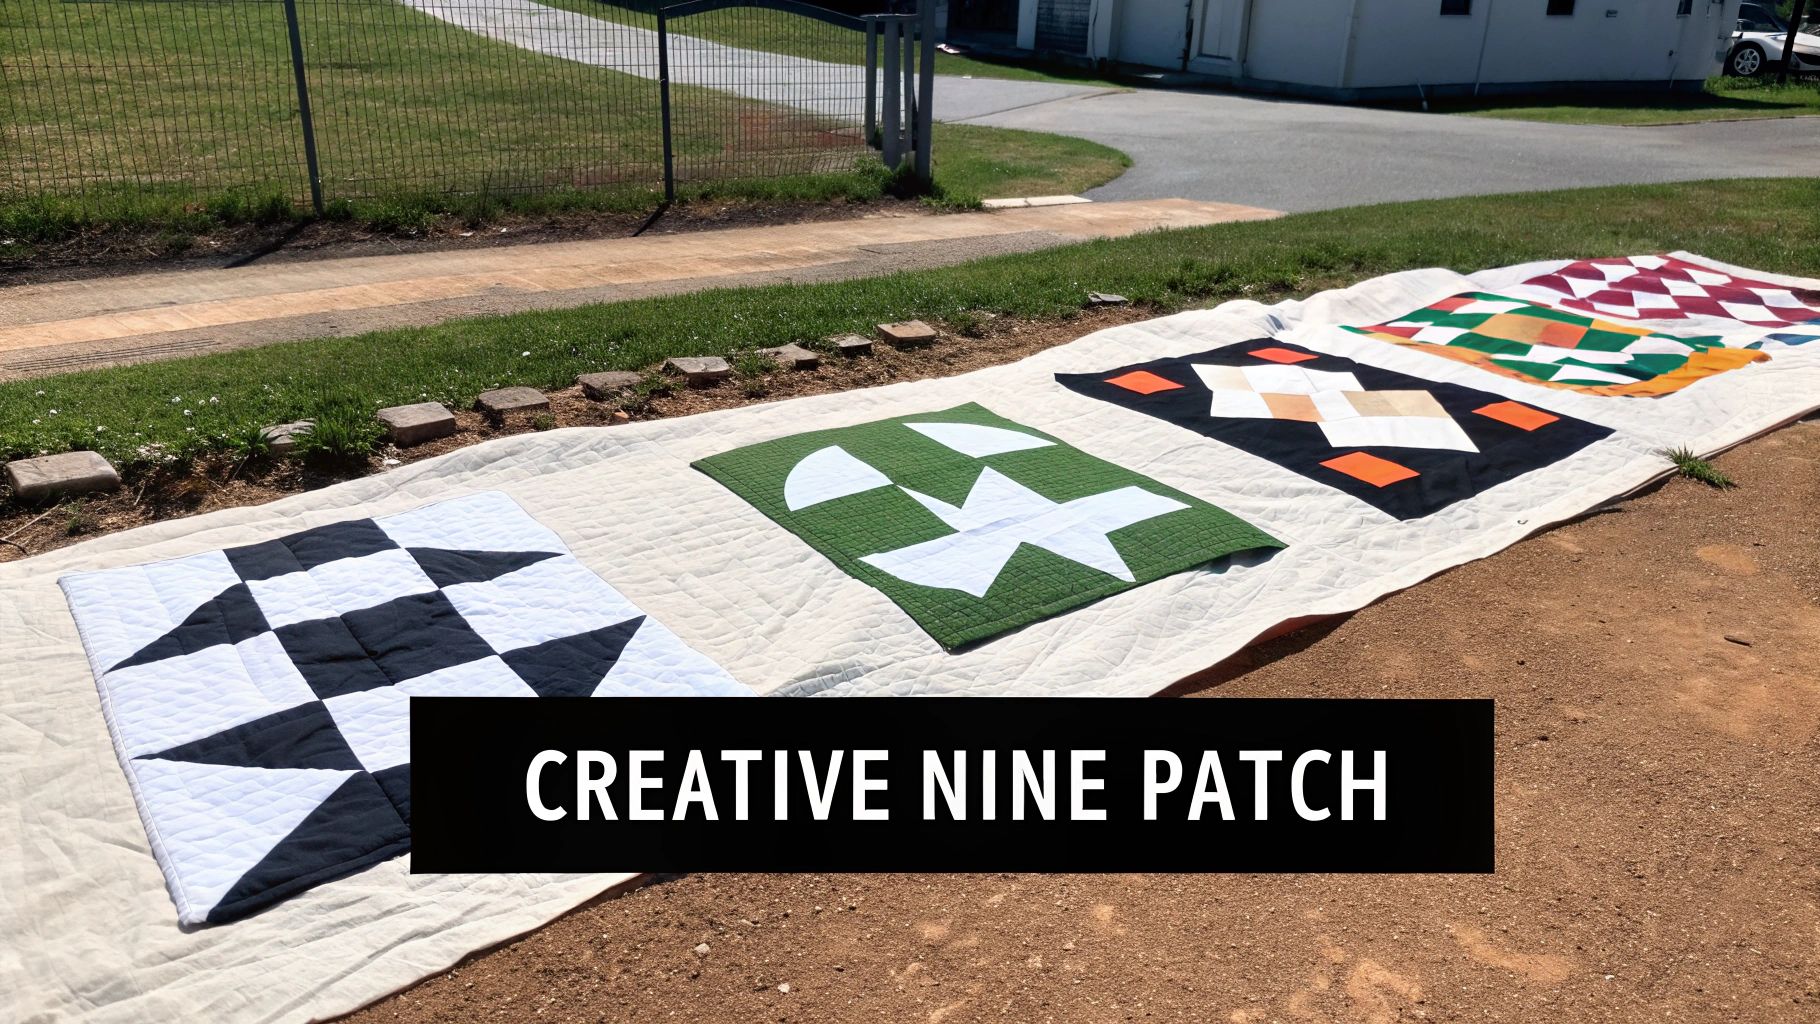
The Disappearing Nine Patch Illusion
Ready for a little quilting magic? The Disappearing Nine Patch is a beginner’s best friend because it looks incredibly intricate but starts with the same simple block you’ve already made. It’s an easy block quilt pattern that delivers a serious "wow" factor.
After sewing a standard Nine Patch block, you’re going to make two cuts right through the center—one horizontally and one vertically. Just imagine drawing a plus sign across the middle of your block.
Then the fun begins. You rearrange those four new smaller units, rotating some of them to see what patterns emerge. Sew them back together, and you have a completely new, more complex-looking block. It's a fantastic trick for getting a sophisticated result with very little extra effort.
Embrace the Scrappy Nine Patch
Every quilter eventually ends up with a treasured scrap bin, overflowing with leftover fabric pieces from past projects. The Scrappy Nine Patch is the perfect way to put those beautiful odds and ends to good use so that nothing goes to waste.
Instead of sticking to just two or three coordinated fabrics, you get to pull from your entire collection. The only real "rule" here is to try and maintain a general sense of light and dark values. This contrast is what helps the design pop.
This approach gives you a quilt that’s bursting with personality and memories. Each little square tells a story of a different project, making your finished quilt a vibrant, one-of-a-kind masterpiece that is uniquely yours.
My favorite tip for scrappy quilts is to use a consistent background fabric. Choosing the same light-colored fabric for all the "light" squares in your Nine Patch blocks will tie all those different scraps together beautifully, creating a cohesive and polished look.
Play With Scale for Modern Designs
Another simple way to put a twist on this classic is by playing with its size. The Nine Patch concept works whether your starting squares are tiny 1.5-inch pieces or massive 10-inch cuts.
- Go Big for Impact: Using large fabric squares to create oversized blocks is a fantastic shortcut. Sewing just a handful of these giant blocks together can give you a bold, modern baby quilt in a single afternoon.
- Go Small for Detail: On the other hand, tiny Nine Patch blocks, sometimes called "postage stamp" blocks, create an incredibly detailed and intricate look. It definitely requires more patience, but the stunning result is well worth the effort.
By simply changing the size of your initial squares, you can dramatically alter the entire feel of your quilt. It just goes to show that this easy block quilt pattern truly is a foundation for endless creativity.
Turning Your Blocks Into A Quilt Top
So, you've got a beautiful, neat stack of finished quilt blocks. Now what? This is where the magic really happens—turning those individual squares into a stunning, cohesive quilt top. It’s the moment your project truly comes to life.
Before you even think about sewing another stitch, take some time to play. I always recommend laying your blocks out on the floor, a bed, or a large table. Seeing how different arrangements look can completely change the entire feel of your quilt.
Choosing Your Layout
The most common layout you'll see is a straight set, where blocks are simply arranged in classic horizontal and vertical rows. It’s clean, it’s timeless, and it always looks fantastic. A straight set is the perfect way to let the checkerboard effect of a traditional Nine Patch really shine.
If you're feeling a bit more adventurous, you could try an on-point layout. This just means you rotate each block by 45 degrees so they sit like diamonds. This simple twist gives the quilt a completely different energy and can make even a basic block design feel much more intricate.
Here's a little trick I've learned over the years: once you have a layout you like, snap a picture of it with your phone. It’s amazing how seeing the whole design on a small screen helps you spot areas that feel unbalanced or could use a different block placement.
Adding Sashing and Borders
Have you ever noticed quilts with thin strips of fabric separating the blocks? That’s called sashing, and it’s a wonderful tool for a few key reasons.
- It frames your work: Sashing gives each block its own defined space. This is especially helpful if your blocks feature very busy prints that might otherwise run together.
- It adds size: If your quilt top is turning out a bit smaller than you’d hoped, adding sashing is an easy and elegant way to increase the final dimensions.
- It creates a secondary pattern: Using a contrasting sashing color can create a beautiful grid-like design that adds another layer of interest to the finished quilt.
Borders are the final frame for your entire quilt top. They serve a practical purpose by making sure the edges are straight and stable, but they're also your last big design opportunity. A simple border in a coordinating fabric gives a clean finish, while a more elaborate pieced border can add a final, dramatic flourish.
Whether you choose to add sashing, borders, or neither, this is the stage where your collection of individual blocks finally becomes a unified work of art.
Got Questions? We've Got Answers
Stepping into the world of quilting is a blast, but it's totally normal to hit a few snags along the way. Honestly, getting past these early hurdles is what separates a project you love from one you want to hide in a closet. Let's walk through some of the most common questions I hear from new quilters.
What's the Best Fabric to Start With?
If you're just starting out, my answer is always, always 100% quilting cotton. There's a good reason it's the go-to for quilters everywhere. It behaves exactly how you want it to—it doesn't stretch and slide around while you're trying to cut and sew.
Quilting cotton also holds a press like a dream, which is key for getting those flat, crisp seams you need for accurate blocks. Plus, with the sheer volume of colors and prints available, you'll have no trouble finding something that inspires you. My best advice? Steer clear of slippery fabrics like rayon or stretchy knits for now. You can tackle those once you've got a couple of cotton quilts under your belt.
How Can I Sew a Perfect Quarter-Inch Seam?
A consistent 1/4 inch seam is probably the single most important skill in quilting. I'm not exaggerating! If your seams are even a little bit off, your blocks won't come out the right size, and that throws everything else off down the line.
The easiest way to nail this is with a special 1/4 inch presser foot for your sewing machine. It has a little guide on the side that makes it practically foolproof. Don't have one? No problem. You can make your own guide by placing a strip of painter's tape or even a stack of sticky notes on your machine bed, with the edge lined up exactly 1/4 inch from your needle.
A quick pro-tip: Before you even think about sewing your real fabric pieces, run a test seam on a couple of scraps. Grab a ruler and measure it. Taking that extra 30 seconds to double-check your setup will save you a ton of frustration later.
Why Are My Quilt Block Corners So Off?
Ah, the classic beginner's dilemma! If your points and corners aren't meeting up, it almost always comes down to one of three things: your cutting wasn't accurate, your seam allowance is wobbly, or your pressing technique needs a tweak. If you've already sorted out the first two, let's talk about pressing.
The secret to perfect points is a little trick called "nesting your seams." When you're ready to join two rows of a block, press the seams of one row to the left and the seams of the other row to the right.
Now, when you put those two rows right-sides-together, you'll feel the seams lock into place against each other. It’s a little physical "click" you can feel with your fingers. This keeps the fabric from shifting as you stitch, and voilà—your corners will line up beautifully every time. It’s a game-changer!
From your very first stitch to that final, beautiful quilt, we're here to help you on your creative path at Famcut.com. Find an incredible selection of high-quality fabrics, quilting tools, and fun classes perfect for every quilter.