


Master the Card Trick Quilt Pattern
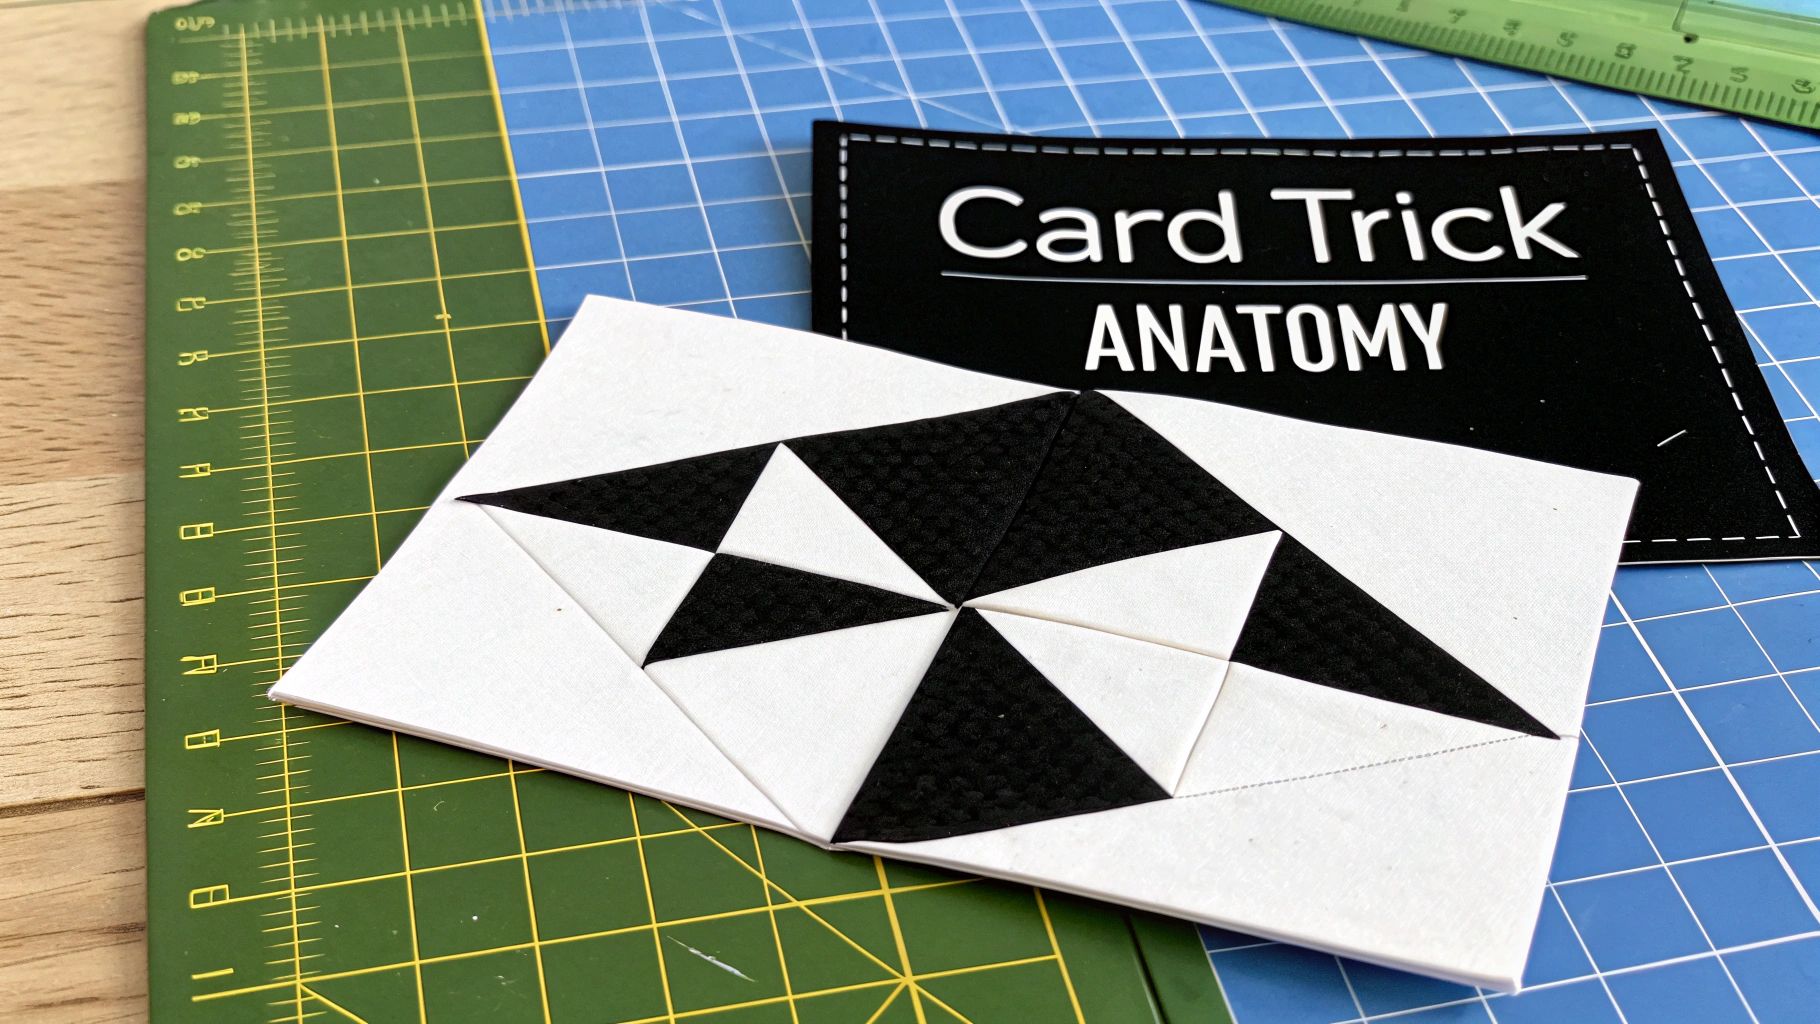
The Card Trick quilt pattern is a total showstopper. It creates this amazing optical illusion of interwoven cards, and all you need are four different fabrics. It might look incredibly complex, but the secret is that it's built from a simple nine-patch block using basic quilting units like half-square and quarter-square triangles. Nailing the placement of these triangles is the key to pulling off its mesmerizing effect.
Understanding the Magic of the Card Trick Block
Before you even think about cutting, it’s really helpful to understand what makes this block tick. At its core, it’s just a standard nine-patch grid. The genius is in the clever arrangement of triangles that fool the eye. Each of the four "cards" looks like it's sliding over one fabric and under another, which creates a sense of depth and movement you don’t often see in traditional blocks.
This visual sleight of hand comes from the precise placement of colors and the interplay between two key components:
- Half-Square Triangles (HSTs): These simple units form the outer edges of the "cards," defining their main shape and color.
- Quarter-Square Triangles (QSTs): These are a bit more involved. They make up the four corner blocks and, most importantly, the center block where all four "cards" seem to overlap.
Once you get a feel for how these simple pieces fit together, the whole process becomes much less intimidating. When you see it's just a puzzle of triangles, the pattern feels totally doable.
The Anatomy of the Illusion
To create the block, you'll need four distinct fabrics plus a background. We can call them Fabric A, B, C, and D. The magic happens because each triangle unit is pieced to continue the "line" of a specific fabric as it travels across the block.
For example, that crucial center square is a single quarter-square triangle unit made from triangles of all four fabrics. This is the spot where every "card" appears to intersect.
The real trick isn't in sewing complicated shapes—it's in organizing simple ones. The entire interwoven effect comes down to placing the right colored triangle in the right spot within the nine-patch grid.
This strategic assembly is what makes the Card Trick pattern such a fun challenge compared to simpler blocks. It’s a fantastic way to sharpen your skills, especially when it comes to matching points and working with triangles.
A Modern Classic with Deep Roots
While the Card Trick quilt pattern has a modern, graphic feel, it's actually a traditional design that really took off in the 1970s. It was designed by Gutcheon and became a huge hit after being featured in publications like McCall's. This cemented its place as a beloved nine-patch variation. You can learn a bit more about the history of this classic quilt block on createwhimsy.com.
By taking a moment to understand this fundamental structure, you're not just blindly following a pattern. You're learning the theory behind the illusion itself. That knowledge will give you the confidence to pick your fabrics and tackle the assembly, ensuring your finished block is a masterpiece of precision and design.
Choosing Fabrics That Make Your Pattern Pop
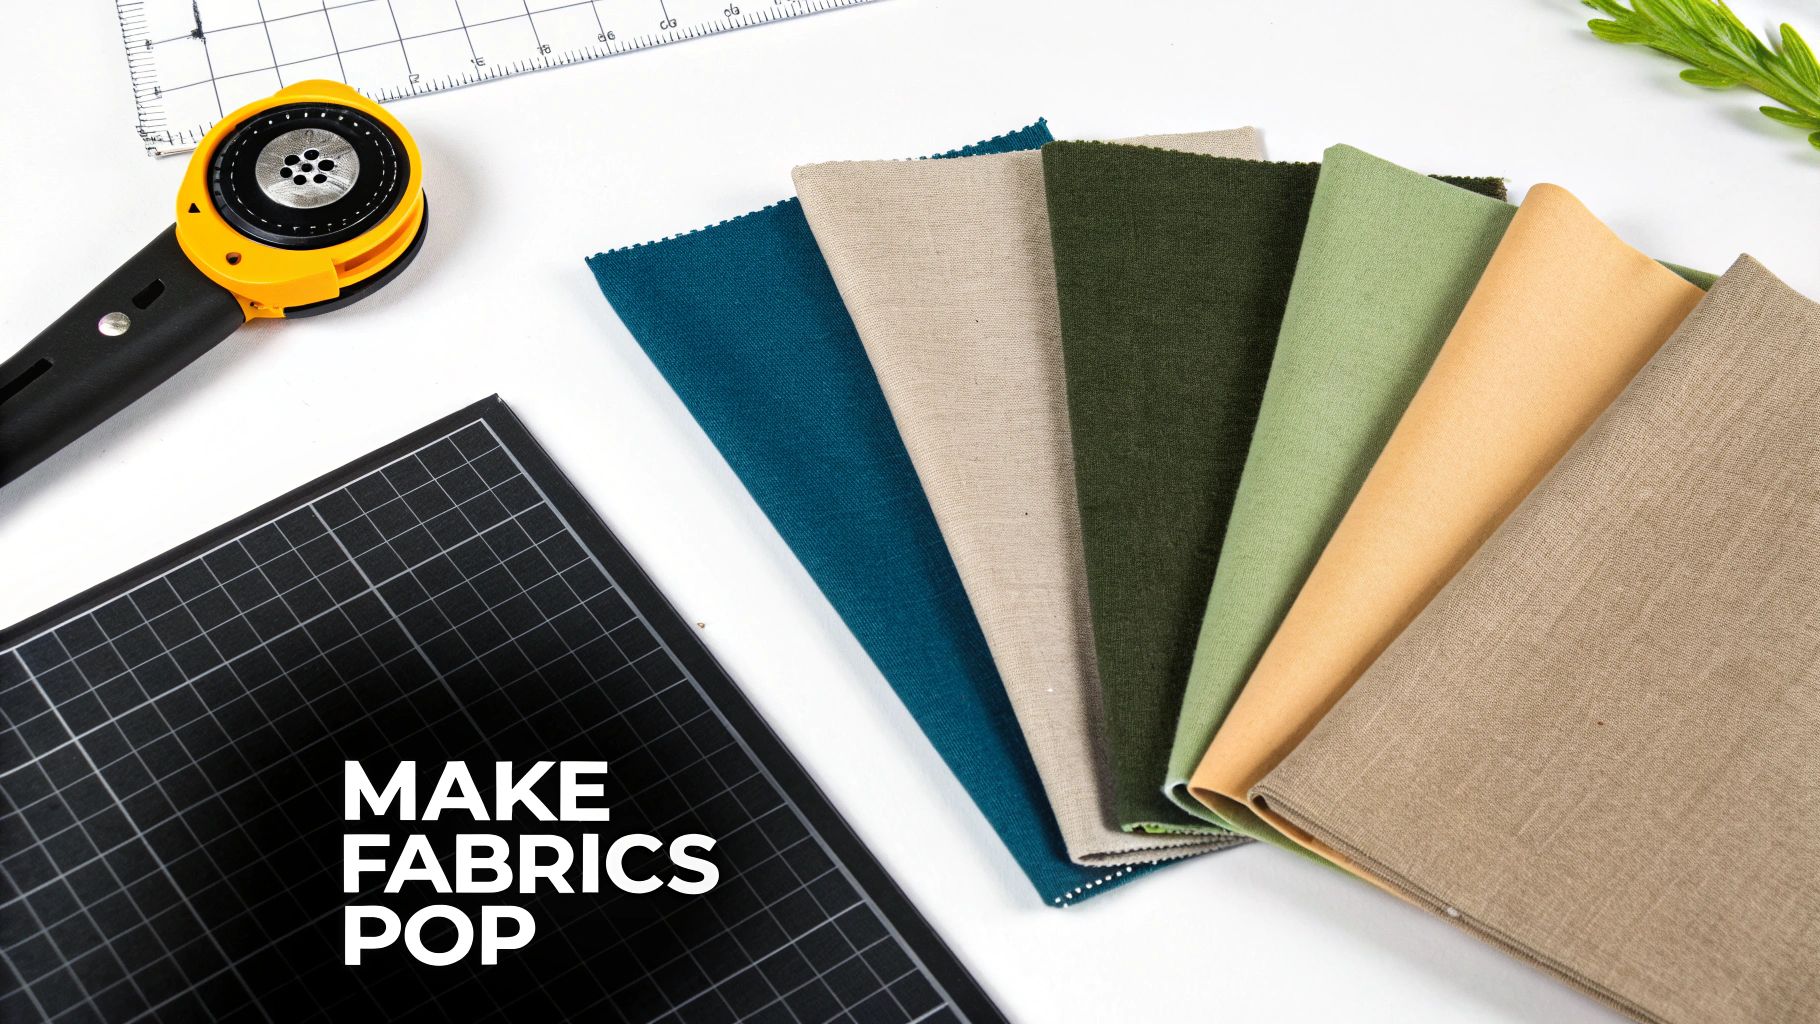
The real magic behind a show-stopping Card Trick quilt isn't just about picking colors you love—it's about choosing fabrics that work together to create an illusion. The whole "weaving" effect hinges on how your fabrics play off one another. To pull it off, you have to think about value, which is simply how light or dark a fabric is.
Strong contrast is everything here. If your four "card" fabrics and your background are too close in value, that intricate, interwoven design will just blur into a muddy mess.
Here’s a great little trick I use all the time: lay out your potential fabrics and snap a quick black-and-white photo with your phone. This instantly gets rid of the color and shows you the true values. You'll see right away if there's enough of a difference between them to make your design stand out.
Building Your Fabric Palette
As you gather your five fabrics (four for the cards, one for the background), your main goal should be creating a clear separation in their values. This is what makes each piece of the puzzle distinct.
- Go Bold with Solids: This is probably the easiest way to guarantee success. Pairing rich, saturated colors against a clean, light background—like this natural bella solid fabric—creates a graphic, modern quilt where the design is impossible to miss.
- Play with Prints: You can absolutely bring patterns into the mix, but be strategic. Small-scale or tone-on-tone prints are your best bet. I'd steer clear of anything with a large, busy motif, as it can easily overpower the block's geometry and hide all your beautiful piecing.
- Try a Low-Volume Background: Instead of a plain solid, a low-volume fabric can add a lovely touch. These are light-colored fabrics with a very subtle, low-contrast print that adds a bit of texture and depth without fighting for attention with your main "card" fabrics.
If you're looking for a shortcut to a beautifully coordinated palette, grabbing one of the many pre-cut fabric bundles like a Layer Cake Collection can be a huge time-saver. The fabrics in these collections are designed to go together, so a lot of the guesswork is already done for you.
Getting Your Toolkit Ready for Precision
Even the most stunning fabric pull can fall flat if your cutting is off. The Card Trick block is full of triangles, which means you need sharp points and accurate seams to get that clean, polished look. Having the right tools isn't a suggestion; it's a necessity for this one.
My best piece of advice? Start with a fresh rotary cutter blade. A dull blade is a quilter's worst enemy—it will drag and stretch your fabric, leading to wonky cuts. Those little inaccuracies will compound and cause some major frustration when you start sewing everything together.
Along with that sharp blade, make sure you have a good-quality quilting ruler with clear markings and a self-healing cutting mat. These basic tools are your foundation for success. They’re what will help you turn that beautiful stack of fabric into a flawless finished block, with all the crisp points and clean lines that make the Card Trick quilt so satisfying to sew.
Your Cutting Guide for Flawless Blocks
If there's one secret to a perfect Card Trick block, it’s this: it all starts with the cut. Seriously. Get this part right, and everything that follows—the piecing, the pressing, the final assembly—becomes a whole lot smoother.
Think of it this way: your rotary cutter and mat are laying the foundation for the entire quilt. Even tiny inaccuracies here can snowball into major headaches down the road, especially when you’re trying to line up all those sharp, crisp points that make this block so stunning. Consistent, accurate cuts are truly non-negotiable for this pattern.
The Math Behind the Triangles
The magic of the Card Trick block comes from just two simple units: half-square triangles (HSTs) and quarter-square triangles (QSTs). To make them come out perfectly sized after sewing, we need to add a specific seam allowance to our initial fabric squares.
Here’s the breakdown:
- For Half-Square Triangles (HSTs): The go-to formula is to add 7/8 of an inch to your finished size. So, for the 3-inch finished HSTs in our block, you’ll cut your starting squares to 3 7/8 inches.
- For Quarter-Square Triangles (QSTs): These need a little more wiggle room for the extra seams. Here, you'll add 1 1/4 inches to the finished size. That means for our 3-inch finished QST unit, we start by cutting 4 1/4-inch squares.
Once you understand the "why" behind these numbers, you can resize this block or any other triangle-based pattern with confidence.
Fabric Cutting Chart for a 9-Inch Finished Block
To make a single 9-inch Card Trick block (which will measure 9.5 inches unfinished), you'll need precise cuts from your four "card" fabrics and your background fabric. I’ve laid it all out for you in the chart below.
| Fabric Piece Type | Fabric Name (A, B, C, Background) | Cut Size (inches) | Quantity to Cut |
|---|---|---|---|
| HST Squares | Fabric A & Background | 3 7/8" x 3 7/8" | Cut 1 of each |
| HST Squares | Fabric B & Background | 3 7/8" x 3 7/8" | Cut 1 of each |
| HST Squares | Fabric C & Background | 3 7/8" x 3 7/8" | Cut 1 of each |
| QST Square | Fabrics A, B, C, & Background | 4 1/4" x 4 1/4" | Cut 1 of each |
These measurements will give you all the pieces you need to construct one beautiful block.
My best piece of advice? Cut all the pieces for one block at a time. Before you even think about sewing, organize your freshly cut fabric into neat, labeled stacks. A few sticky notes or pins labeled "A," "B," and so on will be your best friend and prevent any mix-ups.
Tips for Cutting With Accuracy
Before you bring your rotary cutter to the fabric, make sure your material is pressed well and starched. Starching is a game-changer; it adds stability and keeps the fabric from stretching or shifting while you cut. This is especially crucial when you're cutting those quarter-square triangles on the bias.
A great ruler makes a world of difference, too. I find that a good non-slip ruler helps me keep everything straight and true, every single time. If you're looking for recommendations, the Quilter's Select non-slip ruler is a fantastic tool for this kind of precision work.
And of course, always live by the quilter's golden rule: "measure twice, cut once." This careful prep work is your first and most important step toward a flawless Card Trick block.
Assembling Your Card Trick Block
Alright, with all your fabric cut and ready, we get to the fun part: sewing! This is where those neat little stacks of squares start to look like the classic Card Trick quilt block. We'll begin by making the cornerstone of this design—the half-square triangles, or HSTs.
Making the Half-Square Triangles
First up, you’ll be creating the outer HSTs. Grab one 3 7/8-inch square from each of your main fabrics (A, B, and C) and pair them up with a background square of the same size. You should have three pairs ready to go.
On the back (wrong side) of the lighter fabric in each pair, draw a single diagonal line from one corner to the other. Now, you’ll sew a scant 1/4-inch seam on both sides of that line. Why a scant seam? It’s a little quilting secret. That tiny bit of extra room—just a thread's width smaller than a true quarter-inch—accounts for the fabric that gets taken up in the fold when you press, which is the key to getting perfectly sized units.
Once you’ve sewn your two seams, just slice right down the middle on your drawn line. Voila! You’ve just made two identical HSTs from each pair.
This infographic really captures how a simple system of stacking, cutting, and labeling can make the whole process go so much smoother. It's all about setting yourself up for success.
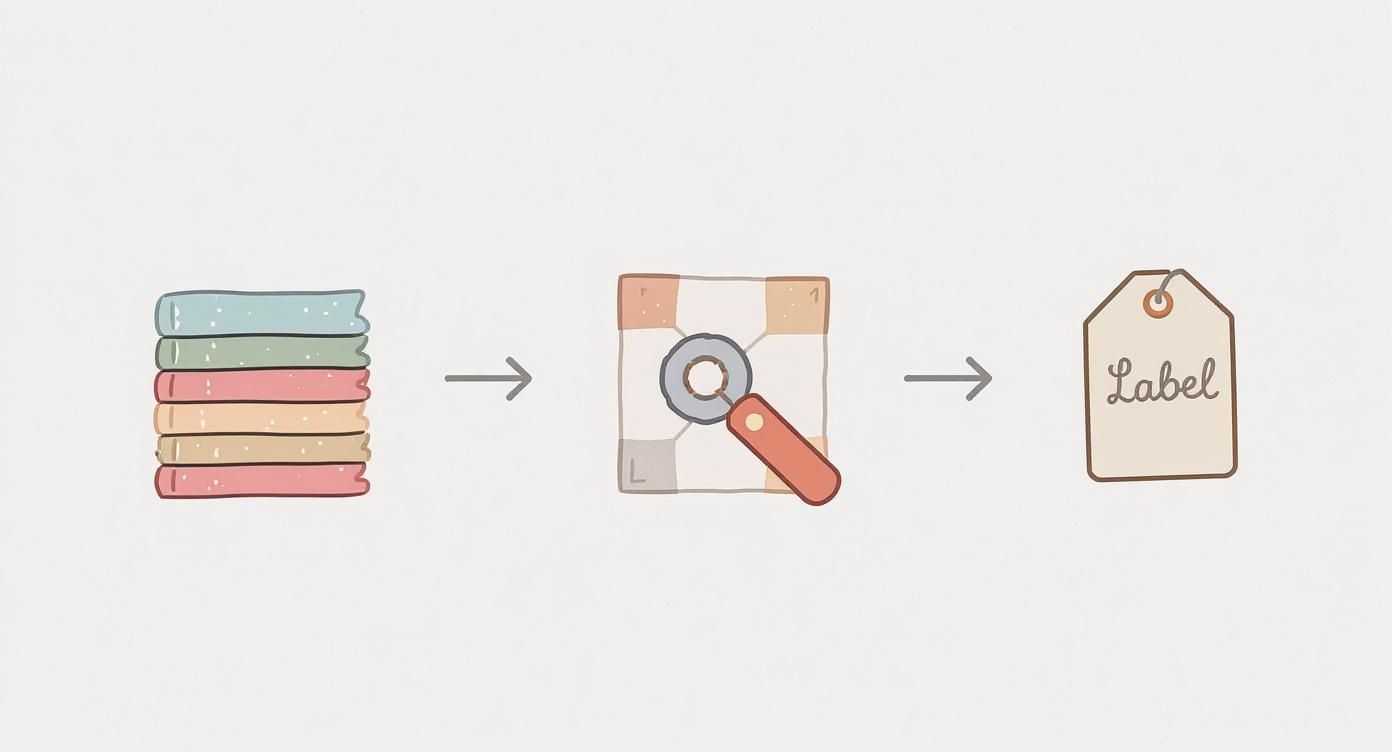
Honestly, this stack-cut-label method is a lifesaver. It keeps things from getting chaotic and ensures you always have the right piece at the right time.
Creating the Centerpiece: The Quarter-Square Triangle
Now for the real magic—the quarter-square triangle (QST) unit. This is the piece that sits right in the middle of the block, where all four "cards" look like they overlap. For this, you'll need your four 4 1/4-inch squares: one from each card fabric (A, B, and C) and one from your background.
We start by making two special HSTs.
- First, pair Fabric A with Fabric B.
- Then, pair Fabric C with the Background fabric.
Sew and cut these exactly like you did the others. Now you have two brand-new HSTs. Place them right sides together, making sure to "nest" the seams. This means butting them up snugly against each other so the bulk is on opposite sides. This is absolutely essential for getting a sharp, perfect point in the very center of your block.
I've found that using a few quilting clips like these G-Easy clips here is a game-changer. They hold everything steady without the risk of piercing and distorting the fabric that sometimes comes with pins.
With your HSTs clipped together, draw a new diagonal line on the top unit, this time running perpendicular to the seam. Sew 1/4-inch on both sides of this new line, then cut on the line. You've just created two identical QST units! We only need one for our block, so you can set the extra one aside for another project. A little bonus block!
The All-Important Pressing and Trimming
Before a single piece gets sewn into the block, every unit needs to be pressed and trimmed down to its final, exact size. I can't stress this enough—this is probably the most critical step for making sure your block is square and all your points line up beautifully.
- Pressing: I recommend pressing your seams to one side, usually toward the darker fabric so you don't see it through the lighter side. On the QST unit, try "fanning" or "pinwheeling" the seams at the center. This distributes the bulk and helps it lie nice and flat.
- Trimming: Using a quilting ruler, trim all six of your HST units down to a perfect 3.5 inches square. Then, do the same for your single QST unit, trimming it to 3.5 inches square. A ruler with a clear diagonal line is your best friend here; it helps you keep everything square without accidentally chopping off your points.
Take your time trimming. Seriously. Rushing this is the fastest way to a wonky block. A perfectly trimmed unit is the foundation for those crisp, professional-looking points we're all after in the Card Trick quilt pattern.
Putting It All Together
Lay out your nine trimmed units on your cutting mat in a three-by-three grid, just like a tic-tac-toe board. Follow your pattern's diagram for placement. The QST goes right in the middle, with the HSTs arranged around it to create that cool interwoven effect. Take a moment to double-check that every triangle is pointing the right way.
Now, sew the units into three rows. Here's a pro tip: press the seam allowances in alternating directions for each row. For instance, press the seams in row one to the right, row two to the left, and row three back to the right. This little bit of prep work allows the seams to nest perfectly when you join the rows.
Finally, sew the three rows together. You'll feel those nested seams lock into place, which is one of the most satisfying feelings in quilting. Give your finished block one last good press. It should measure a perfect 9.5 inches square, ready to meet the other blocks in your quilt top.
Designing Your Quilt Top Layout
You've done the hard part—you have a beautiful stack of finished Card Trick blocks ready to go! This is where the real magic begins, as you start thinking about how to bring all those individual pieces together into one stunning quilt top.
Sure, you could just sew them all together in a simple grid, and it would look fantastic. But there are a few other tricks up our sleeve that can completely change the personality of your quilt. The layout you choose is your final artistic flourish on the card trick quilt pattern.
The most direct route is a classic grid, maybe a 4x4 or 5x5 arrangement. When you sew the blocks directly to each other, you get this incredible, interwoven effect where the pattern seems to dance across the entire quilt. It’s a bold, modern choice that really lets the intricate piecing shine.
Framing Your Blocks with Sashing
If you're aiming for a more traditional feel, or you just want to give your blocks a little breathing room, sashing is the way to go. Think of sashing as the frame for each little masterpiece. Those strips of fabric between the blocks give your eyes a place to rest and help each Card Trick block stand out on its own.
- Simple Sashing: Using strips of a solid background fabric creates a clean, crisp look. It's also a fantastic trick for making your quilt a bit bigger without having to piece more blocks!
- Cornerstones: For an extra pop of detail, you can add small squares of fabric, called cornerstones, right where the sashing strips meet. This is the perfect spot to pull in an accent color from one of your "card" fabrics and tie everything together.
The colors you pick for your sashing and cornerstones will have a huge impact on the finished quilt. If you want to dive deeper into how different colors play together, our guide on Color Basics for Makers Understanding the Rainbow is a great resource.
Creating Drama with an On-Point Layout
Ready for a showstopper? Setting your blocks on-point is how you get there. This just means you rotate every block by 45 degrees, turning each square into a diamond. The result is a quilt top filled with dynamic diagonal lines that create a wonderful sense of energy and movement.
An on-point layout does take a little more planning. You’ll need to do some math to cut special setting triangles and corner triangles. These custom-cut pieces are what you'll use to fill in the zig-zag edges of the layout and square up the quilt top.
Even though it involves a bit of extra geometry, the visual reward is huge. The diagonal grid completely transforms the look of the Card Trick blocks, often creating beautiful new secondary patterns where the corners of the blocks meet. It’s a breathtaking way to take a classic design and turn it into something truly extraordinary.
Common Questions About This Quilt Pattern
Even a well-loved design like the Card Trick quilt can throw you a curveball now and then. Let's walk through some of the common sticking points I see quilters run into, so you can tackle this block with total confidence.
My Points Aren't Lining Up Perfectly!
This is, without a doubt, the number one frustration with this block. When those points don't meet up just right, it almost always boils down to one of three things: cutting, seam allowances, or trimming. If your initial cuts are off by even a hair, that tiny error will multiply as you piece the block together.
My best advice? Double-check your measurements before you cut. But the real game-changer is this: never skip trimming your HST and QST units down to their exact unfinished size. This step is your secret weapon. It corrects any minor slip-ups and ensures every piece of the puzzle fits together flawlessly. Finally, nesting your seams when you join the rows is the last trick to lock those points perfectly in place.
Can I Make This With Fewer Than Four Fabrics?
You absolutely can! The classic four-fabric look is a stunner, but this pattern is surprisingly flexible. The secret isn't the number of fabrics you use, but the contrast in value between them.
- Three Fabrics: Try a background with just two "card" colors. This simplifies the look a bit but keeps that beautiful interwoven effect.
- Two Fabrics: This creates a really bold, graphic block. It puts the focus squarely on the geometric shapes rather than the illusion of weaving.
As long as there's a clear difference between your light and dark fabrics, the design will pop.
How Do I Reduce Seam Bulk in the Center?
Ah, the dreaded bulky center. That spot where all the seams meet can get notoriously thick, making it tough to quilt later on. The best way to deal with this is to "pinwheel" or "fan" your seams.
Here’s how: after you sew the final seam on your center QST unit, carefully use a seam ripper to pop just the few stitches right at the very center of the seam allowance. This little trick lets you press the seams in a circular direction. The bulk gets distributed evenly, helping the block lie beautifully flat.
Once your whole quilt top is done, the right batting also makes a huge difference in getting a smooth finish. If you're not sure what to choose, you can find some fantastic advice in this Hobbs batting recommendation chart to help your quilt drape just right.
At Famcut.com, we're here to cheer you on through every part of your creative journey, from that first cut to the final stitch. Feel free to explore our wide selection of fabrics, tools, and resources to bring your next quilting project to life. Visit us at https://famcut.com to find everything you need.