


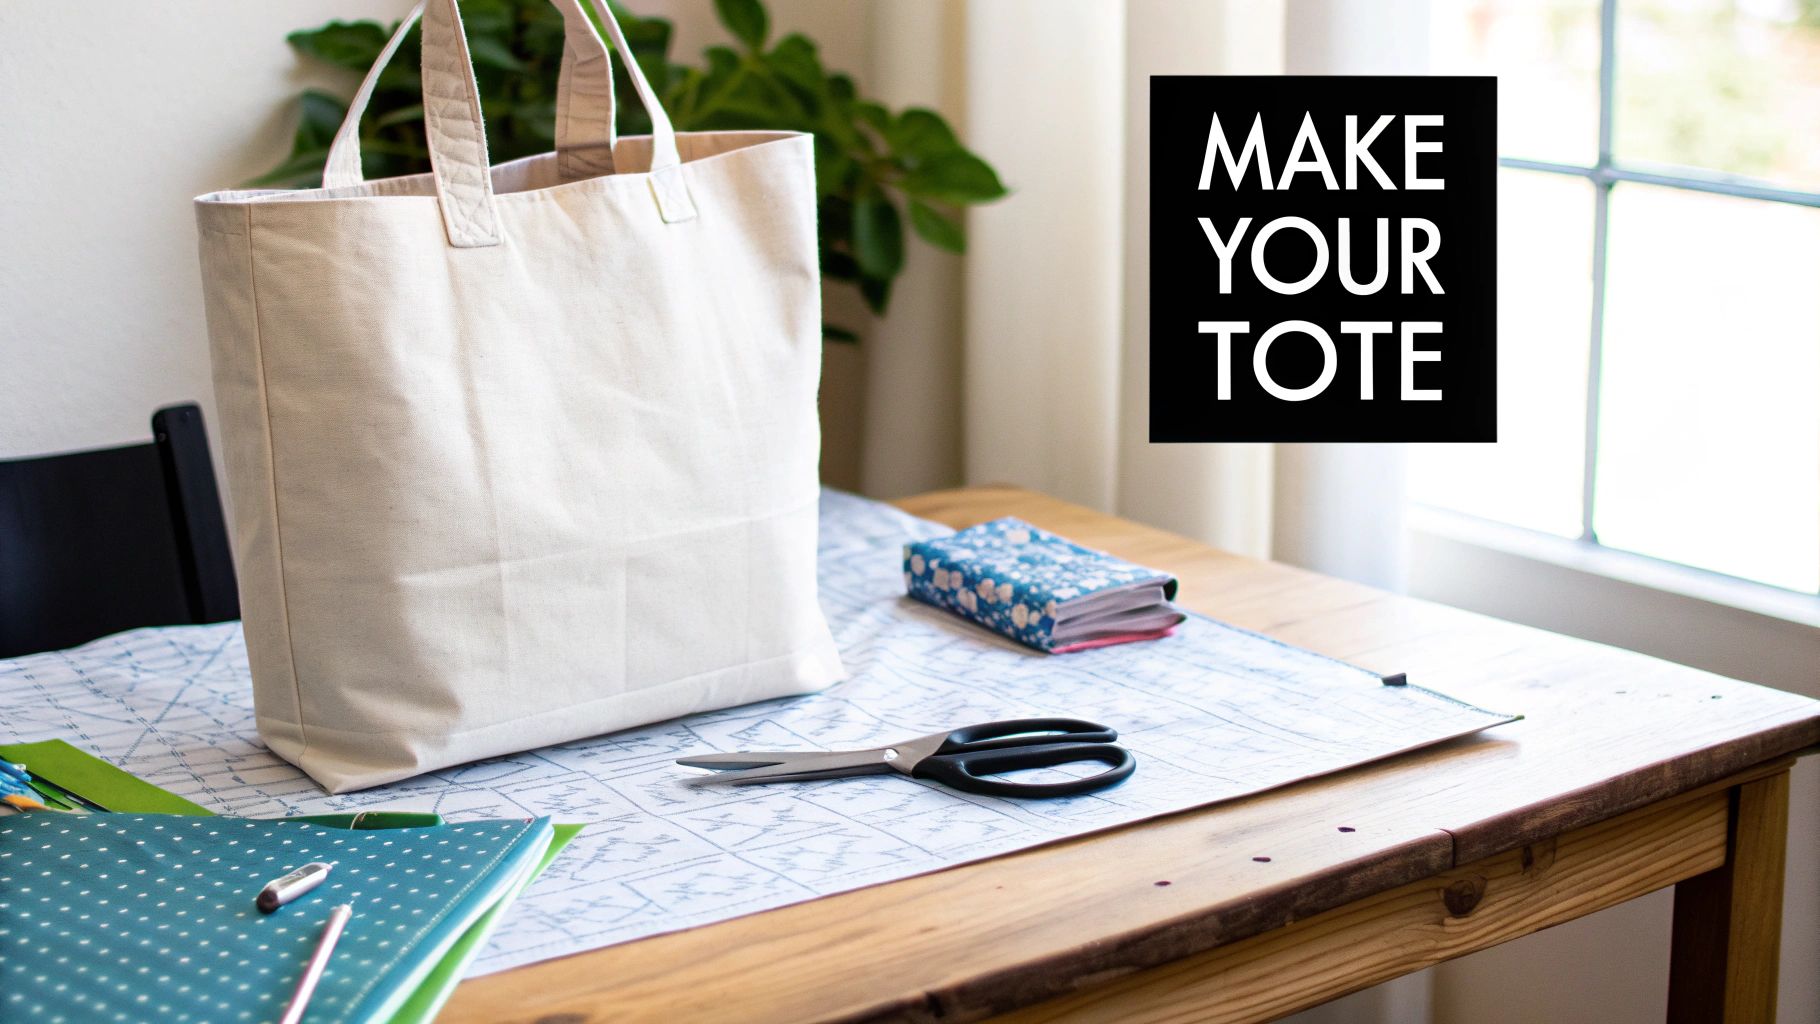
Your Ultimate Canvas Tote Bag DIY Guide With a Free Pattern
So, you're ready to make a sturdy, stylish bag that's also good for the planet? A canvas tote bag DIY project is the perfect way to create a personalized carryall you'll find yourself using every single day. This guide is your complete, beginner-friendly roadmap, taking you from the very first cut to the final stitch.
Why Make Your Own Canvas Tote Bag
Making your own tote is so much more than just a sewing project. It's a real, practical step toward living more sustainably and a fantastic way to express your personal style. As more of us move away from single-use plastics, a durable, reusable canvas bag has become an everyday essential. When you make it yourself, you guarantee a high-quality item that’s exactly what you want.
Honestly, this isn't just about putting fabric together. It's about that deep satisfaction you get from creating a functional piece that shows off your values. Whether you're an experienced quilter looking for a quick and satisfying make or a complete beginner eager to learn, this guide will give you the confidence to succeed.
The Rise of the Reusable Tote
The shift toward reusable bags is more than just a passing trend; it's a major global movement. The market for canvas tote bags is growing fast, all because of a shared desire to cut down on plastic waste. In fact, projections show the market hitting USD 1.2 billion in 2025 and climbing all the way to USD 2.1 billion by 2035.
Tote bags are on track to make up a massive 38.9% of the entire canvas bag market by 2025. Their simple, roomy design and dual handles make them perfect for daily life, and their popularity just keeps growing.
This project is all about empowering you to create something that is both beautiful and incredibly useful. You're not just following a pattern; you're building a new skill and making a durable accessory that can replace hundreds of plastic bags over its lifetime.
What You'll Learn in This Guide
We're going to move beyond the usual generic instructions and give you a clear, photo-guided process. Think of this as everything you need to know before starting your canvas tote bag DIY journey.
Here’s a little preview of what’s coming up:
- Material Selection: I'll walk you through choosing the perfect weight of canvas and the most durable webbing for your straps.
- Step-by-Step Construction: You'll follow a detailed tutorial, complete with photos, for cutting, sewing, and finishing your tote from start to finish.
- Professional Techniques: You'll master simple but effective tricks, like boxing the corners to give your bag real structure and reinforcing the straps for maximum strength.
- Customization Ideas: We’ll explore how to add pockets, closures, and other decorative touches to make your tote truly one-of-a-kind.
If you love the feeling of creating something unique from scratch, you might also enjoy exploring some ideas for other custom DIY projects. The skills you build here can open the door to all sorts of creative endeavors.
Now, let's get started on your perfect carryall.
Setting Yourself Up For Success: Gathering Your Tools and Materials
Before you even think about threading your sewing machine, let’s talk prep. The secret to a fantastic, durable canvas tote bag—one that can actually handle a heavy load of groceries or a stack of library books—lies in choosing the right supplies from the start.
Getting this part right makes the entire sewing process so much smoother and guarantees you’ll end up with a bag you're proud of. Think of this as building a strong foundation. Let’s walk through exactly what you need, so you can head to the fabric store with a game plan.
Choosing The Perfect Canvas Fabric
The heart of your tote bag is, of course, the canvas. And not all canvas is created equal. The weight of the fabric is the single most important factor for getting that sturdy, structured feel we all love in a good tote.
For a classic, all-purpose tote, I always recommend a 10 to 12-ounce cotton canvas. This is truly the sweet spot. It’s beefy enough to stand up on its own, but it won’t put up a fight with your home sewing machine.
You'll probably see a few different types on the shelf:
- Duck Canvas: This is my go-to. It has a super tight, smooth weave that makes it tough as nails and naturally water-resistant.
- Washed Canvas: If you want a softer, more broken-in feel right from the start, this is a great option. It’s been pre-washed to give it a more relaxed vibe.
- Waxed Canvas: This stuff is amazing for weather resistance and develops a gorgeous, rugged patina over time. Just know it requires a bit of special handling when sewing.
For your first project, you can't go wrong with a standard 10 oz duck canvas. It’s no wonder this material is set to dominate the market, projected to hold a 32.18% market share for tote bags by 2025. People are catching on to its strength and eco-friendly benefits—one great canvas bag can replace hundreds of plastic ones. If you're a data nerd like me, you can explore more about these market trends and see the numbers for yourself.
Before we move on, here's a quick checklist to make your shopping trip a breeze. I've put together a table of everything we're about to cover, from fabric to the right sewing machine needle.
Essential Materials and Tools Checklist
This table is your quick-reference guide to all the supplies needed for your canvas tote bag project, with my personal recommendations for getting the best results.
| Item | Recommended Specification | Pro Tip |
|---|---|---|
| Canvas Fabric | 10-12 oz Cotton Duck Canvas | Feel the fabric! A good canvas should feel substantial, not flimsy. |
| Straps | 1" to 1.5" Cotton Webbing | Choose a width that feels comfortable on your shoulder. Comfort is key. |
| Sewing Needle | Denim/Jeans Needle, Size 90/14 or 100/16 | Don't skip this! A universal needle will likely break or skip stitches. |
| Thread | Heavy-Duty or Upholstery Thread | This adds crucial strength to your seams, especially where the straps attach. |
| Cutting Tool | Sharp Fabric Scissors or Rotary Cutter | A fresh blade makes all the difference for clean, fray-free edges. |
| Marking Tool | Chalk Pencil or Disappearing Ink Pen | Test on a scrap first to make sure the marks remove easily. |
| Measuring Tool | Clear Acrylic Ruler & Cutting Mat | A quilting ruler is perfect for ensuring your cuts are perfectly square. |
With this list in hand, you’re ready to gather your gear with confidence. Now let's dive a bit deeper into some of those key items.
Selecting Strong And Comfortable Straps
The straps are the workhorses of your tote, so they need to be tough. While you could make them from your canvas, I almost always reach for pre-made cotton webbing. It's faster, easier, and engineered for strength.
Look for webbing that is 1 to 1.5 inches wide. Anything narrower can dig into your shoulder when the bag is loaded up. Cotton is a fantastic choice because it’s strong but still soft and flexible.
Pro Tip: When you're at the store, actually hold the webbing. Drape it over your shoulder. Some types can be scratchy, while others are soft and smooth. Go with what feels good to you—after all, you’re the one who will be carrying it!
Essential Sewing Tools And Notions
Finally, let's round up the tools that will make this project a joy instead of a headache. The right gear will give you that clean, professional finish.
- A Heavy-Duty Needle: This is a non-negotiable. Swap out that standard needle for a denim or canvas needle, size 90/14 or 100/16. These needles are built to punch through thick fabric layers without bending, breaking, or skipping stitches. Seriously, it will save you so much frustration.
- The Right Thread: Your all-purpose thread might not be up to the task. Grab a spool of heavy-duty or upholstery-grade thread. It will make your seams much more durable, especially at high-stress points like the strap attachments.
- Sharp Cutting Tools: Whether you prefer a good old pair of fabric scissors or a rotary cutter, make sure your blade is sharp. A dull blade will chew up the canvas and leave you with frayed, messy edges.
- Measuring and Marking: A clear acrylic ruler and a self-healing cutting mat are a sewer’s best friends for getting perfectly straight, square cuts. For marking your stitch lines, a simple chalk pencil or a disappearing ink fabric marker works great on canvas.
Bringing Your Tote to Life: A Step-by-Step Guide
Alright, this is where the fun really begins. You’ve got your materials, your machine is ready—now it’s time to turn that flat piece of fabric into a tote bag you'll be proud to show off. We'll go through this together, step by step, so every stitch builds your confidence.
Think of this as your personal sewing lesson. I'll walk you through everything from getting that first cut just right to adding the professional finishing touches. Let's get sewing.
This whole project really boils down to just a few core parts, as you can see here.
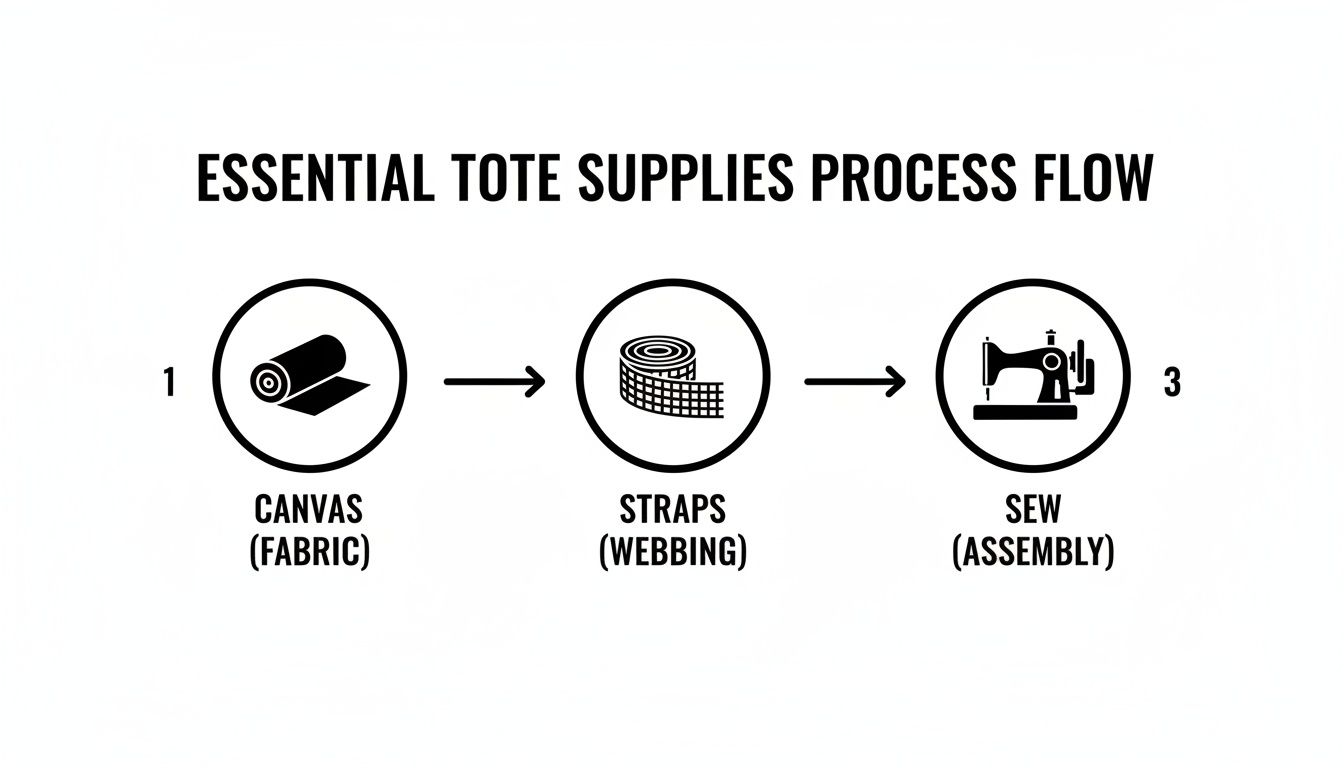
It’s that simple: the canvas body, the straps, and the sewing that holds it all together.
Preparing and Cutting Your Fabric
I can't stress this enough: your first step is the most important for getting a professional result. A wonky cut will lead to a lopsided bag, so please, take your time here. Before you even think about cutting, give your canvas a good press with a hot iron to get rid of any creases from being folded.
Once your fabric is nice and smooth, grab your acrylic ruler and a disappearing ink pen. Mark out the dimensions from the pattern directly onto the fabric. For a classic, do-it-all medium tote, you'll be cutting one large rectangle.
Typical Dimensions for a Medium Tote:
- Main Body Piece: You'll need one rectangle measuring 36 inches long by 18 inches wide.
- Strap Pieces: If you're making your own, cut two rectangles that are 24 inches long by 4 inches wide. If you're using pre-made webbing, just cut it to length.
Carefully cut along your lines with sharp fabric scissors or a rotary cutter. Honestly, a rotary cutter and a self-healing mat will give you the cleanest, straightest edges possible. Always remember the old sewer's mantra: measure twice, cut once.
Constructing the Main Bag Body
With your main piece cut, fold it in half so the shorter ends meet, making sure the right sides of the fabric are facing each other. That fold you just made? That's the bottom of your bag. You should now be looking at a folded rectangle that’s 18 inches by 18 inches.
Pin the two raw side edges together. Using a heavy-duty thread and a denim needle (trust me on this), sew down each side with a 1/2 inch seam allowance. Don't forget to backstitch at the start and finish of each seam to lock those stitches in. This is absolutely critical for the bag's long-term durability.
My Pro Tip: The key to perfectly straight seams is to stop watching the needle. Instead, keep your eye on the seam allowance guide on your machine's throat plate. This small shift in focus makes a huge difference and helps you sew a perfectly straight line every time.
After you've sewn both sides, press those seams open with your iron. I know it seems like a small thing, but this reduces bulk and helps the bag sit correctly, which makes a huge difference in the final product.
The Magic of Boxing the Corners
This next bit is a total game-changer. "Boxing the corners" is the secret to giving your tote a flat bottom, which lets it stand up on its own instead of slumping into a puddle. It looks fancy, but it's surprisingly easy to do.
- Prep the Corner: Keep the bag inside out. At one of the bottom corners, pinch the side seam and the bottom fold together to create a point. You want that side seam to line up perfectly with the center of the bottom fold.
- Mark Your Line: Lay this point flat, forming a little triangle. Measure down 2 inches from the very tip of the triangle and draw a straight line right across.
- Sew and Trim: Stitch directly on that line, backstitching at both ends to make it strong. Then, trim off the excess triangle fabric, leaving about a 1/2 inch seam allowance.
Do the exact same thing for the other bottom corner. When you turn your bag right side out, you'll have a beautifully structured base. It’s a simple technique that instantly elevates your project from "homemade" to "handcrafted."
Creating and Attaching the Straps
Time for the handles! Your straps will be taking all the weight, so attaching them securely is not optional. We'll use a special reinforcement stitch to make sure they can handle a heavy laptop or a full load of groceries.
If you’re using pre-made cotton webbing, just cut two pieces to your preferred length—24 inches is a great starting point for a comfortable shoulder bag. If you’re making them from scratch, take your 4-inch wide strips, fold them in half lengthwise, and press. Open them back up, fold the raw edges into that center crease, and press again. Finally, fold the whole thing in half along the original crease and topstitch down both long edges for a clean, sturdy strap.
To attach them, you'll first want to hem the top edge of the bag. Fold the raw edge down 1/2 inch and press, then fold it down another 1 inch and press again. This creates a neat, double-fold hem.
Now, measure in 4 inches from each side seam along that top hem and make a small mark. This is where the outside edge of each strap will sit. Tuck the raw ends of a strap about 1 inch deep under the hem at your marks. Double-check that the strap isn't twisted, then pin it firmly in place.
Reinforcing the Straps for Durability
This is the final, and most important, sewing step. Start by stitching the hem all the way around the top of the bag, which will catch the bottom of your strap ends. Then, you'll go back to each of the four spots where a strap is attached.
For ultimate strength, we're going to sew an "X-box" stitch. Simply sew a small rectangle around the base of the strap where it meets the bag. Then, sew two diagonal lines from corner to corner inside that rectangle, forming an 'X'. This technique distributes weight and stress evenly, making it nearly impossible for the straps to rip away from the bag.
Once all four strap ends are reinforced, give the whole tote one last press with the iron. And that's it—you've just created a tough, high-quality canvas tote from scratch
Giving Your Canvas Tote Its Unique Flair
You’ve done the hard work and built a sturdy, reliable tote bag. The foundation is solid. Now for the fun part—making it truly yours. This is where your canvas tote bag diy project goes from being just a bag to being a reflection of your personal style.
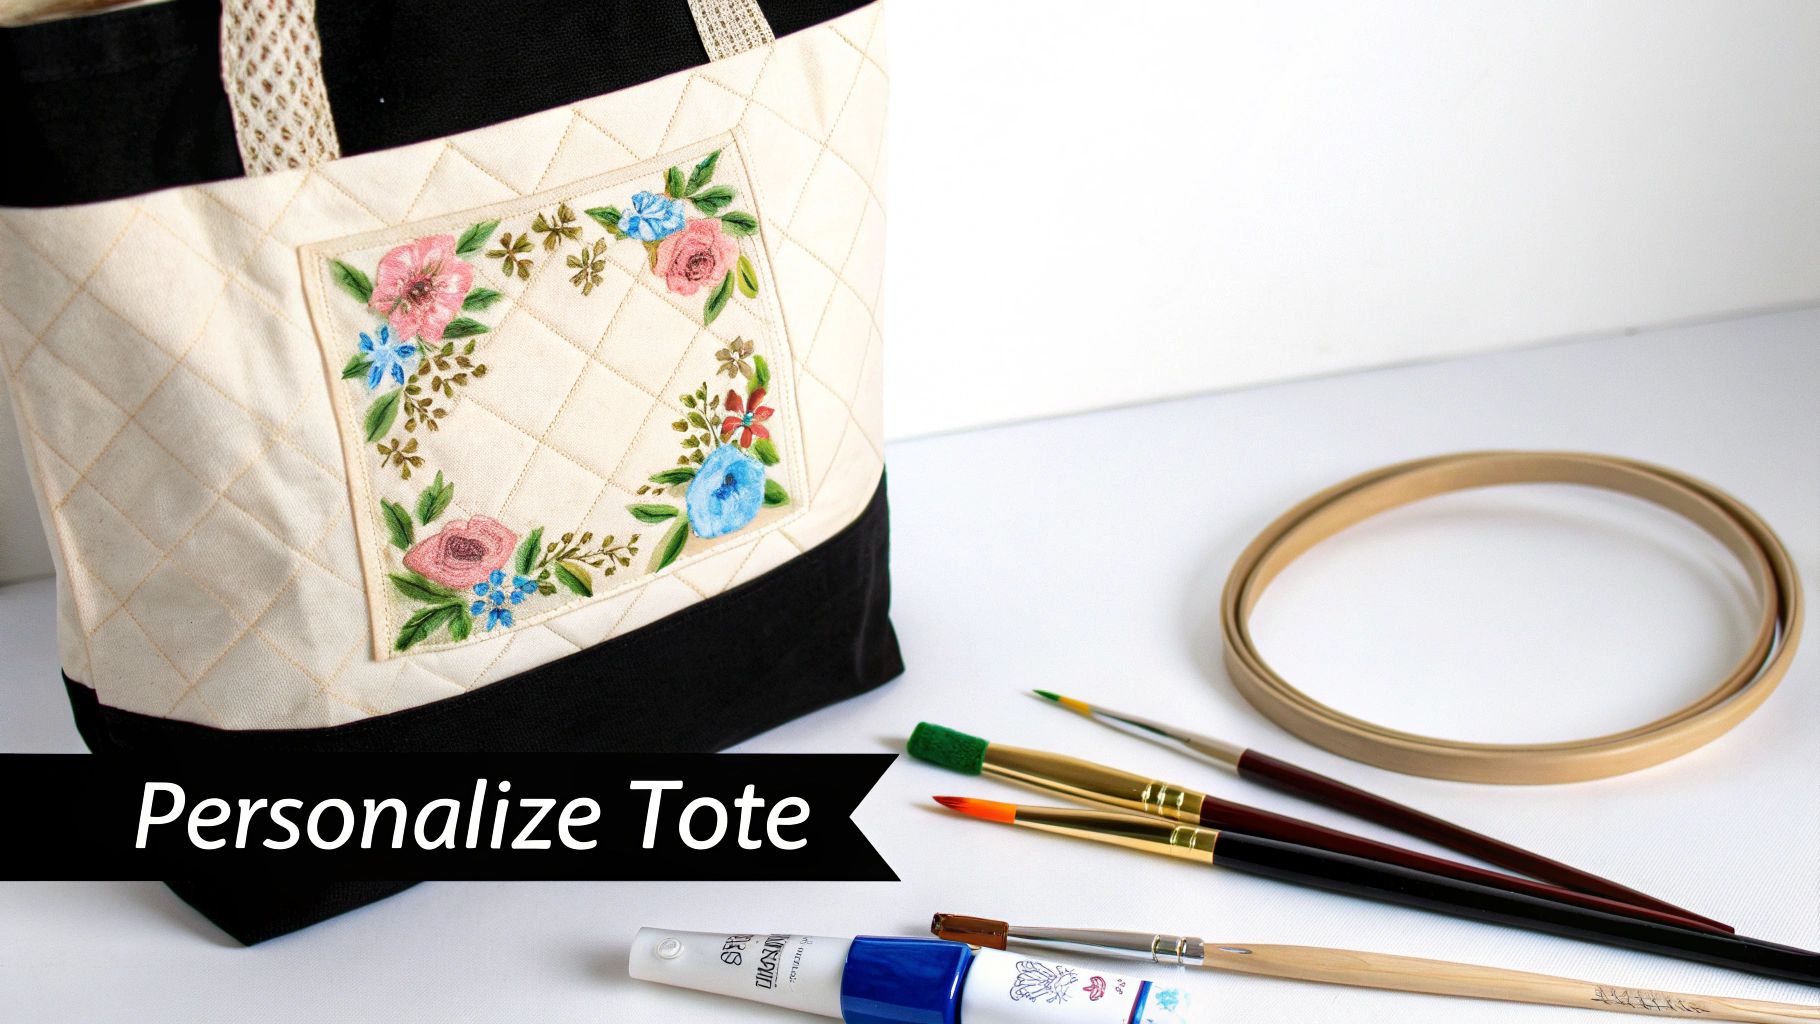
Whether you’re a quilter dying to add a patchwork pocket or someone who just wants a secure spot for their keys, this is the stage where you tailor the bag to your life.
Let’s Talk Pockets
An open-tote is great, but pockets are a game-changer for organization. Adding one or two is a simple move that makes your bag so much more useful. You don't need anything fancy to get started.
Here are a few of my go-to pocket styles that you can easily add, even after the bag is mostly assembled:
- The Simple Patch Pocket: This is the easiest win. Just take a rectangle of fabric, hem the top, fold the other three sides under, and stitch it right onto the lining or the outside of your bag. Done.
- The Divided Patch Pocket: Want a little more order? Make that patch pocket a bit wider and run a line of stitching straight down the middle. Now you’ve got perfect little slots for a pen and your phone.
- The Zippered Pocket: If you need to keep valuables safe, a zippered pocket is your best bet. I usually make a separate little zip pouch and then just sew it securely into the lining. It gives you a really clean, pro-looking finish.
I can't stress this enough: adding pockets is about making the bag work for you. That little slot you add for your bus pass or the secure spot for your keys is what turns a good bag into your favorite bag.
It’s this kind of personalization that’s driving huge growth in the tote bag market, which is expected to expand by USD 9.82 billion between 2025 and 2029. People are tired of generic. They want durable, stylish bags they can make their own, especially since one good canvas tote can replace over 1,000 plastic bags.
Choosing the Right Closure
The classic open-top tote is great for grabbing things on the go, but sometimes you need to button things up for a little more security. Adding a closure is a surprisingly simple upgrade that provides a lot of peace of mind in a crowd.
Here are a few options to consider:
| Closure Type | Perfect For... | My Skill Rating |
|---|---|---|
| Magnetic Snap | Quick, easy access with a solid hold. | Beginner |
| Button and Loop | A charming, slightly rustic feel. | Beginner |
| Recessed Zipper | Maximum security for everything inside. | Intermediate |
Honestly, for most bags, a magnetic snap is the perfect compromise. It gives you that satisfying "click" and keeps things secure without the fuss of installing a full zipper.
Decorating Your Canvas
Okay, let's get to the really creative stuff. This is where your plain canvas becomes a blank slate for your artistry.
Painting and Stenciling This is probably the most direct way to get your vision onto the fabric. Grab some acrylic paints, mix them with a fabric medium (this is key!), and go to town. The medium keeps the paint from getting stiff and cracking. Once you heat-set it with an iron, it’s permanent. Stencils are also brilliant for clean lines and repeating patterns.
Embroidery and Appliqué For a beautiful, textural look, nothing beats hand embroidery. You can stitch a simple monogram, a cascade of flowers, or anything in between. If you’re new to it, a simple backstitch for outlines and a satin stitch for filling in color will get you surprisingly far. Appliqué is another favorite of mine—you just sew smaller fabric shapes onto your bag to create bold, graphic designs.
Iron-On Vinyl (HTV) If you're after that super crisp, professional graphic look, Heat Transfer Vinyl (HTV) is your friend. You can design your own graphics on a machine like a Cricut or buy pre-made designs. It’s perfect for adding a name, a punchy quote, or a cool logo.
The satisfaction you get from the hands-on process of Do It Yourself product customization is what makes a project like this so special. These personal flourishes are what elevate a simple tote into a treasured accessory or a truly meaningful handmade gift.
Pro Tips, Troubleshooting, and Care Instructions
Even the most straightforward sewing project can throw you a curveball. Don't sweat it—this is just part of the process. Think of it as turning a moment of frustration into a new skill. This is where we'll tackle those common little hiccups you might run into while making your canvas tote and talk about how to keep your finished bag looking great for years.
We'll walk through everything from skipped stitches to bulky seams. Most of these problems have surprisingly simple fixes, and soon you'll be handling them like you've been sewing for decades.
Taming Your Sewing Machine
I can't tell you how many times I've heard from people whose sewing machines start to protest when sewing through thick layers, especially where the handles join the top of the bag. If you notice your machine skipping stitches or creating a tangled "bird's nest" of thread underneath, the first thing you should do is stop and check your needle.
Nine times out of ten, a dull or wrong-sized needle is the culprit. A standard universal needle just doesn't have the muscle to punch through heavy canvas and webbing. The fix is usually as simple as swapping it out for a sharp, new denim needle, a size 100/16 is perfect for this job.
Another little trick for getting over those chunky seams is to use a "hump jumper." If you don't have one, just fold up a small piece of scrap canvas and tuck it behind the needle, right under the back of the presser foot. This levels the foot out, allowing it to glide over the thick spot instead of getting stuck.
Key Takeaway: Never try to force your machine through a thick seam. Listen to it. If it sounds like it's struggling, pause and assess. A fresh needle and a level presser foot solve 90% of these issues.
Achieving a Professional Finish
It’s the small details that really make a project sing, taking it from "homemade" to "handcrafted." Spending just a few extra minutes on the finishing touches will make your tote bag sturdier and look so much cleaner.
Pressing Is Not Optional I'm going to say it louder for the people in the back: press your seams as you go! It’s the single best thing you can do for your project. Pressing seams open reduces bulk, makes your corners turn out beautifully crisp, and gives the whole bag a sharp, professional structure. Keep that iron on and handy.
Keep Fraying Edges in Check Canvas is a woven fabric, which means its raw edges will want to unravel over time. To stop that from happening, you'll want to finish the raw seams on the inside of your tote.
Here are a few great ways to do it:
- Zigzag Stitch: This is a basic stitch on almost every machine. Just sew a wide zigzag right along the raw edge of your seam allowance.
- Overcasting Stitch: If your machine has an overcasting or overedge stitch, even better! It’s designed specifically to bind edges.
- Pinking Shears: For a quick, no-sew finish, trim your seam allowances with pinking shears. That sawtooth pattern does a great job of minimizing fraying.
Long-Term Care for Your Canvas Tote
You've put all this effort in, so let's make sure your bag stays in prime condition. Good care actually starts before you even cut your fabric.
Always pre-wash your canvas in cold water and tumble dry on a medium setting. This is a non-negotiable step that pre-shrinks the material, preventing any weird warping or shrinking after your bag is all sewn up.
For everyday messes, spot-cleaning is your best friend. Grab a damp cloth and a tiny bit of mild soap to gently work on any stains. Steer clear of harsh detergents, as they can strip the fabric's color.
When it needs a more thorough cleaning, you can toss it in the washing machine. Just turn the bag inside out and run it on a gentle cycle with cold water. I recommend letting it air dry to help it keep its shape and avoid wrinkles. Once it's dry, a quick once-over with a hot iron will bring it right back to its original crispness.
Your Top Questions About Making a DIY Canvas Tote
It's totally normal to have a few questions before you dive into a new project. I've been there! Let's tackle some of the most common things people ask when making a canvas tote bag diy for the first time. Getting these cleared up will help you start sewing with confidence.
What’s the Best Weight of Canvas For a Tote Bag?
For most projects, you'll want to go with a 10 to 12-ounce cotton duck canvas. I find this is the sweet spot. It’s heavy enough to give your bag a sturdy, professional feel but not so beastly that your home sewing machine will cry for mercy.
If you go any lighter, say an 8 oz canvas, the bag might end up a bit floppy. On the other hand, anything over 14 oz can be a real struggle to punch through, especially when you're sewing over multiple layers at the seams or attaching the straps.
The goal is a durable bag without a frustrating sewing experience. Sticking to the 10-12 oz range gets you a fantastic result without needing a heavy-duty industrial machine.
Do I Really Need to Pre-Wash My Canvas?
Yes, you absolutely do! I know it's tempting to skip this step and get right to the cutting, but please don't. Canvas is made from cotton, a natural fiber that loves to shrink. Pre-washing the fabric before you cut anything out means your finished bag won't get all wonky and small the first time you launder it.
Just pop it in the wash on a cold cycle, then tumble dry on medium. That one simple step protects all your hard work and ensures your tote keeps its shape for years to come.
How Can I Make My Tote Bag Straps Extra Strong?
The straps take the most abuse on any tote, so making them rock-solid is key. My go-to method is sewing an "X-box" stitch right where the straps meet the bag. It’s a game-changer for durability.
Here’s how it works:
- Start by sewing a small square or rectangle at the very base of the strap.
- Then, sew two diagonal lines from corner to corner inside that box, creating a perfect 'X'.
This little trick spreads the load's tension across a much larger area, making it incredibly tough for the straps to rip off, no matter how much you stuff in your bag. It's a simple technique that adds a huge amount of strength.
Can I Add a Lining to My Canvas Tote?
Of course! Lining your tote is a great way to kick it up a notch. It gives the inside a clean, polished look by hiding all the raw seams, and it's a perfect chance to add a splash of personality with a fun print or a bold color.
You'll want to use a lighter fabric for the lining, like a quilting cotton. Just make the lining the exact same way you made the outer bag, boxed corners and all. Once that’s done, you slip it inside the main tote (wrong sides of the fabric facing each other) and stitch them together right along the top edge. It’s a surprisingly easy upgrade that makes a world of difference.
At Famcut.com, we love helping makers like you find everything you need to bring your ideas to life. From fabrics and tools to inspiration for your next project, we've got you covered. Come see what we have to offer at https://famcut.com.