


10 Best Sewing Projects for Beginners to Start in 2026
Embarking on your sewing journey is an exciting venture into creativity and self-expression. The hum of the machine, the feel of fabric, and the satisfaction of creating something with your own hands is unparalleled. But where do you begin? The sheer volume of patterns and ideas can feel overwhelming, often leading to analysis paralysis before the first stitch is even sewn. This guide is designed to cut through that noise, presenting the 10 best sewing projects for beginners to get you started on the right foot.
Each project has been carefully selected to build foundational skills, boost your confidence, and leave you with a functional, beautiful item. We'll break down the essentials for each one, covering everything from materials and tools to common pitfalls and quick tips. This structured approach ensures your first steps are successful, not stressful. As you gather your materials, it’s a great idea to set up a dedicated area; learning how to effectively organize your craft supplies can make the entire process smoother and more enjoyable. From simple tote bags to stylish pillow covers, this list provides the perfect starting point to master basic techniques like sewing straight lines, finishing seams, and installing simple closures.
1. Simple Tote Bag
The simple tote bag is one of the best sewing projects for beginners because it introduces fundamental skills on a forgiving, functional item. This project primarily involves sewing straight lines to join two rectangular fabric pieces and attach handles, making it an ideal first step into garment construction and accessories. It's a project that delivers high satisfaction with a low-stress process, resulting in a useful item you can use immediately for groceries, books, or daily essentials.
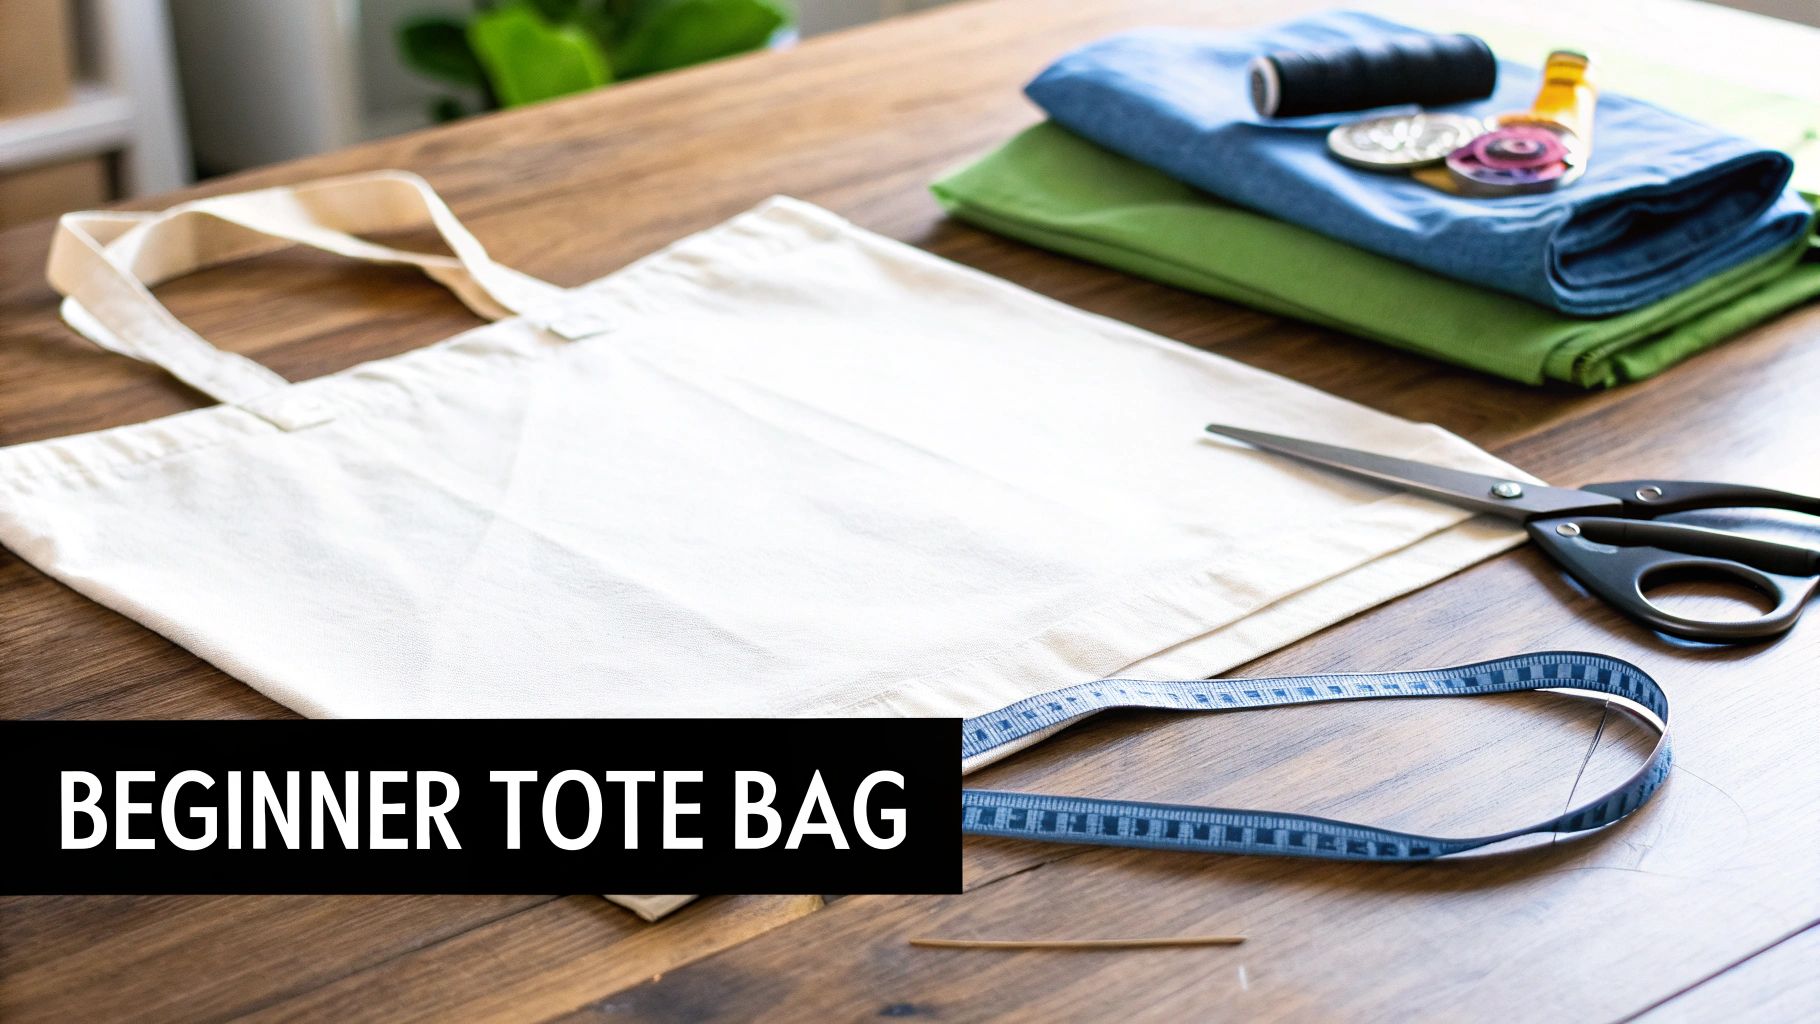
Why It’s a Great Starting Point
A tote bag requires minimal fabric and builds confidence quickly. You will practice measuring and cutting fabric, sewing straight seams, finishing raw edges to prevent fraying, and topstitching for a professional look. The skills learned here, such as creating a "baguette" or boxed corner to give the tote depth, are directly transferable to more complex projects like zipper pouches and simple garments.
Project Snapshot
- Estimated Time: 1-2 hours
- Difficulty: 1/5 (Very Beginner-Friendly)
- Key Skills: Straight stitching, seam finishing, attaching straps, topstitching.
Quick Tips for Success
- Fabric Choice: Start with a sturdy, non-stretch woven fabric like cotton canvas, duck cloth, or quilting cotton. These materials are stable and easy to handle under the needle.
- Reinforce Handles: The point where the handles meet the bag is a major stress point. Reinforce this area by sewing a small "X" inside the box of your handle stitching for maximum durability.
- Use a Walking Foot: If you are using a thicker fabric like canvas, a walking foot attachment can help feed the layers of fabric through the machine evenly, preventing puckering.
For those interested in showcasing their finished projects and partnering with brands, exploring creative collaborations can be a great next step. You can find more information about how to get started with gifted collaborations for creators.
2. Pillowcase
A simple pillowcase is often cited as one of the best sewing projects for beginners because it boils down the process to its simplest form: sewing straight lines. This project involves joining two rectangular fabric pieces with just three seams, making it an incredibly fast and rewarding way to learn fundamental machine skills. The result is a practical, usable item for your home, boosting your confidence and inspiring you to tackle more complex creations.
Why It’s a Great Starting Point
Making a pillowcase teaches precision without being overly difficult. You will practice measuring and cutting accurately, maintaining a consistent seam allowance, and finishing raw edges for a clean interior. Learning a technique like the "burrito" or "hot dog" method for a polished cuff introduces you to construction concepts that are used in garment sewing. It is a low-stakes project that delivers a professional-looking finish with minimal effort.
Project Snapshot
- Estimated Time: 30-60 minutes
- Difficulty: 1/5 (Very Beginner-Friendly)
- Key Skills: Straight stitching, seam allowances, pressing seams, finishing techniques.
Quick Tips for Success
- Fabric Choice: Soft, breathable quilting cotton is a perfect starting fabric. It's stable, easy to press, and comes in countless designs. For a cozier feel, flannel or minky fabric are great options, though they can be a bit more slippery.
- Try French Seams: For a high-end finish with no raw edges visible, try using French seams. This technique encloses the seam allowance within another seam, creating a durable and tidy look inside the pillowcase.
- Press Your Seams: Always press your seams with an iron as you go. Pressing the seams open or to one side makes your stitching more accurate and gives the final product a crisp, professional appearance.
As your skills grow, you might consider sharing your creations online. For those looking to partner with brands, an influencer outreach service can help connect you with relevant opportunities in the crafting space.
3. Drawstring Bag
The drawstring bag is a fantastic project that takes beginners beyond simple seams into the world of functional closures. This project teaches you how to create a casing, which is a channel for threading a cord or ribbon, a skill essential for items like elastic-waist pants and hooded sweatshirts. The result is a highly practical bag, perfect for organizing small items, packaging gifts, or even storing props for cosplay.
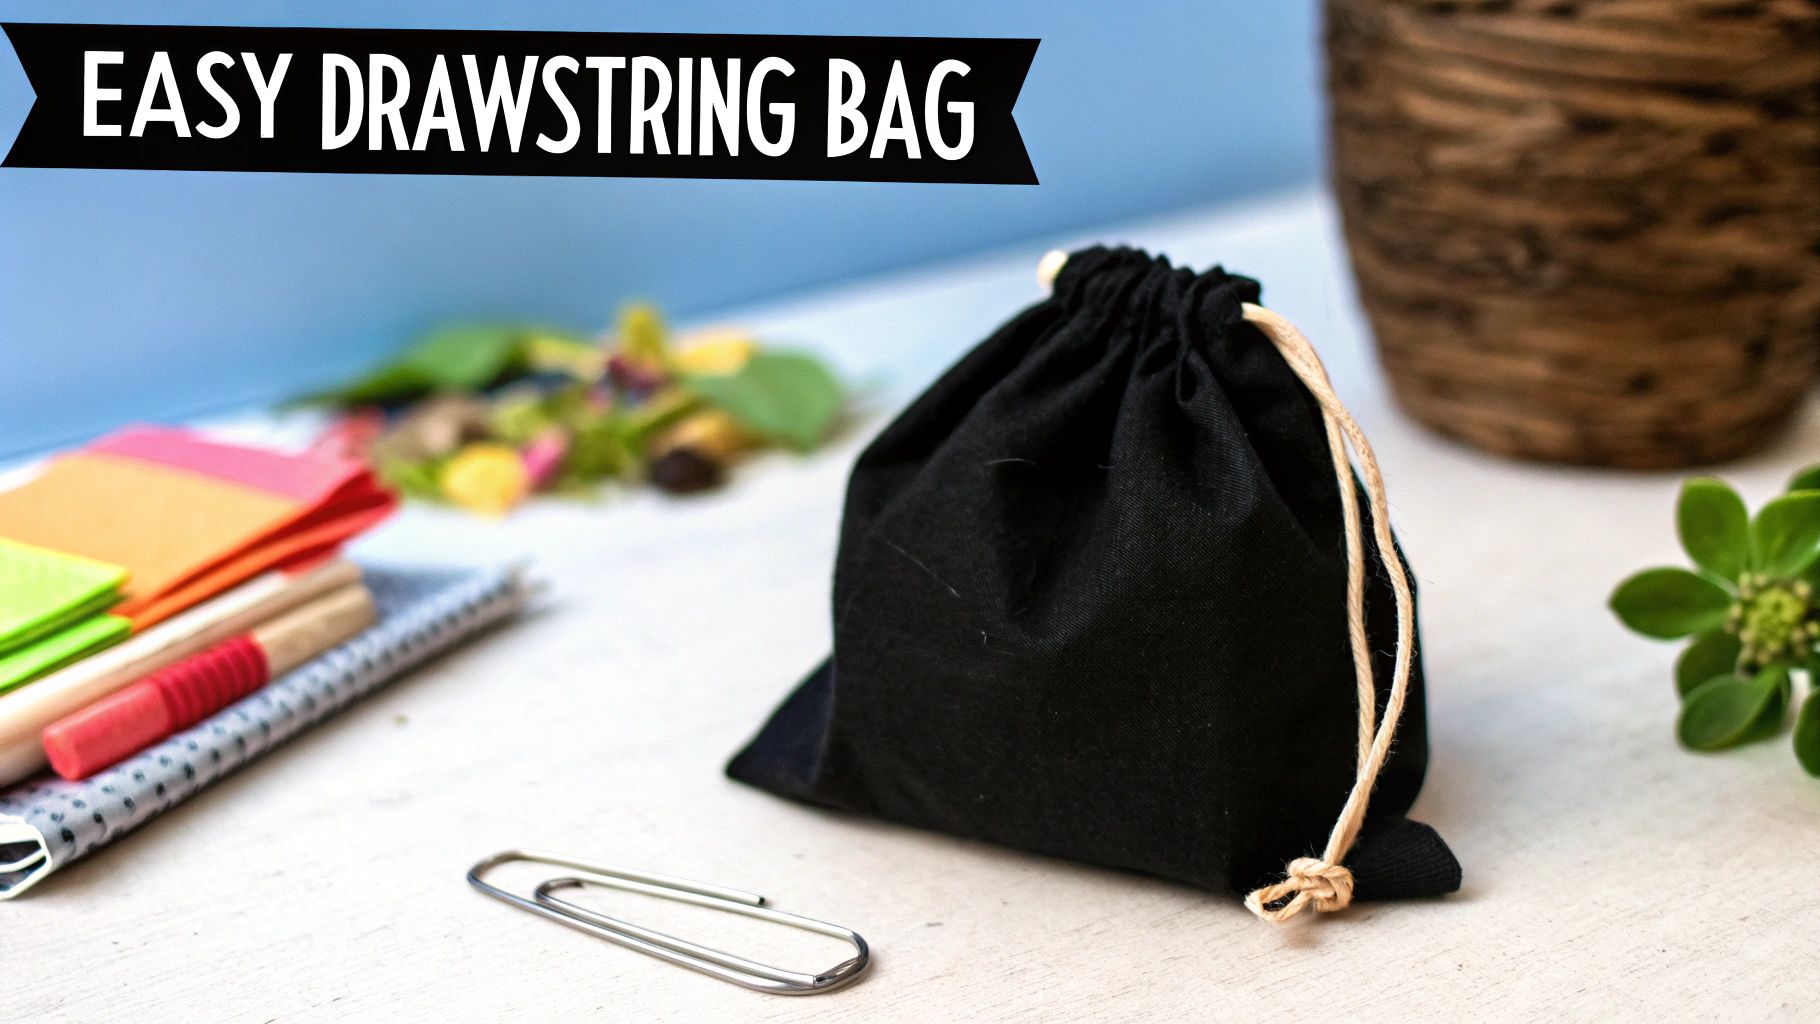
Why It’s a Great Starting Point
This project builds directly on the skills used in making a tote bag but adds the challenge of creating a neat and functional drawstring channel. You'll master folding, pressing, and edge-stitching to form the casing, and learn the simple trick of threading a cord through it. Its versatility is a major plus; you can make small dice bags for gaming, satin-lined jewelry pouches, or larger gym bags, all using the same fundamental technique.
Project Snapshot
- Estimated Time: 1-2 hours
- Difficulty: 2/5 (Easy)
- Key Skills: Straight stitching, creating a casing, threading a drawstring, topstitching.
Quick Tips for Success
- Easy Threading: Attach a safety pin to the end of your cord or ribbon to easily guide it through the casing channel without it getting lost.
- Casing Size: Ensure your casing is about 1/4 inch wider than your drawstring. This prevents the cord from getting stuck and allows it to glide smoothly.
- Sharp Corners: Before turning the bag right-side out, snip the bottom corners at a 45-degree angle (be careful not to cut the stitches). This reduces bulk and gives you crisp, professional-looking corners.
As you gain confidence, you can document your creative process and share it online. For those looking to partner with brands, consider exploring how your new skills can be showcased on UGC creator platforms.
4. Apron
An apron is a fantastic and practical garment for new sewists, blending simple straight seams with essential construction techniques. This project introduces you to working with a pattern, creating straps or ties, and adding functional elements like pockets, all while making something you can wear and use. It’s one of the best sewing projects for beginners because it feels like making real clothing but without the complicated fitting challenges, offering a satisfying and useful outcome.
Why It’s a Great Starting Point
Making an apron teaches you how to lay out pattern pieces, finish edges neatly, and attach components like waist ties and neck loops. You can customize it with different pocket styles, from a simple patch pocket to a large divided one for holding tools. The skills you develop, such as hemming, topstitching, and creating channels for ties, are fundamental to almost all future garment sewing projects.
Project Snapshot
- Estimated Time: 2-3 hours
- Difficulty: 2/5 (Beginner-Friendly)
- Key Skills: Using a pattern, sewing hems, creating and attaching straps, applying pockets.
Quick Tips for Success
- Pre-Wash Fabric: Always pre-wash your fabric, especially for kitchen items, to prevent it from shrinking after your first wash.
- Use Sturdy Material: Choose durable woven fabrics like denim, canvas, or heavy cotton drill. These materials hold their shape well and are easy to sew.
- Add Pockets: Don't skip the pockets! They are great for practicing topstitching and add immense functionality. Reinforce the top corners of pockets with a small backstitch or triangle stitch for extra strength.
Once you’ve perfected your apron, you might consider showing off your creation. For those interested in brand partnerships, you can learn more about influencer gifting opportunities.
5. Simple Skirt or Pants
Moving into apparel, simple elastic or drawstring-waist skirts and pants are some of the best sewing projects for beginners ready to tackle their first garment. These projects teach foundational garment construction skills like reading a pattern, taking body measurements, and assembling pieces without the complexity of zippers or buttons. The result is a comfortable, wearable piece like pajama bottoms or a simple A-line skirt, providing an immense sense of accomplishment.
Why It’s a Great Starting Point
Making your first piece of clothing builds skills essential for more advanced sewing. You will learn to work with a commercial pattern, understand seam allowances, create a channel for an elastic or drawstring, and practice hemming. These garments are forgiving on fit, allowing you to focus on construction techniques. Successfully creating something you can wear is a huge confidence booster that motivates you to continue learning.
Project Snapshot
- Estimated Time: 2-4 hours
- Difficulty: 2/5 (Easy)
- Key Skills: Using a pattern, sewing curved seams, creating a waistband casing, hemming.
Quick Tips for Success
- Fabric Choice: Opt for light to medium-weight woven fabrics like quilting cotton, poplin, flannel, or chambray. They are stable, easy to press, and don't slip around while sewing.
- Pre-Wash Your Fabric: Always wash and dry your fabric before cutting. This pre-shrinks the material, ensuring your finished garment will fit correctly after its first wash.
- Press As You Go: Use an iron to press every seam open or to one side as you complete it. This simple step creates a crisp, professional finish and makes subsequent steps much easier.
After making a few custom pieces, many creators look for ways to showcase their work. You can discover influencer gifting platforms to connect with brands that align with your new sewing skills.
6. Fabric Bookmarks
Fabric bookmarks are one of the best sewing projects for beginners looking for a quick, satisfying, and low-waste activity. This project is perfect for using up small fabric scraps left over from larger endeavors, teaching precision in cutting, turning, and topstitching on a miniature scale. Because they are so fast to make, bookmarks offer immediate gratification and serve as excellent handmade gifts for book lovers, students, or convention attendees. They are a fantastic way to practice fundamental skills without the commitment of a large project.
Why It’s a Great Starting Point
Making a bookmark is a low-stakes exercise in handling small pieces of fabric, pressing seams, and sewing neat, straight edges. You can experiment with decorative stitches, appliqué, or even light embroidery to add a personal touch. The skills you'll practice, such as creating sharp corners and clean finished edges, are essential for more detailed work like collar points and pocket flaps in garment sewing. It’s an ideal project for building confidence and mastering machine control.
Project Snapshot
- Estimated Time: 20-30 minutes
- Difficulty: 1/5 (Very Beginner-Friendly)
- Key Skills: Cutting small pieces, sewing straight lines, pressing, topstitching, turning right-side-out.
Quick Tips for Success
- Add Structure: Use a lightweight fusible interfacing on the wrong side of your fabric pieces. This adds body and prevents the bookmark from feeling flimsy.
- Create Clean Edges: Before you sew, carefully fold and press your seam allowances. This creates crisp, professional-looking edges that are easier to stitch neatly.
- Incorporate a Tassel: Add a ribbon loop or a handmade tassel into one of the short seams before stitching it closed. This adds a functional and decorative element.
- Batch Your Work: If making several bookmarks, create an assembly line. Cut all your fabric pieces first, then fuse all the interfacing, then sew all the seams to work efficiently.
7. Cloth Napkins
Creating a set of custom cloth napkins is an elegant and practical project that teaches precision and essential finishing techniques. This project focuses on creating perfectly square corners and consistent hems, skills that are foundational for everything from tablecloths to garment making. It is an excellent way to practice meticulous sewing on a small scale, resulting in a beautiful and eco-friendly addition to your dining table that you can use daily or for special occasions.
Why It’s a Great Starting Point
Cloth napkins are one of the best sewing projects for beginners because they master the art of the hem. You will learn to measure, cut, press, and stitch double-fold hems, which encase raw fabric edges for a clean, durable finish. This repetitive process builds muscle memory and a steady hand, improving the quality of all your future sewing. The skills you gain, particularly in creating sharp mitered or folded corners, are directly applicable to more advanced home décor and quilting projects.
Project Snapshot
- Estimated Time: 1-2 hours for a set of four
- Difficulty: 1/5 (Very Beginner-Friendly)
- Key Skills: Accurate cutting, pressing, double-fold hemming, creating corners.
Quick Tips for Success
- Press Before You Sew: The secret to perfect hems is a hot iron. Carefully press each fold into place before you take it to the sewing machine. This creates a crisp guideline that makes stitching straight a breeze.
- Use a Hemming Foot: A narrow hemming foot or a 1/4-inch quilting foot can help you create small, perfectly consistent hems with very little effort. Practice on a scrap piece of fabric first to get the hang of it.
- Choose the Right Fabric: Quilting cotton is ideal for beginners as it's stable and comes in countless prints. For a more luxurious feel, try a linen-cotton blend, but be prepared for it to shift a bit more.
8. Zippered Pouch
A zippered pouch is the perfect intermediate-beginner project that introduces one of the most useful skills in sewing: installing a zipper. While zippers might seem intimidating, a simple pouch breaks the process down into manageable steps. This project teaches precision and attention to detail, resulting in a highly functional item perfect for storing makeup, sewing supplies, or small cosplay accessories. It is one of the best sewing projects for beginners looking to level up from basic seams.
Why It’s a Great Starting Point
This project builds directly on the skills learned from making tote bags or pillows but adds the challenge of working with hardware. You’ll learn how to align a zipper, stitch close to the teeth, and assemble a project in a different order. Successfully making a lined pouch provides a huge confidence boost and opens the door to creating garments, bags, and home decor items that require zipper closures.
Project Snapshot
- Estimated Time: 1-2 hours
- Difficulty: 2/5 (Confident Beginner)
- Key Skills: Zipper installation, topstitching, working with lining, sewing small corners.
Quick Tips for Success
- Use a Zipper Foot: This specialized presser foot is essential. It allows you to stitch right alongside the zipper teeth without the foot getting in the way, ensuring a straight and secure seam.
- Baste First: Before sewing the zipper permanently, use basting tape or hand stitches to hold it in place. This prevents the zipper from shifting and ensures a professional finish.
- Add a Lining: Creating a separate lining gives your pouch a clean interior and hides all the raw seams. It’s a simple extra step that makes the final product look much more polished.
9. Simple Throw Pillow Cover
Creating a simple throw pillow cover is a fantastic project for beginners looking to add a personal touch to their home décor. This project is highly versatile, allowing you to practice fundamental skills like measuring, cutting, and sewing straight seams on a manageable scale. It’s an ideal way to experiment with different fabrics and closure techniques, resulting in a functional and decorative item that can instantly refresh any room.
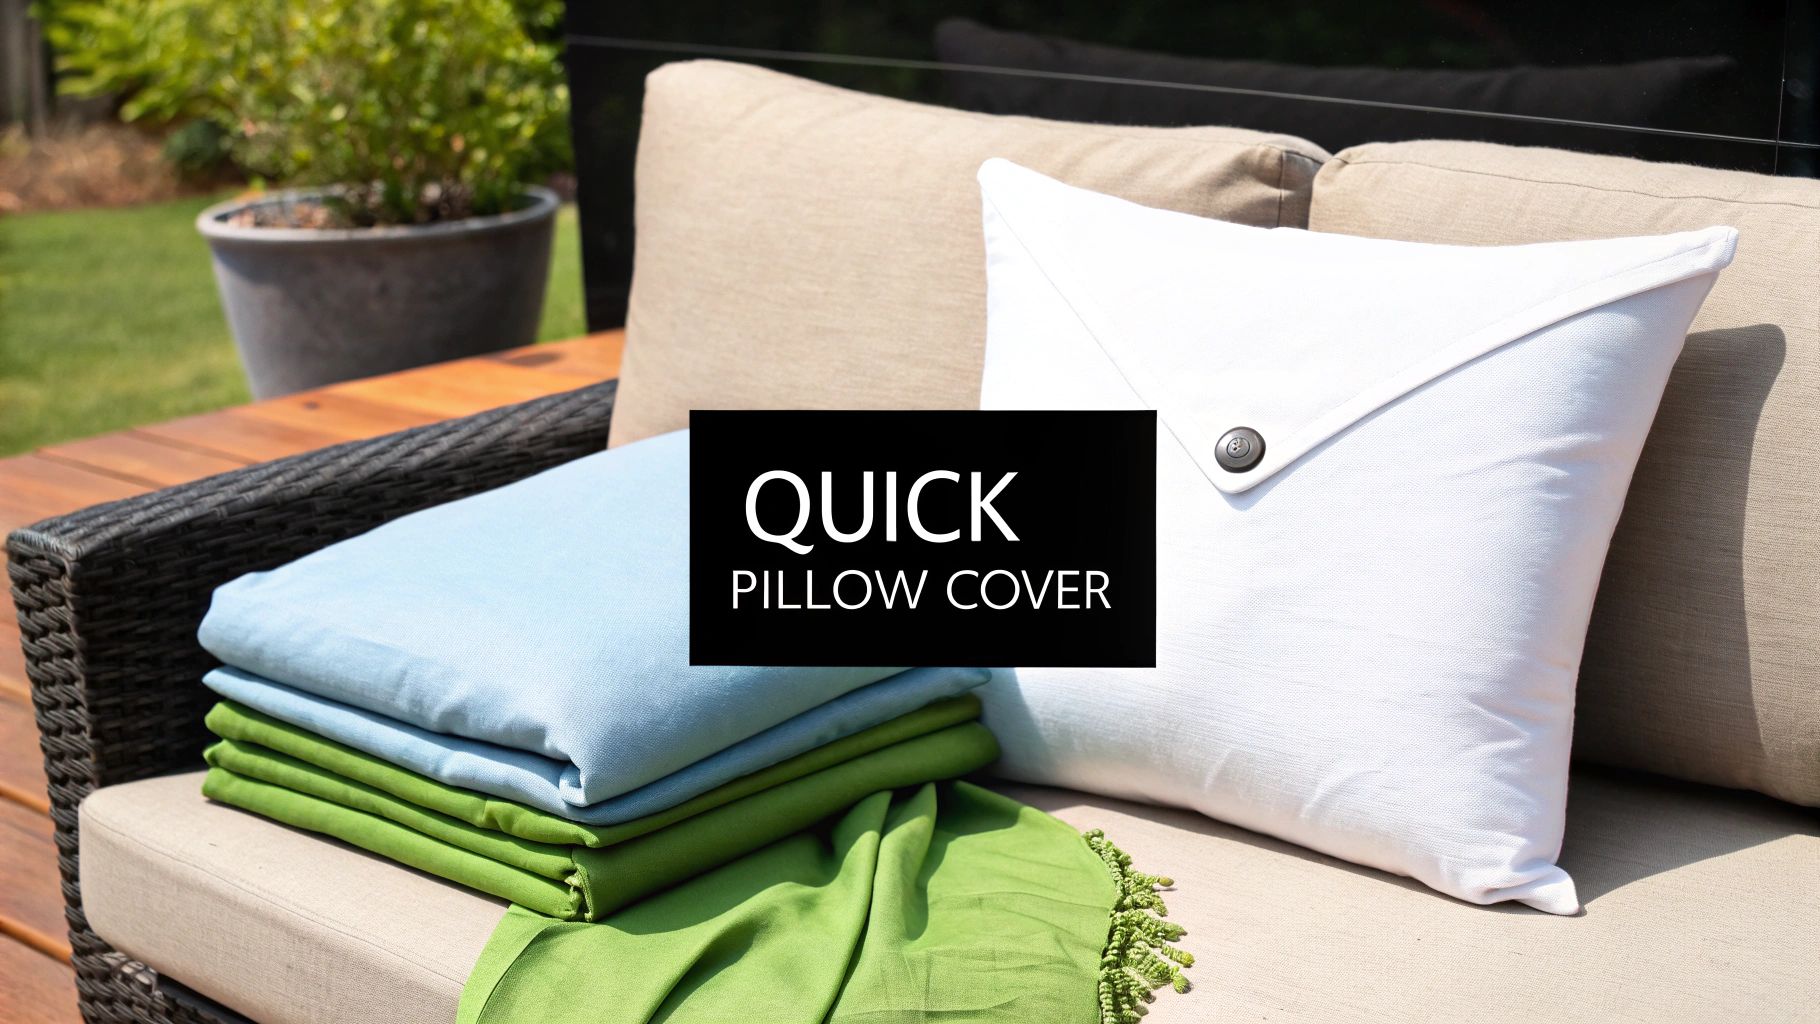
Why It’s a Great Starting Point
A pillow cover is essentially a fabric square, making it one of the most forgiving sewing projects for beginners. The project introduces concepts like seam allowance and different closure types, such as a simple envelope closure which requires no zippers or buttons. Mastering this allows you to build confidence before tackling more complex projects involving fasteners, and the finished product provides instant gratification.
Project Snapshot
- Estimated Time: 30-60 minutes
- Difficulty: 1/5 (Very Beginner-Friendly)
- Key Skills: Straight stitching, finishing seams, creating an envelope closure, measuring accurately.
Quick Tips for Success
- Closure Choice: Start with an envelope closure. It is the easiest method for beginners as it only involves folding fabric over itself to create an opening, avoiding zippers or buttonholes.
- Press Your Seams: For sharp, professional-looking corners, press your seams open with an iron before turning the pillow cover right-side out. This simple step makes a significant difference in the final appearance.
- Add a Detail: For a more polished look, try topstitching about 1/4 inch from the edges of the finished cover. This adds a decorative touch and helps the pillow hold its shape.
10. Fabric Scrap Coasters or Trivets
Fabric scrap coasters and trivets are fantastic sewing projects for beginners because they utilize small pieces of leftover fabric and introduce quilting fundamentals on a miniature scale. This project involves layering fabric with batting, quilting the layers together, and binding the edges to create a professional finish. It’s an incredibly practical project that produces useful, giftable items for your home, allowing you to practice essential skills without committing to a large, expensive quilt.
Why It’s a Great Starting Point
This project is a perfect introduction to quilting techniques. You will learn how to make a "quilt sandwich" (top fabric, batting, and backing), practice simple straight-line quilting or even try free-motion designs, and master the art of creating and attaching binding. These skills are the building blocks for any future quilting or home décor projects, from placemats and table runners to full-sized quilts. Plus, it’s an excellent way to use up precious fabric scraps.
Project Snapshot
- Estimated Time: 1-2 hours for a set of four
- Difficulty: 2/5 (Beginner-Friendly with new techniques)
- Key Skills: Layering fabric, simple quilting, creating and attaching binding, topstitching.
Quick Tips for Success
- Fabric Choice: Use 100% cotton fabric and cotton batting, as they absorb moisture well and can withstand heat. For trivets, use a specialized insulated batting like Insul-Bright to protect surfaces from hot dishes.
- Secure Your Layers: Before quilting, use safety pins, temporary spray adhesive, or hand basting to hold your fabric and batting layers together. This prevents shifting and puckering as you sew.
- Press Everything: Pressing your seams flat as you go, especially when attaching the binding, is the key to achieving sharp, professional-looking corners and edges.
Top 10 Beginner Sewing Projects Comparison
| Item | 🔄 Implementation complexity | ⚡ Resources & tools | ⭐ Expected outcome / quality | 📊 Ideal use cases | 💡 Key tips |
|---|---|---|---|---|---|
| Simple Tote Bag | Low–Medium — straight seams, handle attachment | Canvas/quilt cotton, thread, basic hardware (D‑rings), sewing machine | ⭐⭐⭐⭐ — durable and highly usable | Beginner finished project, market bag, gift | Reinforce handles; pre-cut pieces |
| Pillowcase | Very Low — three straight seams | <1 yd fabric, thread, sewing machine | ⭐⭐⭐ — neat, practical result fast | Sewing practice, bedding, quick gifts | Use consistent seam allowance; press seams |
| Drawstring Bag | Low — casing and folding skills | Fabric scrap, cord/ribbon, safety pin/bodkin | ⭐⭐⭐ — useful pouch for small items | Cosplay prop storage, dice/gaming pouch | Make casing slightly wider than cord; use safety pin |
| Apron | Medium — multiple seam types and attachments | Sturdy fabric (canvas/denim), bias tape, thread | ⭐⭐⭐⭐ — wearable and functional | Crafting/cooking apron, cosplay workshop wear | Pre‑wash fabric; use bias tape for clean edges |
| Simple Skirt or Pants | Medium — body measurements and fitting | Pattern, fabric, elastic/drawstring, thread | ⭐⭐⭐⭐ — wearable with proper fit | Casual garments, cosplay lower pieces | Measure accurately; fit during construction |
| Fabric Bookmarks | Very Low — small precise pieces | Scraps, interfacing, thread, optional ribbon | ⭐⭐⭐ — quick, giftable small items | Scrap use, convention gifts, fast projects | Use lightweight interfacing; press edges before stitching |
| Cloth Napkins | Low–Medium — precise hemming and pressing | Cotton/linen, iron, thread, presser foot | ⭐⭐⭐⭐ — polished home accessory sets | Tableware, gifts, eco-friendly swaps | Use 1/4" presser foot; starch and press for crisp hems |
| Zippered Pouch | Medium — zipper installation practice | Fabric, zipper, zipper foot, optional lining | ⭐⭐⭐⭐ — functional and skill‑building | Makeup, tool/prop storage, beginner zipper projects | Use zipper foot; baste zipper before final stitching |
| Simple Throw Pillow Cover | Low–Medium — closure choice affects complexity | Fabric, closures (envelope/zipper/buttons), thread | ⭐⭐⭐ — decorative home item | Home décor, practice closures, scrap use | Choose envelope closure for ease; press corners well |
| Fabric Scrap Coasters/Trivets | Very Low — small layered assembly | Scraps, batting/fusible fleece, quilting thread | ⭐⭐⭐ — practical, quick gift items | Scrap utilization, craft fairs, home accessories | Use cotton and fusible fleece; topstitch and make sets |
Your Sewing Adventure Awaits
You've just explored a curated collection of the best sewing projects for beginners, from the practical utility of a simple tote bag to the polished finish of a zippered pouch. Each project on this list was chosen not just for its simplicity, but for the fundamental skills it teaches. Mastering straight stitches with cloth napkins, learning to insert a drawstring, or getting comfortable with topstitching on an apron are the foundational blocks upon which all future sewing expertise is built. The journey from a novice to a confident sewist is paved with these small, successful creations.
Key Takeaways for Your First Stitches
As you look back on the projects we've covered, from the simple skirt to fabric scrap coasters, remember the core principles that will guide your progress. The most important lesson is that perfection is not the goal; progress is. Your first pillowcase might have a slightly wobbly seam, and that’s a sign of learning, not failure. Embrace your seam ripper as a tool for correction, not a symbol of defeat. Every stitch you unpick is a lesson in tension, fabric handling, or machine control that you will carry forward.
Another crucial takeaway is the importance of preparation. Taking the time to pre-wash your fabric, press your seams as you go, and read through all instructions before you even touch the sewing machine will save you from countless frustrations. These small habits, established now with these beginner projects, will become second nature, enabling you to tackle more complex garments and patterns with greater ease and precision down the line.
Your Actionable Next Steps
The path forward is clear and exciting. Don't let this newfound knowledge sit idle. Your immediate next step is to choose one project from this list that genuinely sparks your interest.
- Select Your Project: Are you drawn to the instant gratification of a fabric bookmark or the practical charm of a handmade apron? Pick the one that makes you want to start right now.
- Gather Your Supplies: Use the materials list provided for your chosen project as a shopping guide. Focus on quality basics; good thread and a sharp needle make a world of difference.
- Set Up Your Space: Carve out a dedicated area for your sewing, even if it's just a small corner of a table. Having your machine, tools, and materials organized and accessible makes the process smoother and more enjoyable.
- Embrace the Process: Put on some music, follow the tutorial, and focus on one step at a time. Celebrate the small victories, like winding a bobbin correctly or sewing your first straight seam.
By completing even one of these best sewing projects for beginners, you are not just making an object; you are building confidence, honing a valuable skill, and unlocking a powerful form of creative expression. You are joining a vibrant global community of creators, makers, and artisans. The skills you cultivate today will allow you to mend beloved clothes, create personalized gifts, and eventually, bring your own unique designs to life.
Ready to find the perfect fabric for your first project or connect with fellow creators? Visit Famcut.com to explore our curated selection of high-quality materials and discover local workshops and resources designed to support your sewing journey. Let Famcut.com be your partner as you transform from a beginner into a confident, creative sewist.