


8 Best Beginner Sewing Projects to Start Your Hobby in 2026
Starting a new sewing hobby can feel both exciting and overwhelming. With countless patterns, fabrics, and techniques, knowing where to begin is often the biggest hurdle. The key to building lasting confidence and skill is to start with projects that are both achievable and rewarding. This guide is specifically designed to eliminate that initial guesswork. We've curated a list of the best beginner sewing projects to set you up for success, moving you from novice to confident creator one stitch at a time.
Each project on this list was chosen to teach you a fundamental skill, from sewing a perfectly straight line to inserting a simple elastic waistband or installing a zipper. Before you dive in, it’s a good idea to gather your basic supplies. To begin your journey into sewing, gathering essential sewing tools like a measuring tape is a crucial first step, ensuring your creations are precise from the start.
Whether you're dreaming of crafting a unique handmade wardrobe, personalizing your home decor, or simply looking for a fulfilling new creative outlet, these foundational projects are your perfect starting point. Get ready to thread your machine, press your fabric, and transform a simple piece of cloth into something beautiful and functional. Let's start creating
1. Tote Bags and Simple Pouches
Tote bags and simple pouches are quintessential first projects for a reason. They offer a direct path to creating something functional while mastering the absolute fundamentals of sewing. These projects primarily involve sewing straight lines and understanding basic construction, making them one of the best beginner sewing projects for building confidence quickly.
The core of this project is simple: sew two pieces of fabric together to create a container. This simplicity allows you to focus entirely on essential skills like maintaining a consistent seam allowance, pivoting at corners, and finishing seams for durability. You learn how fabric behaves and the importance of pressing seams without the complexity of fitting a garment.
Project Variations for All Skill Levels
The beauty of a tote or pouch lies in its versatility. You can start with a basic two-panel canvas grocery bag and, as your skills grow, introduce new elements.
- Absolute Beginner: A simple, unlined tote bag using sturdy cotton canvas.
- Confident Beginner: A cosmetic pouch with a contrasting lining fabric. This teaches you how to sew a "bag within a bag."
- Advanced Beginner: A pouch that introduces installing a zipper, a crucial skill for many future projects.
Mini-Instructions: Your First Tote
- Cut: Cut two identical rectangles of sturdy fabric (e.g., 15x17 inches for the bag, two 4x22 inch strips for straps).
- Straps: Fold each strap piece in half lengthwise, wrong sides together, and press. Open it up, fold the raw edges to the center crease, press again, then fold in half and press one last time. Topstitch along both long edges.
- Attach Straps: Pin the ends of each strap to the top edge of the right side of a bag panel, about 3 inches in from each side. Baste them in place with a 1/4-inch seam allowance.
- Assemble Bag: Place the two bag panels right sides together, with straps sandwiched inside. Pin and sew along the two sides and the bottom, using a 1/2-inch seam allowance.
- Finish: Turn the bag right side out and press everything for a crisp, professional finish.
Pro-Tip: Always iron your fabric before cutting and press your seams open as you sew. This single step dramatically improves the final appearance of your project, making it look polished and professional rather than homemade.
Once you have mastered the basic construction, you can get creative. Explore a vast collection of different styles of tote bags to find inspiration for adding pockets, boxed corners for depth, or magnetic snaps.
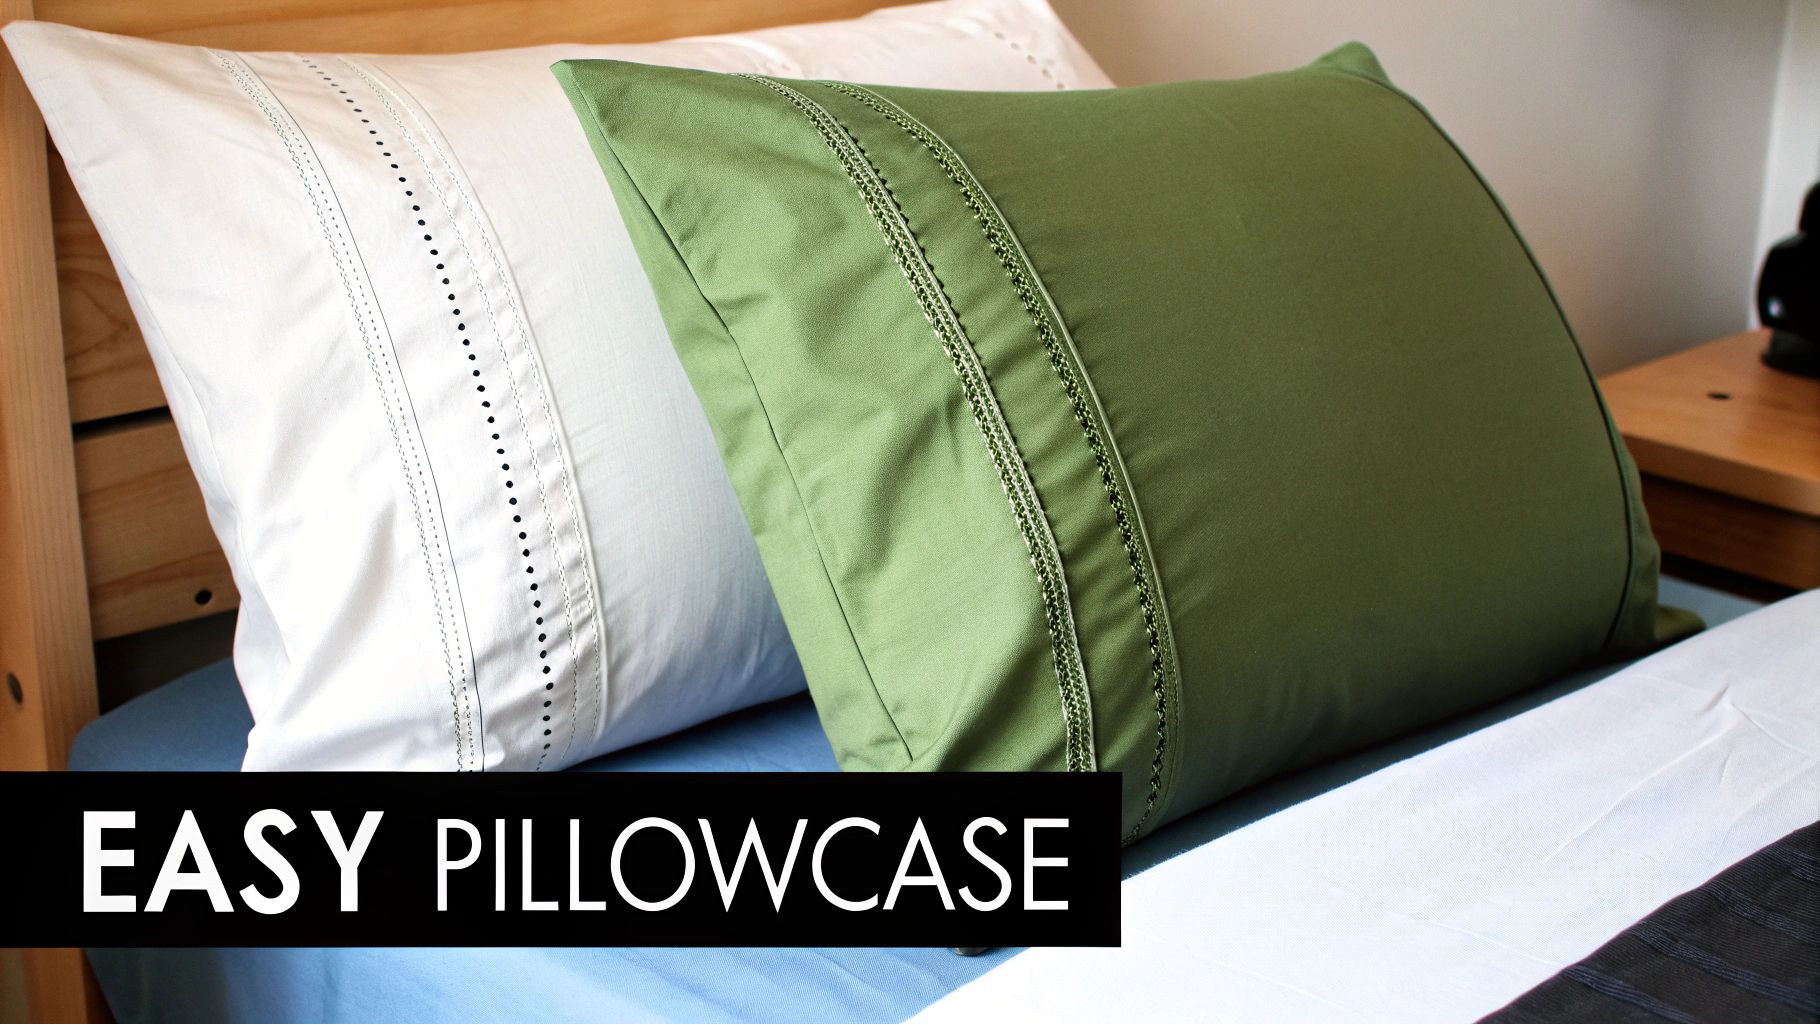
2. Simple Pillowcases and Cushion Covers
Pillowcases and cushion covers are perfect beginner sewing projects for anyone wanting to spruce up their home decor. They build on the same straight-line sewing skills as a tote bag but introduce you to working with larger pieces of fabric and creating professional-looking finishes. This project is a fantastic way to learn fundamental construction techniques that are directly applicable to both home goods and garment sewing.
The core of this project involves creating an "envelope" to hold a pillow form, which teaches you about seam allowances, pressing, and turning corners neatly. Because you are creating a functional household item, you get the immediate satisfaction of seeing your work in use, making it a highly rewarding experience for new sewers.
Project Variations for All Skill Levels
The basic pillowcase is a canvas for creativity. You can start with a simple envelope closure and advance to more complex designs as you gain confidence.
- Absolute Beginner: A one-piece envelope closure cover using quilting cotton.
- Confident Beginner: A two-fabric cushion cover, using different materials for the front and back to practice handling various fabric weights.
- Advanced Beginner: Adding a decorative flange or simple piping around the edges to learn precision sewing and trim application.
Mini-Instructions: Your First Envelope Pillow Cover (for a 16" form)
- Cut: Cut one rectangle of fabric 17 inches wide by 42 inches long.
- Hem Ends: On each of the short 17-inch ends, fold the raw edge under by 1/2 inch, press, then fold another 1/2 inch and press again to create a clean double-fold hem. Topstitch both hems down.
- Fold: Lay your fabric right side up. Fold one hemmed edge in toward the center by 12 inches. Fold the other hemmed edge in to overlap the first one, ensuring the total length of the folded piece is 16 inches.
- Assemble Cover: Pin the raw side edges securely. Sew both sides with a 1/2-inch seam allowance. Backstitch at the beginning and end of each seam.
- Finish: Clip the corners, turn the cover right side out, and use a point turner or a chopstick to poke the corners out crisply. Press the entire cover and insert your pillow form.
Pro-Tip: Use a rotary cutter and a clear quilting ruler for cutting your fabric. This method is much faster and more accurate than using scissors, ensuring your starting pieces are perfectly square, which is crucial for a professional-looking pillow cover.
Once you’ve mastered the basics, you can explore adding appliqué, different closure types like buttons, or even try your hand at quilting a decorative pillow top.
3. Elastic-Waist Pants and Shorts
Elastic-waist pants and shorts are a fantastic leap into garment sewing for newcomers. They introduce the basics of pattern reading and clothing construction without the intimidating steps of installing zippers or creating fitted waistbands. These projects build on the skill of sewing straight lines and introduce gentle curves, making them one of the best beginner sewing projects for anyone aspiring to create their own wardrobe.
The core of this project involves sewing a few simple pattern pieces together and creating a channel for elastic. This forgiving process allows you to learn about garment fit, how fabric drapes, and the basics of hemming. You will gain a tangible understanding of how flat fabric pieces transform into a three-dimensional, wearable item.
Project Variations for All Skill Levels
The beauty of elastic-waist pants is their adaptability. You can start with a simple pair of pajama shorts and gradually add more complex features as you become more comfortable with the process.
- Absolute Beginner: A pair of simple lounge shorts using a stable cotton or flannel fabric.
- Confident Beginner: Full-length pajama pants with a contrasting drawstring added to the elastic waistband.
- Advanced Beginner: Tapered joggers made from a stable knit fabric, introducing side-seam pockets.
Mini-Instructions: Your First Lounge Shorts
- Cut: Following a simple pattern, cut two front pieces and two back pieces from your fabric.
- Seams: Place the two front pieces right sides together and sew the curved crotch seam. Repeat for the two back pieces.
- Assemble Legs: Open the front and back units and place them right sides together, matching the crotch seams. Sew the long inner leg seam and the two outer side seams.
- Waistband: Fold the top raw edge down by 1/4 inch and press. Fold down again by about 1.5 inches to create a casing, press, and stitch close to the first fold, leaving a 2-inch opening.
- Finish: Thread your measured elastic through the casing, sew the elastic ends together, and stitch the opening closed. Hem the bottom of each leg to your desired length.
Pro-Tip: Always pre-wash and dry your fabric before cutting. Garment fabrics, especially cotton and knits, can shrink significantly, and skipping this step could result in your finished pants being too small after the first wash.
Once you feel confident, you can explore adding details like patch pockets or cuffs. There are many beginner-friendly patterns available from companies like Simplicity that offer a great starting point for your first wearable garment.
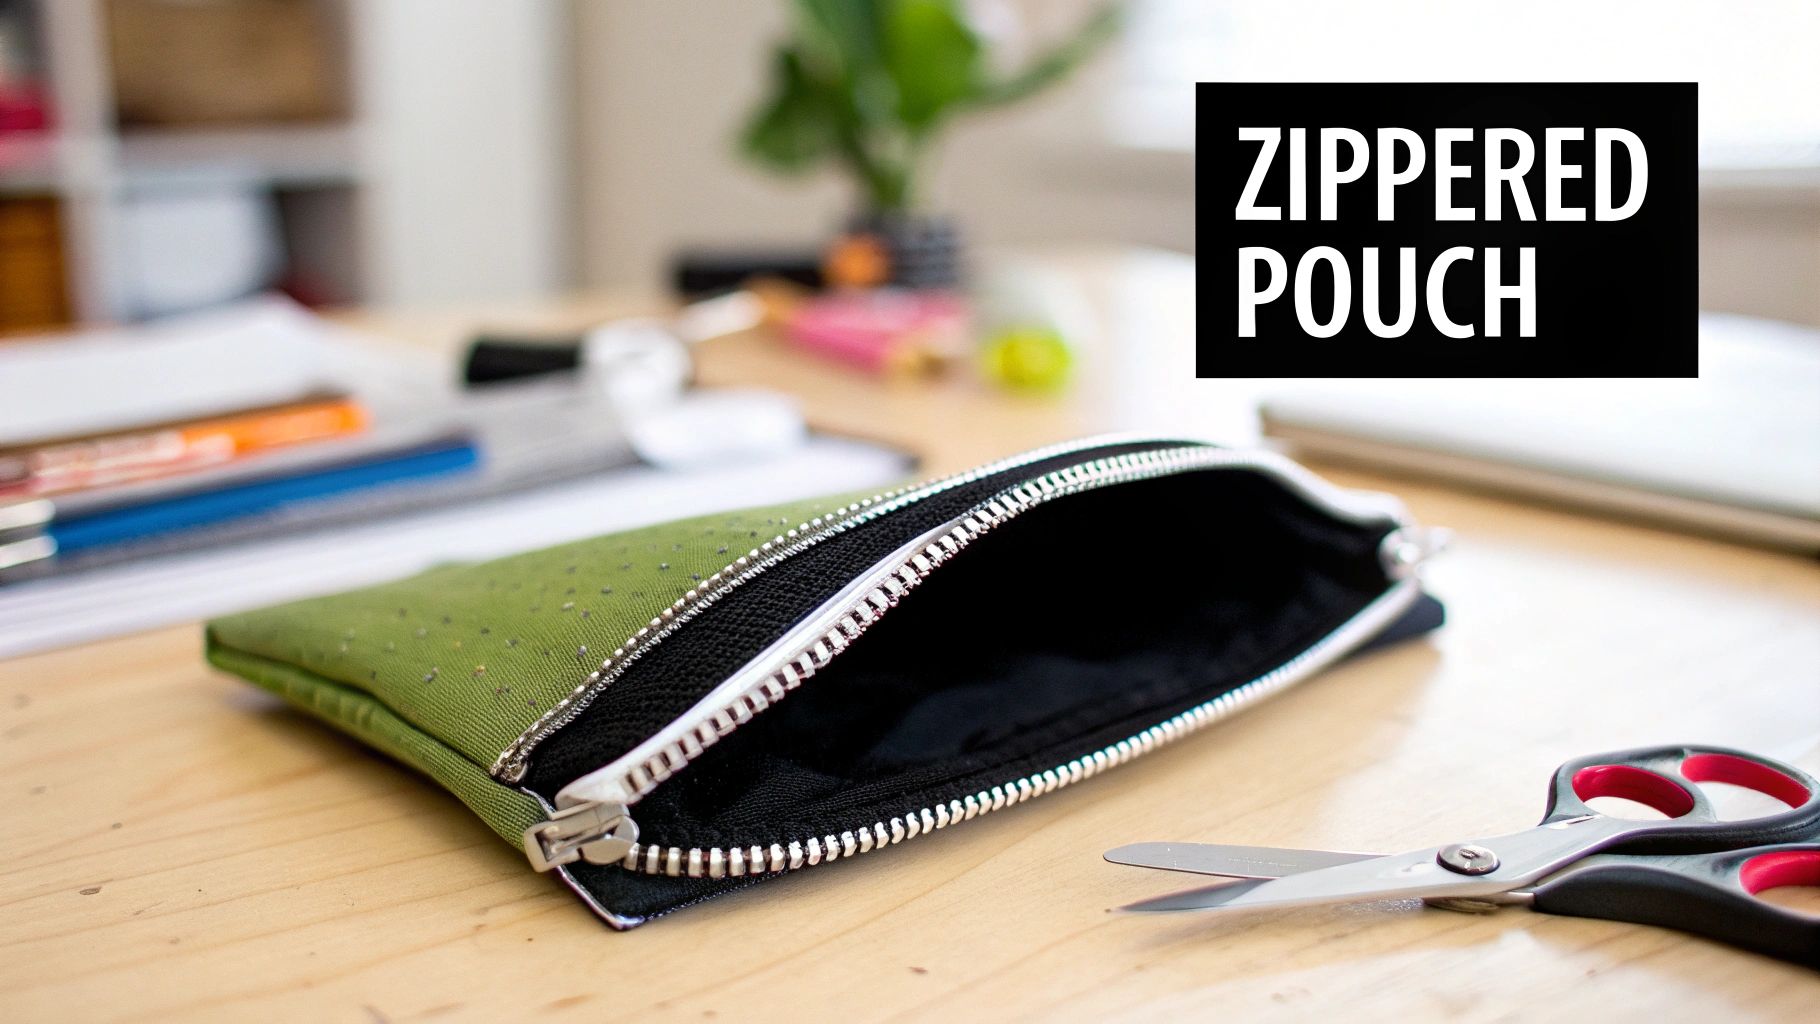
4. Lined Zippered Pouches and Makeup Bags
Lined zippered pouches are a fantastic next step after you've mastered basic straight-line sewing. This project introduces several key skills, including installing a zipper, working with lining fabric, and assembling multiple pieces with precision. Creating a lined pouch teaches you how to give your projects a professional, durable finish, making it one of the best beginner sewing projects for those ready to advance their skills.
The core concept involves creating a "bag within a bag" and neatly attaching a zipper between the outer fabric and the inner lining. While it may sound complex, the process is straightforward and incredibly rewarding. It opens the door to creating a huge variety of functional items like cosmetic bags, pencil cases, and electronics organizers.
Project Variations for All Skill Levels
The basic zippered pouch can be adapted in countless ways as your confidence grows. Start simple, then add features to challenge yourself.
- Absolute Beginner: A simple, unlined pouch with a zipper. This focuses solely on the zipper installation technique.
- Confident Beginner: A fully lined cosmetic bag. This teaches you how to manage and sew both an exterior and interior layer simultaneously.
- Advanced Beginner: A lined pouch with boxed corners to add depth, or one that includes a small internal pocket.
Mini-Instructions: Your First Lined Pouch
- Cut: Cut two identical rectangles of outer fabric and two of lining fabric (e.g., 8x10 inches). You will also need one zipper that is at least as long as the top edge of your fabric.
- Assemble Zipper Sandwich: Place one lining piece right side up. Place your zipper on top, right side up. Place one outer fabric piece on top of that, right side down. Pin the top edges together and sew using a zipper foot.
- Repeat: Repeat the process for the other side of the zipper with the remaining fabric pieces, creating another "sandwich."
- Press and Topstitch: Press the fabric away from the zipper teeth on both sides. Topstitch along the fabric next to the zipper for a clean finish and to prevent the fabric from getting caught.
- Assemble Bag: Important: Open the zipper halfway. Unfold your pieces so the two outer fabrics are right sides together and the two lining fabrics are right sides together. Pin all the way around, leaving a 3-inch gap in the bottom of the lining for turning.
- Finish: Sew all the way around the perimeter (excluding the gap). Clip the corners, turn the bag right side out through the gap in the lining, and then sew the gap closed. Push the lining inside the bag and press.
Pro-Tip: Using a zipper foot on your sewing machine is non-negotiable for this project. This specialized presser foot allows you to stitch extremely close to the zipper teeth, resulting in a straight, professional-looking application that is impossible to achieve with a standard foot.
5. Quilted Blankets and Simple Quilts
Quilting might seem intimidating, but simple blankets are fantastic beginner sewing projects that build core skills through repetition. These projects teach precision, planning, and patience by piecing together smaller fabric cuts to create a large, impressive, and functional item. The process boils down to sewing straight lines repeatedly, allowing you to perfect your seam allowance and pressing technique.
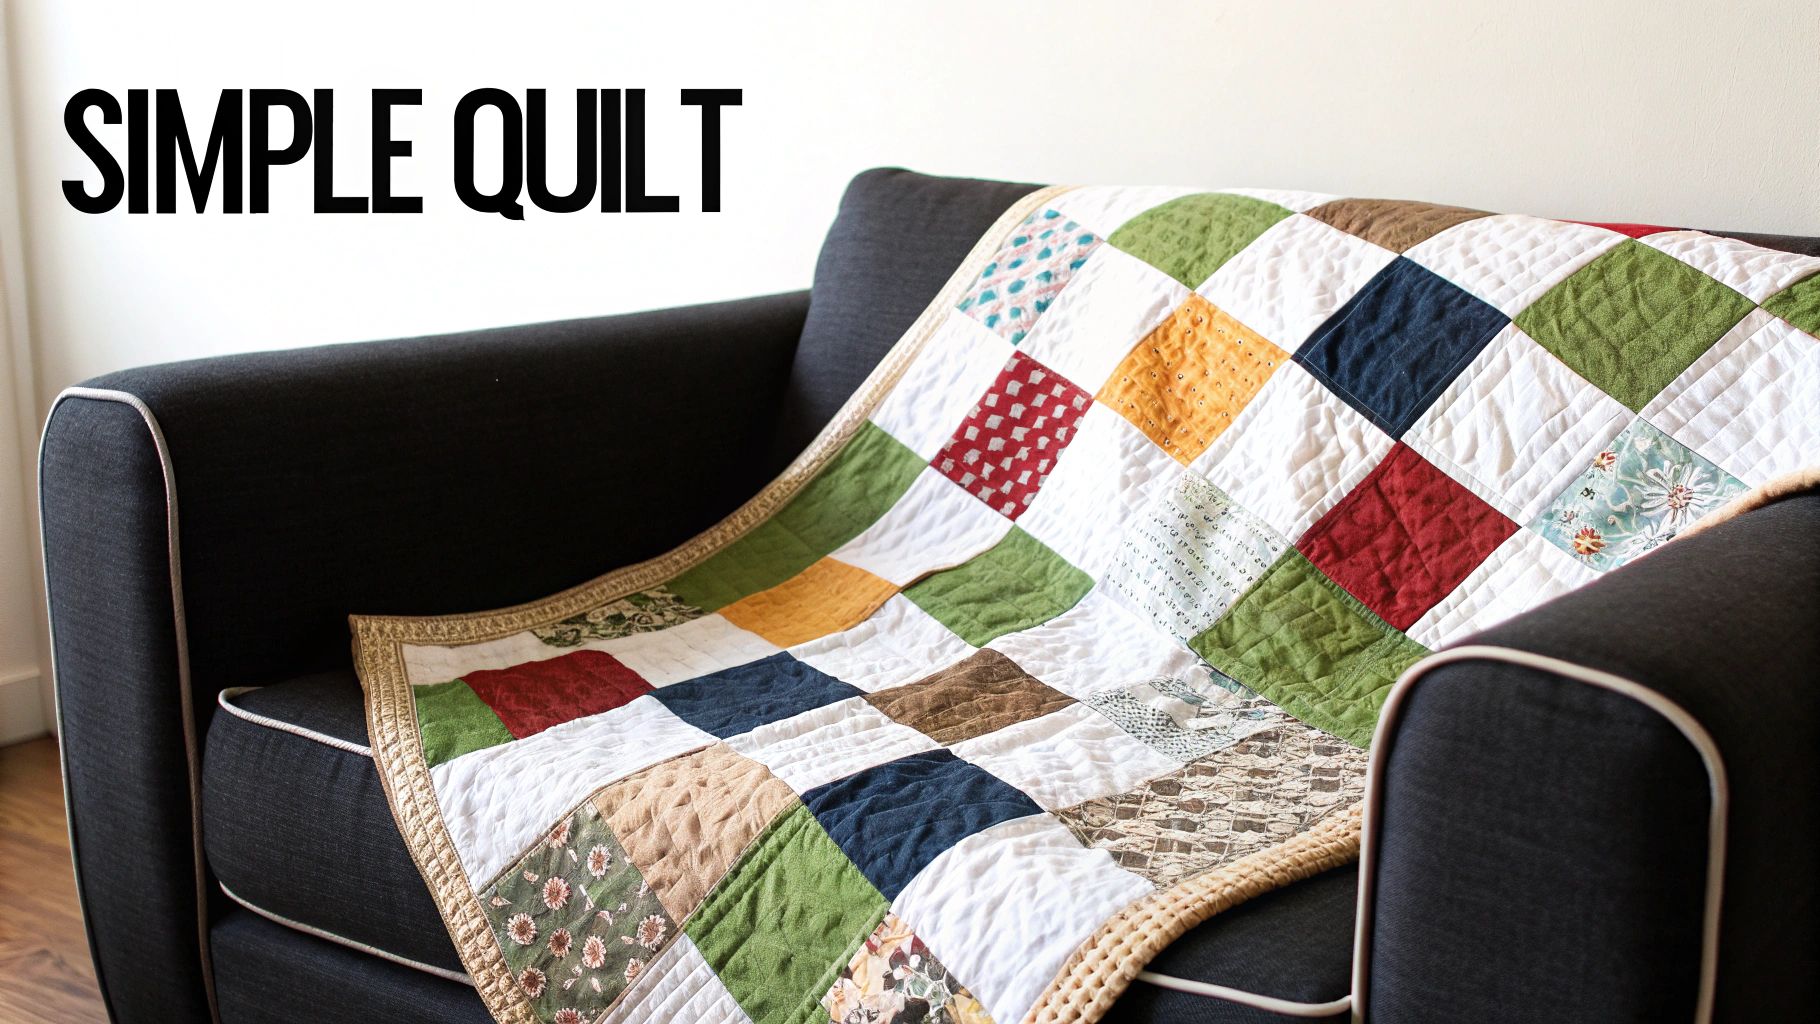
The beauty of starting with a simple quilt is that it introduces you to the entire quilting workflow: cutting, piecing, basting, quilting, and binding. Each step is a self-contained skill, and mastering them on a basic project provides the foundation needed for more complex designs. The result is not just a finished object but a true heirloom.
Project Variations for All Skill Levels
Quilting offers a clear path for progression. You can start with projects that minimize difficult cutting and scale up to more intricate block designs as your confidence grows.
- Absolute Beginner: A "strip quilt" made from long fabric strips (like those from a "Jelly Roll" pre-cut bundle).
- Confident Beginner: A "charm pack quilt" using pre-cut 5-inch squares. This introduces piecing smaller units together.
- Advanced Beginner: A classic "nine-patch" block quilt, which requires more precise cutting and seaming to make the points match.
Mini-Instructions: Your First Patchwork Quilt
- Cut: Arrange your pre-cut fabric squares (charm packs are perfect) into rows on a flat surface or design wall until you like the layout.
- Piece Rows: Sew the squares in each row together, right sides facing, using a consistent 1/4-inch seam allowance. Press the seams of alternating rows in opposite directions (e.g., row 1 seams to the left, row 2 to the right).
- Assemble Top: Sew the completed rows together, one by one. The opposing seam directions will help your corners "nest" together for a perfect match.
- Make Quilt Sandwich: Layer your backing fabric (wrong side up), batting, and quilt top (right side up). Smooth out all wrinkles and baste the layers together with safety pins or spray baste.
- Finish: Quilt the layers by stitching straight lines ("stitching in the ditch" along the seam lines is a great start), then trim the excess batting and backing. Attach the binding around the edges to finish your quilt.
Pro-Tip: Precision is everything in quilting. Using a 1/4-inch quilting foot for your sewing machine is a game-changer. It ensures every seam is perfectly consistent, which is crucial for making all your pieces fit together correctly.
6. Simple Skirts and Wrap Skirts
Stepping into garment making can feel intimidating, but simple skirts are the perfect gateway. Projects like A-line skirts with elastic waistbands or basic wrap skirts introduce fundamental garment construction principles without the complexities of zippers, buttons, or precise fitting, making them one of the best beginner sewing projects to bridge the gap from accessories to apparel.
The core of this project is learning how fabric drapes on the body and how to create a wearable item from flat pattern pieces. You'll tackle key skills like creating a channel for elastic or ties, sewing long, straight seams for a waistband, and hemming a curved edge. This forgiving entry into clothing construction builds immense confidence for more advanced projects.
Project Variations for All Skill Levels
Skirts offer a fantastic canvas for growth. You can begin with a simple rectangle of fabric and evolve to more structured designs as you become more comfortable.
- Absolute Beginner: A simple gathered skirt using two rectangles of fabric and an elastic waistband.
- Confident Beginner: A classic wrap skirt that teaches you how to finish edges and create a waistband with ties.
- Advanced Beginner: An A-line skirt made from multiple panels, which introduces matching seams and more complex shaping.
Mini-Instructions: Your First Wrap Skirt
- Cut: Cut one large rectangle for the skirt body based on your hip measurement plus ease, and two long strips for the waistband and ties.
- Hem Skirt: Hem the two short sides and the bottom edge of the skirt body rectangle. A double-fold hem works perfectly.
- Gather: Sew two rows of long basting stitches along the top raw edge of the skirt body. Gently pull the threads to gather the fabric until it matches your desired waist measurement.
- Attach Waistband: Fold the waistband strip in half lengthwise, wrong sides together, and press. Sandwich the gathered edge of the skirt inside the folded waistband, leaving long "tails" on each end for the ties. Pin securely.
- Finish: Topstitch along the entire length of the waistband, catching the front and back and closing the open ends of the ties. Press for a clean, finished look.
Pro-Tip: Before hemming, let your skirt hang for 24 hours. Fabric, especially when cut on a curve or bias, can stretch. Hanging it allows the fabric to settle, so you can trim any unevenness for a perfectly level hem.
Once you’ve conquered the basics, you can explore adding patch pockets, trying different hem lengths, or working with fabrics like denim or corduroy. You can find inspiration and easy-to-follow patterns from indie designers like Patterns for Pirates that specialize in beginner-friendly garments.
7. Fabric Bookmarks, Coasters, and Small Fabric Accessories
Tiny projects like bookmarks and coasters are fantastic for gaining confidence and are some of the best beginner sewing projects for using up scrap fabric. They offer a low-stakes way to practice foundational skills, turning small pieces of fabric into charming, useful items in under an hour. These quick wins build momentum and motivation for tackling larger projects.
The core of these projects involves sewing small pieces of fabric together, turning them right side out, and topstitching for a finished look. This simple process allows you to perfect your accuracy with a small seam allowance, practice crisp corner turning, and understand the importance of pressing without the pressure of a large or complex item.
Project Variations for All Skill Levels
The beauty of these small accessories is their adaptability. You can start with the most basic version and gradually add complexity as you become more comfortable with your machine.
- Absolute Beginner: A simple two-layer fabric bookmark with a ribbon tail.
- Confident Beginner: A set of quilted fabric coasters using a layer of batting. This introduces sewing through multiple layers.
- Advanced Beginner: A small fabric-covered gift tag or hair clip base, which requires precise cutting and careful seam finishing.
Mini-Instructions: Your First Fabric Coaster
- Cut: Cut two identical squares of cotton fabric (e.g., 5x5 inches) and one square of fusible fleece or cotton batting that is slightly smaller (e.g., 4.5x4.5 inches).
- Fuse: Center the fleece/batting on the wrong side of one fabric square and press with an iron to fuse it in place.
- Assemble: Place the two fabric squares right sides together. Pin and sew around all four sides with a 1/4-inch seam allowance, leaving a 2-inch opening on one side for turning.
- Turn & Press: Clip the corners to reduce bulk. Turn the coaster right side out through the opening. Use a chopstick or point turner to gently poke out the corners. Press flat, making sure the raw edges of the opening are tucked in neatly.
- Finish: Topstitch 1/8-inch from the edge all the way around the coaster. This closes the opening and adds a durable, decorative finish.
Pro-Tip: When sewing small items, use a shorter stitch length (e.g., 2.0-2.5mm). This creates a more secure seam, which is crucial for items that will be turned right side out and have their corners poked, preventing stitches from pulling apart.
Once you feel confident, experiment with different shapes like hexagons or circles. You can also get creative by exploring a wide array of small accessory patterns online to find inspiration for making key fobs, tiny pouches, or embellished cable organizers.
8. Aprons and Simple Garment Overlays
Aprons and simple garment overlays are a fantastic gateway into clothing construction without the stress of perfect fitting. They introduce core garment-making skills like creating ties, attaching waistbands, and adding functional pockets. These projects are forgiving by nature, making them one of the best beginner sewing projects for anyone wanting to sew something they can wear immediately.
The construction of a simple apron teaches you how to handle larger pieces of fabric and apply finishing techniques that give items a professional look. You'll work with straight seams, gentle curves for bibs, and the satisfying process of turning and topstitching ties, all of which are transferable skills for more complex garments down the line.
Project Variations for All Skill Levels
The basic apron can be customized endlessly, allowing you to build on your skills with each new project you tackle.
- Absolute Beginner: A simple half-apron made from one piece of fabric with two long ties.
- Confident Beginner: A full-bib apron that requires attaching a neck loop and a large patch pocket on the front.
- Advanced Beginner: A reversible apron using two different coordinating fabrics, which teaches clean finishing techniques without exposed seams.
Mini-Instructions: Your First Half-Apron
- Cut: Cut one rectangle for the apron body (e.g., 20x30 inches), one for the waistband (e.g., 4x31 inches), and two long strips for the ties (e.g., 4x40 inches each).
- Hem Apron: Hem the two sides and the bottom edge of the apron body by folding the raw edge in 1/4 inch, pressing, then folding another 1/2 inch and topstitching.
- Create Ties: Make the ties by folding each strip in half lengthwise, right sides together. Sew the long edge and one short edge with a 1/4-inch seam allowance. Clip the corner, turn right side out, and press flat.
- Attach Waistband: Press the waistband piece in half lengthwise, wrong sides together. Unfold it, then pin one long raw edge to the top raw edge of the apron body, right sides together, sandwiching the raw ends of the ties at each corner. Sew this seam.
- Finish: Fold the waistband over the seam allowance to the back, tuck the remaining raw edge under, and topstitch along the entire length of the waistband to secure it for a clean finish.
Pro-Tip: Pre-wash and iron your cotton fabric before you start. Aprons are meant to be used and washed frequently, and this step prevents your finished project from shrinking and warping after the first wash.
Once you feel comfortable with the basics, explore different styles. You can experiment with adding ruffles, shaping the hemline, or dividing a large pocket into smaller compartments for tools, making your future projects both beautiful and practical.
Top 8 Beginner Sewing Projects Comparison
| Project | Complexity 🔄 | Resources & Time ⚡ | Expected outcomes ⭐ / Results 📊 | Ideal use cases 💡 | Key advantages ⭐ |
|---|---|---|---|---|---|
| Tote Bags and Simple Pouches | 🔄 Low — straight seams, few pieces | ⚡ Low: basic fabric + notions; ~2–4 hrs | ⭐⭐⭐ — Functional, giftable; good stitch practice 📊 | Beginners, quick gifts, scrap usage | Low cost; fast confidence boost; highly customizable |
| Simple Pillowcases and Cushion Covers | 🔄 Low–Medium — larger panels, finishing | ⚡ Medium: larger yardage; ~2–6 hrs | ⭐⭐⭐⭐ — Polished home décor impact 📊 | Home decorators, gift makers, pressing practice | Teaches pressing & finishing; scalable sizes |
| Elastic‑Waist Pants and Shorts | 🔄 Medium — garment assembly, elastic insertion | ⚡ Medium: 1–2 yd fabric + elastic; ~3–5 hrs | ⭐⭐⭐⭐ — Wearable garments; fit learning 📊 | Loungewear, cosplayers, wearable practice | Teaches fitting, hemming, elastic techniques |
| Lined Zippered Pouches and Makeup Bags | 🔄 Medium–High — zipper + lining precision | ⚡ Medium: multiple fabrics, zipper; ~2–4+ hrs | ⭐⭐⭐⭐ — Professional finish; sellable items 📊 | Intermediate beginners, sellers, travel organizers | Teaches zipper insertion & linings; polished results |
| Quilted Blankets and Simple Quilts | 🔄 High — many pieces, precise piecing/quilting | ⚡ High: lots of fabric, batting, tools; weeks→months | ⭐⭐⭐⭐⭐ — Heirloom-quality impact; strong visual results 📊 | Dedicated quilters, gift makers, stash-busters | Scalable complexity; teaches precision & planning |
| Simple Skirts and Wrap Skirts | 🔄 Medium — waistband/hem work, drape | ⚡ Medium: 1–2 yd fabric; ~4–6 hrs | ⭐⭐⭐⭐ — Wearable, visible results 📊 | Fashion sewers, cosplayers, wardrobe refresh | Wearable outcome; forgiving fits; hem/waistband practice |
| Fabric Bookmarks, Coasters & Small Accessories | 🔄 Very Low — tiny pieces, simple seams | ⚡ Very Low: scraps; 15–45 min each | ⭐⭐ — Quick, low-impact items; high throughput 📊 | Absolute beginners, kids, quick gifts, scrap use | Fast wins; minimal materials; excellent practice pieces |
| Aprons and Simple Garment Overlays | 🔄 Low–Medium — ties, pockets, edge finishing | ⚡ Medium: 1–2 yd fabric; ~3–5 hrs | ⭐⭐⭐ — Practical, usable garments 📊 | Kitchen crafters, cosplayers, gift makers | Teaches tie/waistband & pocket insertion; forgiving fit |
Your Next Stitch: From Beginner to Creator
You’ve just journeyed through a curated collection of the best beginner sewing projects, each one a launchpad for your creative potential. From the straightforward utility of a tote bag to the satisfying finish of a simple elastic-waist skirt, these projects are more than just items to make. They are the fundamental building blocks of your sewing education, designed to build confidence one stitch at a time.
Each project you've seen, whether it’s a set of fabric coasters or a cozy quilted blanket, introduces a core technique. Mastering straight lines with pillowcases, learning to insert a zipper with a makeup bag, or understanding how to create a casing for elastic are all essential skills. These are not just one-off tricks; they are the vocabulary you will use to construct more complex and ambitious creations down the road.
Turning Mistakes into Milestones
The most crucial takeaway is this: every single stitch is progress. Your first few seams might be wobbly, your corners might not be perfectly sharp, and you will inevitably become well-acquainted with your seam ripper. Embrace this process. A crooked seam on a simple pouch is a lesson in guiding fabric. A bunched-up elastic waistband teaches you about tension and distribution.
Key Insight: Mistakes are not failures; they are practical, hands-on tutorials that no book or video can replicate. The most accomplished sewists have a rich history of "learning moments" that paved their way to mastery.
Your Actionable Path Forward
The journey from novice to confident creator is built on consistent action. Don't let this newfound inspiration fade. Take these concrete steps to keep your momentum going:
- Choose and Commit: Look back at the list and select one project that genuinely excites you. Don't overthink it. The best beginner sewing project is the one you are motivated to start today.
- Gather Your Tools: Use the material lists provided to gather your fabric, thread, and notions. Visiting a local fabric store can be an inspiring experience in itself, allowing you to feel textures and see colors in person.
- Set Up Your Space: Dedicate a small, organized area for your sewing machine and tools. Having everything accessible makes it much easier to sit down for a quick 15-minute sewing session.
- Celebrate the Finish: When you complete your project, take a moment to appreciate it. Acknowledge what you learned, what you're proud of, and what you might do differently next time. This reflection is a powerful tool for growth.
By tackling these projects, you're not just learning to operate a machine; you are unlocking a world of self-expression, sustainability, and personal satisfaction. The ability to mend a favorite garment, create a personalized gift, or design a piece of clothing that fits you perfectly is a powerful and rewarding skill. Your creative adventure is officially underway.
Ready to move beyond the basics with expert guidance? Explore the wide range of sewing and cosplay classes at Famcut.com, where you can find specialized workshops designed to elevate your skills from beginner to expert. Visit Famcut.com to find a class that matches your creative goals and join a community of passionate makers.