


Your Complete Guide to Batting for Quilts Sizes
When it comes to choosing the right batting for your quilt, there’s one golden rule every quilter lives by: your batting must be bigger than your quilt top. I always recommend the “4-inch rule,” which means adding a generous four-inch margin to every single side. This little bit of extra fabric is your safety net, and trust me, it’s what separates a frustrating project from a fantastic finish.
Your Essential First Step in Choosing Quilt Batting
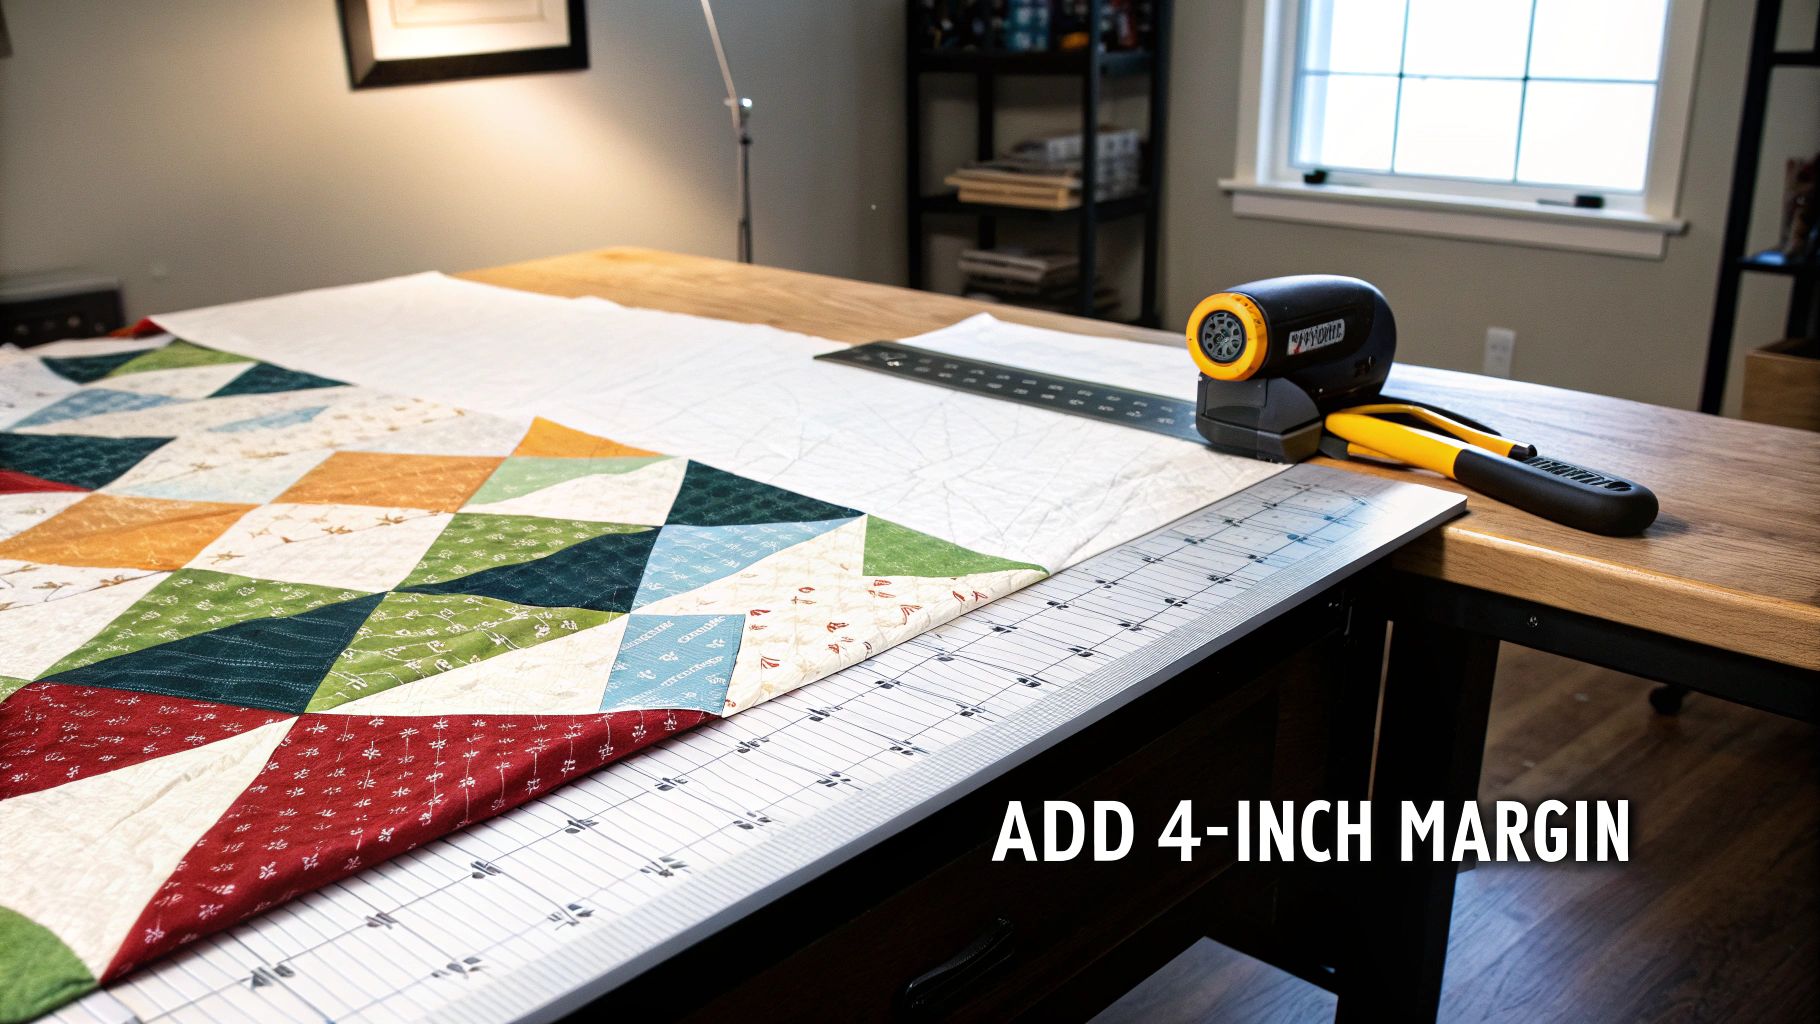
Think of that extra batting like the matting around a photograph in a frame. It gives you the space you need to work and makes sure your final masterpiece—the quilt itself—is perfectly centered and beautifully finished. Skip this step, and you’re setting yourself up for a world of quilting headaches. This margin isn't just for show; it serves some very real, very practical purposes.
Why You Need Extra Batting
That extra four inches on each side—which adds up to a total of eight inches to both the length and width of your quilt top's measurements—is the best insurance policy you can have. I consider it completely non-negotiable if you’re aiming for a professional, polished quilt.
Here’s why that buffer is so critical:
- It Accounts for Shifting: No matter how carefully you pin, the layers of your quilt sandwich will move a bit during quilting. This extra batting ensures your quilt top never wanders off the edge while you’re stitching.
- It Prepares for Shrinkage: Most batting, especially natural fibers like cotton, will shrink a little after the first wash. That allowance helps your quilt settle into its final shape without becoming smaller than you intended.
- It Allows for Squaring Up: Once all the quilting is done, you’ll need to trim the edges to get them perfectly straight. This border gives you the clean slate you need for precise cutting, resulting in crisp sides and sharp corners.
By always building in this buffer, you take the guesswork out of the equation. It's a simple habit that prevents the all-too-common nightmare of coming up short, letting you focus on the fun part—the quilting!
A Quick Reference for Common Sizes
To help you get started, here's a simple chart that makes matching your quilt to the right batting size a breeze. It's built around standard quilt dimensions and already includes that all-important 4-inch rule.
Quick Reference Chart for Quilt and Batting Sizes
| Quilt Type | Approximate Quilt Top Size (Inches) | Recommended Minimum Batting Size (Inches) |
|---|---|---|
| Crib | 36" x 52" | 44" x 60" |
| Throw / Lap | 50" x 65" | 58" x 73" |
| Twin | 70" x 90" | 78" x 98" |
| Full / Double | 85" x 108" | 93" x 116" |
| Queen | 90" x 108" | 98" x 116" |
| King | 110" x 108" | 118" x 116" |
This chart is a great starting point, especially if you're making a standard-sized bed quilt. Just find your quilt top's dimensions and see the minimum batting size you'll need to buy.
Making Sense of Pre-Cut Batting Sizes
When you walk into a quilting shop like Famcut, you'll likely see a whole wall of pre-cut batting, neatly folded and packaged. The labels are familiar—Crib, Twin, Queen, King—and for a lot of us, they're a lifesaver. Who wants to wrestle with a giant, unwieldy roll of batting if they don't have to?
But here's a little secret from one quilter to another: those labels can be a bit deceiving if you take them at face value.
A "Queen" package isn't just for a quilt destined for a queen-sized bed. It's better to think of these pre-cuts like you would a standard sheet of plywood at the hardware store. You pick the piece that’s big enough for your project, knowing you’re going to trim off the extra. This shift in thinking is where you find real value and versatility.
Look at the Numbers, Not the Name
The real trick is to completely ignore the name on the package and look straight at the dimensions. A standard Queen pre-cut batting, for example, is usually 90" x 108". That's a generous piece of material, making it a fantastic, all-purpose workhorse for quilters who tackle all sorts of different projects.
Think about it this way: buying one Queen package could give you enough batting for a couple of smaller quilts. That one 90" x 108" piece could easily become:
- One Large Throw Quilt: A cozy throw often measures around 58" x 73", which leaves a pretty big piece left over.
- And a Baby Quilt: That leftover piece could be just the right size for a 44" x 60" baby quilt.
This approach isn't just about saving money; it’s about being smart and efficient. You end up with batting ready to go for your next project, saving you an extra trip to the store when inspiration strikes.
The moment you stop seeing a pre-cut package as a single-use item and start seeing it as a convenient slab of material, you become a much smarter shopper. It's all about using every last inch and cutting down on waste.
The Savvy Quilter's Game Plan
Thinking this way helps you sidestep one of the most common (and frustrating!) mistakes in quilting: buying batting that's just a little too small. It is always better to buy a size bigger than you think you need. A "Twin" package might seem perfect for your lap quilt, but grabbing the "Full/Double" gives you a much safer buffer and maybe even leftovers for a matching pillow or a small wall hanging.
So, before you head to the checkout, just compare your quilt top's measurements (plus that crucial 8-inch safety margin) to the dimensions printed on the package. It's a simple, two-second check that guarantees you'll have the right coverage every single time. By choosing the right package, you can often get the material for two projects for the price of one, turning a simple supply run into a smart investment for your quilting stash.
How to Calculate Batting for Custom Size Quilts
So, what happens when your creative vision doesn't fit neatly into a standard "Queen" or "Twin" box? Custom quilts are where the real fun begins, but they definitely require a slightly different game plan for choosing your batting. Instead of just grabbing a package off the shelf, you’ll need a simple, reliable formula to get it right every time.
Don't worry, this is quilting, not calculus. The core principle is exactly the same: your batting needs to be bigger than your quilt top. For custom projects, this is the golden rule that will save you a world of headaches.
The Essential Custom Batting Formula
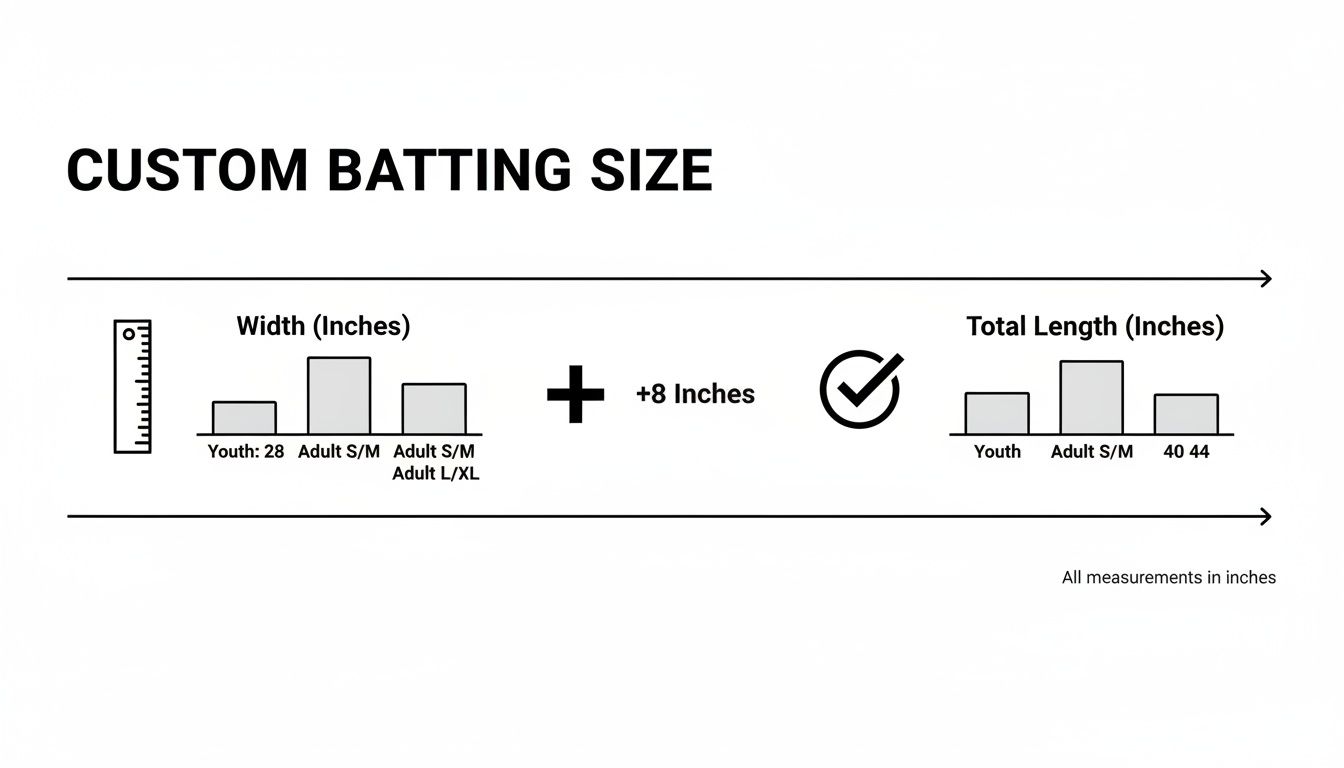
To figure out the perfect batting size for a one-of-a-kind quilt, you just need the finished dimensions of your quilt top. Once you have your width and length measurements, you can pop them right into this formula.
(Quilt Top Width + 8 inches) x (Quilt Top Length + 8 inches) = Your Required Batting Size
That extra 8 inches is your non-negotiable safety net. It gives you a crucial four-inch buffer on all four sides of your quilt top.
Think of it like a baker who always keeps extra flour on the counter when kneading dough. That extra bit isn't part of the final loaf, but it's essential for a smooth process and a perfect result. This overage accounts for any shifting during quilting, potential shrinkage, and gives you clean, straight edges for trimming and squaring up later.
Putting the Formula into Practice
Seeing the formula in action makes it click. Let’s walk through a couple of real-world examples to show you just how simple it is to calculate your batting needs for any custom project.
Example 1: A Custom Wall Hanging
Imagine you've pieced a beautiful, modern wall hanging that measures 30 inches wide by 45 inches long. It's an unusual size, so a pre-cut package probably won't be a perfect fit. Here's how to apply the formula:
- Calculate the Width: 30 inches (quilt top) + 8 inches (allowance) = 38 inches
- Calculate the Length: 45 inches (quilt top) + 8 inches (allowance) = 53 inches
- Your Result: You need a piece of batting that is at least 38" x 53".
Example 2: An Oversized Throw Blanket
Now, let's say you're making an extra-cozy, oversized throw for your couch. Your finished quilt top measures 62 inches wide by 78 inches long.
- Calculate the Width: 62 inches (quilt top) + 8 inches (allowance) = 70 inches
- Calculate the Length: 78 inches (quilt top) + 8 inches (allowance) = 86 inches
- Your Result: For this project, you need a piece of batting measuring at least 70" x 86".
By consistently applying this simple math, you take all the guesswork out of buying batting for your unique creations. It ensures you have exactly what you need, so you can move forward with the quilting process confidently and avoid any of those last-minute fabric store emergencies.
How Batting Material Affects Size and Shrinkage
The type of fiber your batting is made from plays a massive role in how your finished quilt will look and feel. It’s not just about warmth; different materials have their own unique personalities. Some are stable and predictable, while others shrink up after washing to create that classic, crinkly quilt texture we all love.
Getting to know these differences is the secret to making sure the quilt you imagine is the quilt you actually get. The material directly impacts how much extra batting you need, mainly because of shrinkage. It’s a small detail that can make a big difference, especially after that first trip through the laundry.
The Great Shrinkage Debate
When it comes to batting, shrinkage is probably the biggest thing to wrap your head around. Some fibers shrink, and some don't. Knowing which is which can save you from a quilting headache later on.
Think about it: even a small percentage adds up on a big project. A 5% shrinkage rate on a queen-sized quilt that's 90 inches wide means you could lose over four inches! Suddenly, that "little bit extra" you added seems pretty important, right?
Here’s a quick rundown of what to expect from common materials:
- 100% Cotton Batting: This is a classic for a reason. It’s soft, breathable, and gives quilts that traditional, slightly puckered look after washing. Expect it to shrink about 3-5%. Many quilters choose cotton specifically for this effect.
- Polyester Batting: If you want your quilt to stay exactly the size you pieced it, polyester is your best friend. It has almost no shrinkage, usually 0-2%, making it a super reliable and stable choice for a more modern, flat finish.
- Cotton/Poly Blends (80/20): This is the happy medium. You get the soft, natural feel of cotton with the strength and stability of polyester. Shrinkage is minimal, typically around 2-3%.
- Wool Batting: Wool is wonderfully warm and lofty, giving your quilting stitches beautiful definition. It shrinks about 3-5%, similar to cotton, unless you buy a pre-shrunk variety.
Before we dive deeper, let's look at a simple comparison of these common materials. This chart breaks down the key differences to help you zero in on the perfect batting for your next project.
Batting Material Comparison Chart
| Batting Material | Average Shrinkage | Common Loft | Best For |
|---|---|---|---|
| 100% Cotton | 3-5% | Low to Medium | Traditional quilts, achieving a vintage crinkled look, breathability. |
| Polyester | 0-2% | Low to High | Modern quilts, projects needing stability, high-loft comforters. |
| Cotton/Poly Blend | 2-3% | Low to Medium | Everyday quilts, combining cotton's softness with polyester's durability. |
| Wool | 3-5% | Medium to High | Warm quilts, showcasing quilting stitches, providing cozy loft without weight. |
Choosing a material really comes down to the final look you're going for. Do you want that antique, lived-in texture, or a crisp, modern finish? Your answer will point you to the right fiber.
To Pre-Wash or Not to Pre-Wash
So, what do you do about all this potential shrinkage? The simplest solution is to pre-wash your batting. Just toss it in the washer and dryer on a gentle cycle before you build your quilt sandwich. This gets all the shrinking out of the way upfront.
But honestly? A lot of quilters, myself included, skip this step on purpose. We want that shrinkage. It’s what pulls the fabric and thread together, creating that wonderful, cuddly texture that makes a quilt feel like home. There's no right or wrong here—it’s all about the look you want.
The decision to embrace or prevent shrinkage is a creative choice. If you desire a crisp, modern look, pre-washing is your friend. If you're aiming for a cozy, vintage vibe, let the magic happen in the first wash.
The chart below lays out the basic math for figuring out your batting size before you even think about the material. It’s the foundational step for any quilt.
This visual is a great reminder of that golden rule: always add at least 8 extra inches to your quilt top's measurements to give yourself a safe and reliable starting point.
Loft and Its Impact on Your Quilt
Beyond shrinkage, you'll also want to consider loft, which is just a fancy word for the batting's thickness and fluffiness.
A low-loft batting is thin and flat, which is perfect for wall hangings or table runners where you want the intricate piecing to be the star. High-loft batting, on the other hand, is thick and puffy. It creates a much warmer, comforter-style quilt and really makes the quilting stitches pop. Loft won't change your size calculations, but it completely changes the final texture and feel of your quilt.
Using Batting by the Yard and Seaming Scraps
If you find yourself making a lot of quilts, especially in custom or extra-large sizes, you’ve probably realized that those pre-packaged batting sizes can start to feel a bit restrictive. Not only that, but they aren't always the most economical choice. This is where buying batting by the yard, right off the bolt, can be a total game-changer. It gives you incredible flexibility and often works out to be much kinder to your wallet.
Think of it this way: buying pre-cut batting is like getting a small spice jar from the grocery store, while buying off the bolt is like heading to the bulk section. When you know you'll use it, buying by the yard cuts down on packaging and lowers your cost for every quilt you make. This approach is a lifesaver for one-of-a-kind art quilts or those giant bed quilts that just don't fit into a standard box.
As quilting continues to grow in popularity worldwide, smart material management is becoming more important than ever. Understanding how to buy and use batting efficiently helps both hobbyists and professionals keep costs down and reduce waste. You can discover more insights about the expanding quilt market and its latest trends to see just how big this craft has become.
Calculating Yardage from the Bolt
Buying batting off the bolt involves a tiny bit of math, but don't worry, it's simple. Bolts of batting typically come in a few standard widths, with the most common being 90 inches wide (perfect for quilts up to a queen size) and 120 inches wide (your go-to for king-size quilts and other massive projects).
Here's how to figure out what you need:
- Find Your Required Batting Size: Start with the formula we discussed earlier: (Quilt Top Length + 8 inches) to get the total length you'll need.
- Pick the Right Bolt Width: Look at your required batting width and choose a bolt that’s wider than that. If your quilt needs batting that is 70 inches wide, the 90-inch bolt is your best bet.
- Convert Inches to Yards: Batting is sold by the yard, which is 36 inches. To find out how many yards to ask for, just divide your needed length by 36. For example, if you need a piece of batting that’s 86 inches long, you'd calculate 86 ÷ 36 = 2.38 yards. I always round up to be safe—in this case, I’d ask the shop for 2.5 yards.
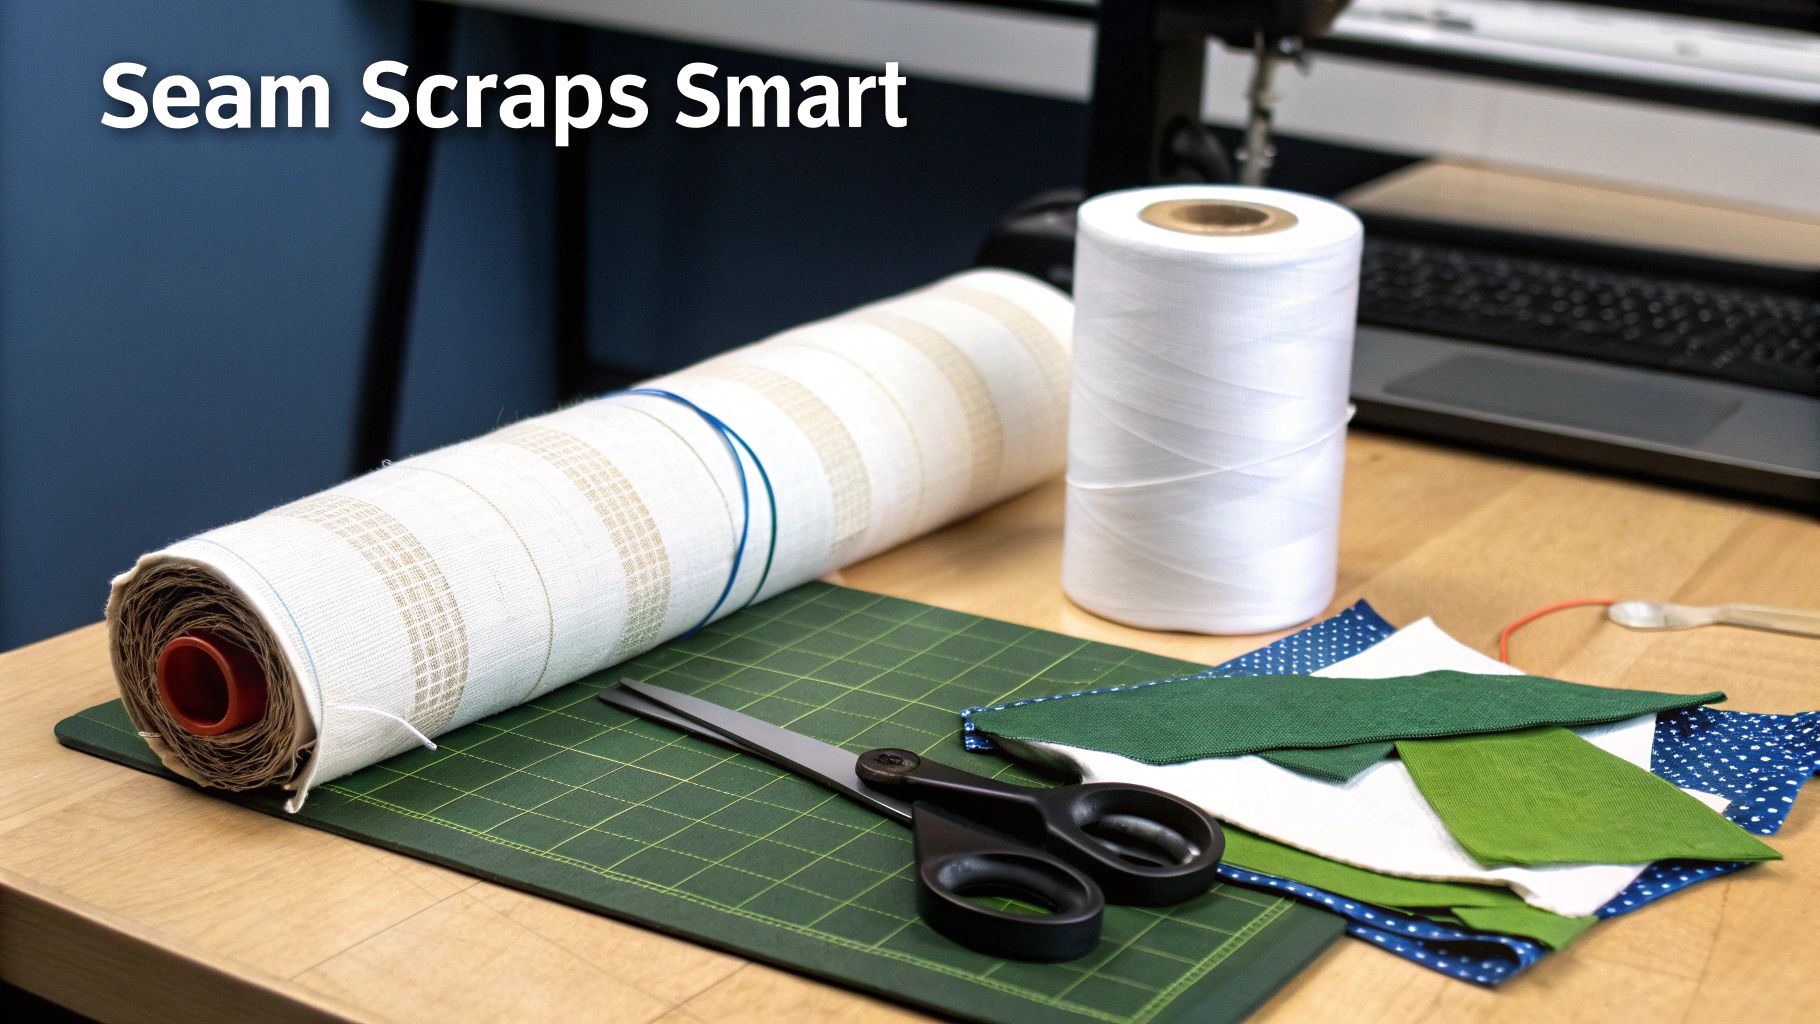
The Art of Seaming Batting Scraps
Ask any seasoned quilter, and they'll tell you: never throw away your batting scraps! Tossing those leftover pieces is like throwing cash in the bin. With just a little bit of effort, you can easily seam those scraps together to create a brand-new, perfectly usable piece of batting for your next project.
Piecing batting scraps is not just about saving money; it’s a sustainable practice that honors the materials and the craft. Every piece has potential, and this method ensures nothing goes to waste.
There are a couple of great ways to join batting pieces together. My two favorites are:
- Using a Zigzag Stitch: First, make sure you have clean, straight edges on your two batting scraps. Butt them up against each other so they are touching perfectly but not overlapping. Then, using a wide zigzag stitch on your sewing machine, stitch them together. The needle should catch the edge of both pieces, creating a flat and surprisingly strong seam.
- Using Fusible Batting Tape: This is a fantastic no-sew method that's super quick. Just lay your two batting pieces edge-to-edge on your ironing board. Place a strip of fusible batting tape over the seam, and press it with a hot iron following the package directions. The heat melts the adhesive, bonding the two pieces securely.
Both of these techniques create a seam that is virtually undetectable. It won’t add any bulk or get in the way of your quilting. Once you master this skill, you'll be able to turn that growing pile of odds and ends into the cozy heart of your next beautiful quilt.
A Special Note for Longarm Quilters
While the standard “four-inch rule” is a fantastic starting point for most of us, longarm quilting plays by a different set of rules. If you’re handing your masterpiece over to a professional or firing up your own longarm machine, you have to think bigger. A lot bigger. This isn't just a friendly suggestion—it's a critical part of the mechanics that lead to a flat, beautifully stitched quilt.
The go-to rule for longarm quilting is to have your batting and backing extend at least 6 to 8 inches beyond your quilt top on all four sides. That means your batting should be a total of 12 to 16 inches wider and longer than your quilt top. I know, it sounds like a ton of extra material, but every inch of that space is essential for the process.
Why Longarm Machines Need All That Extra Room
Imagine a painter stretching a canvas. To get it perfectly taut, they need extra fabric to wrap around the wooden frame. A longarm machine operates on a similar principle, using rollers and clamps to get flawless tension across all three layers of your quilt sandwich.
This generous border is the quilter's workspace and serves a few vital purposes:
- Loading the Quilt: The extra material is what gets physically clamped or pinned to the machine’s rollers (often called leaders). Without this margin, there's simply nothing for the machine to grab onto to load the quilt.
- Creating Perfect Tension: Side clamps are often attached along the quilt's edges to keep everything smooth and taut from side to side. This extra batting and backing provides a safe zone for those clamps, preventing them from distorting the edges of your quilt top.
- Giving the Machine Space to Move: The quilting head needs room to maneuver. This buffer ensures the machine can stitch right to the very edge of your quilt top—and even a little beyond—without bumping into clamps or running off the fabric.
When you're prepping a quilt for a longarm service, that extra 6-8 inches isn't just waste. It's the working margin your quilter needs to properly load, tension, and stitch your quilt. Giving them that space is the best thing you can do to guarantee a beautiful, professional finish.
Rule Number One: Always Check with Your Quilter
Before you make a single cut, the most important thing you can do is talk to your longarm quilter. While the 6 to 8-inch margin is a solid industry standard, every quilter has their own preferred setup. Some might need exactly 6 inches, while others might ask for a full 8 inches just to be safe.
Asking this one simple question upfront saves everyone time, headaches, and frustration. It ensures your quilt arrives ready to go, allowing them to focus on what they do best. Think of it as the first step in a successful collaboration that ends with a quilt you'll cherish for years.
Answering Your Lingering Questions About Batting Size
Alright, we've covered the basics, but I know from experience that once you start laying out your fabric, new questions always pop up. It’s those little specific scenarios that can make you second-guess yourself. Let's tackle some of the most common head-scratchers I hear from quilters so you can move forward with total confidence.
Can I Use Batting That's the Exact Same Size as My Quilt Top?
I get this question all the time, and my answer is always a firm—but friendly—"please don't!" It might seem like a smart way to save material, but it almost always leads to frustration.
When you're quilting, the layers naturally shift and pull. Without that extra margin around the edges, it's incredibly easy for your quilt top to slide right off the batting in one spot, or for the backing to pull away in another. You also need that extra space to square up your quilt after quilting is done. Trimming it down gives you those perfectly straight edges for binding, which is key to a professional-looking finish.
Think of that extra batting as your insurance policy. Always give yourself at least 4 to 8 inches of extra batting on both the length and width. It's the secret to a smooth process and a beautiful, square quilt.
Does the Batting's Loft Change the Size I Need?
Loft is just the word we use for the thickness or fluffiness of the batting. It's true that a high-loft batting will give you a puffier, more textured quilt, but does it really impact your size calculations?
Honestly, not much. While a super-dense quilting pattern on a very thick batting might "use up" a tiny bit of the surface area, the effect is so small it's not worth worrying about. Your best bet is to stick with the tried-and-true rule: the standard 4- to 8-inch allowance works perfectly, no matter which loft you choose.
How Do I Get Creases and Wrinkles Out of My Batting?
Nothing is worse than quilting over a hidden wrinkle! Taking a few minutes to smooth out your batting before you start is a step you won't regret.
The simplest trick is to pop it in your dryer. Just toss it in on a low-heat or air-fluff cycle for about 10-15 minutes, and most of the folds will relax on their own. If you're dealing with some really stubborn creases, throw a slightly damp towel in with it. The bit of steam it creates works wonders to release those deeper folds.
Is It Better to Buy Pre-Cut Batting or Off the Bolt?
This really comes down to what kind of quilter you are and what your current project looks like. There’s no single right answer.
- Pre-cut packages are fantastic for convenience. If you're making a standard twin, queen, or king-sized quilt, they take all the guesswork out of it. Just grab and go!
- Buying by the yard from a bolt often makes more sense financially if you quilt a lot, tackle odd-sized projects, or want to avoid waste by getting the precise amount you need.
Think about your project, your storage space, and your budget. The best choice is whatever makes your quilting life easier.
Whether you're looking for the perfect pre-cut package or need a custom cut off the bolt, Famcut is here to support your creative journey. You can explore our huge selection of premium quilting supplies over at Famcut.com and find everything you need to bring your next idea to life.