


Master These 8 Basic Embroidery Stitches for Beginners in 2026
Welcome to the vibrant world of hand embroidery, a craft that transforms simple thread and fabric into stunning works of art. If you're new to this creative pursuit, you've come to the right place. This guide is your foundational toolkit, designed to cut through the noise and teach you the essential techniques needed to start your first project with confidence. We will walk you through the most crucial basic embroidery stitches for beginners, providing clear, step-by-step instructions for each one. From the simple Running Stitch to the elegant French Knot, mastering these core stitches will give you a versatile vocabulary to bring any design to life.
Learning these mechanical skills is an excellent way to improve your fine motor control. The precise, repetitive motions of pulling a needle and thread through fabric directly enhance your manual precision. To better understand the mechanics behind this skill, you can explore more about what is hand dexterity and how crafts like embroidery can strengthen it.
This listicle is structured for clarity and action. You won't find generic advice here, only practical steps and real-world applications for stitches like the Backstitch, Satin Stitch, and Chain Stitch. Our goal is to equip you with a solid foundation, empowering you to tackle more complex patterns and even create your own unique designs. Let's get started.
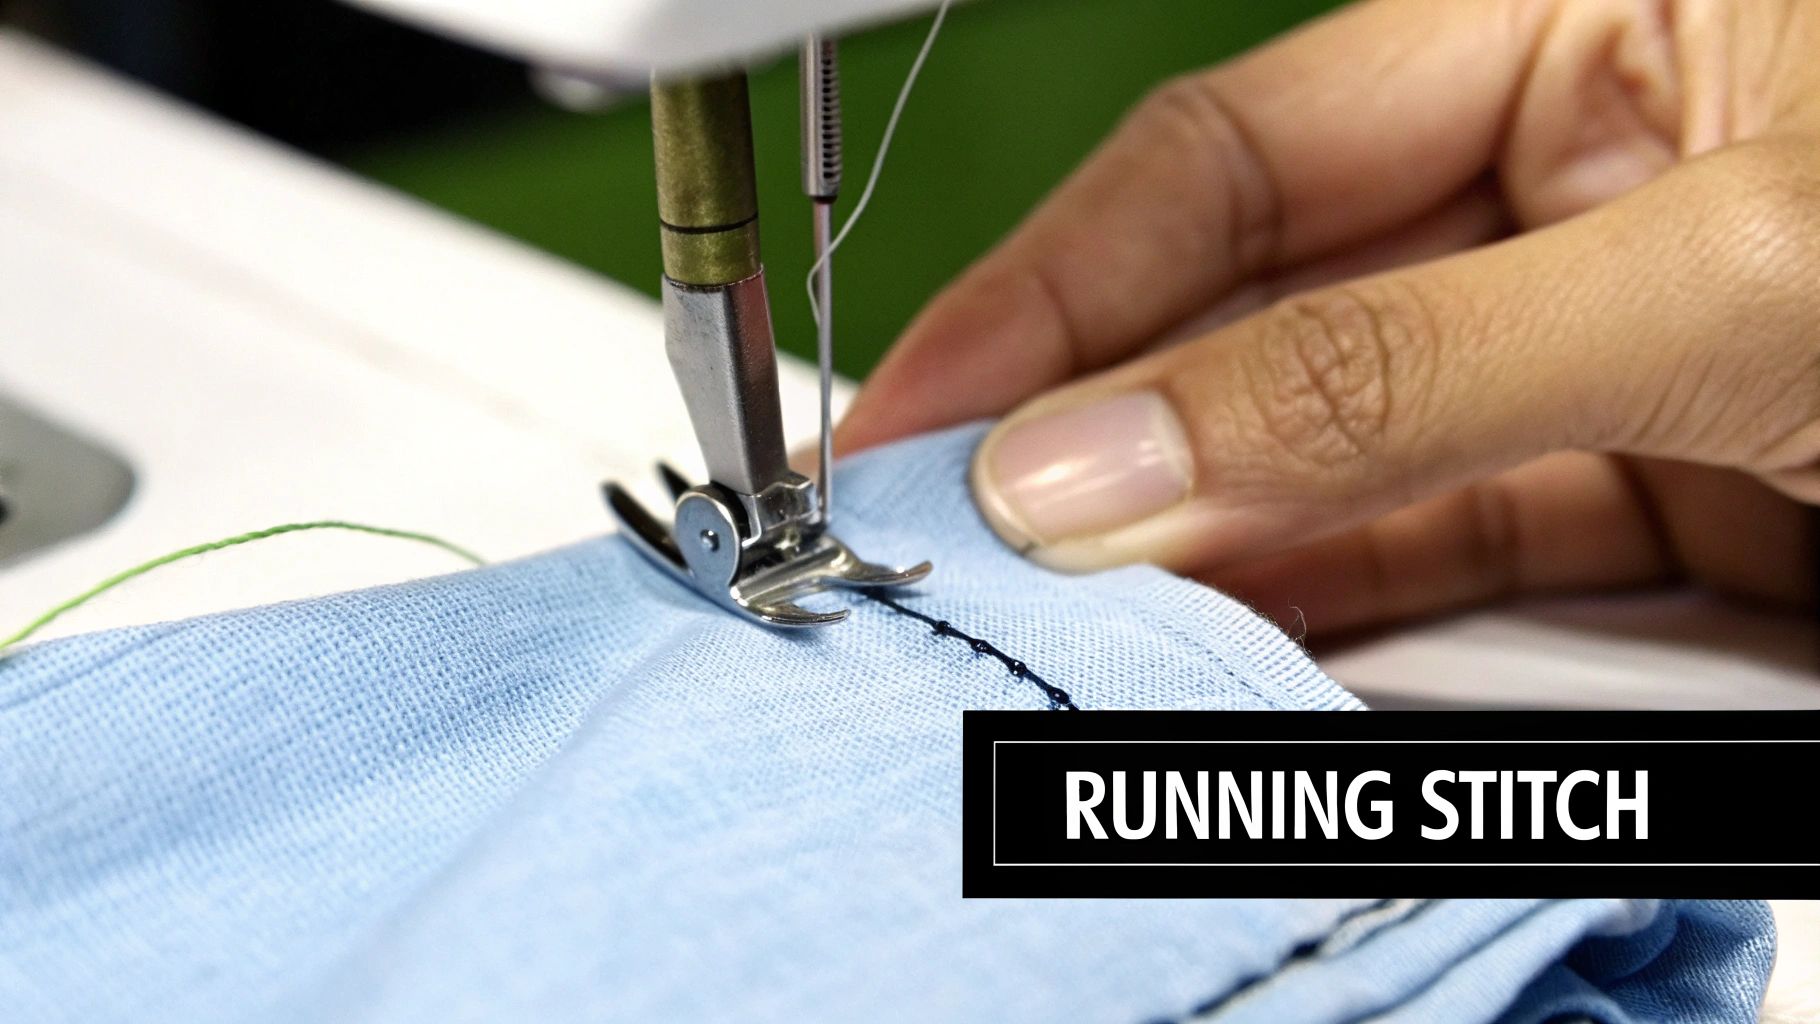
1. Running Stitch
The running stitch is the cornerstone of hand embroidery and one of the most basic embroidery stitches for beginners. Its simple, in-and-out motion creates a dashed line, making it perfect for outlining shapes, creating borders, and adding delicate details. Think of it as drawing with thread; it’s the fundamental skill that builds your control over the needle and floss.
This stitch is essential because it teaches the core principles of embroidery: how to maintain even stitch length and consistent tension. Mastering this simple technique provides the foundation needed to tackle more complex stitches with confidence.
How to Execute the Running Stitch
Executing the running stitch is straightforward. Start by bringing your needle up through the fabric from the back at your starting point. Move the needle forward a short distance (about 1/8 inch is a good standard) and push it back down through the fabric. Continue this up-and-down motion along your design line, striving to keep both the stitches and the gaps between them equal in length.
Common Applications and Examples
The versatility of the running stitch makes it a go-to for many projects. It's not just for practice; it’s a functional and decorative stitch used by crafters of all skill levels.
- Outlining: Defining the edges of a design before filling it in.
- Borders: Creating simple, elegant borders on quilt squares or garments.
- Detailing: Adding fine lines, like the armor embellishments on a cosplay piece or the delicate veins on an embroidered leaf.
- Sashiko: Serving as the primary stitch in traditional Japanese Sashiko embroidery.
Tips for a Perfect Running Stitch
- Maintain Uniformity: Keep your stitches and the spaces between them consistent in length for a clean, professional look. A small ruler or a water-soluble fabric marker can help guide you initially.
- Manage Tension: Avoid pulling the thread too tight, which can pucker the fabric. The floss should lie flat against the surface without being loose or saggy.
- Use a Thimble: Pushing the needle through fabric repeatedly can be tough on your fingers. A thimble helps you push the needle with ease and control.
- Practice First: Before starting on your main project, practice on a scrap piece of fabric to get a feel for the rhythm and tension.
2. Backstitch
The backstitch is one of the most durable and fundamental embroidery stitches, prized for creating a solid, continuous line that closely mimics machine sewing. Unlike the dashed appearance of a running stitch, this technique produces an unbroken line, making it a powerful tool for outlining and lettering. It is an essential skill for any beginner’s toolkit due to its strength and clean finish.
This stitch is critical for projects that require crisp, defined edges and durability. Mastering the backstitch provides the ability to create strong, clear linework that serves as the backbone for more intricate designs, making it one of the most versatile and practical basic embroidery stitches for beginners.
How to Execute the Backstitch
To create a backstitch, start by bringing your needle up through the fabric from the back. Make a single straight stitch forward, then bring the needle up again a stitch-length ahead of your first stitch. To complete the backstitch, push the needle back down into the same hole where your first stitch ended. This "one step forward, one step back" motion creates a solid, connected line.
Common Applications and Examples
The backstitch's strength and clean appearance make it a favorite in traditional embroidery and modern crafting, especially in communities like professional cosplay where durability is key.
- Outlining: Creating sharp, defined outlines for characters and shapes before filling them in.
- Lettering: Stitching clear and legible text on any fabric project.
- Reinforcing Seams: Adding strength to seams on performance costumes or cosplay pieces that endure stress.
- Detailed Linework: Embroidering fine details, such as facial features on a character or intricate patterns on cosplay armor.
Tips for a Perfect Backstitch
- Keep Stitch Length Uniform: For a smooth, even line, aim to keep your stitches a consistent length, typically between 1/16 and 1/8 of an inch.
- Maintain Moderate Tension: Pulling the thread too tight can cause the fabric to pucker. Let the floss sit smoothly on the surface.
- Practice Direction: Stitching curves can be tricky. Practice on a scrap piece of fabric to get comfortable with changing direction smoothly.
- Choose Durability: Use the backstitch for any embroidery that needs to be strong and withstand wear, such as on clothing or bags.
3. Split Stitch
The split stitch creates a textured, solid line by literally splitting the previous stitch as you work. This technique produces a look similar to a fine chain, making it an excellent choice for bold outlines and lettering that needs more presence than a simple running stitch. It is one of the most versatile basic embroidery stitches for beginners because it combines the precision of an outline stitch with a unique, dimensional texture.
This stitch is fundamental for moving beyond simple dashed lines into more solid, expressive line work. Mastering it allows you to create smooth curves and strong outlines, adding a professional and polished look to your projects. Its texture provides a slightly raised effect, giving your embroidery more visual interest and depth.
How to Execute the Split Stitch
To create a split stitch, start by making one straight stitch. Bring your needle up through the fabric a short distance from the end of that first stitch, piercing directly through the middle of the floss. Pull the thread through to create your second stitch, and then repeat this process, always bringing the needle up through the center of the preceding stitch.
Common Applications and Examples
The split stitch's solid, textured line makes it perfect for a variety of applications where definition and detail are key.
- Outlining: Creating strong, clean outlines for character emblems on cosplay cloaks and armor.
- Lettering: Stitching dimensional lettering on quilted wall hangings or personalized items.
- Filling: Using rows of split stitch close together to fill in small shapes with a smooth, woven texture.
- Decorative Details: Adding embellished border details on costumes or performance pieces.
Tips for a Perfect Split Stitch
- Use Fewer Strands: For a clean split, use one to three strands of embroidery floss. More strands can be difficult to pierce cleanly.
- Keep Stitches Short: Maintain short, even stitches to create smooth curves and a neat, consistent line.
- Aim for the Center: Practice precision by carefully angling your needle to split the thread directly in the middle. Practicing on a scrap of fabric first helps build accuracy.
- Combine with Other Stitches: The split stitch works beautifully when combined with other stitches, like the satin stitch, to create mixed-media effects and varied textures.
4. Stem Stitch
The stem stitch is a fundamental technique that creates a beautiful, rope-like line, making it one of the most versatile basic embroidery stitches for beginners. Also known as the crewel stitch, its slightly twisted texture is perfect for outlining curves and creating flowing, organic shapes. It’s the go-to stitch for bringing natural elements like stems and vines to life.
This stitch is essential for adding dimension and movement to your work. Mastering it allows you to create elegant, textured outlines that are more substantial than a simple running stitch, providing a solid foundation for more intricate botanical and script-based designs.
How to Execute the Stem Stitch
To create a stem stitch, bring your needle up through the fabric at your starting point. Make a short, straight stitch forward, but before pulling the floss taut, bring the needle back up halfway through the stitch, slightly to one side of the stitch line. Pull the thread through to tighten the first stitch, then repeat the process, always keeping the working thread on the same side of the needle to create a consistent, twisted effect.
Common Applications and Examples
The stem stitch's graceful curve and solid line make it ideal for a variety of decorative and practical applications, especially in projects that feature natural or flowing elements.
- Stems and Vines: Creating realistic stems for embroidered flowers and flowing vines in botanical quilt designs.
- Outlining Curves: Defining the edges of circular or curved shapes where a backstitch might appear jagged.
- Lettering: Embroidering elegant, cursive script for monograms or quotes.
- Costume Accents: Adding vine and leaf embellishments to fairy or fantasy cosplay and decorative borders on renaissance faire garments.
Tips for a Perfect Stem Stitch
- Stay Consistent: Always keep your working thread on the same side of the needle (either always above or always below) as you make each stitch. This is the key to achieving the classic rope-like twist.
- Shorten Stitches on Curves: When working around tight curves, use shorter stitches to maintain a smooth and even line.
- Manage Tension: Maintain even tension to create a smooth, uniform rope effect. Pulling too tightly will pucker the fabric, while loose stitches will look uneven.
- Try Variegated Thread: This stitch works beautifully with variegated or multi-colored floss, as the twisting motion highlights the subtle color changes and adds extra visual interest.
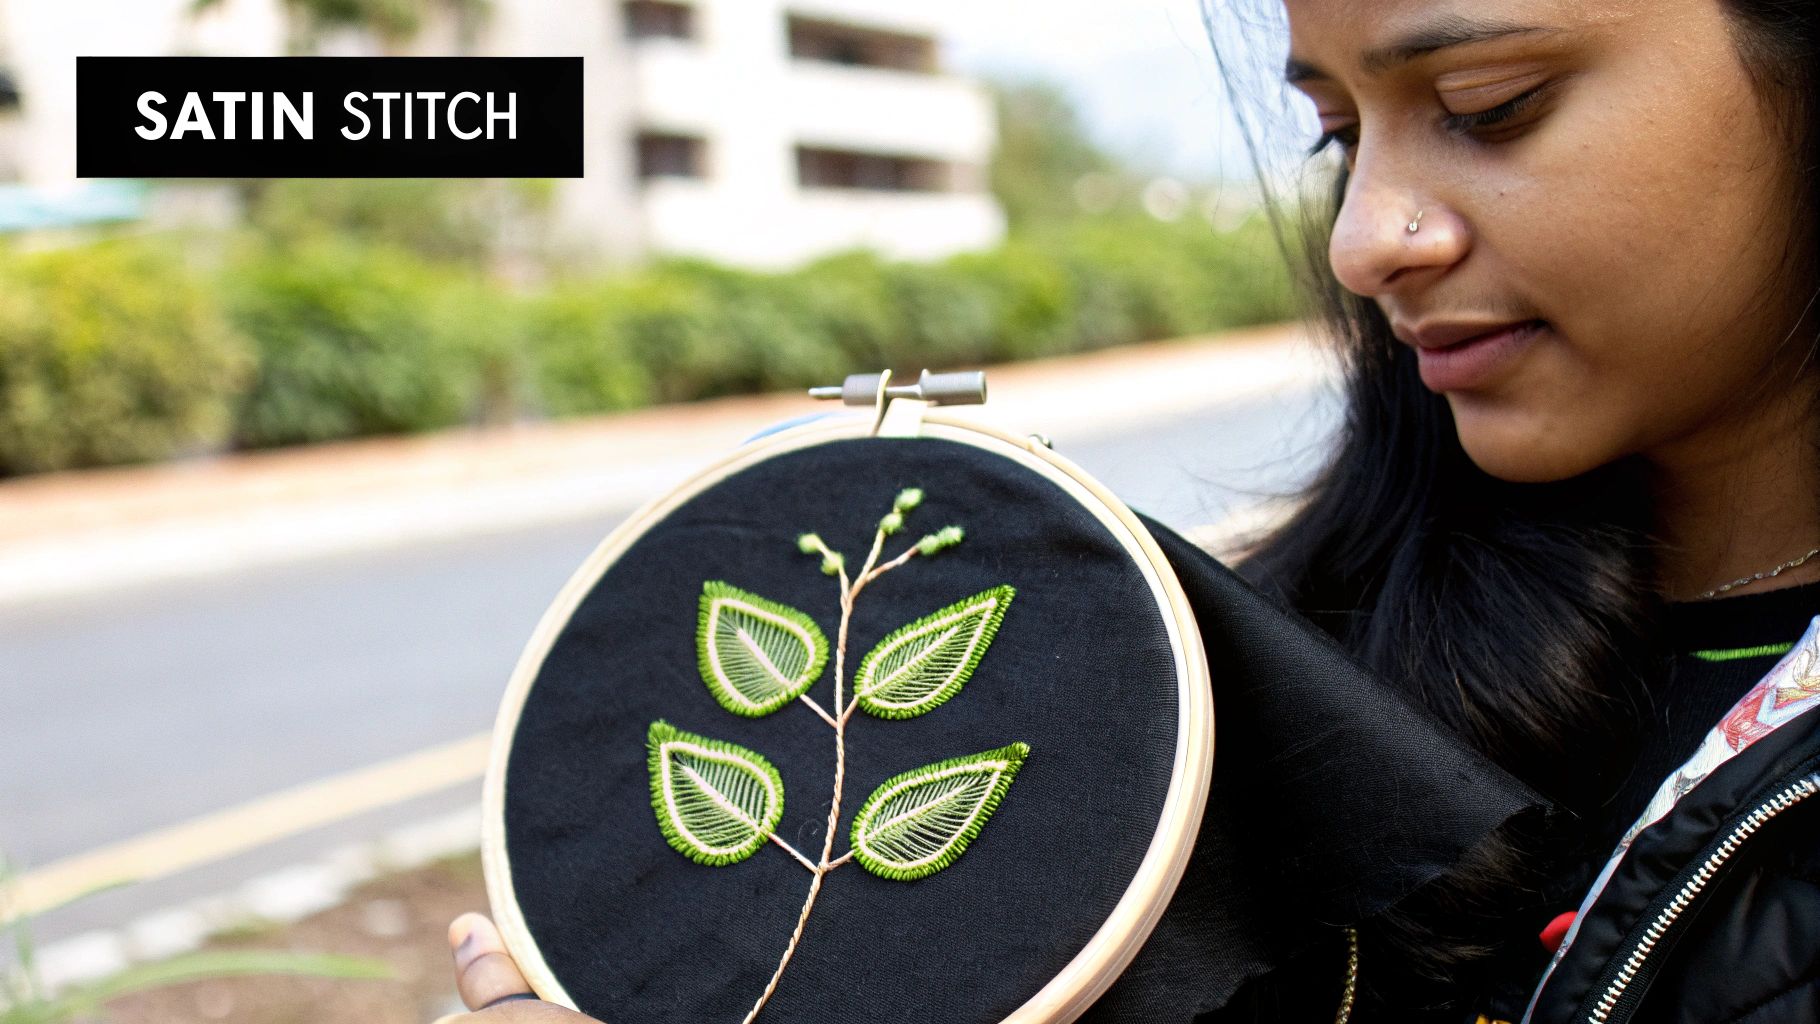
5. Satin Stitch
The satin stitch is the primary technique for filling shapes and areas with solid, smooth color. It involves laying straight stitches parallel and close to one another across a shape, creating a satiny, lustrous surface. This stitch is essential among basic embroidery stitches for beginners who want to move from outlining to filling designs, making it a staple for creating vibrant, colorful pieces.
Mastering the satin stitch allows you to create bold, impactful designs with a professional finish. It’s perfect for showcasing the sheen of embroidery floss and is fundamental for everything from traditional floral patterns to modern cosplay embellishments.
How to Execute the Satin Stitch
To begin a satin stitch, bring your needle up through the fabric on one edge of the shape you want to fill. Then, take the needle directly across to the opposite edge and push it down. Bring the needle back up right next to your starting point and repeat the process, laying each new stitch tightly against the previous one until the entire shape is filled.
Common Applications and Examples
The satin stitch is the go-to for adding solid blocks of color and a smooth texture to any embroidery project. Its beautiful finish makes it highly popular for decorative work.
- Filling Shapes: Creating the vibrant centers of costume emblems and insignia.
- Character Details: Stitching bright, solid character eyes in embroidered portraits.
- Embellishments: Adding lustrous details to cosplay armor and costume plating.
- Appliqué: Using it for decorative fill work on quilt appliqué pieces.
Tips for a Perfect Satin Stitch
- Define Your Edges: Before you begin, outline your shape with a backstitch or split stitch. This creates a raised, clean edge to guide your satin stitches.
- Stay Parallel: Ensure every stitch lies perfectly parallel to the others. Angling your stitches to follow the natural contours of the shape will create a more dynamic look.
- Manage Tension: Maintain even, consistent tension. Pulling too tight will pucker the fabric, while loose stitches will look uneven and snag easily.
- Choose Your Floss: Use an appropriate number of floss strands for your design. For small details, 2-3 strands work well, while larger areas may require all six for better coverage.
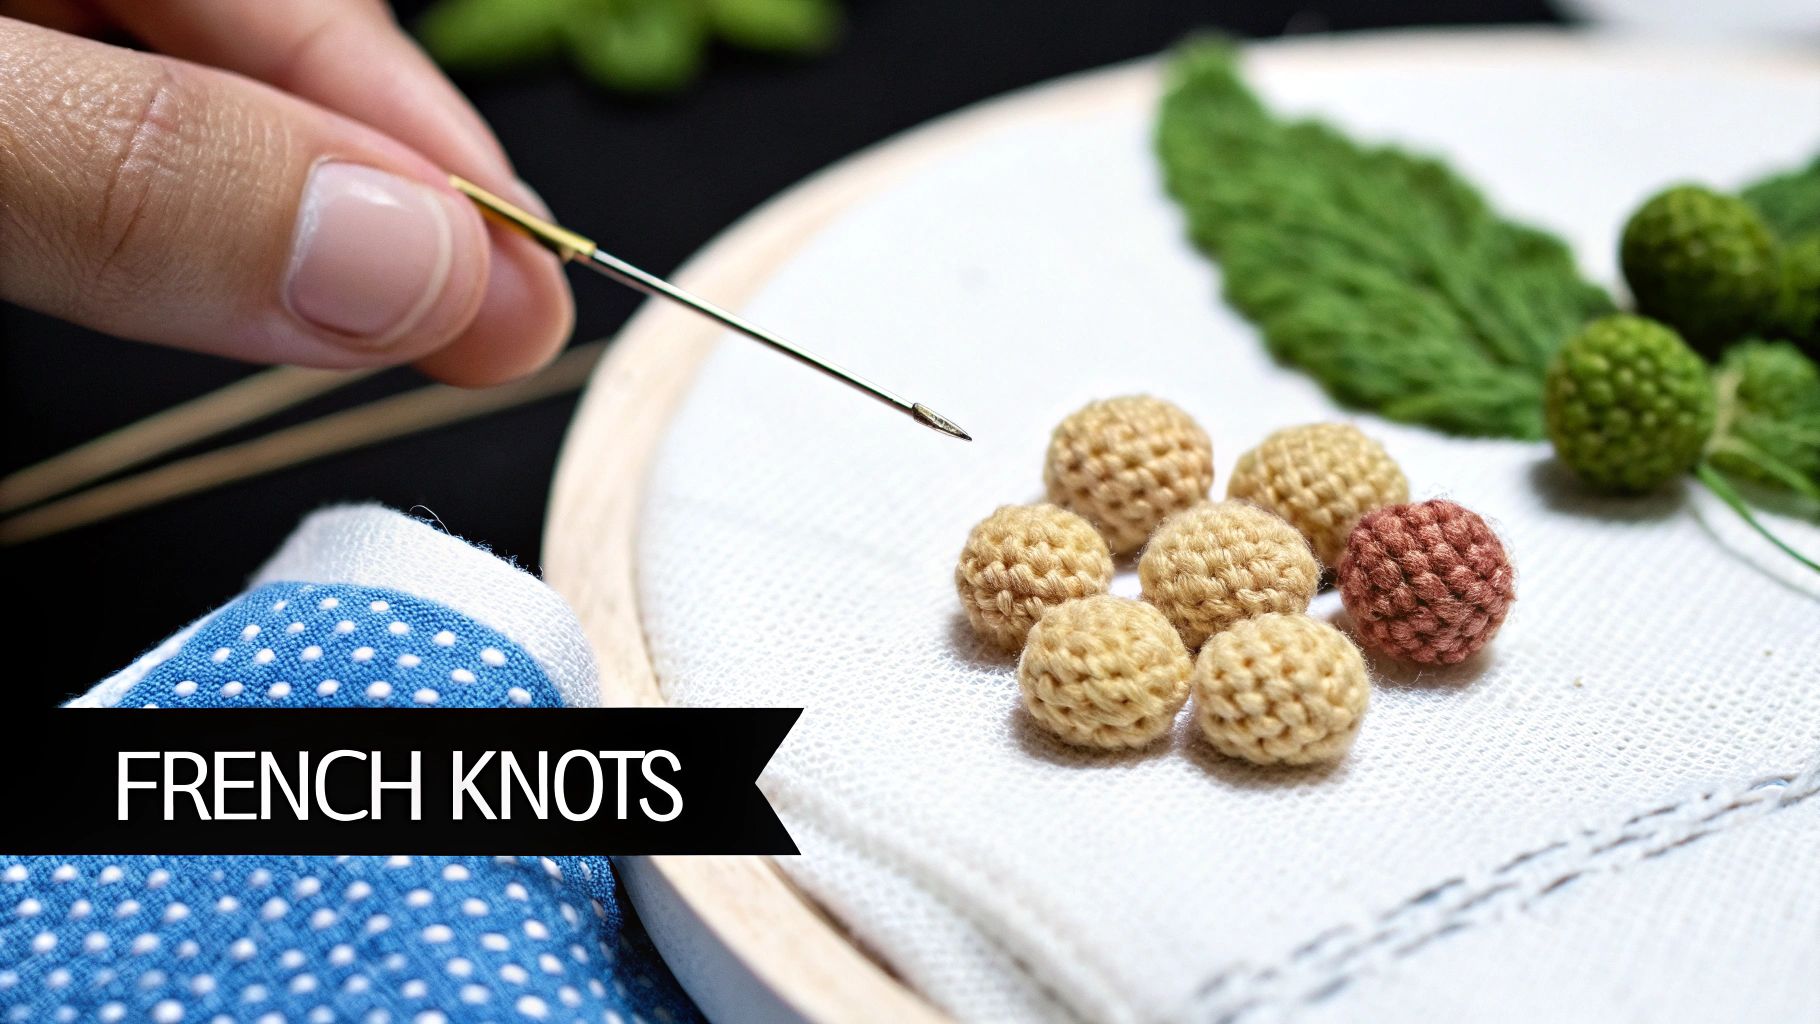
6. French Knot
The French knot is a classic decorative stitch that creates small, three-dimensional dots on the surface of the fabric. It is perfect for adding texture and intricate detail to any embroidery project. This stitch involves wrapping the floss around the needle before passing it back through the fabric, forming a raised knot that can be used individually or clustered together for a dramatic effect.
Mastering the French knot is a significant milestone for any beginner embroiderer. It teaches precise needle control and tension management, skills that are crucial for more advanced textural work. Its ability to create everything from tiny seeds in a strawberry to sparkling stars in a night sky makes it an indispensable technique in your stitching arsenal.
How to Execute the French Knot
To create a French knot, bring your needle up through the fabric from the back. Hold the floss taut with your non-dominant hand, and wrap it around the needle two or three times close to the fabric. Re-insert the needle into the fabric very close to, but not in, the original hole. Pull the needle through to the back while maintaining tension on the floss, which will form a neat knot on the surface.
Common Applications and Examples
The French knot is one of the most versatile basic embroidery stitches for beginners, used to add dimension and fine detail to a wide variety of projects.
- Floral Centers: Adding realistic centers to embroidered flowers like daisies or sunflowers.
- Costume Embellishments: Creating the illusion of beads or sparkly jewels on cosplay and theatrical costumes.
- Textural Fills: Clustering knots together to create textured areas, such as animal fur or fluffy clouds.
- Decorative Details: Using single knots for eyes on small figures, stars in a galaxy scene, or sprinkles on an embroidered cupcake.
Tips for a Perfect French Knot
- Consistent Wraps: For a standard knot, wrap the thread two to three times around the needle. Using more or fewer wraps will change the knot's size, so be consistent for a uniform look.
- Maintain Tension: Keep the floss taut as you wrap the needle and pull it through the fabric. This is the key to creating a tight, neat knot that doesn't unravel.
- Use Shorter Thread: Work with shorter lengths of floss (12 inches or less) to minimize the risk of tangling and frustration.
- Stabilize Your Fabric: Practice on a piece of scrap fabric stretched tightly in a hoop before working on your final project. This helps you get the tension right without puckering your good material.
7. Chain Stitch
The chain stitch creates a textured, rope-like line of interconnected loops, making it one of the most visually striking and versatile basic embroidery stitches for beginners. It’s perfect for creating bold outlines, decorative borders, and filling in areas with a unique, raised texture. This stitch builds on the fundamental up-and-down motion but introduces the concept of looping thread to form a continuous line.
Learning the chain stitch is an important step for any new embroiderer. It helps develop more advanced needle control and an understanding of how stitches can be linked together to create dynamic, flowing designs that stand out from the fabric.
How to Execute the Chain Stitch
To start a chain stitch, bring your needle up through the fabric from the back. Then, insert the needle back down into the same hole (or very close to it) but don’t pull the thread all the way through. Leave a small loop on the surface. Bring your needle back up a short distance away, making sure it comes up inside the loop. Gently pull the thread taut to form the first "chain," and repeat the process to create a continuous line.
Common Applications and Examples
The chain stitch is highly adaptable and used in countless embroidery styles, from delicate floral work to bold, modern patterns. Its texture and definition make it a popular choice for many applications.
- Bold Outlines: Creating defined outline work on character designs or lettering.
- Textural Fill: Filling in shapes like petals or leaves to give them dimension.
- Costume Embellishment: Adding decorative edging and trim to cosplay cloaks and robes.
- Decorative Borders: Crafting intricate, eye-catching border elements on quilted pieces or home decor.
Tips for a Perfect Chain Stitch
- Keep Loops Consistent: Strive for uniform loop size and stitch length throughout your chain for a clean, professional appearance.
- Anchor the Final Loop: Secure the last chain by making a tiny anchoring stitch over the end of the loop. This prevents the entire line from unraveling.
- Go Bold: Use a thicker thread or multiple strands of floss to create a more prominent, impactful chain effect.
- Practice Loop Formation: Before starting on your main project, practice forming the loops on a scrap piece of fabric to get a feel for the rhythm and tension required.
8. Long and Short Stitch (Shading Stitch)
The long and short stitch, also known as the shading stitch or needle painting, is a sophisticated technique used to create realistic shading and smooth color transitions. It involves a series of alternating long and short straight stitches laid out in offset rows, which blend colors together seamlessly. This method is fundamental for achieving a dimensional, photorealistic effect in embroidery.
While it's more advanced than other basic embroidery stitches for beginners, learning it opens up a world of creative possibilities, particularly for detailed work like botanical art, portraits, and intricate cosplay embellishments. It's the key to turning flat designs into textured, lifelike masterpieces.
How to Execute the Long and Short Stitch
To begin, create a row of alternating long and short straight stitches along the top edge of your shape. For the second row, bring the needle up through the fabric within the stitches of the first row and make new long stitches that cover the gaps. The key is to stagger the start and end points of each stitch, ensuring they nestle into the row above to eliminate clear lines between colors.
Common Applications and Examples
This stitch is perfect for any project requiring depth, shading, and realism. It’s a favorite among artists looking to elevate their textile work from simple line art to a detailed illustration.
- Realistic Portraits: Creating subtle skin tones and believable hair texture in embroidered characters.
- Botanical Art: Shading flower petals and leaves to give them a three-dimensional look.
- Cosplay Embellishments: Adding dimensional shading to armor, emblems, and fabric details for a professional finish.
- Animal Portraits: Replicating the soft, varied texture of fur and feathers.
Tips for a Perfect Long and Short Stitch
- Study Your Subject: Before you begin, observe how light hits your subject. Having a reference photo or artwork helps in placing colors accurately.
- Use Fewer Strands: Work with one or two strands of floss for the finest detail and the smoothest color blending.
- Blend Gradually: Transition between shades slowly. If you have five shades of a color, work from lightest to darkest in order to create a natural gradient.
- Work in Small Sections: Tackle small areas at a time to maintain control over stitch direction and density, which prevents the work from becoming messy.
8 Beginner Embroidery Stitches Comparison
| Stitch | Implementation Complexity 🔄 | Resources & Speed ⚡ | Expected Outcomes ⭐📊 | Ideal Use Cases | Key Tips 💡 |
|---|---|---|---|---|---|
| Running Stitch | Very low — beginner-friendly, basic needle control | Minimal thread; very fast to execute | ⭐ Low visual weight; 📊 Good for clean outlines and fine detail | Outlining, borders, quilting, cosplay base layers | Keep stitches uniform (~1/8"); use a guide; maintain tension |
| Backstitch | Low–medium — needs coordination for consistent length | Uses more thread; slower than running stitch | ⭐ High durability and professional look; 📊 Continuous, machine-like line | Reinforcing seams, crisp outlines on wearable cosplay | Keep length 1/16–1/8"; moderate tension; practice direction |
| Split Stitch | Medium — precision required to split previous stitch | Moderate thread use; slower than basic stitches | ⭐ Medium–high visual texture; 📊 Raised, bold outlines with dimension | Dimensional emblems, decorative outlines, specialty surfaces | Use 1–3 strands; keep stitches close; angle needle to split |
| Stem Stitch | Medium — angle and side control important | Moderate resources; moderate speed | ⭐ Medium visual interest; 📊 Smooth, rope-like curved lines | Vines, stems, flowing organic shapes on fantasy cosplay | Keep thread consistently on one side; maintain even tension |
| Satin Stitch | Medium–high — requires even tension and edge control | High thread use; time-consuming for large areas | ⭐ High impact and polished fill; 📊 Smooth, lustrous solid shapes | Filling emblems, eyes, armor details, appliqué | Lay parallel stitches closely; backstitch edges first; match strand count |
| French Knot | Medium — technique requires practice for consistency | Low thread use; quick once mastered | ⭐ High decorative impact; 📊 Small 3D dots and clustered texture | Sparkle/embellishments, floral centers, clustered details | Wrap 2–3 times; use short thread lengths; stabilize fabric |
| Chain Stitch | Medium — steady hand and loop control needed | Moderate thread; reasonably quick for bold lines | ⭐ High visual boldness; 📊 Connected loop texture for strong outlines | Decorative borders, bold costume edging, textured fills | Keep loop size consistent; anchor ends; use thicker thread for emphasis |
| Long & Short Stitch | High — advanced shading technique, steep learning curve | High thread/time investment; slow | ⭐ Very high realism; 📊 Smooth color gradation and dimensional shading | Realistic portraits, shading on costume pieces, botanical detail | Study light/shade; use 1–2 strands for detail; blend colors gradually |
Stitching It All Together: Your Next Steps in Embroidery
You have now journeyed through the foundational building blocks of hand embroidery. The eight essential stitches we’ve covered, from the simple, utilitarian running stitch to the painterly long and short stitch, are more than just techniques; they are the alphabet of a new creative language. With these tools now in your creative arsenal, you possess the core skills needed to trace intricate lines, fill bold shapes with color, and add delightful texture to any fabric surface.
Think of each stitch as a different kind of brushstroke. The backstitch and stem stitch are your fine-liners, perfect for creating crisp outlines and delicate lettering. The satin stitch is your broad, flat brush, ideal for laying down smooth, solid blocks of lustrous color. Meanwhile, the French knot acts as a dimensional detail brush, adding pops of texture that bring your work to life. The true magic happens when you start combining these basic embroidery stitches for beginners.
From Knowledge to Practice: Your Creative Path Forward
Mastery in embroidery, like any craft, is built on a foundation of consistent practice. The path from a beginner to a confident stitcher is paved with small, joyful experiments. Don't aim for a flawless masterpiece on your first try. Instead, embrace the learning process with a "sampler" mindset.
A sampler is a piece of fabric where you can freely practice different stitches without the pressure of a finished project. It's your personal stitch library and playground.
Actionable Next Steps:
- Create a Stitch Sampler: Dedicate a piece of scrap fabric, like linen or cotton, to practicing each of the eight stitches. Try stitching them in straight lines, curves, and circles to understand how they behave.
- Experiment with Variables: See how a stitch changes when you use a different number of floss strands. A six-strand backstitch looks vastly different from a single-strand one. Play with various thread types and needle sizes to discover your favorite combinations.
- Start a Simple Project: Find a beginner-friendly pattern or draw a simple design onto fabric. A small floral motif, a monogrammed letter, or a simple geometric shape are excellent first projects that allow you to apply what you've learned.
Unlocking Your Unique Artistic Voice
The ultimate goal is not just to replicate patterns but to develop your own artistic style. As you become more comfortable with these basic embroidery stitches, you'll begin to see how they can be modified and combined in unique ways. Perhaps you'll favor the bold texture of chain stitch for filling areas, or maybe you'll master the subtle shading of the long and short stitch to create realistic, thread-painted art. This journey of discovery is where your unique creative voice emerges. Every stitch you place is a step toward making your creative visions a tangible reality. Your adventure in embroidery has only just begun; the needle is in your hand, and a world of colorful thread awaits.
Ready to put your new skills to the test? From high-quality DMC floss and durable linen fabric to the perfect hoops and needles, Famcut.com is your Atlanta-based partner for all your embroidery needs. Visit us online at Famcut.com or stop by our store to explore our curated selection and get the premium materials that will make your first project a stunning success.