


Your Guide to Backing Fabric for Quilts
Let's be honest, the quilt top gets all the glory. It's where the intricate piecing and vibrant colors come together to tell a story. But the backing? That's the unsung hero, the quiet foundation that makes the whole quilt work.
The backing is the final layer of your quilt sandwich, and it's what truly holds everything together. Your choice here isn't just about picking a pretty fabric; it dictates the quilt's drape, its weight, and how it feels when you snuggle up under it.
The Hidden Foundation of Your Quilt
Think of the backing as the support system for your masterpiece. A good one works hand-in-hand with your batting and quilt top, preventing frustrating issues like puckering or stretching while you’re quilting. It's the key to a quilt that's as strong and beautiful on the inside as it is on the out.
Every decision, from the type of material to the width of the fabric, has a ripple effect on your final quilt. The right fabric can make the quilting process feel like a dream, but the wrong one can turn it into a wrestling match, leaving you with a less-than-perfect finish.
Why Your Choice Matters So Much
The impact of your backing choice goes way beyond looks. It’s a decision that affects:
- Longevity: A sturdy backing protects the delicate batting and strengthens your seams, ensuring the quilt can handle years of love, use, and washing.
- Comfort: This is the layer that touches your skin. Soft cottons or cozy flannels are popular for a reason—they make your quilt feel like a hug.
- The Quilting Process: A stable, high-quality fabric is a joy to work with. Your needle will glide through it, creating even, beautiful stitches whether you're quilting by hand or by machine.
It's no surprise that as quilting grows in popularity, the focus on quality materials grows with it. The quilting market was valued at over USD 5.3 billion in 2024 and is projected to hit nearly USD 7.8 billion by 2031. A huge chunk of that is driven by raw materials like the fabric we're talking about. If you're curious, you can read more about these quilting market trends and see how the industry is expanding.
A great quilt back is the secret to a professional finish. It’s the difference between a beautiful blanket and a cherished heirloom that stands the test of time.
Ultimately, the backing fabric is the final, crucial piece that brings your entire creative vision to life. To help you navigate the options, let's start with a quick checklist of what to keep in mind.
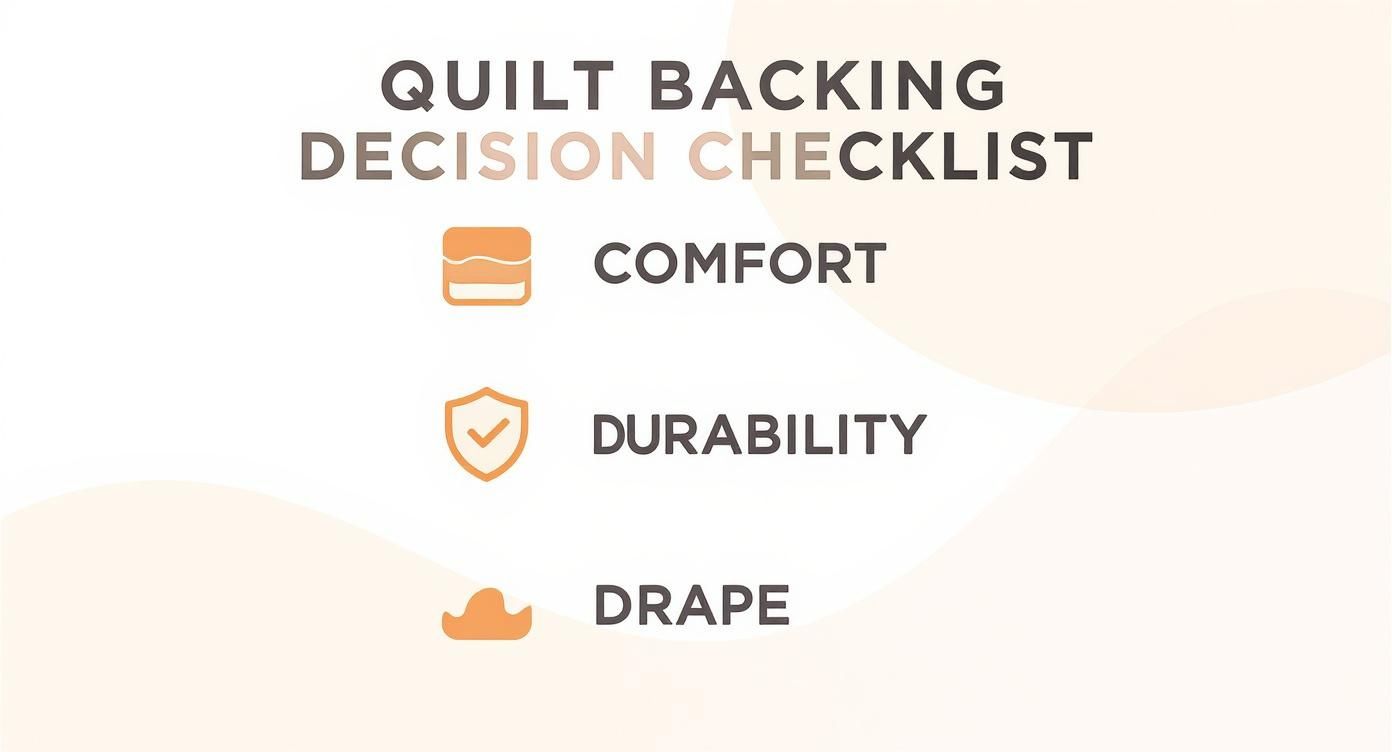
Quilt Backing Decision Checklist
This table breaks down the key factors you'll want to consider as you start shopping for your quilt's foundation.
| Consideration | Why It Matters | Key Options |
|---|---|---|
| Material | Affects the feel, durability, and washability of the quilt. | Cotton, Flannel, Minky, Lawn |
| Fabric Width | Determines if you'll need to piece the back, which adds time and seams. | Standard 44", Wide Backs 108" |
| Weight & Weave | Influences the quilt's drape and how easy it is to needle. | Quilting Cotton, Sheeting, Sateen |
| Design & Color | The design can either complement or hide your quilting stitches. | Solids, Small Prints, Large Prints |
| Pre-Washing | Prevents shrinkage and color bleeding after the quilt is finished. | Wash or Don't Wash (it's a debate!) |
Keeping these points in mind will set you up for success as we dive deeper into each one.
Choosing the Right Fabric for Your Quilt Back
Picking the perfect backing for your quilt is so much more than just matching colors. The fabric you choose is a huge decision, one that dictates the final feel, weight, and even the longevity of your finished quilt. Think of the backing as the foundation—it has to be just right.
You wouldn't use the same material for a light, airy summer throw as you would for a heavy, snuggly winter quilt. So, where do you start? Let's walk through the most common choices and figure out which one is the best fit for your project.
Comparing Popular Backing Fabric Types
When you'm standing in the fabric store, the options can feel a little overwhelming. Let's make it simpler by comparing the most popular materials head-to-head. Each one has its own personality, both for you working with it and for the lucky person who gets to use the finished quilt.
Here's a quick rundown of the big players in the quilting world.
| Fabric Type | Best For | Ease of Use | Things to Know |
|---|---|---|---|
| Quilting Cotton | All-purpose quilting, beginners, heirloom quilts | High. It's stable, predictable, and behaves like most quilt top fabrics. | The gold standard. It’s breathable, durable, and comes in endless prints. |
| Flannel | Cozy winter quilts, baby quilts, lap throws | Medium. Prone to shrinking and stretching. Pre-washing is a must. | Adds wonderful warmth and weight but requires a bit more care when basting. |
| Minky | Ultra-soft baby quilts, sensory blankets, luxurious throws | Low. Very slippery and stretchy. Requires a walking foot and lots of pins. | Incredibly plush and soft, but not for the faint of heart. The results are worth the effort! |
This table should give you a good starting point. Quilting cotton is almost always a safe and reliable bet, but don't be afraid to try flannel or minky when you want to add that extra touch of coziness.
The decision tree below can help you visualize which factors—comfort, durability, and drape—are most important for your specific project.
Ultimately, your quilt's intended use should be your guide. A well-chosen backing ensures the finished product is exactly what you envisioned.
What to Look for in Weave and Quality
Beyond the type of fiber, the quality of the fabric itself is a game-changer. You might hear people talk about thread count, but for quilting, a super-high thread count can actually be a problem. Fabric with a very tight, dense weave is tough for a needle to punch through, which can lead to skipped stitches or even broken needles. Frustrating, right?
Instead, look for a fabric with a smooth, even weave that feels sturdy but not stiff. If you can easily see through it when you hold it up to the light, it's probably too thin and won't hold up well over time. A good quality quilting cotton hits that sweet spot perfectly.
The backing fabric is often a significant portion of a quilt's total material. A recent trends survey noted that backing can account for 30-40% of the fabric used in a typical quilt, underscoring its importance in the nearly USD 5 billion quilting industry.
There's a reason so many of us default to cotton—its reliable performance and ease of use make it a smart investment, especially if you want your quilt to become a cherished heirloom. If you're curious about what other quilters are using, you can explore more insights from the 2025 quilting trends survey.
For larger quilts, using a natural cotton wideback fabric is a fantastic way to get a smooth, seamless finish without having to piece your backing together.
Calculating Yardage Without the Headache
We’ve all been there—that sinking feeling when you realize your backing fabric is just a little bit too small. Getting your yardage right from the start isn't just about saving yourself a last-minute trip to the fabric store; it's about making sure the final quilting stage is as smooth and enjoyable as possible.
Let’s walk through how to get it right every single time.
The first thing you have to decide is what width of fabric you're working with. Your standard quilting cottons are almost always 42-44 inches wide. For anything bigger than a baby quilt or a small lap throw, you'll find yourself having to piece together multiple lengths of fabric to get a big enough backing. It’s totally doable, but it does add an extra step.
This is where extra-wide fabrics, or "wide backs" as we call them, are an absolute lifesaver. These bolts are typically a glorious 108 inches wide, sometimes even more. For a queen or king-sized quilt, using a wide back is a no-brainer. You skip the seaming process entirely, leaving you with a perfectly smooth canvas for your quilting. There are some fantastic options out there, like this 120-inch wide natural muslin that I love for bigger projects.
The Quilter's Golden Rule for Overage
Okay, before you even think about grabbing a calculator, let's talk about the single most important part of this whole process: adding overage. Your backing fabric and your batting must be bigger than your quilt top. This isn't just a suggestion; it’s a non-negotiable part of setting yourself up for success.
This extra fabric is your "handling margin," and it's critical for a few reasons:
- Loading onto a longarm: If you send your quilts out, the longarmer needs several inches of extra fabric on all sides to clamp the project securely onto their frame.
- Allowing for shifting: As the quilt is stitched, the layers have a tendency to shift and shrink up a tiny bit. That extra margin ensures your quilt top stays safely in the middle.
- Basting with confidence: Whether you’re pin-basting on your floor or using a spray, that extra room around the edges makes the whole process less stressful.
The Rule of Thumb: Add a minimum of 4 inches to both the length and the width of your quilt top. So, if your quilt top is 60" x 80", your backing needs to be at least 64" x 84". Always check with your longarmer, though, as many prefer an even larger margin!
Calculating for Standard 44-Inch Fabric
Let's run through a real-world example. Say you've finished a generous lap quilt that measures 60 inches wide by 72 inches long. Following our overage rule, we need a final backing piece that's at least 64" x 76".
Since our fabric is only 44 inches wide, we'll have to join two pieces to cover the 64-inch width. Here’s how the math breaks down:
- Determine your cut length: You need each piece to be 76 inches long. I always add a few extra inches for squaring up the fabric after pre-washing, so let's round that up to an 80-inch cut.
- Calculate total inches: You'll need two pieces that are each 80 inches long. That means you need 160 inches of fabric in total (80" x 2).
- Convert to yards: Now, just divide the total inches by 36. 160 ÷ 36 = 4.44 yards. To be safe, you'll want to buy 4.5 yards from the shop.
Calculating for Extra-Wide 108-Inch Fabric
Now, let's take that same 60" x 72" quilt top but use a 108" wide back. You'll see right away how much easier this is.
- Find your needed dimensions: Again, you need a piece that is 64" x 76".
- Calculate the yardage: Because the 108" width of the fabric easily covers both the 64" and 76" dimensions of your project, you only need to buy enough fabric to cover the longest side. In this case, that's 76 inches.
- Convert to yards: Divide 76 by 36. 76 ÷ 36 = 2.11 yards. I’d purchase 2.25 yards just to have plenty of wiggle room for squaring up.
See the difference? It's a huge time and fabric saver. The demand for convenient choices like wide backs is a big reason why the global quilting fabric market was valued at about USD 3.5 billion in 2023 and continues to expand. It's clear that quilters appreciate materials that make their craft easier and more beautiful.
Getting Your Backing Ready for a Perfect Finish
If there's one thing that separates a homemade quilt from a handmade one, it's the prep work. Properly preparing your backing fabric is where you lay the groundwork for a smooth, pucker-free finish that looks incredible. Trust me, taking a little extra time here will save you a world of frustration down the road.
Think of fabric fresh off the bolt as a beautiful but slightly unruly canvas. It needs a bit of taming before you can turn it into a masterpiece. These next steps are my non-negotiables for making sure a quilt lies flat, lasts for decades, and looks just as good on the back as it does on the front.
The Great Pre-Washing Debate
Let’s settle this old argument right now: you absolutely should pre-wash your quilt backing. It’s the single most important step for preventing two of the biggest quilting heartbreaks—shrinkage and color bleeding. Can you imagine spending weeks piecing a gorgeous quilt top, only to have the backing shrink unevenly in the first wash, creating a puckered, distorted mess?
Pre-washing is even more crucial when you're mixing fabrics. Cottons, flannels, and even specialty materials like a cozy ivory extra-wide solid minky fabric all shrink at slightly different rates. Washing them first gets all that movement out of the way before a single stitch goes through your quilt sandwich.
A simple wash and dry cycle is your insurance policy against a finished quilt that puckers and warps. It equalizes the fabric, ensuring every layer of your quilt sandwich behaves predictably.
Here’s my go-to method for getting it right:
- Wash Gently: I always use a gentle cycle with a mild, color-safe detergent. If I'm working with deep reds, blues, or any saturated color, I toss in a color catcher sheet just to be safe. It’s amazing what those little sheets can pick up!
- Dry Carefully: Tumble dry on low or medium heat. The real trick is to pull the fabric out while it's still just a little bit damp. This makes ironing a breeze and prevents those deep-set wrinkles that are so hard to get out later.
Squaring Up for a Straight Start
Once your fabric is washed and dried, it’s time to square it up. Fabric often gets pulled and stretched during manufacturing and even in the wash, leaving you with edges that are anything but straight. If you try to quilt with an off-grain backing, you’re practically asking for a twisted, wonky finish.
To get it perfectly square, spread your fabric out on the biggest cutting mat you have. Line up one of the selvage edges (that’s the tightly woven edge you'll trim off anyway) with a horizontal line on your mat. Using a long quilting ruler, make a clean, straight cut along one side to create a perfect 90-degree corner. From there, just rotate the fabric and repeat on the other three sides until you have a perfect rectangle.
This simple step is your guarantee that the backing will lay flat and true when you baste it. No weird pulling or shifting.
The Final Press for a Flawless Canvas
The last thing to do before you start basting is to give your backing a really good press. Wrinkles are the absolute enemy of a flat quilt. Even the tiniest crease can get stitched into a permanent, ugly tuck when you're quilting. This is where a little patience really pays off.
Set your iron to the right heat for your fabric—and use steam! I find it makes a huge difference. Work in sections, moving the iron deliberately. Don't just slide it back and forth; that can stretch the grain. Instead, use a firm up-and-down motion: lift, press, lift, press.
If you’re working with a massive piece of fabric, it helps to fold it neatly in half and press one side, then flip and do the other. Then, open it up and give that center crease one final press to get it perfectly smooth. Now you have a pristine canvas, ready to become the flawless foundation of your beautiful quilt.
Designing a Quilt Back with Personality
Let's be honest, why should the quilt top get all the attention? I like to think of the backing fabric for quilts as more than just the final layer; it's a second canvas, a secret waiting to be discovered. Moving beyond a single, plain piece of fabric is your chance to add a delightful surprise.
This is where you can really tie the whole project together, making it feel intentional and thoughtfully designed from every angle. Plus, it's the perfect opportunity to use up those precious scraps and give your quilt a signature touch that's all your own.
Weaving in Leftover Blocks
One of my absolute favorite ways to design a quilt back is by raiding the "orphan block" pile. You know the ones—the extra pinwheels you made just in case, or the half-square triangles that didn't quite fit the final layout. Don't let them languish in your scrap bin!
By arranging these leftovers into a decorative strip or a central panel on the back, you create a beautiful echo of the quilt top. It’s a simple trick with some big payoffs:
- Cohesion: It instantly connects the front and back designs, giving your quilt a polished, custom-made feel.
- Frugality: You get to celebrate every last piece of the gorgeous fabric you chose for the front. Nothing goes to waste!
- Interest: It adds an unexpected pop of pattern and personality, telling a richer story about the making of the quilt.
Just picture it: a simple vertical column of leftover blocks, framed on either side by your main backing fabric. It’s an easy, low-effort move that adds a massive dose of character.
When you start planning your quilt back as part of the initial design, you elevate your project from a cozy blanket to a true piece of textile art. The back becomes a secret second quilt for its owner to discover and enjoy.
Making Quilting Stitches Pop or Disappear
The fabric you choose for the back also has a huge say in how your quilting stitches show up. You can absolutely use this to your advantage to create different visual effects.
A solid-colored backing, for instance, puts your quilting on full display. Every stitch becomes a prominent design feature. If you've poured hours into perfecting a detailed free-motion quilting pattern, a solid fabric is the perfect stage to let that hard work shine. Gaining a little more confidence in how colors work together can be a game-changer here; you can learn more about color basics for makers and quilters.
On the flip side, a busy, large-scale print is a quilter’s best friend for camouflaging stitches. This is a brilliant strategy if you're just starting out and aren't totally confident in your stitch consistency. It’s also great when you want the texture of the quilting to be felt more than seen. The print provides a forgiving background, letting the overall crinkly goodness shine through without drawing attention to any little wobbles.
Your Top Quilt Backing Questions, Answered
When you're diving into the world of backing fabric for quilts, a few questions always seem to pop up. I’ve heard them from quilters in my local guild and seen them all over online forums. Let’s tackle some of the most common head-scratchers so you can move forward with confidence.
Think of this as your go-to cheat sheet for those little details that can make a huge difference in how your quilt turns out.
Can I Just Use a Bed Sheet for My Quilt Backing?
It's a tempting thought, isn't it? A bed sheet seems like such an easy and budget-friendly solution. But in my experience, it's a shortcut that usually leads to more trouble than it's worth.
The problem is that sheets are woven very differently from quilting cotton. They have a much higher thread count and a super-tight weave. Your machine needle will have a tough time getting through it, which often leads to skipped stitches, broken needles, and a ton of frustration with your tension. Plus, that silky sateen finish can make the layers slip and slide against the batting. It’s always best to stick with fabric made for quilting.
How Much Bigger Does the Backing Really Need to Be?
This is a big one, especially if you plan to use a longarm quilter. The golden rule is to make your backing and batting at least 4 inches larger than your quilt top on all four sides. So, if your quilt top measures 60" x 80", you’ll want your backing to be at least 68" x 88".
This extra fabric, or "overage," isn't just for show. It gives you critical wiggle room.
- It makes the basting process so much less stressful.
- It accounts for the natural shifting and pulling that happens during quilting.
- It’s a non-negotiable requirement for longarmers, who need that extra fabric to clamp the quilt onto their machine's frame.
A friendly heads-up: Always, always check with your longarmer first. Some require even more than four inches of overage to work their magic. That extra space lets them test tension and ensure the quilting design runs beautifully right off the edge of your quilt top.
What's the Best Way to Piece a Quilt Back?
When you need to piece your backing fabric, a few simple steps can make it look seamless and professional. First things first: always trim off the selvage edges before sewing your panels together. Those tightly woven edges can shrink differently and cause puckering.
Use a slightly smaller stitch length (I like to use a 1.8 or 2.0) and a generous half-inch seam allowance. This adds a ton of strength. For more insights on pairing your materials, this Hobbs Batting recommendation chart is a fantastic resource.
The most important step? Press your seams open. This distributes the bulk from the seam allowance, so you won’t feel a hard ridge running down the back of your finished quilt. If you have a choice, I also recommend running your seams horizontally (from side to side). This orientation puts less stress on the seam when the quilt is loaded onto a longarm frame.